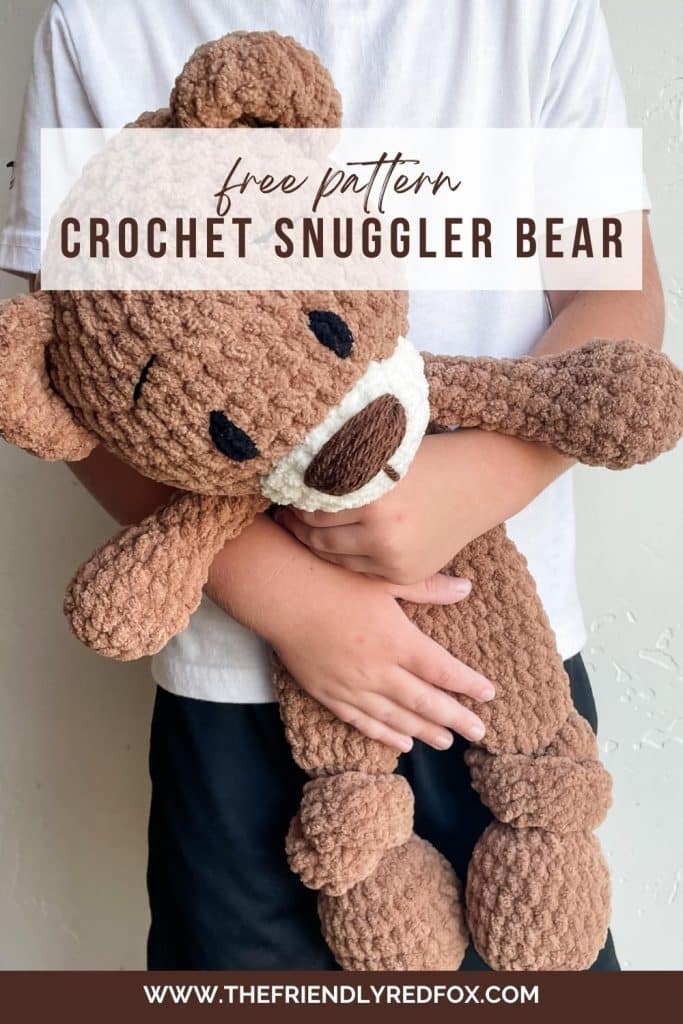
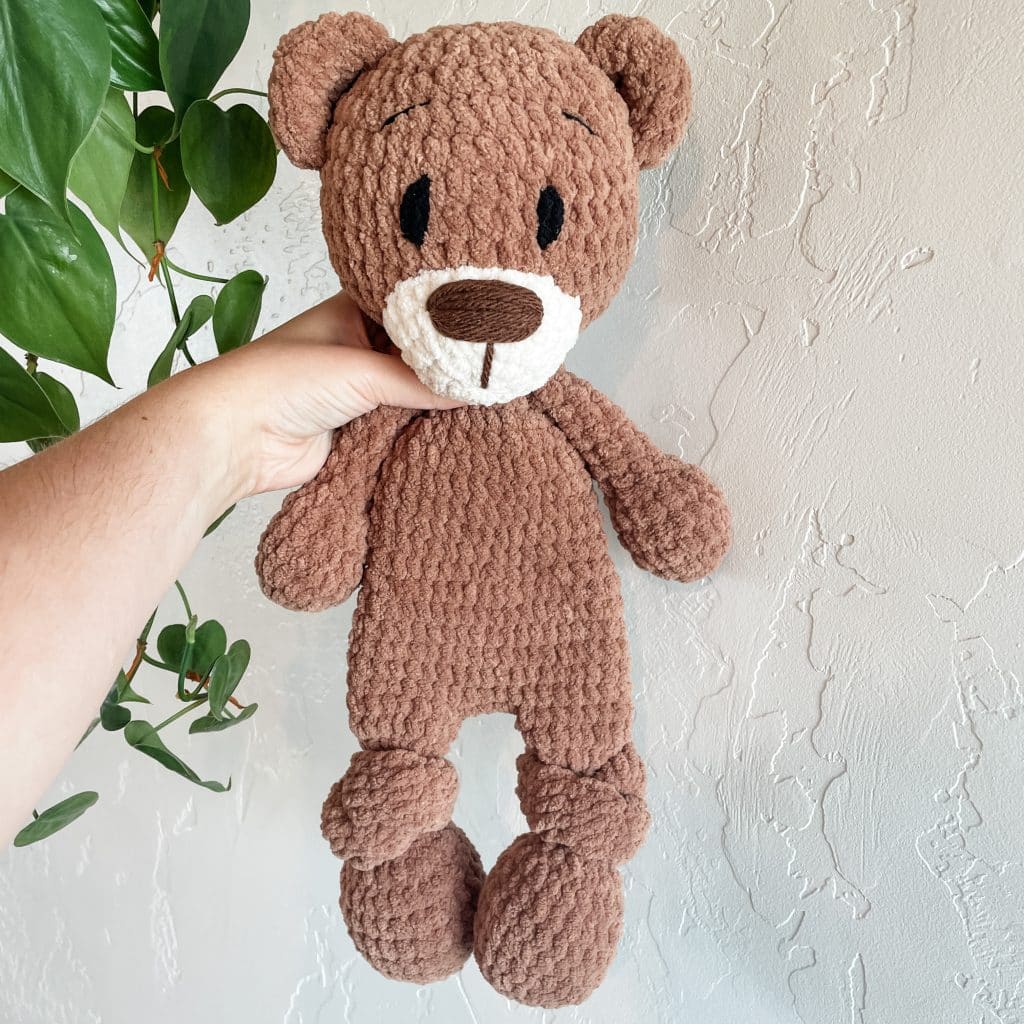
Free Crochet Snuggler Pattern Bear
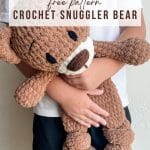
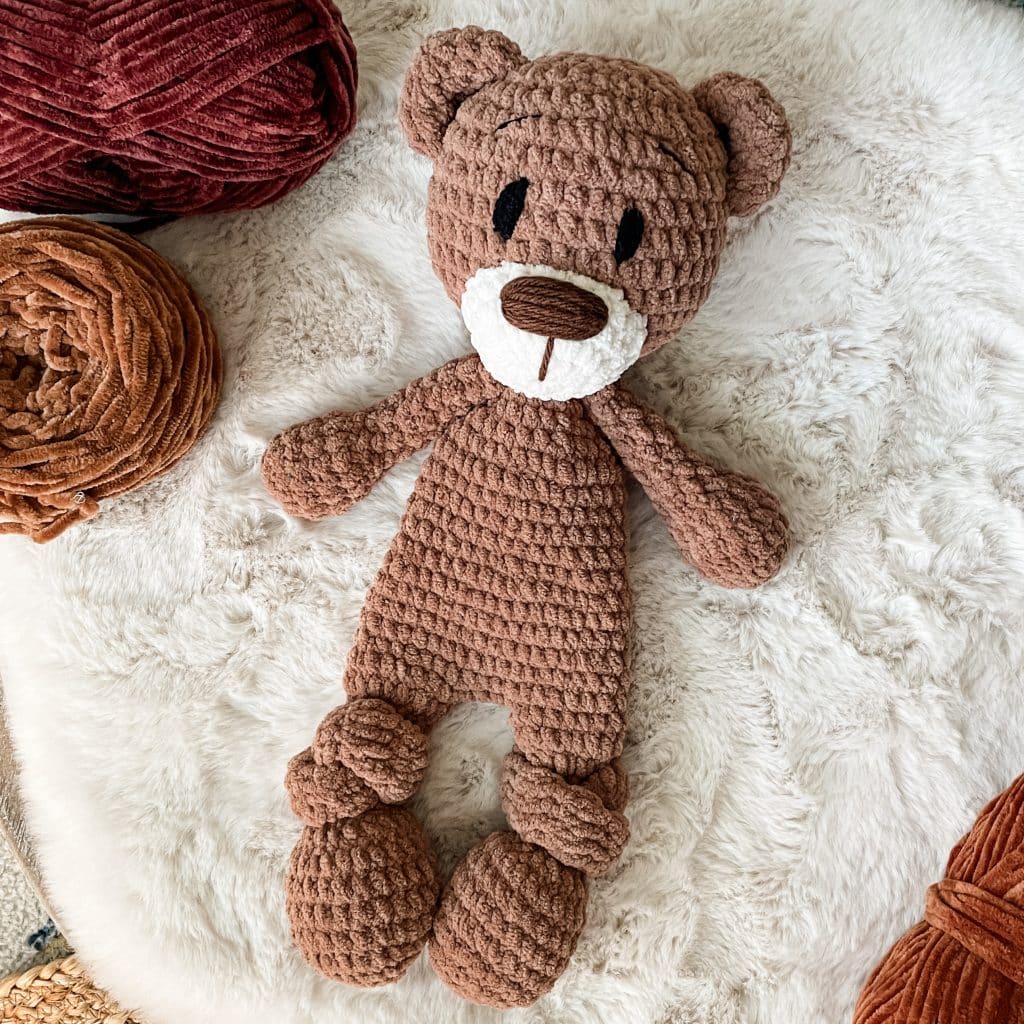
This cozy free crochet snuggler pattern is a spin on the classic bear! This crochet snuggler bear is a half stuffy, half lovey- the perfect baby or toddler gift!
Free Crochet Snuggler Pattern
This free crochet snuggler bear pattern was one of the funnest things I have made in a long time. I know I would have loved this concept back when I was little. I had a big love for my blankets and stuffed animals, so something that puts those together? Crochet snuggler pattern of my dreams!
JOIN MY NEWSLETTER TO RECEIVE…
A free email course-Amigurumi 101
This free amigurumi email course gives you what you need to master the basics of amigurumi, along with some extra tips and tricks!
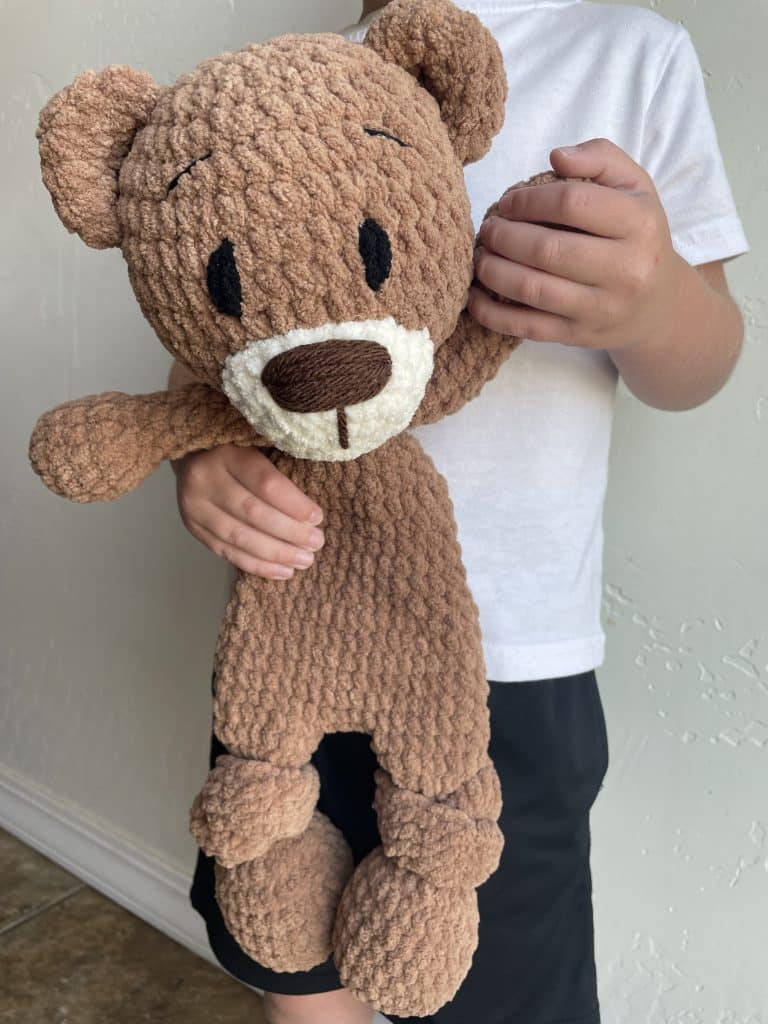
This crochet snuggler bear is made with Premier Basix Chenille, but you could substitute Bernat blanket yarn instead. I prefer the Premier, because it seems a little more lightweight and easier to work with, but I love the color options for the crochet snuggler patterns that blanket yarn has! It comes out to be about 16 inches tall. You can see my four year old holding it in some of the pictures, so you can have a reference!
I feel like a plush teddy bear is such a classic gift. This other free teddy bear crochet pattern was designed for my sweet nephew. I obviously love teddy bears because I also designed this plush version! Again, because of the yarn and design, this crochet snuggler pattern is great for younger hands.
Would you like to save this project for later? Input your email address below, and we will promptly deliver the project to your inbox.
Want the Ad-free, Printable PDF?
You can find it in one of my stores!
Materials you’ll need
To get started making this free crochet snuggler bear pattern, you’ll first want to gather all your materials first.
There is a whole section where you can find tutorial videos for different parts of this pattern. Most are linked in the section they are specific to, but if you want to view them before you begin you can see the collection here.
Plush Teddy Bear Crochet Pattern
Neck strengthener
*Click here for a video and picture tutorial on how this works*
In a magic circle, SC 7. SC in each around for a total of 12 rows. Fasten off and leave a long tail to sew the hole closed and sew through the neck. See attached PDF.
Plush Bear Body Pattern
Feet/Body/Head
Beginning with the feet and using the body color:
Round 1: In a magic circle, SC 8.
Round 2: SC INC in each around. (16)
Round 3: SC in the first, SC INC in the next. Repeat around. (24)
Rounds 4-7: SC in each around. (24)
Round 8: SC in the first, INV DEC in the next. Repeat around. (16)
Round 9: INV DEC in each around. (8)
*Stuff the foot part, but not the next chain rows.*
From here on, you will be chaining 2, DC in the same stitch and crochet around. Then attach to the first stitch with a slip stitch. This creates the part of the leg that you will knot. You can knot before you attach the legs or afterwards. The foot may be “squished” a bit as you tie, but there should be enough length. I created a video to show the next part of the leg, and you can see that here.
Rounds 10-19: DC in each around. (8)
Round 20: SC INC in each around. Attach to the first stitch with a slip stitch and chain 1 (16)
Round 21: SC in each around. (16)
Fasten off the first foot. On the second foot, chain 4 and slip stitch to the first leg where you fastened off. Click here for a video and photo tutorial of this next part!
Round 22: Chain 1 and SC in each stitch around on the leg (16). SC in each chain across. (4) SC in each stitch around the second leg. (16) SC on the other side of the chain. (4) Attach to the first SC with a slip stitch. (a total of 40)
Rounds 23-27: SC in each around. (40)
Round 28: SC in the first three. INV DEC in the next. Repeat around. (32)
Rounds 29-33: SC in each around. (32)
Round 34: SC in the first two. INV DEC in the next. Repeat around. (24)
Round 35-37: SC in each around. (24)
Round 38: SC in the first. INV DEC in the next.. Repeat around. (16)
Round 39: SC in each around. (16)
Round 40: INV DEC 8 times. (8)
From here we are increasing the head. Have your neck strengthener ready to insert (See here for a video!).
Round 41: SC INC in each around. (16)
Round 42: SC in the first, SC INC in the next. Repeat around. (24)
Round 43: SC in the first two stitches, SC INC in the next. Repeat around. (32)
Round 44: SC in the first three stitches, SC INC in the next. Repeat around. (40)
Round 45-53: SC in each around. (40)
Stuff here, and continue to stuff as you close.
Round 54: SC in the first 3, INV DEC in the next. Repeat around. (32)
Round 55: SC in the first 2, INV DEC in the next. Repeat around. (24)
Round 56: SC in the first, INV DEC in the next. Repeat around. (16)
Round 57: INV DEC in each around. (8)
Sew the remaining hole closed.
Crochet Bear Parts
Snout and Embroidered Nose
In ivory color:
Round 1: In a magic circle, SC 6
Round 2: SC INC in each stitch around (12)
Round 3: SC in first, SC INC in next. Repeat around. (18)
Rounds 4-5: SC in each around. (18)
Fasten off and leave a long tail to sew on to the face. Get a long piece of brown yarn.
Embroider the nose on about row 4, making about 4-5 passes through the same stitches. Bring the needle up from the back, and cover about 4-5 stitches.
With plush yarn, I find it easier to attach the snout after I stuff the head.
The bottom of the snout should be at the base of the head, near where it connects to the neck. It should cover about 4 rows. Pin it in place and use the tail to attach it. Stuff it lightly before you close. This is a quick video that shows my favorite way to sew open pieces like this on!
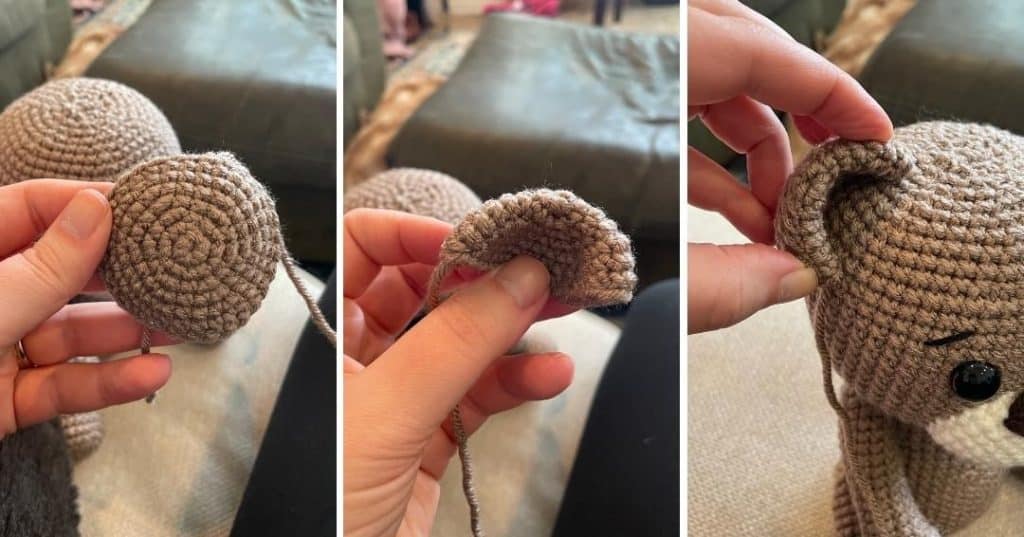
Ears (make 2)
Round 1: In a magic circle, SC 8.
Round 2: SC INC in each around. (16)
Round 3: SC in the first, SC INC in the next. Repeat around. (24)
Round 4: SC in each around. (24)
Fasten off and leave a long tail. Fold the ears in half. You will attach the ears through both halves of the ear and through the head. Sew the ears about 3 rows out from the top of the head. The halves will curve and span about 5 rows between each side. Here is a video on how I attached mine! It is a worsted weight yarn (like the picture below) but the exact same principle!
Eyes
I use bulky black yarn and sew two eyes. Two stitches tall and four stitches apart, centered above the nose. Here is a video of me doing it!
Arms
Stuff the hand and the bottom half of the arm as you go.
Round 1: In a magic circle, SC 8.
Round 2: SC INC in each around. (16)
Rounds 3-5: SC in each around. (16)
Round 6: INV DEC in each around. (8)
Rounds 7-15: SC in each around.
Fasten off an extra-long leave. Sew the opening closed.
Attach the arms between rows 15 and 16 of the body. Use the yarn through method, or if you prefer you can do it the traditional way.
Did you make this pattern?
Mention me @thefriendlyredfox so we can see your creations! You can also leave a comment below!
Thank you for your pattern and very detailed instructions, it was really easy to follow. My first try with velvet yarn and I love it. The bear turned out so cute and soft.
Hi, I’m somewhat new to crocheting and was wondering if this pattern was beginner friendly? I didn’t see a skill level, and didn’t know if I knew enough pertaining to crocheting to even attempt this yet.
I would classify it as a late beginner pattern. 🙂 A little experience would be helpful, I think, especially with blanket yarn! But if you decide to go for it, I do have videos to help.
Hi! We are having our first son this winter and I’d love to crochet him this bear as that will be his nickname. I would like to make it smaller, how would you suggest I go about this? I’ve yet to crochet anything and have very limited knowledge, but am determined to learn!
I have a smaller version right here! https://www.thefriendlyredfox.com/free-bear-crochet-lovey/
Hi. Kali
I’ve started this adorable pattern for my grandbaby. I’m wondering where you found colored fiberfill? I’ve looked in all the craft stores near me and online as well to no avail
Hoping you have a source you’d share?!
Thankyou, Sue W
It has been out of stock everywhere for me as well!! I wish I could be more help. I’m sorry!
How much yarn for the bear
About 180 yards if you use the suggested yarn.
what is INV DEC? I am familiar with decreasing, but haven’t heard the term INV DEC.
It’s a decrease that makes it look like just one stitch! Put your hook through the FRONT LOOP ONLY of the two stitches you are bringing together. Pull yarn through. You will have two loops on your hook. Pull yarn through both loops to finish the stitch.
The transition from body round 9 to 10 doesn’t seem to make sense. If you finish round 9 with an invisible decrease and then chain 2 as the note in bold text suggests, and then make 8 dc for round 10, the chain 2 will make a strange gap. Are we supposed to do a slip stitch at the end of round 9 and then do the chain 2? Does the first ch2 count as one of the 8 dc or not?
Thanks for your help.
If you chain 2 right from the last stitch of round 9 and then do the DC in the same stitch, there shouldn’t be a gap! The ch2 doesn’t count as a stitch. There’s a video link if you haven’t seen that yet, it really helps!
Some more questions: At the end of rounds 1-8 are we supposed to slip stitch in the first stitch or are we working in the round?
When we finish rounds 10-19, are we supposed to slip stitch in the top of the ch2 or the top of the first dc?
Thanks again.
Rounds 1-9 are worked in the round. Rounds 10-20 are closed with a slip stitch in the first DC and then after that you begin working in the round again.
I get it now. I had just never done round transitions exactly like that before. Thanks for the help.
You’re welcome!
Hi. Kali.
I crocheted this adorable teddy for my one year old great grandson for Christmas. He loved it. Was fairly easy pattern, but difficult to count stitches in that velvety yarn. But I made it through. I shall craft another similar item for my future great granddaughter
Thankyou so much, Sue
After round 40, what do you mean by “Have your neck strengthener ready to insert.” What strengthener?
It’s a crochet tube that you make at the beginning before you start your bear body. The pattern section is called “Neck strengthener”.
Would I be able stuff this body and not tie knots in the limbs? Wanting this size bear but not as a snuggler! The other bear pattern you have is a little smaller than I need it so maybe this one could be big enough! I am hoping for closer to 20“ long. Love love love the bear pattern!
You could certainly try! It would be an experiment! These guys are about 16″ long when you use the recommended hook size and yarn. You could also just size up in hook, yarn, or both to get a few more inches!
Thank you for the great pattern and clear instructions/videos. This was my first attempt at amigurumi and it was not as scary as I thought it would be. I’ll definitely be doing more!
I was given a couple skeins of Yarn Bee Truly Teddy yarn and wondered how this Snuggler pattern would turn out using it–any idea? Thanks!
The Truly Teddy is also a size 6 yarn, so it would work ok, I think! Just be aware that there might be some finished size differences because it’s not the yarn the pattern was written with, and you might need to change your hook size. But I’d love to see the finished product! That yarn is so fun!
Hi Kali! Thank you so much for the free patterns! I love the size of the bear, but want to make a dragon instead. Would it work do double the stitches of your dragon snuggler pattern to get the 16″ size of the bear? Thanks!
The dragon is about 3/4 the size of the bear – so doubling the stitches wouldn’t work. You could use a thicker yarn and bigger hook for the dragon pattern to make him bigger!