Free Crochet Bunny Snuggler Pattern
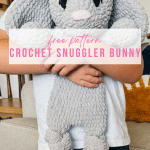
This Free Crochet Snuggler Bunny pattern would make a great gift for many on your list! A crochet snuggler bunny is a half stuffy, half blanket- the best of both worlds!
Free Crochet Snuggler Pattern
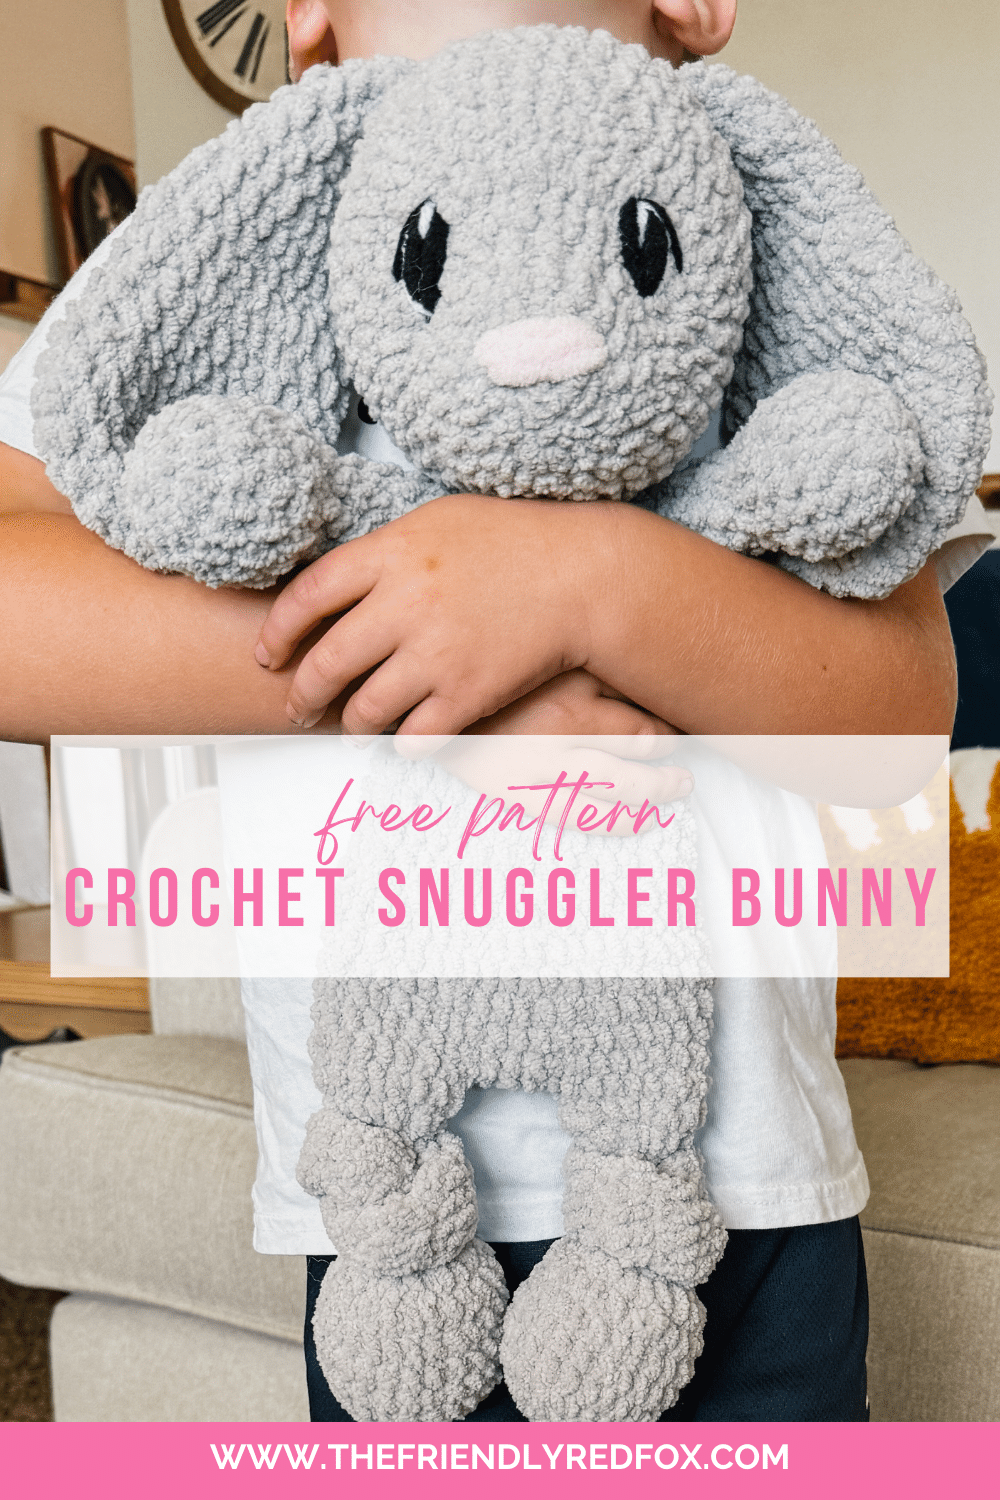
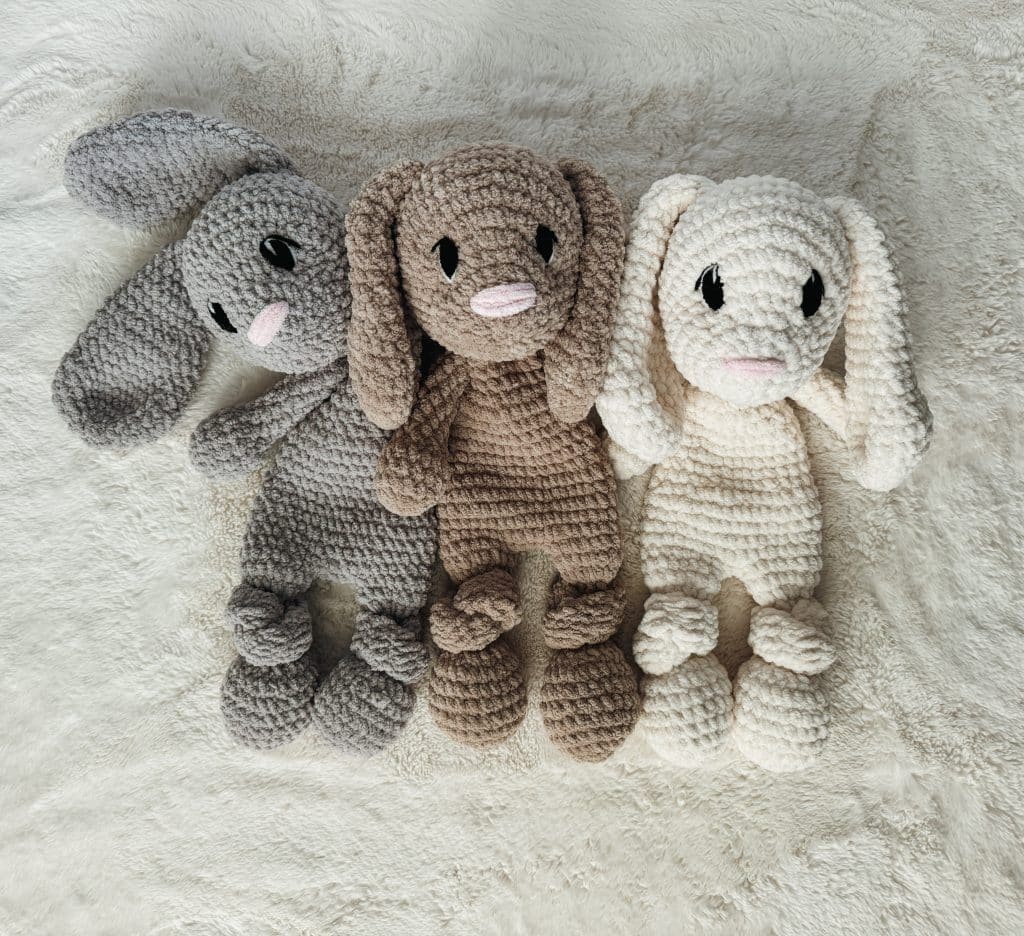
There is a reason that the “Velveteen Rabbit” is such a well loved story- everyone loves a floppy eared bunny. That is why it was a no brainer to make a free crochet bunny snuggler pattern. You already know I love the snuggler– half blanket, half stuffed animal. This design features those floppy ears we all love, along with a sweet nose and adorable eyes.
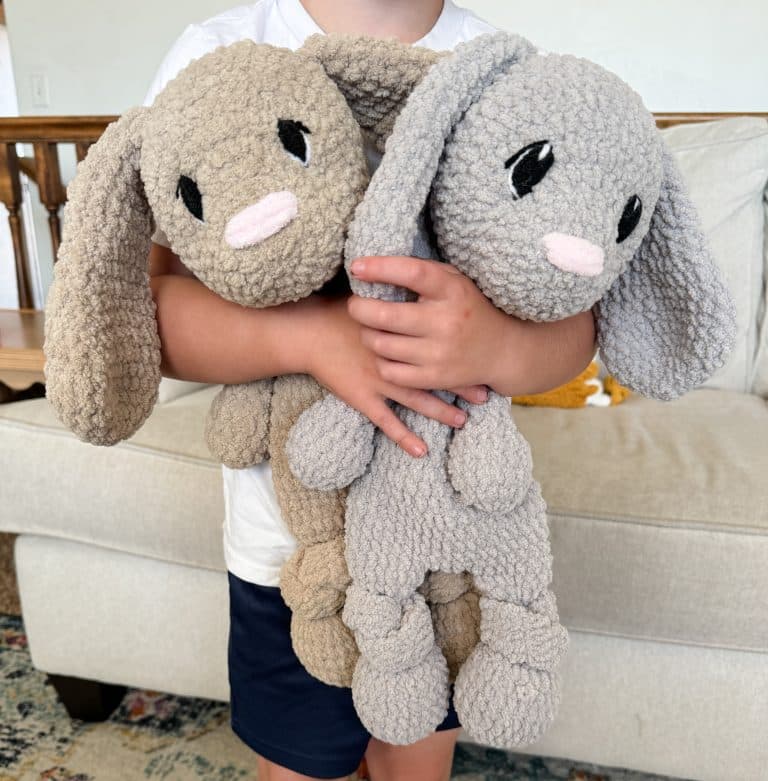
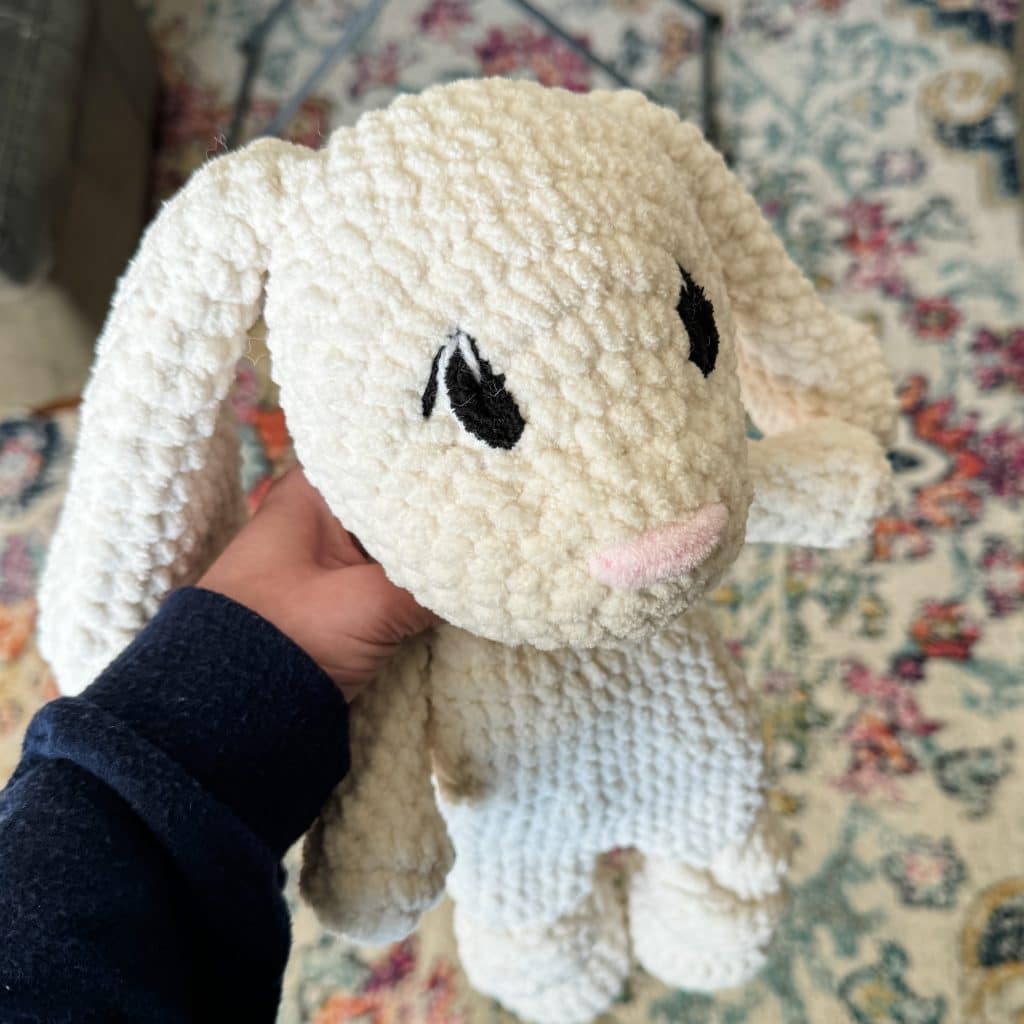
This crochet snuggler bunny is made with Premier Basix Chenille, but you could substitute Bernat blanket yarn instead. I prefer the Premier, because it seems a little more lightweight and easier to work with, but I love the color options for the crochet snuggler patterns that blanket yarn has! It comes out to be about 16 inches tall. You can see my four year old holding it in some of the pictures, so you can have a reference!
Just as an FYI, I could get an entire bunny out of one skein of Bernat Blanket yarn but never could with the Premier Basix. I tried multiple times, but even though the packages say they have the same amount, and they weigh the same amount (I even bought a scale to check!) I needed two skeins of the Premier. I went with the yardage necessary for the Premier, and I always calculate a little extra to account for tension. Just wanted to give you a heads up!
Wouldn’t this be such a dream to cuddle up with? If you want something even more classic, you can try the Snuggler Bear pattern! If you want a smaller project, but still need a bunny snuggler – this pattern comes in Mini!!
Would you like to save this project for later? Input your email address below, and we will promptly deliver the project to your inbox.
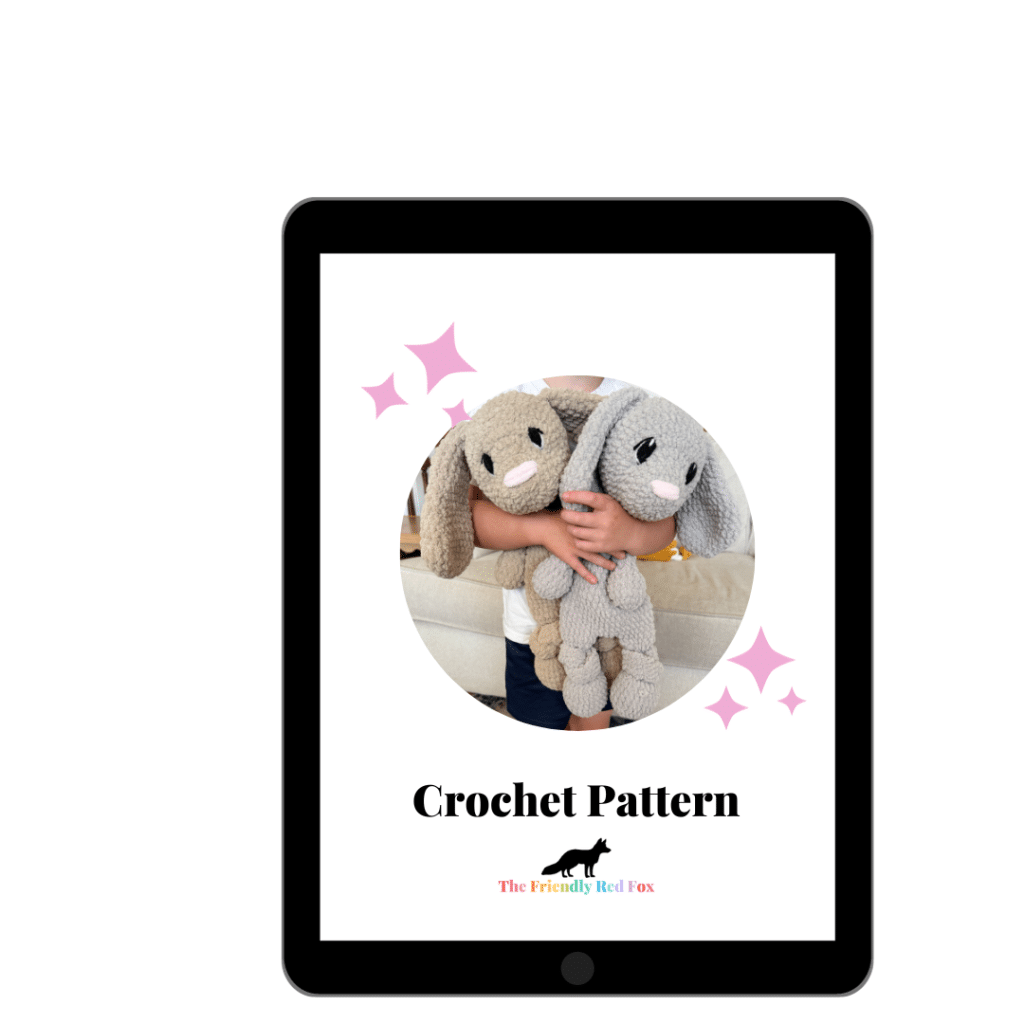
Want the Ad-free, Printable PDF?
You can find it in one of my stores!
Materials you’ll need
To get started making this free crochet snuggler bunny pattern, you’ll want to gather all your materials first.
There is a whole section where you can find tutorial videos for different parts of this pattern. Most are linked in the section they are specific to, but if you want to view them before you begin you can see the collection here.
Snuggler Bunny Crochet Pattern
Beginning with the feet:
Round 1: In a magic circle, SC 8.
Round 2: SC INC in each around. (16)
Round 3: SC in the first, SC INC in the next. Repeat around. (24)
Rounds 4-7: SC in each around. (24)
Round 8: SC in the first, INV DEC in the next. Repeat around. (16)
Round 9: INV DEC in each around. (8)
Stuff the foot part, but not the next chain rows.
From here on, you will be chaining 2, DC in the same stitch and crochet around. Then attach to the first stitch with a slip stitch. This creates the part of the leg that you will knot. You can knot before you attach the legs or afterwards. The foot may be “squished” a bit as you tie, but there should be enough length. I created a video to show the next part of the leg, and you can see that here.
Rounds 10-19: DC in each around. (8)
Round 20: SC INC in each around. Attach to the first stitch with a slip stitch and chain 1 (16)
Round 21: SC in each around. (16)
Fasten off the first foot. On the second foot, chain 4 and slip stitch to the first leg where you fastened off.
Click here for a video and photo tutorial of this next part!
Round 22: Chain 1 and SC in each stitch around on the leg (16). SC in each chain across. (4) SC in each stitch around the second leg. (16) SC on the other side of the chain. (4) Attach to the first SC with a slip stitch. (a total of 40)
Rounds 23-27: SC in each around. (40)
Round 28: SC in the first three. INV DEC in the next. Repeat around. (32)
Rounds 29-33: SC in each around. (32)
Round 34: SC in the first two. INV DEC in the next. Repeat around. (24)
Round 35-37: SC in each around. (24)
Round 38: SC in the first. INV DEC in the next.. Repeat around. (16)
Round 39: SC in each around. (16)
Round 40: INV DEC 8 times. (8)
From here we are increasing the flat part that you will attach to the head.
Round 41: SC INC in each around. (16)
Round 42: SC in the first, SC INC in the next. Repeat around. (24)
Round 43 SC in the first two stitches, SC INC in the next. Repeat around. (32)
Crochet Snuggler Bunny Pattern Head and Ears
Head
Round 1: In a magic circle, SC 8.
Round 2: SC INC in each around. (16)
Round 3: SC in the first, SC INC in the next. Repeat around. (24)
Rounds 4: SC in each around. (24)
Round 5: SC in the first 2, SC INC in the next. Repeat around. (32)
Round 6: SC in each around. (32)
Round 7: SC INC in the next 8 stitches. SC in the remaining 24. (40)
Round 8: SC in the first, SC INC in the next. Repeat for a total of 8 times. SC in the remaining 24. (48)
Rounds 9-11: SC in each around. (48)
Round 12: SC in the first 4, INV DEC in the next. Repeat around. (40)
Round 13: SC in each around. (40)
Round 14: SC in the first 3, INV DEC in the next. Repeat around. (32)
Round 15: SC in each around. (32)
Start stuffing here.
Round 16: SC in the first 2, INV DEC in the next. Repeat around. (24)
Round 17: SC in the first, INV DEC in the next. Repeat around. (16)
Round 18: INV DEC in each around. (8)
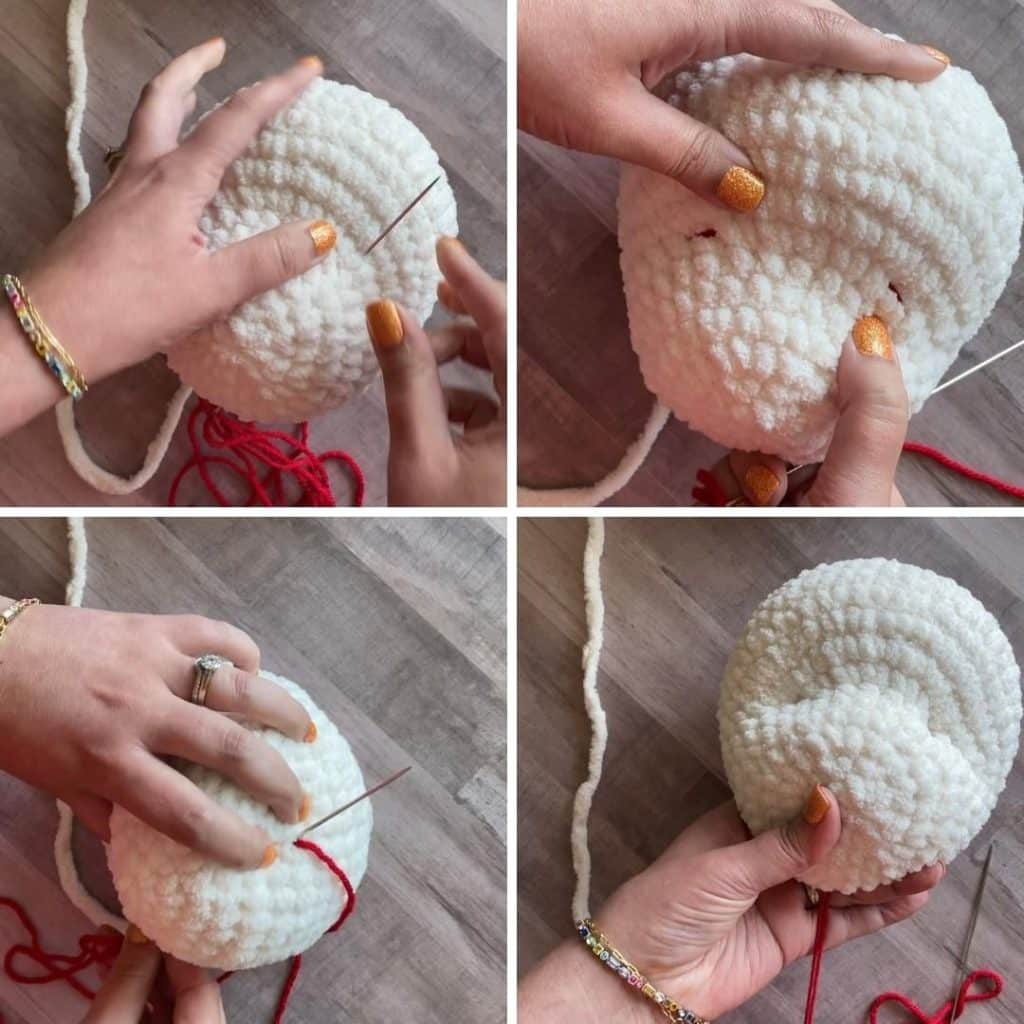
Finish stuffing. Sew the remaining hole closed. Watch the video or scroll down for the picture tutorial on how to shape the face!
Using a long needle, go up through the center of the chin and come out through round 7, to the side before you begin the series of SC INC.
Skip two stitches and go through, and then our about 2 stitches before the end of the SC INCs. (the red lines on the face)
Then go back down two stitches over and out near the same hole under the chin.
Pull the ends tight and the face will indent. Tie the ends tight together and weave the ends in.
With the pink blanket yarn, embroider the nose by making multiple passes (approx. 3-4) through about 4 stitches, where rounds 1 and 2 meet. Go through the same stitches each time for a clean look. Fasten off and pull the ends though, then cut as closely as you can so they pull back into the head.
Ears (make 2)
Round 1: In a magic circle, SC 8.
Round 2: SC INC in each around. (16)
Round 3: SC in the first, SC INC in the next. Repeat around. (24)
Round 4: SC in each around. (24)
Round 5: SC in the first 2, SC INC. Repeat around. (32)
Rounds 6: SC in each around. (32)
Round 7: SC in the first 2, INV DEC in the next. (24)
Round 8: SC in each around. (24)
Round 9: INV DEC in the first. SC in the next 10. INV DEC. SC in the remaining 10. (22)
Round 10: SC in each around. (22)
Round 11: INV DEC in the first. SC in the next 9. INV DEC. SC in the remaining 9. (20)
Round 12: SC in each around. (20)
Round 13: INV DEC in the first. SC in the next 8. INV DEC. SC in the remaining 8. (18)
Round 14: SC in each around. (18)
Round 15: INV DEC in the first. SC in the next 7. INV DEC. SC in the remaining 7. (16)
Round 16: SC in each around. (16)
Round 17: INV DEC in the first. SC in the next 6. INV DEC. SC in the remaining 6. (14)
Round 18: SC in each around. (14)
Round 19: INV DEC in the first. Sc in the next 5. INV DEC. SC in the remaining 5. (12)
Round 20: SC in each around. (12)
Round 21: INV DEC in the first. SC in the next 4. INV DEC. SC in the remaining 4. (10)
Fasten off and leave a long tail to sew the ear on the head. Sew it on about row 4 -6, counting from the back of the head.
Eyes
I use bulky black yarn and sew two eyes. Two stitches tall and four stitches apart, centered above the nose. Here is a video of me doing it!
I also experimented with the eye embroidery on this crochet bunny snuggler pattern. If you want to see the video and picture tutorials for those, you can find the collection here.
Arms
Stuff the hand and the bottom half of the arm as you go.
Round 1: In a magic circle, SC 8.
Round 2: SC INC in each around. (16)
Rounds 3-5: SC in each around. (16)
Round 6: INV DEC in each around. (8)
Rounds 7-15: SC in each around.
Fasten off and leave an extra long tail. Sew the opening closed.
Attach the arms between rows 35-37 of the body. Use the yarn through method, or if you prefer you can do it the traditional way.
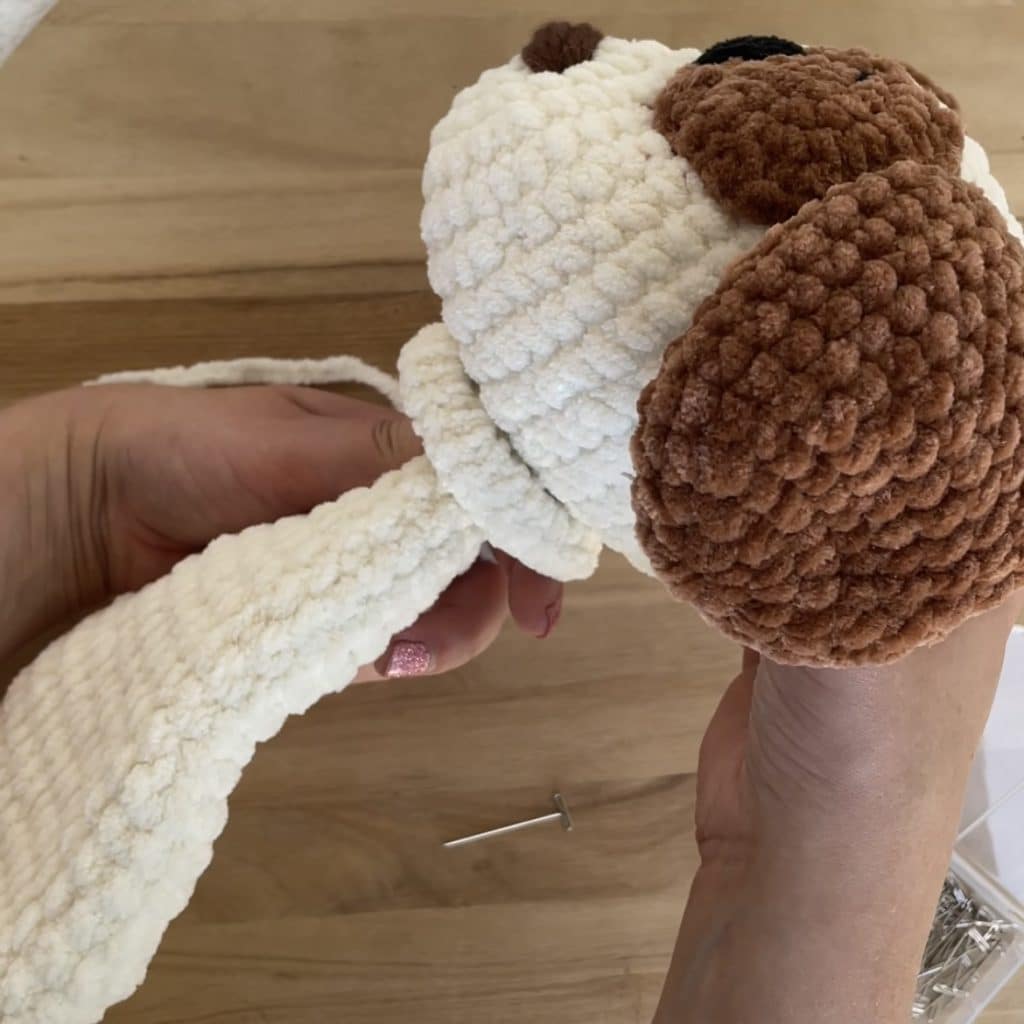
Attaching the Snuggler Crochet Head to the Body
Once you are ready to attach the head to the body, pin the flat disc that is at the top of the body where you want it on the head. Try to center it as best you can. I prefer mine to be slightly close to the nose so that the head flops forward more than backwards.
As you sew, go through both loops on the SC at the top of the disc. Pull tightly each time. Try to pull the disc out as you go, so that it lies as flat to the head as you can.
If you want to watch the video tutorial, you can find it here!
Note: These are pictures from the Snuggler Puppy Pattern, but the principle is the same!

Did you make this pattern?
Mention me @thefriendlyredfox so we can see your creations! You can also leave a comment below!


I’m having a heck of a time making this bunny! Finishing the legs and working up the body I do Rd 23- 27. Then the INV DEC, I now have an opening of less than two fingers. It’s too tight! Why is there an INV DEC? It should be an INC. I’m using Bernat Blanket. It’s going to a 14month old girl for Christmas. I want to make the bear for her brother. Help! Please!
Hi! Sorry you’re having a hard time. The INV DEC makes the neck. This is a snuggler so the body is unstuffed, but then you will widen it again so you have the flat disc to attach the head to! I have a video tutorial at this link so you can see the process! https://www.thefriendlyredfox.com/attach-the-head-to-the-snuggler-body/
If that doesn’t answer your question, feel free to send me an email or message on FB/IG!
Does the head get stuffed?
Loving this so far. It’s adorable!
Thanks!
Yes! Glad you’re enjoying it!
The head does get stuffed. You’ll start stuffing after round 15 and finish stuffing after round 18!
I have made this one time but I have a question in regard to attaching the arms. Your video shows attaching the arms and legs but you are attaching to a stuffed bear body. This is a snuggler so the body is not stuffed. Do you still use the yarn through method on snuggler arms or do you attach them differently? Also do you stuff the arm all the way to top or just the hand and a little above the hand? This pattern was easy to follow and make I love it!!
Yes! I still use the yarn through method. Just lay the snuggler flat while you’re doing it. You can pull a little bit tight when you attach the arms together so there’s no slack when the snuggler gets snuggled. 😀 And the arm is stuffed about halfway up! Glad you enjoyed it!
Where are the directions for the body? I can only see the head, ears and appendages😞
The body is worked from the feet up – you will fasten off the first foot, make the second, and then connect them and work the body up.
I started this pattern, but the hook seems super small for the yarn. I am using the Bernat blanket yarn as you suggest. Bernat has an 8mm hook recommendation, but this pattern says 4mm. I keep losing the yarn because it’s so thick for that hook. Could there be a typo? Thanks!
It’s not a typo! 🙂 I use a 4mm for this yarn – it’s Premier Basix Chenille. I use a small hook because I prefer tighter stitches. It helps them keep their shape better than the bigger hook! But with Bernat, I will sometimes size up to a 5mm or 5.5mm. Amigurumi with worsted weight uses a much smaller hook than the package recommends as well – it’s the same theory!