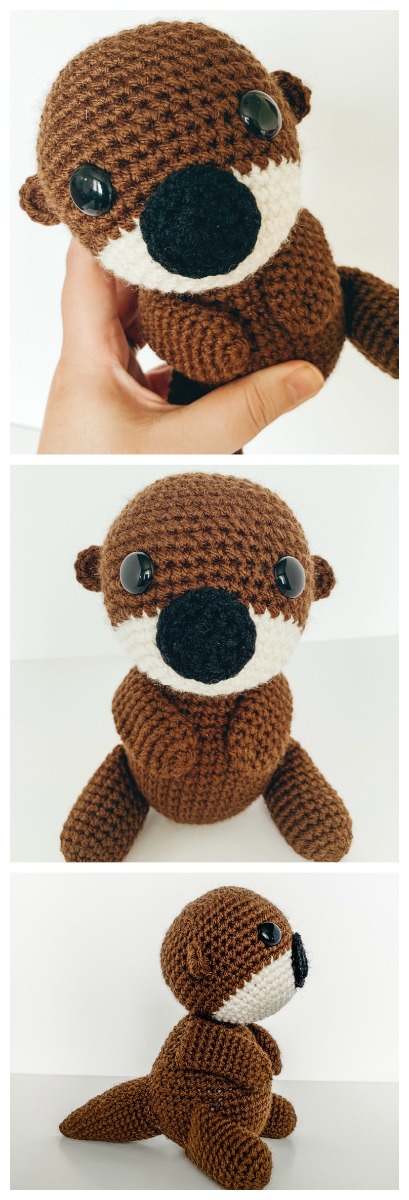
Free Crochet Otter Pattern
Free Crochet Otter Pattern
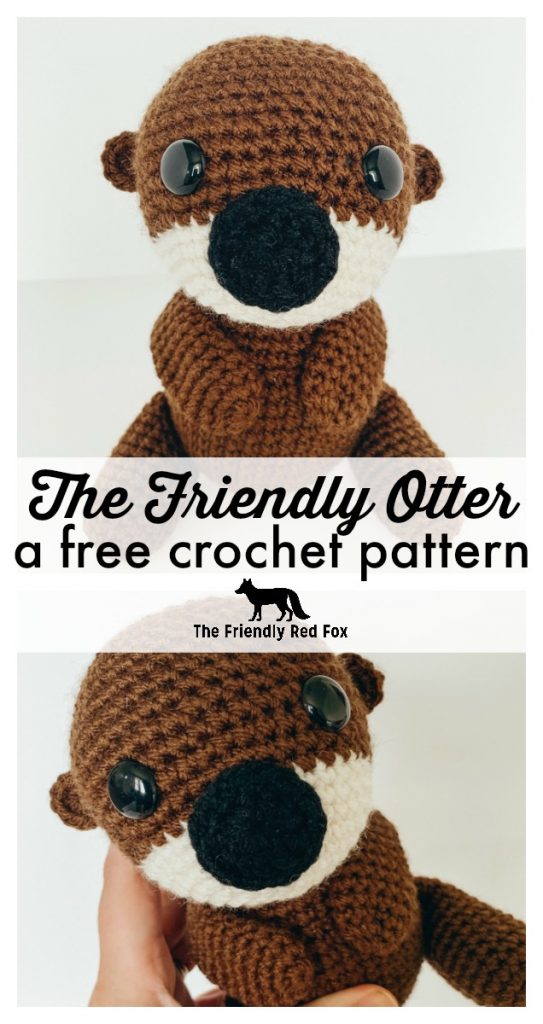
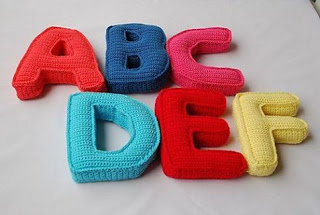
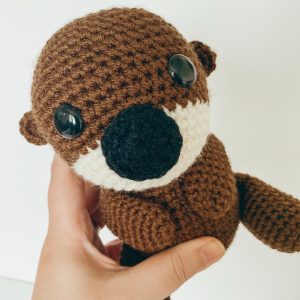
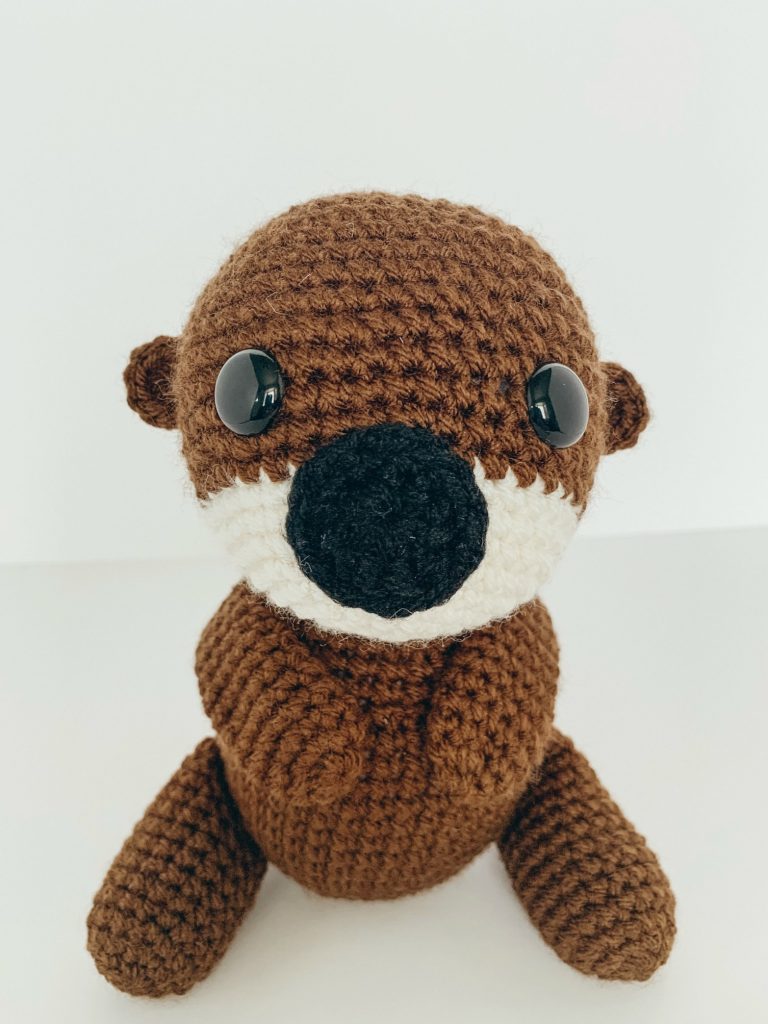
This free crochet otter pattern almost didn’t happen… I was having such a hard time getting what I wanted in my head to translate to yarn and hook! But then I was watching Finding Dory with my boys and the little otters in that Disney film inspired me. I switched a few things around, and I could not be happier with little Otto the Otter! Otto is the Letter O amigurumi in my Amigurumi from A to Z series! You can see the rest of the series here.
I went with safety eyes larger than I usually use for this size for a bit more oomph in the cuteness factor. I have found that my best bet for reliable, and actually safe, safety eyes is this shop on Etsy. This crochet otter is about 8 inches tall and 4 inches wide. His arms are not stuffed and are attached to the body to create that lovable, cuddly look. The head and limbs are crocheted and attached separately. If you hate sewing on amigurumi limbs, watch this video where I share all my best tips and tricks to make it a little more manageable. You may also want to read this post on all my best amigurumi tips and tricks.
Scroll down for the free pattern, or you can purchase the ad-free, printable PDF.
Please note this pattern is only for PERSONAL USE. Please feel free to make as many
items as you wish for yourself, or as gifts. You may sell items made with this pattern but
PLEASE LINK BACK OR GIVE CREDIT TO ME AS DESIGNER. In no way can you
share, reproduce, or sell this pattern. Please respect my rights as a designer, this pattern belongs to The Friendly Red Fox.
You will need:
Approx 120 g size 4 yarn in main color (I used I Love this Yarn in Brown)
Small amount of Ivory worsted weight
Crochet Hook in Size 3.75
Tapestry Needle
Polyfil
15mm safety eyes
stitch marker
Abbreviations
SC– single crochet
SC INC– single crochet increase (2 SC in each stitch)
INV DEC– Invisible decrease (put hook through the FRONT LOOP ONLY of two consecutive stitches [two loops on hook] Yarn over pull through both loops. [two loops on hook] Yarn over pull through two loops)
Magic Circle– Make a loop, leaving a long tail to work with. Insert hook in center of loop, yarn over and draw up a loop. Yarn over, pull through to make the first chain (this does not count as a stitch!). Continue to crochet over the loop and tail with the number of stitches called for. (If you need 6 SC, then crochet 6 SC inside the ring.) Pull the tail to close the circle.
Click here for a video tutorial on the magic circle!
Always move your stitch marker to the last stitch in the round. This pattern is worked in continuous rounds.
The Free Crochet Otter Pattern
Nose
In a magic circle, SC 3x, HDC, DC 2x, TRC 3x, DC 2x, HDC. Pull the circle tight. Slip stitch to the first stitch. Chain 1. (12)
SC in each around. Attach with a slip stitch, and fasten off leaving a long tail to sew on. Center it between the eyes and one row down. I prefer to attach the nose before I close the head (see below) but you can attach it after if you like.
Head
Begin with Ivory:
Round 1: In a magic circle, 6 SC.
Round 2: SC INC in each around. (12)
Round 3: SC in first, SC INC in next. Repeat around. (18)
Round 4: SC in first 2, SC INC in next. Repeat around. (24)
Round 5: SC in first 3, SC INC in next. Repeat around. (30)
Round 6: SC in first 4, SC INC in next. Repeat around. (36)
Rounds 7-9: SC in each around. (36)
Change to brown. Watch this video for my best advice on how to change color in amigurumi!
Round 10: SC in first 5, SC INC in next. Repeat around. (42)
Round 11: SC in first 6, SC INC in next. Repeat around. (48)
Round 12-18: SC in each around. (48)
Attach the eyes between rows 12 and 13, 8 stitches apart. Begin to stuff here. Sew the nose between the eyes, about one row down.
Round 19: SC in the first 6, INV DEC in the next. Repeat around. (42)
Round 20: SC in the first 5, INV DEC in the next. Repeat around. (36)
Round 21: SC in the first 4, INV DEC in the next. Repeat around. (30)
Round 22: SC in the first 3, INV DEC in the next. Repeat around. (24)
Round 23: SC in the first 2, INV DEC in the next. Repeat around. (18)
Round 24: SC in the first, INV DEC in the next. Repeat around. (12)
Round 25: INV DEC around. (6)
Fasten off and carefully sew the remaining hole closed.
Ears
7 HDC in a magic circle. Pull the circle closed. Fasten off and leave a long tail to attach the ears with. Attach the ears around rows 14 up to 17.
Body
With Brown:
Round 1: In a magic circle, 6 SC.
Round 2: SC INC in each around. (12)
Round 3: SC in first, SC INC in next. Repeat around. (18)
Round 4: SC in first 2, SC INC in next. Repeat around. (24)
Round 5: SC in first 3, SC INC in next. Repeat around. (30)
Round 6: SC in first 4, SC INC in next. Repeat around. (36)
Round 7: SC in first 5, SC INC in next. Repeat around. (42)
Rounds 8-13: SC in each around. (42)
Round 14: SC in first 5, INV DEC in the next. Repeat around. (36)
Rounds 15-16: SC in each around. (36)
Round 17: SC in first 4, INV DEC in the next. Repeat around. (30)
Rounds 18-19: SC in each around. (30)
Begin stuffing here.
Round 20: SC in first 3, INV DEC in the next. Repeat around. (24)
Rounds 21-22: SC in each around. (24)
Round 23: SC in first 2, INV DEC in the next. Repeat around. (18)
Round 24: SC in the first, INV DEC in the next. Repeat around. (12)
Fasten off leaving a long tail to see the head on with. The head will be attached an angle with the cream part of his face hanging over the chest. Use pins to keep it in place.
Legs
Round 1: In a magic circle, 6 SC.
Round 2: SC INC in each around. (12)
Round 3: SC in first, SC INC in next. Repeat around. (18)
Rounds 4-14: SC in each around. (18)
Fasten off and leave a long tail to sew on. Stuff the legs. Attach them on either side of the body, with the bottom of the leg on round 7 and the top at about round 12.
Arms
Round 1: In a magic circle, 6 SC.
Round 2: SC INC in each around. (12)
Rounds 3-14: SC in each around. (12)
Fasten off and leave a long tail to sew on. I did not stuff the arms, instead I flattened them so they would be closer to the body. Attach them on row 17 to about row 22 on either side of the body. I used the remaining yarn to secure the flattened arms to the body, just by sewing through different sections of the arm.
Tail
Round 1: 6 SC in a magic ring.
Round 2: SC in each around. (6)
Round 3: INC in each around. (12)
Rounds 4-6: SC in each around. (12)
Round 7: SC in the first, INC in the next. Repeat around. (18)
Rounds 8-10: SC in each around. (18)
Round 11: SC in the first 2, INC in the next. Repeat around. (24)
Rounds 12-18: SC in each around. (24)
Fasten off and leave a long tail. Stuff the tail. Attach it to the body using pins. I attached it with the bottom at about row 6 and the top at about row 13. You might want to take care to make sure your tail lies flat when he is sitting and adjust accordingly.