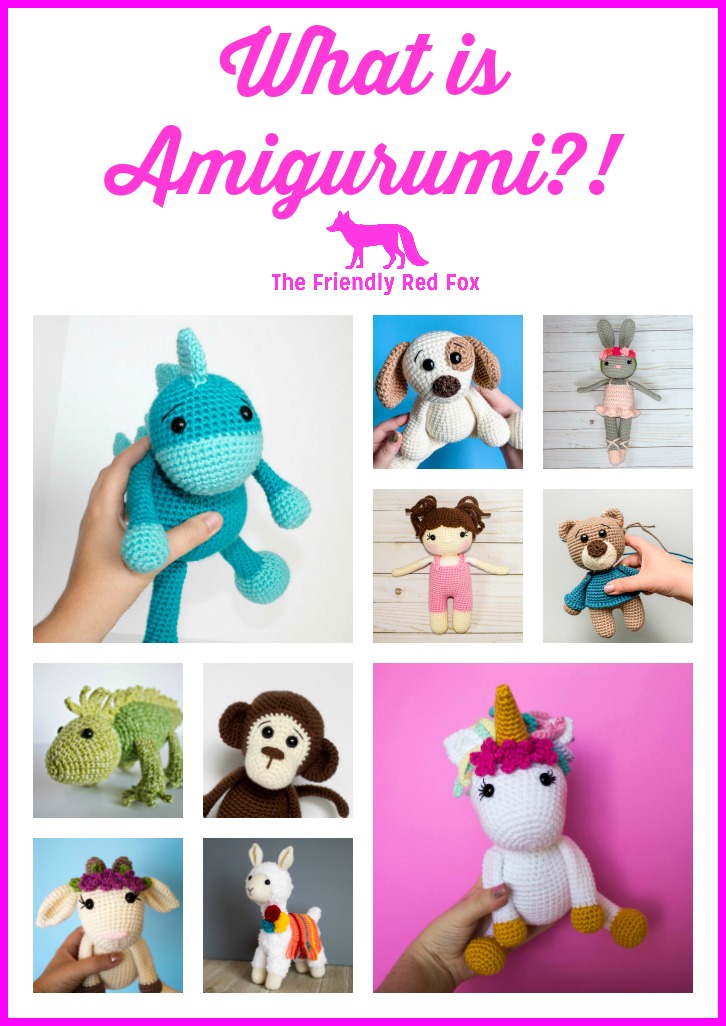
Plush Ballerina Crochet Pattern-a free amigurumi pattern
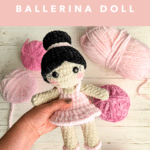
This free plush ballerina crochet pattern makes a graceful amigurumi doll! This amigurumi pattern works up quickly with plush blanket yarn-perfect for gifts and markets.

Plush Yarn Ballerina Crochet Pattern
I have fallen in love with plush yarn and the effect it has when using it for amigurumi! I can’t resist making free crochet plushie patterns, as you can see here! The bulkier yarn allows for a good sized project with less stitches, so I feel like I am flying through the creating process. Once you are familiar with this type of yarn, I think that this is a very beginner friendly project. This little crochet doll definitely works up much faster than the traditional amigurumi!
JOIN MY NEWSLETTER TO RECEIVE…
A free email course-Amigurumi 101
This free amigurumi email course gives you what you need to master the basics of amigurumi, along with some extra tips and tricks!
This plush yarn ballerina pattern is based on my original worsted weight ballerina – The Friendly Grace. But she’s been adjusted to the bulkier yarn. The fun thing, is that even though it takes less stitches, they work up about the same size! One problem I do have with bulky or plush yarn is that you need to be really careful when adding a lot of detail. I prefer to have relatively simple patterns when I use blanket yarn, or else I think you would have a very, very large final plushie!
So, I took great care to make sure that every detail was well thought out. There are a few tips below to make the most of the yarn and stitches in this plush ballerina crochet pattern, so please don’t miss them!
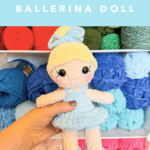
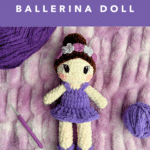
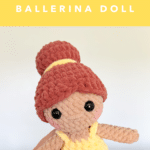
If you are interested in the different colors and types of yarn, I have this page with the dolls and links to the yarn I used for each one! Hopefully that can help with some color inspiration and to find the yarn, I know that can be tricky for skin colors!
If you’re looking for other plush dolls, my Plush Mermaid and Baby Princess are super popular!
Would you like to save this project for later? Enter your email below, and the link will be sent to your inbox!

Ad-free, Printable PDF Full Pattern
My patterns are free on my website, but if your prefer a printable copy, you can find them in my shop!

Bella the Plush Ballerina Pattern
$6

Squishy Unicorn Pattern
$6
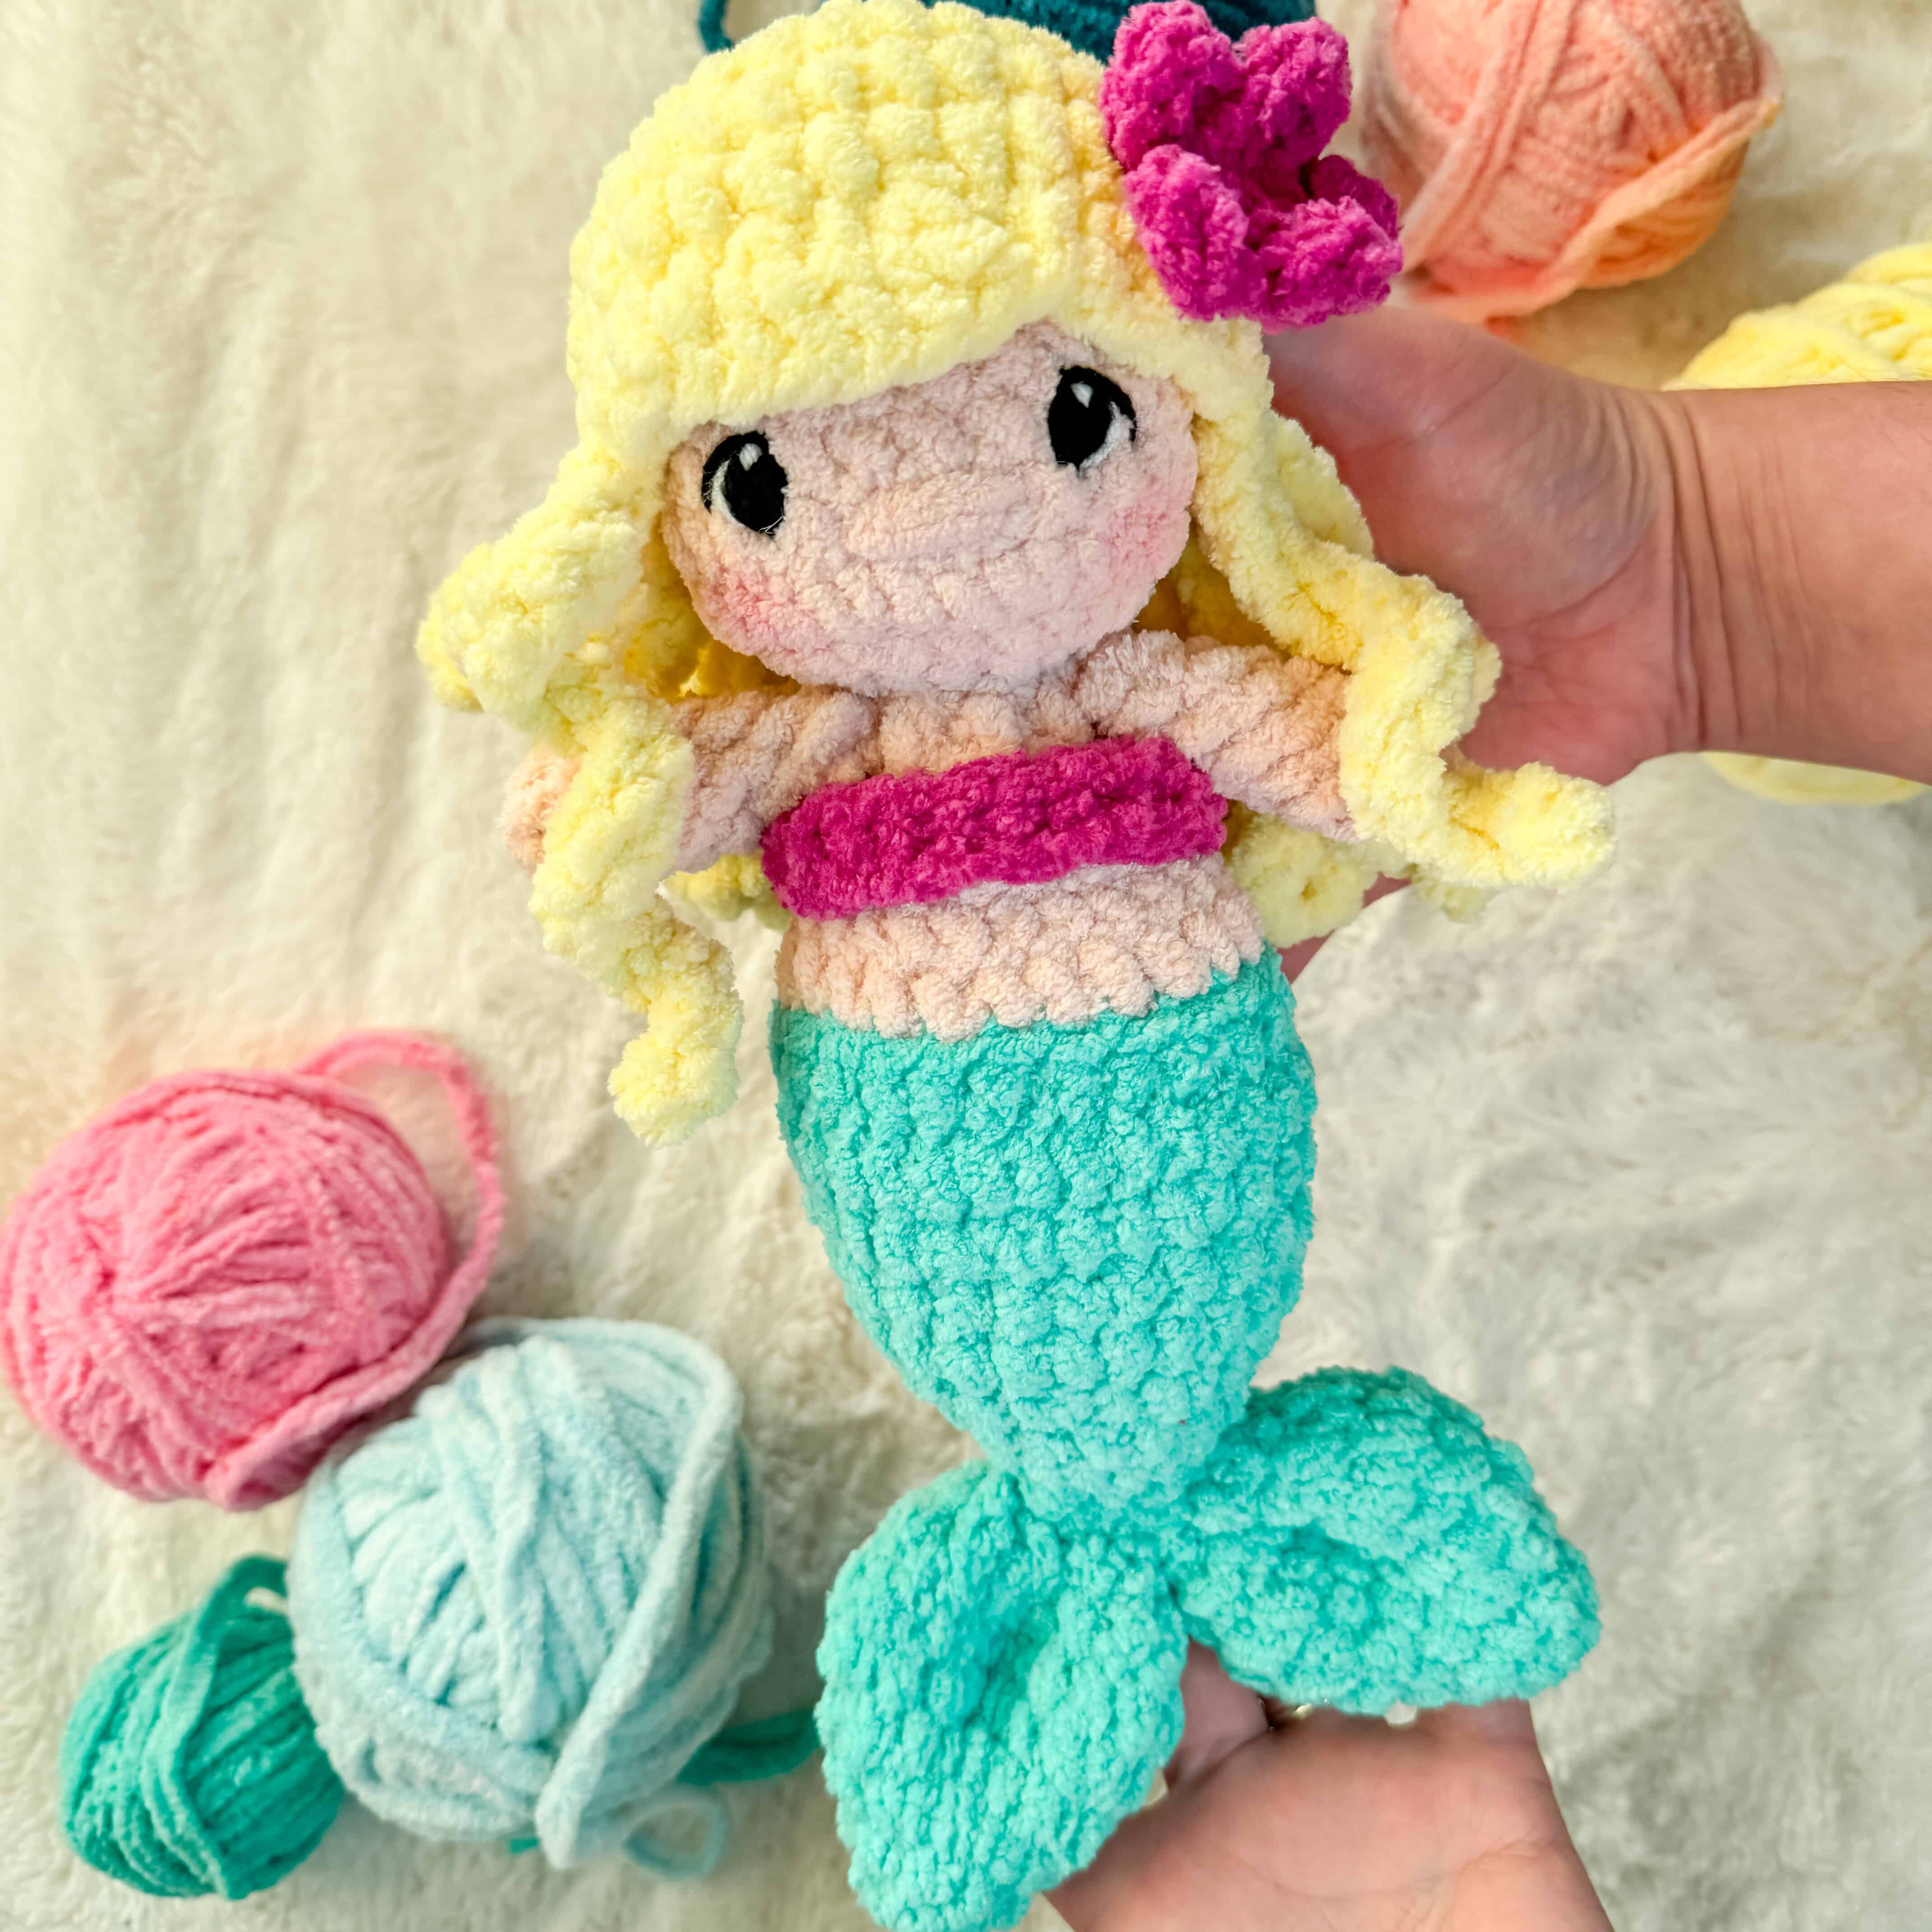
Plush Mermaid Pattern
$6
Materials you’ll need
To get started making this free plush ballerina crochet pattern, you’ll want to gather all your materials first.
You will need:
- 40g blanket yarn for the skin color (See here for skin/hair/clothing color recommendations)
- 30g blanket yarn for the dress
- 30g plush yarn for the hair
- a small amount of worsted weight if you’re doing the flower crown
- Crochet Hook in Size 4.5mm
- Crochet Hook in Size 4.0mm for flower crown
- 13.5mm safety eyes
- Tapestry Needle
- Polyfil
- stitch marker

Notes:
This standing ballerina doll is made by crocheting two legs and then attaching them. This way, the legs, body and head are all made in one piece. The arms are attached at the end. The hair is made like a wig, and then attached to the head. The skirt is attached to the body. You will insert a neck strengthener which will help with the shape and stability of the head.
The arms are attached with a long needle. You can find the video for that here.
You can use safety eyes or try out embroidered eyes so it would be safe for a baby/toddler. You can find my collection of embroidery videos here.
If you like a worsted weight, taller ballerina doll, I have a free pattern you may like! This ballerina doll is the larger, more mature cousin to this one!
For this pattern, I used two methods for the single crochets. On the slippers, dress, and hair I use the yarn over/yarn over method. For anything that is skin-colored, I use the yarn under/yarn over method. I know this sounds complicated, but I promise it isn’t as bad as it may sound! I made the video below to show what I mean. If you are not interested in trying this method, using a slightly smaller hook or tighter tension could work. It is not, of course, mandatory. I just prefer this method, especially using plush yarn!
Crochet Ballerina Doll Amigurumi Pattern
Neck strengthener
*Click here for a video and picture tutorial on how this works*
In a magic circle, SC 7. SC in each around for a total of 7 rows. Fasten off and leave a long tail to sew the hole closed and sew through the neck.
Legs (Make 2) & Body
Starting with the legs and using the accent color:
Round 1: 10 in a magic circle. (10)
Rounds 2-4: SC in each around. (10) *3 rounds*
Change to body color. (see my favorite color changing method here!)
Stuff the legs as you go. It is easier to do it a little at a time, rather than stuffing at the very end.
Rounds 5-15: SC in each around. (10) *11 rounds* (15 rounds total for each leg)
On the first leg, fasten off.
Once you have finished the second leg change to accent color. (This is to provide a “leotard look” to the “crotch area.”)
Chain 2 and slip stitch to the first leg. Find the stitch that lines up the slippers the best- they will be slightly lower/higher because it is crocheted in a spiral.


Ballerina Body (continued)
Round 16: SC in each stitch around the first leg (10). SC in each chain across. (2) SC in each stitch around the second leg. (10) SC on the other side of the chain. (2) (a total of 24)
Rounds 17-21: SC in each around. (24) *5 rounds*
Round 22: SC in the first, INV DEC in the next. Repeat around. (16)
Round 23: SC in each around. (16)
Change to skin color in the next round. Make sure that you are changing color in the back, the opposite side from where you lined up the slippers. It can be in the middle of the round if that’s where it lines up! Begin to stuff here. Continue to stuff as you close.
Round 24: SC in each around. (16)
Round 25: INV DEC 8 times. (8)
From here we are going to increase to the head. See THIS video for helpful tips about how to make your head round!
Round 26: SC in each around. (8)
Round 27: In the front loop only, SC INC. (16)
Round 28: SC in the first, SC INC in the next. Repeat around. (24)
Round 29: SC in the first two stitches, SC INC in the next. Repeat around. (32)
Rounds 30-34: SC in each around. (32) *5 rounds*
Insert the neck strengthener (video here). Attach the eyes between rounds 32 and 33, about 4 stitches apart. Stuff as you close.
Round 35: SC in the first 2, INV DEC in the next. Repeat around. (24)
Round 36: SC in each around. (24)
Round 37: SC in the first. INV DEC in the next.. Repeat around. (16)
Round 38: INV DEC 8 times. (8)
Finish stuffing well here. Fasten off and sew the remaining hole closed.
Embroider the nose with the skin color yarn, between the eyes, one round down. I only do two passes 2-3 stitches wide with this thick yarn.
Optional: Use blush and a CLEAN eyeshadow brush to add blush.
Arms (make 2)
In skin color:
Leave unstuffed
Round 1: 7 SC in a magic circle. (7)
Rounds 2-10: SC in each around. (7) *9 rounds*
Fasten off and leave a long tail to sew the arms on. Close the opening and sew them on between rounds 23 and 24. My favorite method can be found here!
Hair
With hair color:
NOTE: You may need to adjust your hook size here. Different types of yarn work up differently. Stretch the hair out as you try it on OR size up if it works up too tightly. If you need to, add one more row before you get to round 8.
Round 1: In a magic circle, SC 8. (8)
Round 2: SC INC in each around. (16)
Round 3: SC in the first, SC INC in the next. Repeat around. (24)
Round 4: SC in the first 2, SC INC in the next. Repeat around. (32)
Rounds 5-7: SC in each around. (32) *3 rounds*
Round 8: HDC, HDC INC, DC, DC INC, DC, DC INC, skip a stitch and slip stitch in the next. Skip a stitch and DC INC, DC , DC INC, HDC, SC in the remaining 19 stitches. (35)
Fasten off with a long tail and attach with the “part” on an angle.
Note: I sometimes use a hot glue gun to glue the top so it doesn’t shift and then sew the bottom edge.
Bun
With hair color:
Round 1: In a magic circle, SC 8. (8)
Round 2: SC INC in each around. (16)
Round 3: SC in the first, SC INC in the next. Repeat around. (24)
Rounds 4-6: SC in each around. (24) *3 rounds*
Round 7: SC in the first, INV DEC in the next. Repeat around. (16)
Fasten off and leave a long tail to sew on the hair. Lightly stuff the bun and sew it on so that it covers the top three rounds of the hair part.
Bow/Scrunchie:
Using the dress/accent color:
Loop twice around the bun. Tie in front for a bow or in back for a scrunchie!


Flower Crown
Using worsted weight yarn and 4mm hook:
Make a magic circle. *Chain 2, DC into the center. Chain 2 then slip stitch into the center. * repeat the * * for a total of five petals. Pull the magic circle closed. Fasten off.
Make 5 and sew a strand of worsted weight yarn into the backs of them and fasten the crown on around the bun.

Skirt
With dress/accent color:
Round 1: On row 19, attach yarn with a slip stitch around a post from the back of the doll and chain 2. DC in each post around, making sure that the feet of the doll point up, so that the DC points outward, like a skirt would. DC twice in the final stitch and slip stitch to the first DC.
Round 2: Chain 2 and DC INC in each stitch around. Once you reach the first DC, slip stitch to it and fasten off. Weave the remaining tail through the skirt and into the body.

Sleeves
Using the dress/accent color:
Leaving a 3 inch tail, chain 12 times (depending on what yarn you are using, that may be too many. Chain to a length that will touch both sides of the dress, over the arms.) Fasten off and leave a tail to sew on. Place over the arm with each end touching the top of the dress, one end in the front, the other in the back. Use tails to fasten the ends to the body. Weave in ends and trim excess. Repeat on the other side.


Ballet Laces
In slipper/accent color:
- Leaving a 3 inch tail, chain 20 times. Fasten off and leave a tail to sew on. Find the middle of the chains and place it under the leg, about 3 rounds above the top of the slipper. Bring one end around and use the tail to secure it to the side of the leg. Bring the other end across, creating an “X.” Bring the tail of that end through the slipper. Sew a few stitches to make sure the laces stay in place. (decrease or increase chain length as needed, like with the sleeves.)
- Bring the ends out the same hole in the back of the slipper. Tie it off and weave the ends in.


Want the Ad-free, Printable PDF?
You can find it in one of my stores!

Did you make this Plush Ballerina Crochet pattern?
Mention me @thefriendlyredfox so we can see your creations! You can also leave a comment below!
Hi Kali,
I love your patterns and thought I would try the ballerina.
I am gathering the suppllies needed and am needing some help with the type of plush yarn for the hair.
Is this yarn different to the bernat blanket yarn? Im wondering if you used the premier parfait chunky.
I live in Australia so getting some of these yarns can be difficult. For the body and clothes the spotlight moda vera yarn in blankie is a weight 6 yarn that looks like it might be similar.
looking forward to hearing from you
Jenny
I’m not familiar with Australian brands of yarn but I did use Premier Parfait Chunky for the hair! and Bernat Blanket for the body/skin.