Free Moose and Reindeer Crochet Pattern – Plush Shelf-Sitters

Meet the cutest holiday duo— plush moose and reindeer in cozy sweaters and scarves!
With dangling legs and big, snuggly boots, they’re perfect for spreading holiday cheer.

Moose and Reindeer Crochet Pattern
I have fallen in love with plush yarn and its effect when used for amigurumi! I can’t resist making free crochet plushie patterns, as you can see here! The bulkier yarn allows for a good-sized project with fewer stitches, so I feel like I am flying through the creating process. Once you are familiar with this type of yarn, I think that this is a very beginner-friendly project. These little crochet animals definitely work up much faster than traditional amigurumi!
JOIN MY NEWSLETTER TO RECEIVE…
A free email course-Amigurumi 101
This free amigurumi email course gives you what you need to master the basics of amigurumi, along with some extra tips and tricks!
This moose and reindeer crochet pattern is based on my original worsted weight shelf-sitters. But they’ve been adjusted to the bulkier yarn. The fun thing, is that even though it takes less stitches, they work up about the same size! One problem I do have with bulky or plush yarn is that you need to be really careful when adding a lot of detail. I prefer to have relatively simple patterns when I use blanket yarn, or else I think you would have a very, very large final plushie! (I also have a love for smaller ones – like my reindeer and moose squishies!)
So, I took great care to make every detail well thought out. These patterns are unique – it’s the same body and two different heads! There are also a few tips below to make the most of the yarn and stitches in this plush moose and reindeer crochet pattern, so please don’t miss them!
If you are looking for more holiday-inspired patterns, I have a whole page right here!


Ad-free, Printable PDF Full Pattern
My patterns are free on my website, but if your prefer a printable copy, you can find them in my shop!

Plush Moose and Reindeer Pattern
$6

Christmas Shelf-Sitter Pattern Bundle
$6
Squishy Reindeer Pattern
$6
Materials you’ll need
To get started making this free moose and reindeer pattern, you’ll want to gather all your materials first.
You will need:
- 75g Premier Basix Chenille in Caramel
- 80g Plush yarn for Sweater
- 40g Plush yarn for Legs & Scarf (can split into two colors for striping!)
- 40g Bernat Blanket in Coal
- Small amount of Premier Basix Chenille in winter white
- Small amount of Red Plush yarn for the Reindeer Nose
- 12mm safety eyes
- Crochet Hook in Size 4.5mm
- Tapestry Needle
- Polyfil
- stitch marker

Notes:
This pattern creates a cozy moose or reindeer with plush yarn, featuring long, dangly legs for an adorable shelf-sitter look. The heads have different patterns, but the body is the same for each version!
The arms are attached with a long needle. You can find the video for that here.
You can use safety eyes or try out embroidered eyes so it would be safe for a baby/toddler. You can find my collection of embroidery videos here.
If you like a worsted weight shelf-sitter, I have a free pattern you may like! These shelf-sitters are the original version of this pattern!
How to attach a raised edge:
This video shows the method I use, only on my unicorn hoof! It’s the same principle, however, and could be helpful!
Begin by attaching a piece of yarn by putting your hook through the post of a stitch, usually in the back. Grab the yarn and pull through. Chain once, and SC around the same post. Following the line of the round, SC around each post until you reach the first one. Attach to the first stitch with a slip stitch, fasten off and weave in the ends. This stitch is important for adding the boot and sweater details to your moose and reindeer!


Moose and Reindeer Crochet Pattern
**Moose Head**
Head
Starting with the snout in the caramel color:
Round 1: In a magic circle, SC 8.
Round 2: SC INC in each around. (16)
Round 3: SC in the first, SC INC in the next. Repeat around. (24)
Round 4: SC in the first two, SC INC in the next. Repeat around (32)
Round 5: SC in the first two, INV DEC in the next. Repeat around. (24)
Round 6-7: SC in each around. (24) *2 rounds*
Round 8: SC in the first 16. SC INC in the remaining 8. (32)
Round 9: SC in the first 16. *SC in the first, INC* 8x. (40)
Rounds 10-12: SC in each around. (40) *3 rounds*
Insert eyes on round 9, using the 8 INC of round 8 to help center them. There should be about 6 stitches between the eyes.
Round 13: SC in the first 3, INV DEC in each around. (32)
Round 14: SC in the first 2, INV DEC (24)
Begin to stuff here, and continue to stuff as you close.
Round 15: SC in the first, INV DEC (16)
Round 16: INV DEC (8)
Fasten off and sew the remaining hole closed.
Ears (make 2)
Using caramel yarn and working in rows (do not close your magic circle):
Row 1: In a magic circle, SC 8. Ch 1 and turn (8)
Row 2: SC INC in each around. (16)
Row 3: Chain 1 and turn. SC 8x. Chain 2, pulling tightly each time. SC in the remaining 8 stitches. (18)
Fasten off with a long tail. Bringing the ends together, there will be a slight bowl shape. Using one of the ends, sew this together with a few stitches. Weave the end back to the end so you can sew it on the head. Attach the ears around round 12, lined up slightly outside the eyes and so that they face directly out.


Moose Antlers (make 2)
DO NOT STUFF. In winter white:
Make 2:
Round 1: SC 10 in a magic circle.
Rounds 2-8: SC in each around. (10) *7 rounds*
Round 9: SC in the first, INV DEC in the next. Repeat around. (7)
Fasten off with a long tail.
Make 2:
Round 1: SC 8 in a magic circle.
Rounds 2-3: SC in each around. (8)
Fasten off and leave a long tail. Sew this piece on the flat end of the first, longer piece along rounds 4-6.
Attach them behind and inside the ears.


Your Moose Head is done! Click here to go finish the Body!
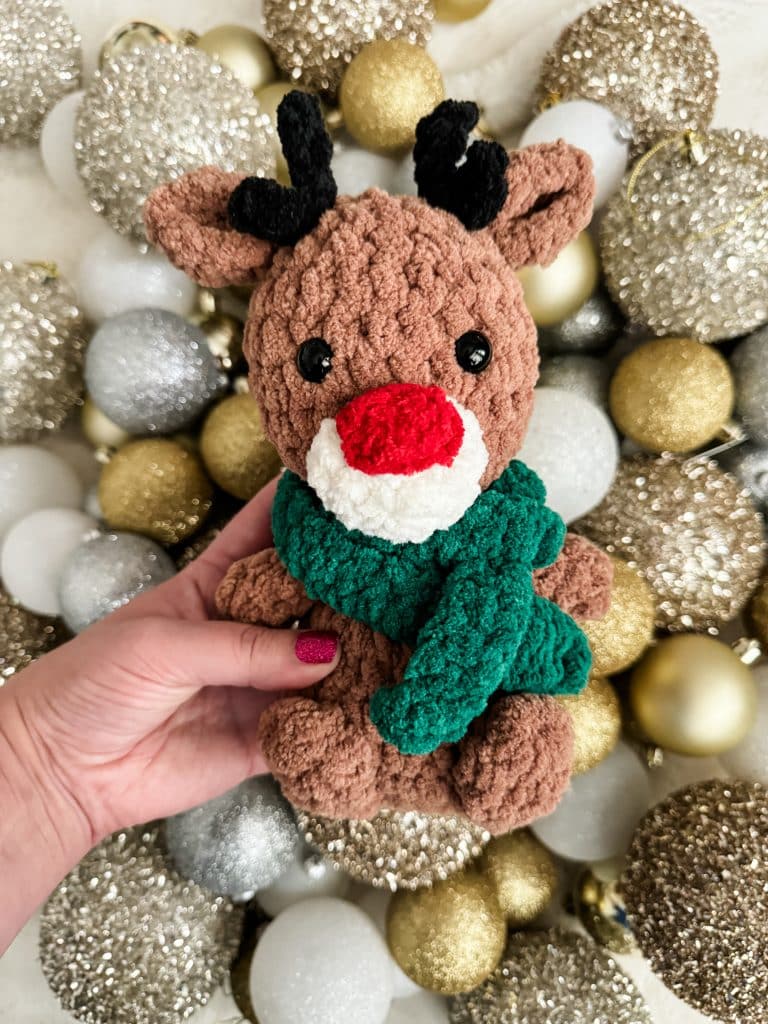
**Reindeer Head**
Head
Starting with the snout in caramel color:
Round 1: In a magic circle, SC 6.
Round 2: SC INC in each around. (12)
Round 3: SC in the first, SC INC in the next. Repeat around. (18)
Round 4: SC in the first 2, SC INC in the next. Repeat around. (24)
Round 5: SC in each around.
Round 6: SC INC in the next 6 stitches. SC in the remaining 18. (30)
Round 7: SC in the first, SC INC in the next. Repeat for a total of 6 times. SC in the remaining 18. (36)
Rounds 8-10: SC in each around. (36) *3 rounds*
Round 11: SC in the first 4, INV DEC in the next. Repeat around. (30)
Round 12: SC in each around. (30)
Add safety eyes between rows 6 and 7 about 6 stitches apart. These are the rows that go up from the snout to form the forehead. Center them using the increases.
Round 13: SC in the first 3, INV DEC in the next. Repeat around. (24)
Round 14: SC in the first 2, INV DEC in the next. Repeat around. (18)
Begin to stuff here. Continue stuffing to the end.
Round 15: SC in the first, INV DEC in the next. Repeat around. (12)
Round 16: INV DEC in each around. (6)
Sew the remaining hole closed.
Nose
In Red:
Round 1: SC 8 in a magic circle.
Round 2: SC in each around. (8)
Fasten off and leave a long tail. Using a needle, do an invisible decrease in each stitch around. This will be similar to using a hook, but is easier to do with the small stitches and blanket yarn. Go through the front loop of two stitches and lightly pull. Once you finish, pull tightly. You will sew this on the very front of the reindeers nose, slightly on top around rounds 1-3. Center between the eyes.
Ears (make 2)
Row 1: In a magic circle, SC 8. DO NOT CLOSE. (8)
Row 2: SC INC in each around. (16)
Row 3: Chain 1 and turn. SC 8x. Chain 2, pulling tightly each time. SC in the remaining 8 stitches. (18)
Fasten off with a long tail. Bringing the ends together, there will be a slight bowl shape. Using one of the ends, sew this together with a few stitches. Weave the end back to the end so you can sew it on the head. Sew them on around rounds 11 and 12 so that they go upwards. Line the ears up to be just outside the eyes.
Reindeer Antlers (make 2)
DO NOT STUFF. In black:
Make 2:
Round 1: SC 6 in a magic circle.
Rounds 2-7: SC in each around. (6)
Fasten off with a long tail.
Make 2:
Round 1: SC 6 in a magic circle.
Rounds 2-3: SC in each around. (6)
Fasten off and leave a long tail. Sew this piece on the flat end of the first, longer piece along rounds 3-5.
Attach them inside the ears, on top of the head.

Your Reindeer Head is done! Click here to go finish the Body!
**Moose & Reindeer Body Pattern **
Legs (make 2)
Note: I stuff only the boot part on the legs. This boot will be finished on round 11, so make sure you stuff before you get too far on the rest of the legs. If you want to watch a video on how I change color in amigurumi, push play on the video below!
Using the boot color:
Round 1: In a magic circle, SC 8.
Round 2: SC INC in each around. (16)
Round 3: SC in the first, SC INC in the next. Repeat around. (24)
Round 4: SC in the first two, SC INC in the next. Repeat around (32)
Round 5: SC in each around. (32)
Round 6: SC in the first two, INV DEC in the next. Repeat around. (24)
Round 7: SC in the first 8, then INV DEC 8x. (16)
Round 8: SC in the first 8, then INV DEC 4X. (12)
Rounds 9-11: SC in each around. (12) *3 rounds*
Change to accent color. From here on you will change colors every three rounds. (see my favorite color changing method here!) The stitch marker will be on the side, so I chose to change color in the back of the legs. There will be 3 stripes of the same color as the bottom, and 2 of a separate accent color. (In the case of the reindeer, 3 winter white stripes and two red ones. I started with the winter white because that is the color I chose for the bottom)
Rounds 12-26: SC in each around. (12) Remember to change colors every three rounds.
Fasten off and leave a long tail to attach.
Using the boot color, add a raised edge around the last round in that color. (You can see a video for it here. It’s for the unicorn hooves, but the stitch is the exact same!)
Flatten the end, with the long tail on the side. Sew this on right beneath the sweater edge, in the front. The flattened end of the legs will cover about 4-5 stitches. Fasten off and weave in the ends.
Body
With the color you ended with from the legs:
Round 1: In a magic circle, SC 8.
Round 2: SC INC in each around. (16)
Round 3: SC in the first, SC INC in the next. Repeat around. (24)
Round 4: SC in the first 2, SC INC in the next. Repeat around. (32)
Round 5: SC in each around. (32)
Change to sweater color.
Rounds 6-8: SC in each around. (32) *3 rounds*
Round 9: SC in the first 2, INV DEC in the next. Repeat around. (24)
Rounds 10-13: SC in each around. (24) *4 rounds*
Starting stuffing here and continue to the end.
Round 14: SC in the first, INV DEC in the next. Repeat around. (16)
Change to caramel color.
Round 15: SC in each around. (16)
Round 16: INV DEC in each around. (8)
Round 17: In the front loop only, SC INC in each around. (16)
Round 18: SC in the first, SC INC in the next. Repeat around. (24)
Fasten off, leaving a long tail to attach the head with. (See the method for attaching discs to heads here!)
Using the sweater color, add a raised edge around the first round in that color. (Round 6)
Arms (make 2)
With caramel color:
Round 1: In a magic circle, SC 7.
Round 2: SC INC in each around. (14)
Round 3-4: SC in each around. (14) *2 rounds
Change to sweater color.
Round 5: INV DEC in the first. SC in the next 5. INV DEC. SC in the remaining 5. (12)
Round 6: SC in each around. (12)
Lightly stuff the hand part here. I usually leave the top part of the arm unstuffed.
Round 7: INV DEC in the first. SC in the next 4. INV DEC. SC in the remaining 4. (10)
Round 8-12: SC in each around. (10) *4 rounds*
Fasten off and leave an extra long tail. Sew the opening closed.
Using the sweater color, add a raised edge around the first round in that color (round 5). Attach to round 14.
Scarf
The type of yarn will make a big difference to the length. Chain to the desired length. Turning, HDC in each chain back to the beginning. Weave in the ends and wrap it around the neck. Tack in the back if you want to secure. Otherwise, feel free to leave as a removable accessory!
I chained 70, used a 6mm hook, and the same blanket yarn as the rest of the pattern.


Want the Ad-free, Printable PDF?
You can find it in one of my stores!

Did you make this Plush Moose or Reindeer Crochet pattern?
Mention me @thefriendlyredfox so we can see your creations! You can also leave a comment below!