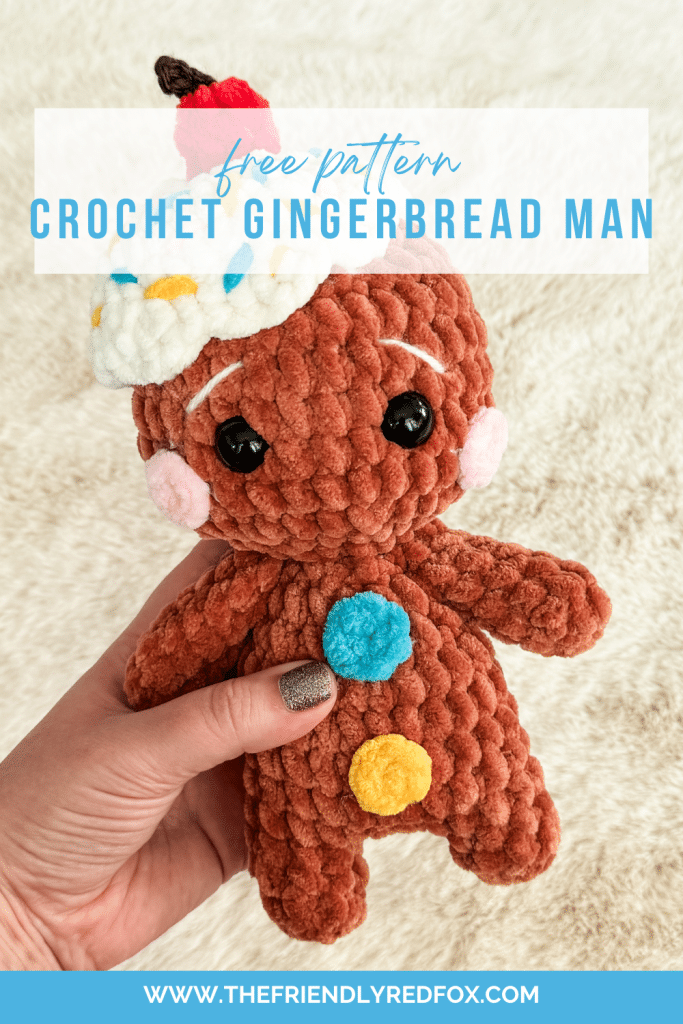
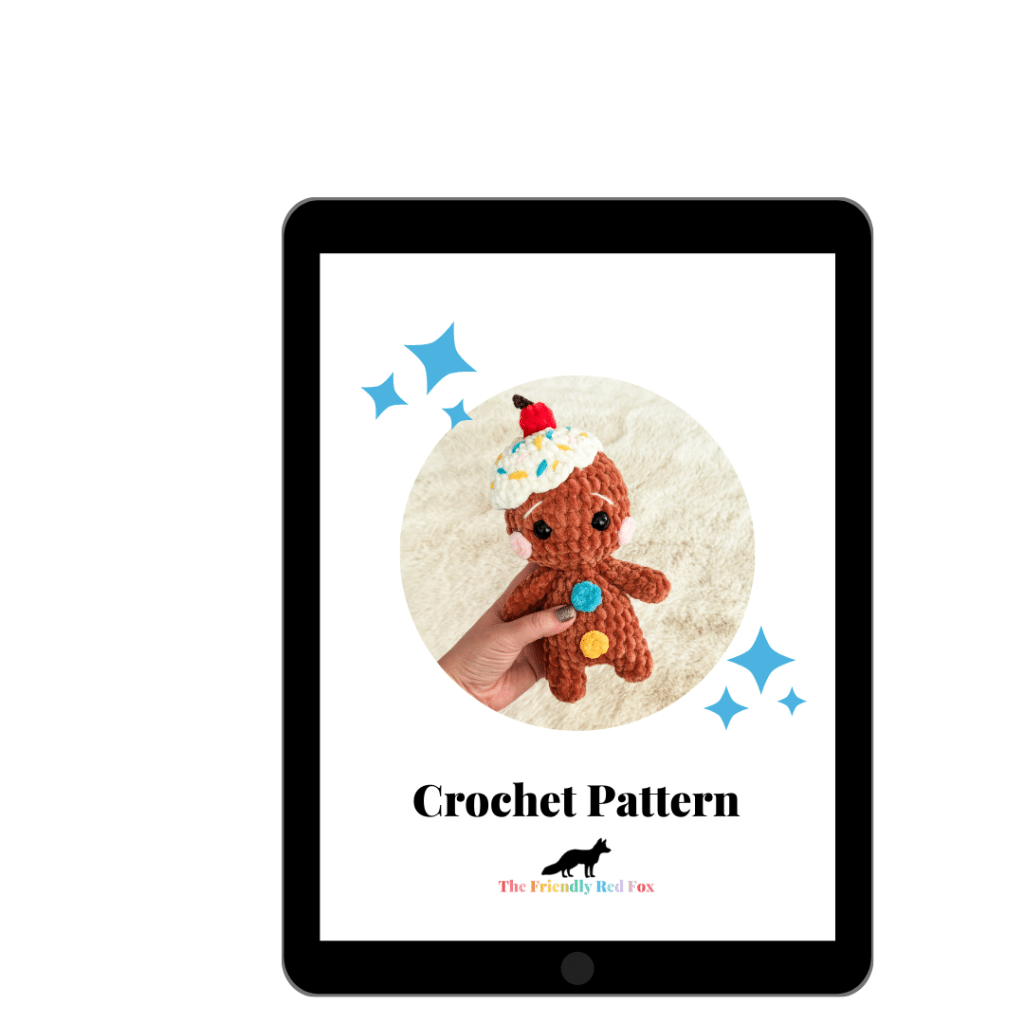
Gingerbread Man Crochet Pattern
This Gingerbread Man Crochet Pattern is free, so you can make an entire family. Cute as a candy button and a perfect Holiday amigurumi pattern.
Gingerbread Man Crochet Pattern
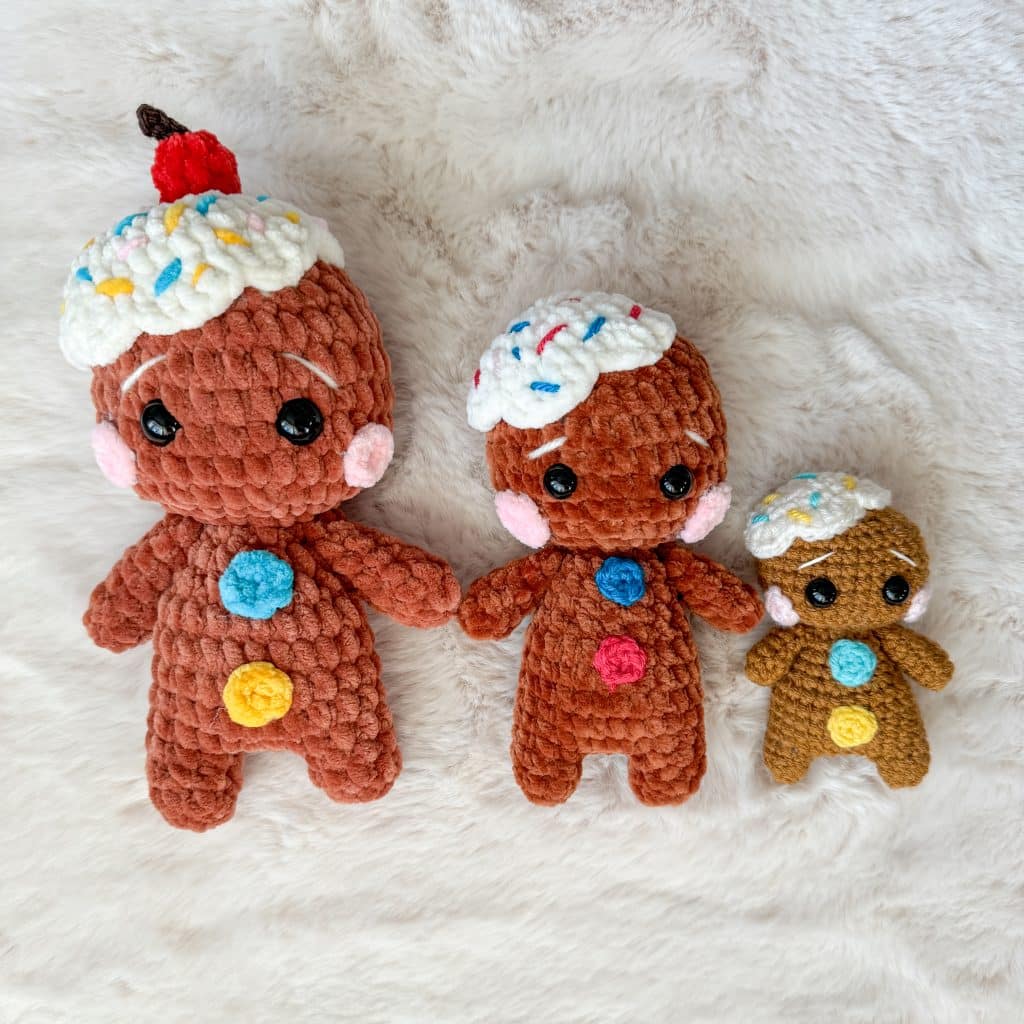
I have fallen in love with plush yarn and the effect it has when using it for amigurumi! I can’t resist making free crochet plushie patterns, as you can see here! The bulkier yarn allows for a good sized project with less stitches, although this pattern is also very cute in worsted weight yarn, as you can see below.
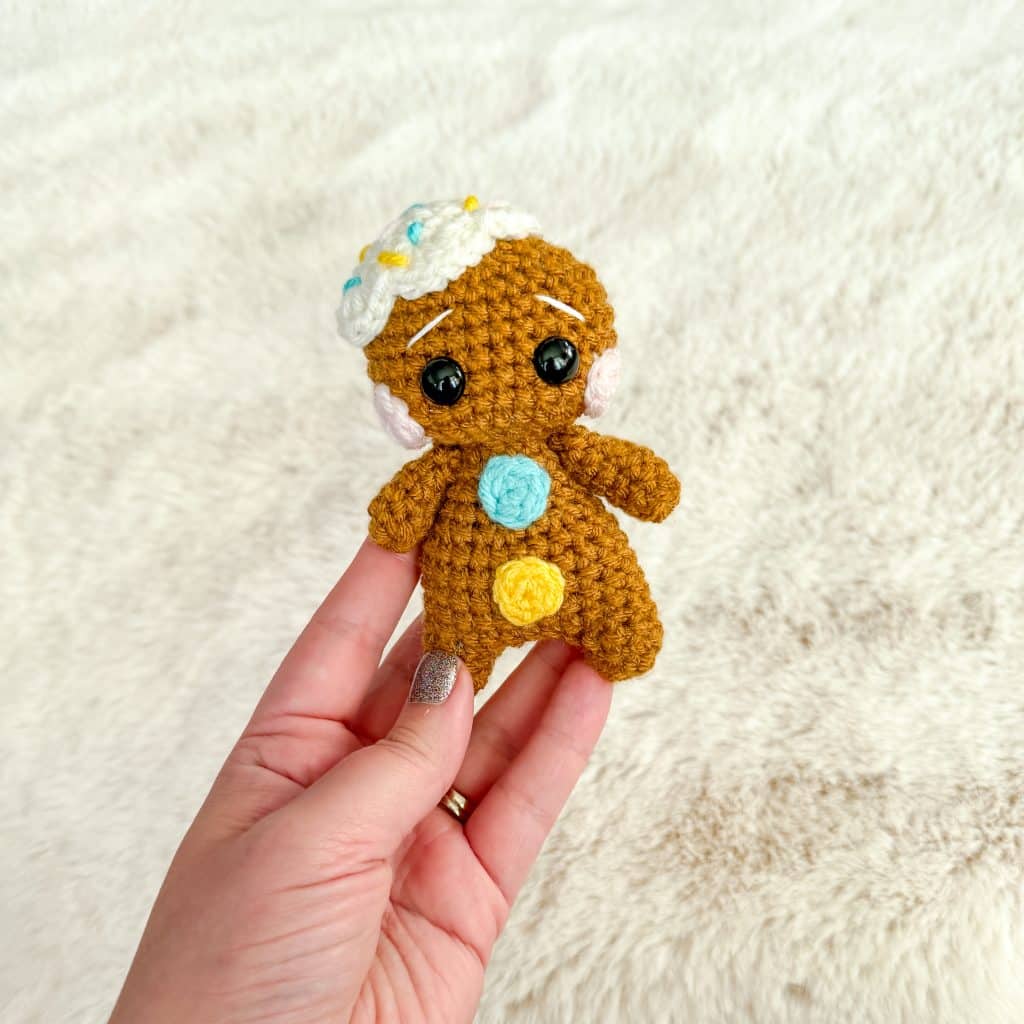
The appeal of the Gingerbread man is in the cartoony character and fun candy and frosting options. I went for the middle ground of fun details while still being a reasonably quick make. This gingerbread man amigurumi pattern can be made with different types of yarns for a different look.
This gingerbread man crochet pattern is a wonderful thing to make for gifts and holiday season markets. Mix up the color of the candy buttons and sprinkles to customize this gingerbread man amigurumi!
Want the Ad-free, Printable PDF?
You can find it in one of my stores!
Gingerbread Man Crochet Pattern Notes
This little gingerbread man is made from the bottom up. You make two feet and attach them as you go. The head is made by decreasing the body and increasing back out. You will use a neck strengthener to keep the head stable. The feet, body, and head are made in one piece. The arms and frosting cap are attached at the end.
Types of Yarn
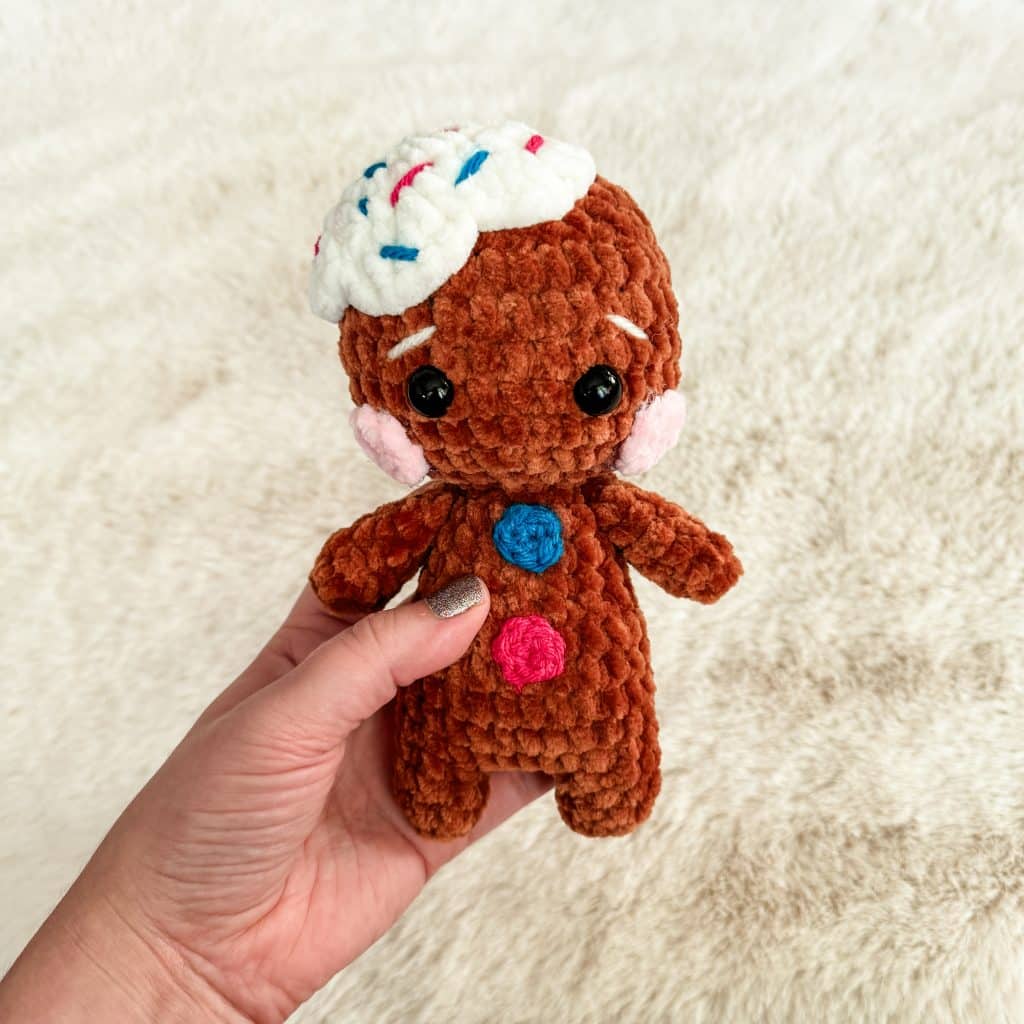
The yarn you use will vary the outcome. In the picture below, each of these are the exact same pattern, but use different types of yarn.
From left to right: Michaels Chenille Home Slim, Premier Parfait Chunky, and size 4 “I Love this Yarn” from hobby lobby. I used a 4mm hook for the first two and a 3.75 for the smallest one.
Materials you’ll need
To get started making this Gingerbread Man crochet pattern, you’ll first want to gather all your materials.
Free Gingerbread Man Crochet Pattern
Neck strengthener
*Click here for a video and picture tutorial on how this works*
In a magic circle, SC 7. SC in each around for a total of 7 rows. Fasten off and leave a long tail to sew the hole closed and sew through the neck.
Candy Buttons and Rosy Cheeks
6 SC in a magic circle. Attach to the first stitch with a slip stitch. Fasten off and leave a tail to sew on to the body.
Make two in candy colors for the body. I used worsted weight yarn for the buttons, but it can be done in chenille yarn as well.
Make two in pink for the cheeks.

Gingerbread Man Body Pattern
Legs/Body/Head
Using brown yarn:
Round 1: In a magic circle, SC 8.
Rounds 2-3: SC in each around. (8)
Fasten off the first foot. On the second foot, chain 4 and slip stitch to the first leg where you fastened off.
Round 4: SC in each stitch around the first leg (8). SC in each chain across. (4) SC in each stitch around the second leg. (8) SC on the other side of the chain. (4) Attach to the first SC with a slip stitch. (a total of 24)
Rounds 5-9: SC in each around. (24)
Round 10: SC in the first, INV DEC in the next. Repeat around. (16)
Sew on the Candy Buttons here.
Rounds 11-12: SC in each around.
Begin to stuff here. Make sure you get the little feet well. Continue to stuff as you close.
Round 13: INV DEC 8 times. (8)
Round 14: SC in each around. (8)
Round 15: In the front loop only, SC INC.
Round 16: SC in the first, SC INC in the next. Repeat around. (24)
Round 17: SC in the first two stitches, SC INC in the next. Repeat around. (32)
Rounds 18-22: SC in each around. (32)
Have your neck strengthener ready to insert. Here is the video tutorial if you haven’t watched it already! Attach the eyes between rounds 19 and 20, about 4 stitches apart. Sew on the cheeks to the side of the eyes, just one round down. Stuff as you close.
Round 23: SC in the first 2, INV DEC in the next. Repeat around. (24)
Round 24: SC in each around. (24)
Round 25: SC in the first. INV DEC in the next.. Repeat around. (16)
Round 26: INV DEC 8 times. (8)
Arms
SC 7 in a magic circle
Rounds 2-7: SC in each around. (7)
Fasten off.
Attach the arms between rows 11 and 12 of the body. Use the yarn through method, or if you prefer you can do it the traditional way.
Frosting Cap
Round 1: 8 SC in a magic circle. (8)
Round 2: SC INC in each stitch around. (16)
Round 3: SC in the first, SC INC in the next. Repeat around. (24)
Round 4: SC in the first 2, SC INC in the next. Repeat around. (32)
Round 4: Skip one stitch and DC INC in the next. DC INC in the next. Slip stitch to the next stitch (the fourth stitch from your stitch marker.) Repeat this process for a total of 8x.
Fasten off and leave a long tail to sew on to the head.
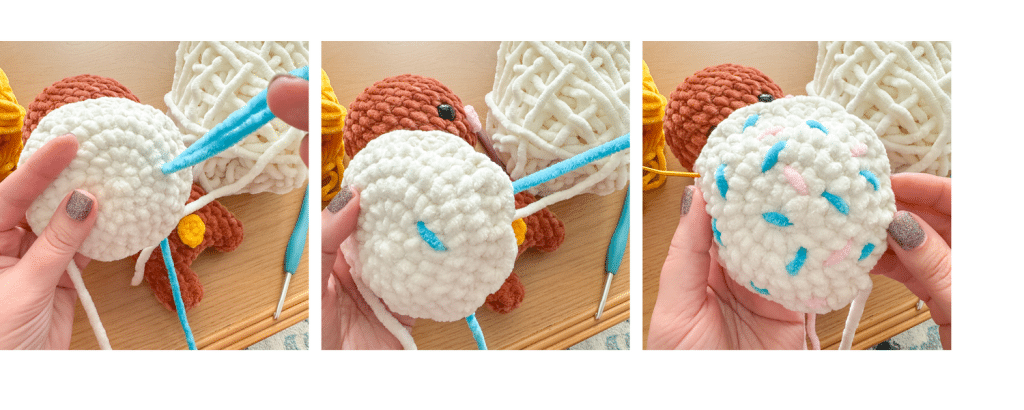
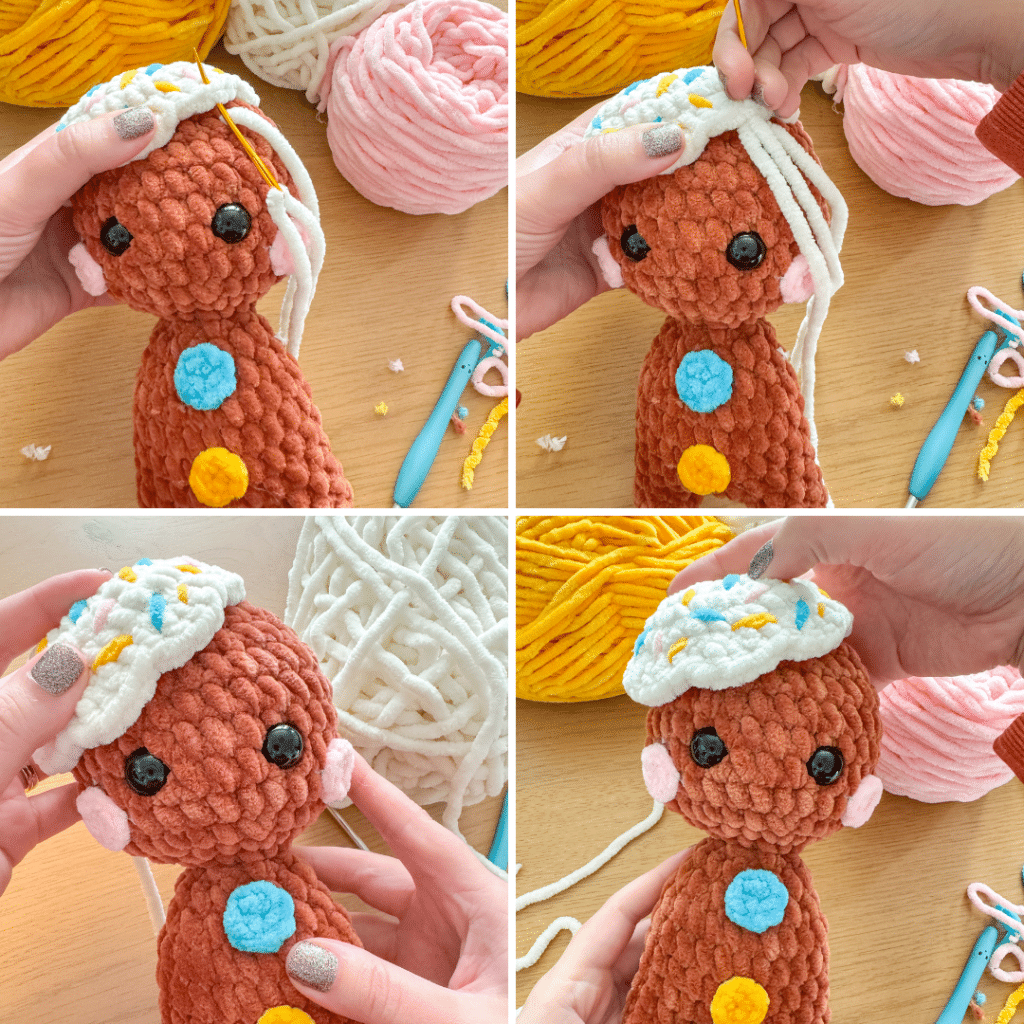
Using a long piece of yarn, sew on sprinkles by coming up from the bottom of the cap and back down over a couple of stitches. Spread out the sprinkles and go in different directions each time. I used three colors of sprinkles, the same colors as my candy buttons and the cheeks.
Sew the cap on at an angle on the top of the head.
Cherry
Using plush red yarn
Round 1: SC 8 in a magic circle.
Round 2: SC in each around. (8)
Round 3: Fasten off and close the circle. Leave a tail to attach to the frosting cap.
Attach the stem before you sew the cherry onto the head.
Stem
Using worsted weight brown yarn
Chain 5. Turn and slip stitch in one chain from the hook and in each remaining chain (4)
Fasten the stem on top by pulling the ends through the center of the cherry and tying a knot on the bottom.
Did you make this pattern?
Mention me @thefriendlyredfox so we can see your creations! You can also leave a comment below!