Free Crochet Bunny Rabbit Pattern
Free Crochet Bunny Pattern
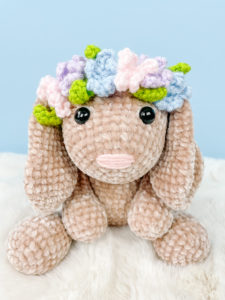
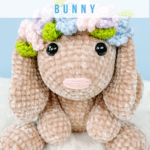
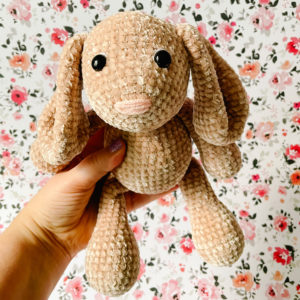
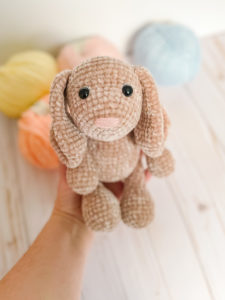
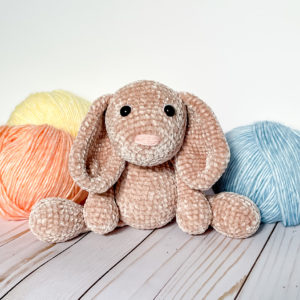
This sweet free crochet bunny rabbit pattern is so perfect to make for Easter (or any time really!) I love the floppy little ears and the simple details. The yarn I used makes it super soft and cuddly. I used Bernat Baby Velvet yarn, but if you can’t find it in the shade you are looking for, the regular velvet seemed to be very similar. I am sure you will adore making a cute little bunny!
Please note this pattern is only for PERSONAL USE. Please feel free to make as many
items as you wish for yourself, or as gifts. You may sell items made with this pattern but
PLEASE LINK BACK OR GIVE CREDIT TO ME AS DESIGNER. In no way can you
share, reproduce, or sell this pattern. Please respect my rights as designer, this pattern belongs to The Friendly Red Fox.
Looking for the ad-free, printable PDF? You can find it on Etsy or Ravelry.
Free Crochet Bunny Rabbit Pattern Materials and Abbreviations
You will need:
Approx 180g Bernat Baby Velvet yarn in Bunny Brown
Small amount of pink worsted weight yarn for nose
Small amount of white worsted weight yarn for pom pom tail
Pom pom maker
Crochet Hook in Size 3.75mm
Tapestry Needle for sewing (I recommend a bent tip needle for amigurumi)
Polyfil
12mm safety eyes
stitch marker
Abbreviations
SC– single crochet
SC INC– single crochet increase (2 SC in each stitch)
INV DEC– Invisible decrease (put hook through the FRONT LOOP ONLY of two consecutive stitches [two loops on hook] Yarn over pull through both loops. [two loops on hook] Yarn over pull through two loops)
Magic Circle– Make a loop, leaving a long tail to work with. Insert hook in center of loop, yarn over and draw up a loop. Yarn over, pull through to make the first chain (this does not count as a stitch!). Continue to crochet over the loop and tail with the number of stitches called for. (If you need 6 SC, then crochet 6 SC inside the ring.) Pull the tail to close the circle.
Free Crochet Bunny Rabbit Pattern
Body
Round 1: In a magic circle, 6 SC.
Round 2: SC INC in each around. (12)
Round 3: SC in first, SC INC in next. Repeat around. (18)
Round 4: SC in first 2, SC INC in next. Repeat around. (24)
Round 5: SC in first 3, SC INC in next. Repeat around. (30)
Round 6: SC in first 4, SC INC in next. Repeat around. (36)
Round 7: SC in first 5, SC INC in next. Repeat around. (42)
Rounds 8-13: SC in each around. (42)
Round 14: SC in first 5, INV DEC in the next. Repeat around. (36)
Rounds 15-16: SC in each around. (36)
Round 17: SC in first 4, INV DEC in the next. Repeat around. (30)
Rounds 18-19: SC in each around. (30)
Begin stuffing here.
Round 20: SC in first 3, INV DEC in the next. Repeat around. (24)
Rounds 21-22: SC in each around. (24)
Round 23: SC in first 2, INV DEC in the next. Repeat around. (18)
Fasten off, leaving a long tail. This is what you will use to sew on the head.
Head
Round 1: In a magic circle, 6 SC.
Round 2: SC INC in each around. (12)
Round 3: SC in first, SC INC in next. Repeat around. (18)
Round 4: SC in first 2, SC INC in next. Repeat around. (24)
Round 5: SC in first 3, SC INC in next. Repeat around. (30)
Round 6: SC in each around. (30)
Round 7: SC in first 4, SC INC in next. Repeat around. (36)
Rounds 8-13: SC in each around. (36)
Round 14: SC in first 5, SC INC in next. Repeat around. (42)
Round 15: SC in first 6, SC INC in next. Repeat around. (48)
Round 16: SC in first 7, SC INC in next. Repeat around. (54)
Rounds 17-19: SC in each around. (54)
Attach the eyes between 10 and 11, six stitches apart. Begin to stuff here. Sew on the nose if applicable. I sewed it on row 4/5. Center between eyes and loop the pink yarn repeatedly through the same holes until you are happy with the nose.
Round 20: SC in the first 7, INV DEC in the next. Repeat around. (48)
Round 21: SC in the first 6, INV DEC in the next. Repeat around. (42)
Round 22: SC in the first 5, INV DEC in the next. Repeat around. (36)
Round 23: SC in the first 4, INV DEC in the next. Repeat around. (30)
Round 24: SC in the first 3, INV DEC in the next. Repeat around. (24)
Round 25: SC in the first 2, INV DEC in the next. Repeat around. (18)
Round 26: SC in the first, INV DEC in the next. Repeat around. (12)
Round 27: INV DEC around. (6)
Fasten off and carefully sew the remaining hole closed. Attach to body between rounds 8-13ish.
Stuff the first half of the leg only.
Legs (make 2)
Round 1: 6 SC in a magic ring
Round 2: SC INC in each around. (12)
Round 3: SC in first, SC INC in next. Repeat around. (18)
Round 4: SC in first 2, SC INC in next. Repeat around. (24)
Rounds 5-10: SC in each around. (24)
Round 11: SC in first 2, INV DEC in the next. Repeat around. (18)
Round 12: SC in each around. (18)
Round 13: SC in the first, INV DEC in the next. Repeat around.(12)
Rounds 14-25: SC in each around. (12)
I attached the legs to the bottom, placing the inside of the leg on approx round 2 of the body, angling them just slightly. I recommend pinning them to make sure you are happy with how they sit.
Stuff the first half of the arm only.
Arms (make 2)
Round 1: 6 SC in a magic ring
Round 2: SC INC in each around. (12)
Round 3: SC in first, SC INC in next. Repeat around. (18)
Rounds 4-7: SC in each around. (18)
Round 8: SC in the first, INV DEC. Repeat around. (12)
Round 9: SC in each around. (12)
Rounds 10-22: SC in each around. (12)
Fasten off and leave a long tail to sew the arm onto the body. Attach between rows 22 and 23.
Ears (make 2)
Round 1: In a magic circle, 6 SC.
Round 2: SC INC in each around. (12)
Round 3: SC in first, SC INC in next. Repeat around. (18)
Round 4: SC in first 2, SC INC in next. Repeat around. (24)
Round 5: SC in first 3, SC INC in next. Repeat around. (30)
Round 6: SC in first 4, SC INC in next. Repeat around. (36)
Round 7: SC in first 5, SC INC in next. Repeat around. (42)
Round 8: SC in each around. (42)
Round 9: SC in the first 5, INV DEC in the next. Repeat around. (36)
Round 10: SC in each around. (36)
Round 11: SC in the first 4, INV DEC in the next. Repeat around. (30)
Round 12: SC in each around. (30)
Round 13: SC in the first 3, INV DEC in the next. Repeat around. (24)
Round 14-18: SC in each around. (24)
Round 19: SC in the first 2, INV DEC in the next. Repeat around. (18)
Round 20-23: SC in each around. (18)
Round 24: SC in the first, INV DEC in the next. Repeat around. (12)
Round 25: SC in each around. (12)
Fasten off, leaving a long tail to use to sew onto the head on the outside of the head (a little bit outside the eyes), pointing down, starting around rounds 14-15.
Tail
Use a pom pom maker of your choice (I very highly recommend Clover Pom Pom makers. I used the yellow one.)
Using only one half of the pom pom maker, make half the pom pom. Tie it off and sew to the bunny’s bum.
 Flowers
*If you want them to be removable, using green yarn, chain a long enough chain to wrap around the head and then tie. Attach the flowers to this.*
In a magic circle SC 5. Slip stitch to the first stitch. *Chain 5. Slip stitch in the same stitch. Slip stitch over the next.* Repeat * * 4 more times for a total of 5 petals. I made 6 for this little bunny.
If you want some greenery with the flowers, I made really simple “leaves” by chaining 7 and then HDC in each chain across, fastening off and attaching them with the flowers.
![]()
![]()

this is so cute. it looks a bit like floppy from bluey (bluey is a TV show). i love floppy and this pattern 🙂