
Free Crochet Puppy Snuggler Pattern Dog Lovey
Free Crochet Snuggler Pattern
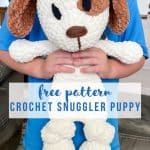
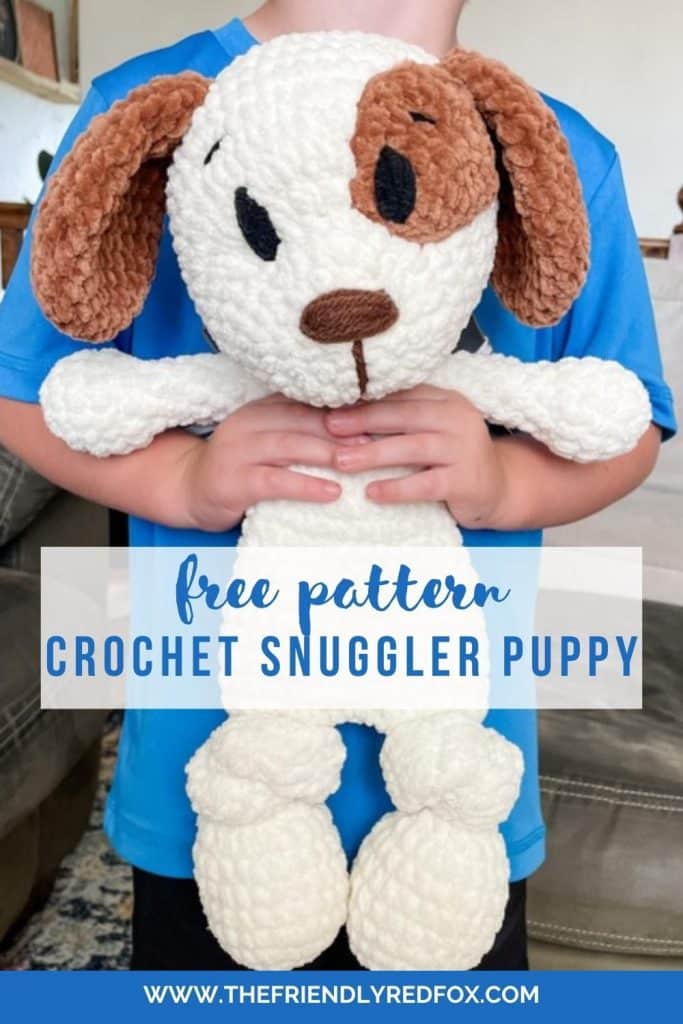
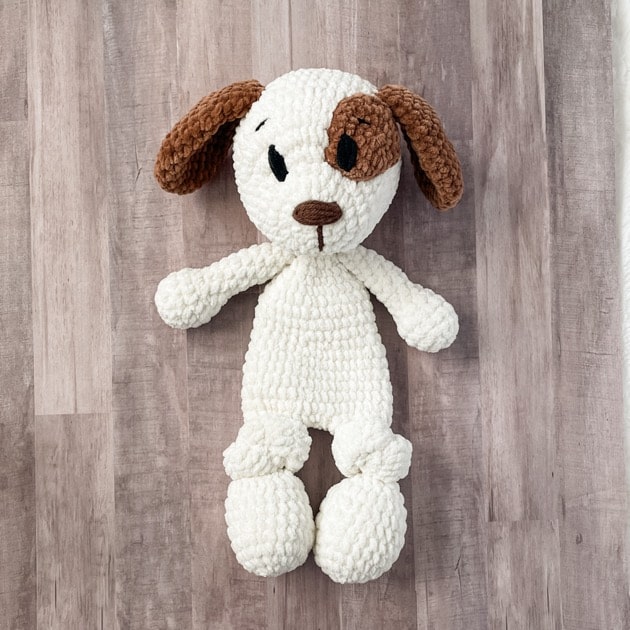
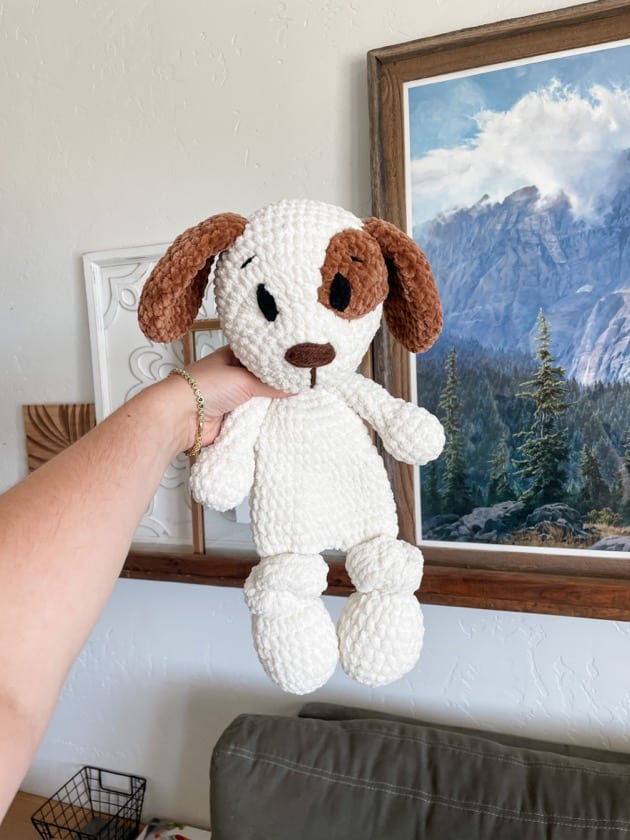
When you think of cute and cuddly, you have to be thinking puppy! That is why it was a no brainer to make a free crochet puppy snuggler pattern. You already know I love the snuggler– half blanket, half stuffed animal. Add an eye patch and floppy ears and no one will be able to resist these cuddly creations!
This crochet snuggler puppy is made with Premier Basix Chenille, but you could substitute Bernat blanket yarn instead. I prefer the Premier, because it seems a little more lightweight and easier to work with, but I love the color options for the crochet snuggler patterns that blanket yarn has! It comes out to be about 16 inches tall. You can see my four year old holding it in some of the pictures, so you can have a reference!
Wouldn’t this be such a great gift for an expectant mother who is also a dog lover? Or if you want something a little more classic, you can try the Snuggler Bear pattern!
Would you like to save this project for later? Input your email address below, and we will promptly deliver the project to your inbox.
Want the Ad-free, Printable PDF?
You can find it in one of my stores!
Materials you’ll need
To get started making this free crochet snuggler puppy pattern, you’ll want to gather all your materials first.
There is a whole section where you can find tutorial videos for different parts of this pattern. Most are linked in the section they are specific to, but if you want to view them before you begin you can see the collection here.
Snuggler Puppy Crochet Pattern
Beginning with the feet and using the body color:
Round 1: In a magic circle, SC 8.
Round 2: SC INC in each around. (16)
Round 3: SC in the first, SC INC in the next. Repeat around. (24)
Rounds 4-7: SC in each around. (24) *4 rounds*
Round 8: SC in the first, INV DEC in the next. Repeat around. (16)
Round 9: INV DEC in each around. (8)
Stuff the foot part, but not the next chain rows.
From here on, you will be chaining 2, DC in the same stitch and crochet around. Then attach to the first stitch with a slip stitch. This creates the part of the leg that you will knot. You can knot before you attach the legs or afterwards. The foot may be “squished” a bit as you tie, but there should be enough length. I created a video to show the next part of the leg, and you can see that here.
Rounds 10-19: DC in each around. (8) *10 rounds*
Round 20: SC INC in each around. Attach to the first stitch with a slip stitch and chain 1 (16)
Round 21: SC in each around. (16)
Fasten off the first foot. On the second foot, chain 4 and slip stitch to the first leg where you fastened off.
Click here for a video and photo tutorial of this next part!
Round 22: Chain 1 and SC in each stitch around on the leg (16). SC in each chain across. (4) SC in each stitch around the second leg. (16) SC on the other side of the chain. (4) Attach to the first SC with a slip stitch. (a total of 40)
Rounds 23-27: SC in each around. (40)
Round 28: SC in the first three. INV DEC in the next. Repeat around. (32)
Rounds 29-33: SC in each around. (32)
Round 34: SC in the first two. INV DEC in the next. Repeat around. (24)
Round 35-37: SC in each around. (24)
Round 38: SC in the first. INV DEC in the next.. Repeat around. (16)
Round 39: SC in each around. (16)
From here we are increasing the flat part that you will attach to the head.
Round 40: SC in the first, SC INC in the next. Repeat around. (24)
Round 41: SC in the first two, SC INC in the next. Repeat around. (32)
Fasten off and leave a long tail to sew disc to head. There will be a video at the bottom of the post to show you how!
Crochet Snuggler Puppy Head and Ears
Head
Round 1: In a magic circle, SC 8.
Round 2: SC INC in each around. (16)
Round 3: SC in the first, SC INC in the next. Repeat around. (24)
Round 4: SC in the first two stitches, SC INC in the next. Repeat around. (32)
Rounds 5-6: SC in each around. (32) *2 rounds*
Round 7: SC INC in the next 8 stitches. SC in the remaining 24. (40)
Round 8: SC in the first, SC INC in the next. Repeat for a total of 8 times. SC in the remaining 24. (48)
Rounds 9-14: SC in each around. (48) *6 rounds*
Round 15: SC in the first 4, INV DEC in the next. Repeat around. (40)
Round 16: SC in the first 3, INV DEC in the next. Repeat around. (32)
Begin stuffing head here. Continue to stuff as you go.
Round 17: SC in the first 2, INV DEC in the next. Repeat around. (24)
Round 18: SC in the first, INV DEC in the next. Repeat around. (16)
Round 19: INV DEC in each around. (8)
Sew the remaining hole closed. Watch the video or scroll down for the picture tutorial on how to shape the face!
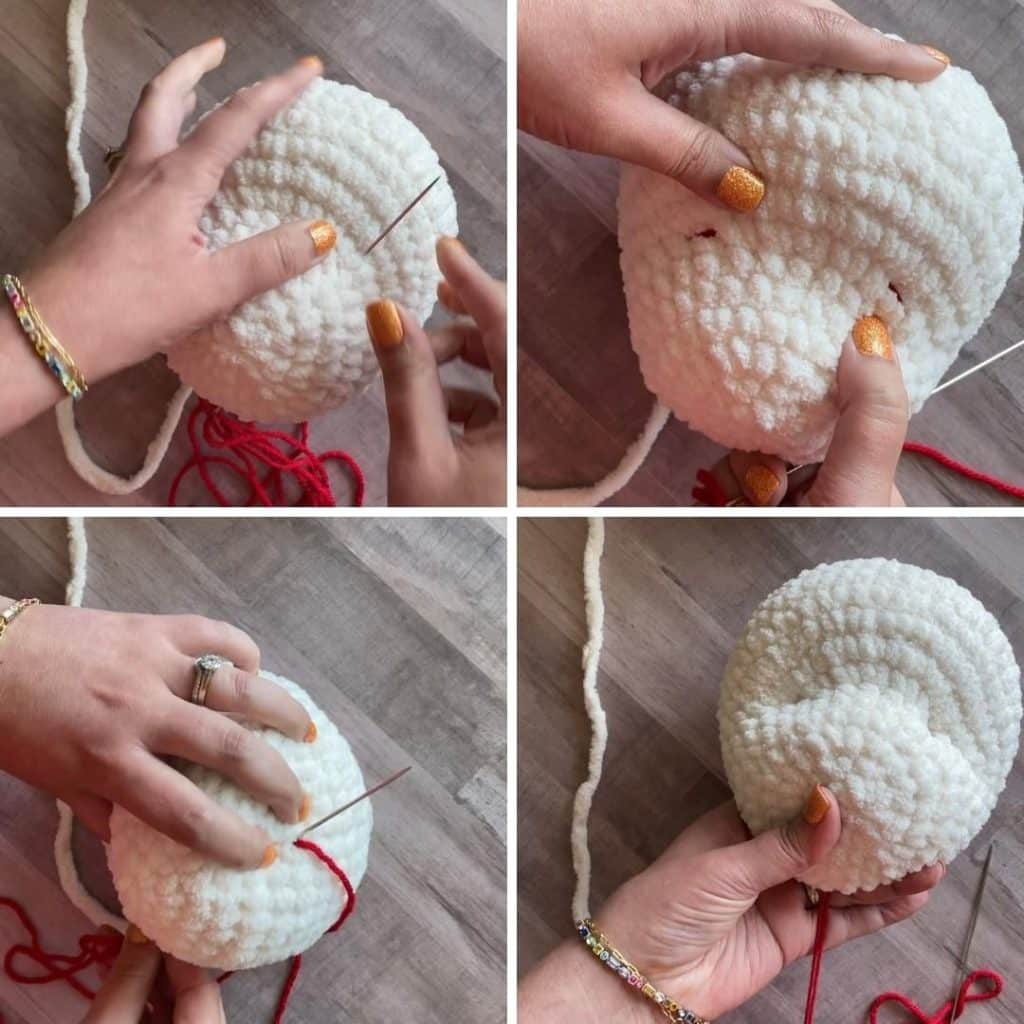
Using a long needle, go up through the center of the chin and come out through round 7, to the side before you begin the series of SC INC.
Skip two stitches and go through, and then our about 2 stitches before the end of the SC INCs. (the red lines on the face)
Then go back down two stitches over and out near the same hole under the chin.
Pull the ends tight and the face will indent. Tie the ends tight together and weave the ends in.
With the brown worsted weight yarn, embroider the nose by making multiple passes (approx. 9) through about 6 stitches, where rounds 2 and 3 meet. Go through the same stitches each time for a clean look.
On your last pass, bring your needle out in the dimple made by the shaping of the face. Go up and under the nose to create the line. Fasten off and pull the ends though, then cut as closely as you can so they pull back into the head.
Ears (make 2)
Round 1: In a magic circle, SC 8.
Round 2: SC INC in each around. (16)
Round 3: SC in the first, SC INC in the next. Repeat around. (24)
Rounds 4-5: SC in each around. (24)
Round 6: SC INC in the first stitch. SC in the next 11. SC INC. SC in the next 11. (26)
Round 7-8: SC in each around. (26)
Round 9: INV DEC once. SC in the next 11. INV DEC. SC in the next 11. (24)
Rounds 10-11: SC in each around. (24)
Round 12: SC in the first, INV DEC in the next. Repeat around. (16)
Round 13-14: SC in each around. (16)
Round 15: INV DEC in each around. (8)
Round 16: SC in each around. (8)
Fasten off and leave a long tail to sew the ear on. You’ll attach them a little outside the eyes, around rounds 12-16 and sew them on towards the back.
Eye Patch
Round 1: In a magic circle, SC 8.
Round 2: SC INC in each around. (16)
Round 3: SC in the first, INC in the next. (24)
Round 4: SC in each stitch around. (24)
Fasten off and leave a long tail to sew on to the face. Attach it right above the shaped nose and to the left.
Eyes & Eyebrows
I use bulky black yarn and sew two eyes. Two stitches tall and four stitches apart, centered above the nose. You will go through the eyepatch, so make sure that is sewn on before you embroider the eyes. Here is a video of me doing it!
– Use worsted weight black yarn for the eyebrows. Embroider two slanted lines about 1 1/2 rows above the eyes. Changing the length and direction of the eyebrows will change your adorable puppy’s expression!
Arms
Stuff the hand and the bottom half of the arm as you go.
With the winter white yarn:
Round 1: In a magic circle, SC 8.
Round 2: SC INC in each around. (16)
Rounds 3-5: SC in each around. (16)
Round 6: INV DEC in each around. (8)
Rounds 7-15: SC in each around.
Fasten off and leave an extra long tail. Sew the opening closed.
Attach the arms between rows 35-37 of the body. Use the yarn through method, or if you prefer you can do it the traditional way.
Attaching the Snuggler Crochet Head to the Body
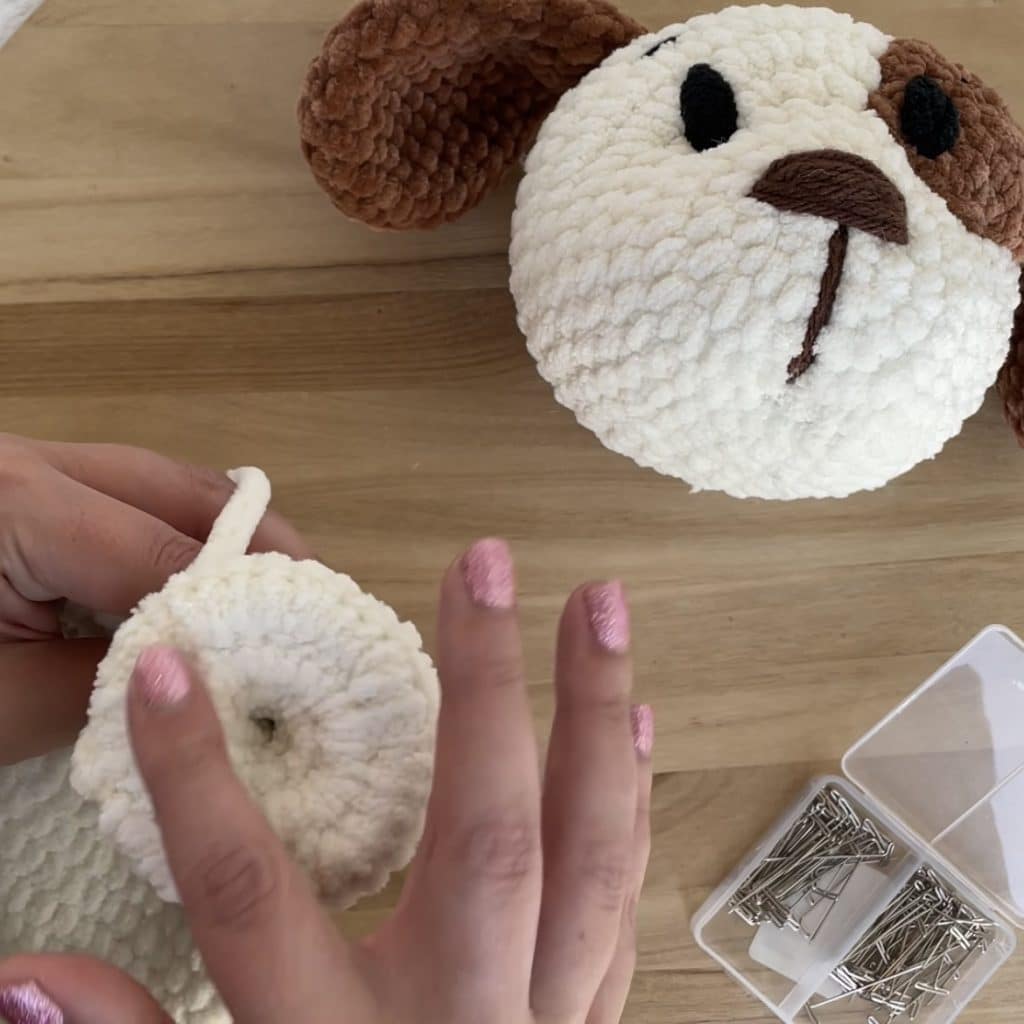
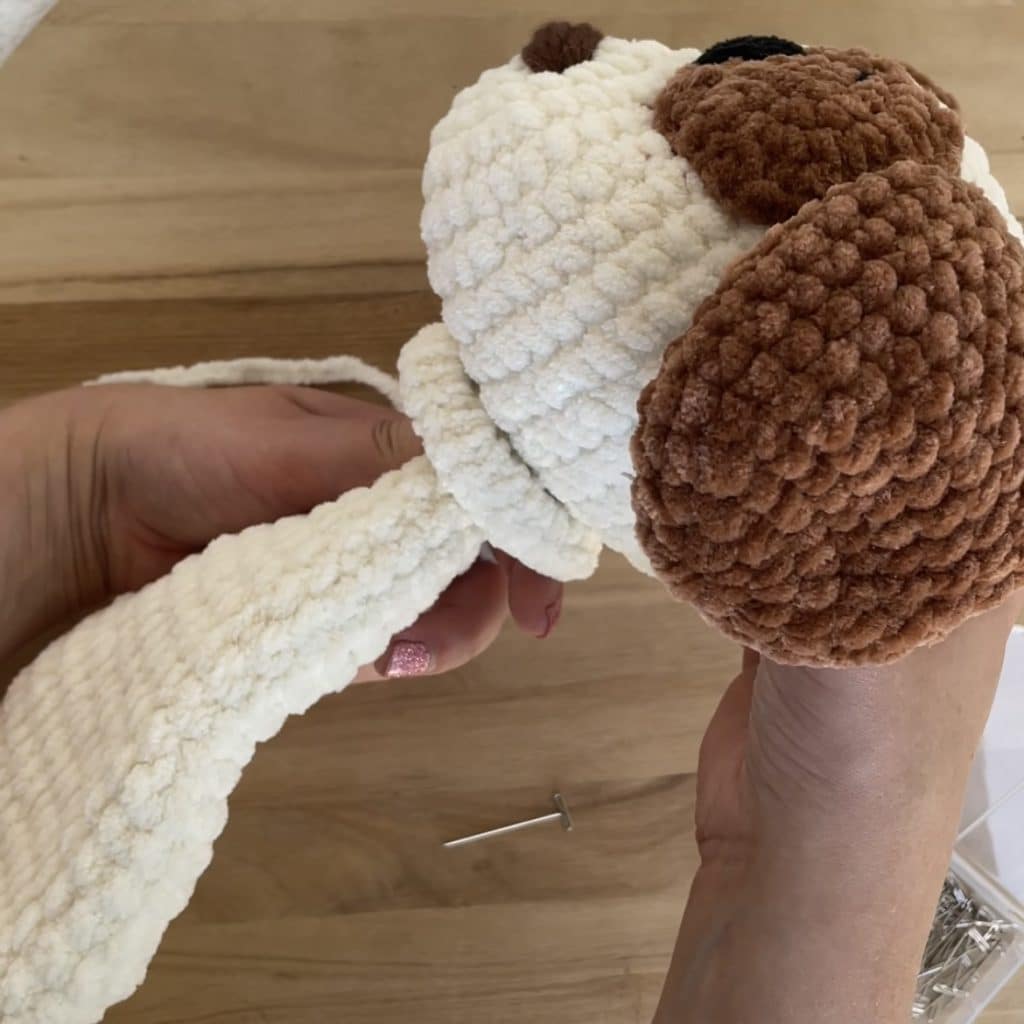
Once you are ready to attach the head to the body, pin the flat disc that is at the top of the body where you want it on the head. Try to center it as best you can. I prefer mine to be slightly close to the nose so that the head flops forward more than backwards.
As you sew, go through both loops on the SC at the top of the disc. Pull tightly each time. Try to pull the disc out as you go, so that it lies as flat to the head as you can.
If you want to watch the video tutorial, you can find it here!
Did you make this pattern?
Mention me @thefriendlyredfox so we can see your creations! You can also leave a comment below!


I’m working on the dog snuggles and I don’t understand row 8 of the head. If I SC, then SC INC repeat 8 times, my row is bigger than the 48 that the pattern mentions. What am I missing ?
You alternate *sc, sc inc* for a total of 8 times! There will still only be an increase of 8, but not 8 sc inc in a row! Does that make sense?
Is the head stuffed on the snugger puppy? The directions do not say to stuff, but it certainly looks as if it is.
Yes, the head is stuffed!
Is the body stuffed for the Snuggler Puppy?
no, just the feet, arms and head!
I’m not understanding row 9, after the 8 Dec, do you chain 2 and Dc in the last Dec, or the next sc and repeat around,*ch 2,DC*
It’s ch2 to get the height of the dc and then dc around so you have 8 dc stitches! (the chain 2 does NOT count towards your final stitch count)
I love the cute snuggler, but am confused about how big it is. When held in the adult hand it looks perfect. When held in front of the child in the blue shirt it looks huge. Which is the correct perspective?
The Original Snugglers are 16″ when finished, if using the same size hook and yarn as instructions. The Minis are 12″ finished!
Is there a tail on the back of the puppy?
There is not!
So adorable. I want to make one asap.
Thanks for sharing.
When looking on your Etsy page for the dog pattern it doesn’t show a mini version. Is it included in the standard pattern?
There is only the original size right now!
I went on Etsy and purchased your 4 pack of these cute snugglers. I LOVE the photos and all the instructions!!!! Definitely worth the money to download!
Thank you! I’m so glad you loved the pattern!
What does INV mean in the INV DEC instruction in round 8?
Invisible decrease! Put your hook through the FRONT LOOP ONLY of two consecutive stitches [two loops on hook] Yarn over pull through both loops. [two loops on hook] Yarn over pull through two loops.
Hello, I’m loving the pattern! My count on row 41 of the body is 48. I have 16 on row 39. Do sc inc for round 40 gives me 32 sc. After round 41 I’m at 48 sc not the 32. I’m not sure how I’m reading the pattern wrong.
Hi! Thanks for catching the numbers! I’ve corrected the pattern!
There’s no instruction to fasten off the body, so I went to the other animal snugglers to make sure I wasn’t missing something, but they all say to fasten off. I went all the way through this pattern to make sure I didn’t need to leave the body attached to the yarn to sew to the head later, but, again, saw nothing instucting anything later in the pattern. I was just wondering why this pattern had it omitted. Thanks a bunch.
Just a typo! I fixed it. Thanks!
Hi. I want to make this pattern. It’s absolutely adorable. As I was looking at the supplies, it says to use a 4mm crochet hook. It’s way smaller than the 8mm which is what is suggested for the super bulky yarn. Is that correct? Just want to make sure before I start.
Thankyou.
That’s correct! If that’s too small for your comfort, feel free to size up a few sizes. I’ve started recently using a 5mm with Bernat Blanket yarn, but stick to my normal 4mm or 4.5mm with Premier Basix Chenille or Parfait Chunky.
Hi Kali
I finished the puppy, but wld like to know in which rows to attach the ears please.
Regards
Annelies
Around round 12-16ish – a little bit outside the eyes. Sew them on so they flop out towards the outside of the head,
I’m having a terrible time with the suggested yarn. It won’t pull cleanly when tightening the magic ring. I’ve tried crocheting a bit looser, then a larger hook but then there are clear gaps in the stitches. Any suggestions?
Yes! I have a post right here that has a few tips about working with plush yarn. My best suggestion with the magic ring is to pull it ALMOST closed after only 2-3 stitches and then finish it in the smaller circle. https://www.thefriendlyredfox.com/tips-and-tricks-for-working-with-plush-yarn/
Hi I’m making the snuggler and having trouble understanding where exactly to put the indents for the head. I know it says row 7 but do I go up one stitch or over one stitch?
You’ll go up a round, but also kind of diagonal in on the stitch. So a little bit of both 🙂 There’s a video right about the instructions that shows the process in real-time! (If you can’t see it, you may need to turn off an ad-blocker if you have one.)
Absolutely love your animals. They are all super wonderful. Thanks
Thank you so much!
Made my own pup but instead of single crochet I use double crochet wanted it bigger came out really cute wish I could send you pictures
Have been searching for a Snuggler pattern for my newborn granddaughter. I love yours, but I’m worried it will be too big. Is there a way to use your pattern but make it smaller? Twelve to. 14 inches would be ideal.
Thanks so much.
You can always use a smaller hook size and thinner yarn!
Curious on this one, so do you mean you double crocheted each individual crochet instead of using single crochetes? Wouldn’t that just make the pattern more elongated? I am only curious because I expected this to be large like the picture with the child holding it and am a bit disappointed its small.
I only use double crochet in the knotted portion of the legs. Everything else is done in single crochet.