Free Crochet Santa Pattern
The Friendly Santa is a free crochet Santa pattern and about 10 inches tall and 4.5 inches wide (not
including the arms and hat.) Santa works up fairly quickly so he is a
great last minute gift or item for craft fairs. For this project I used I
Love this Yarn from Hobby Lobby, a size 4 worsted weight yarn, in red,
white, black and Ivory. For the beard and trim I used Bernat’s Pipsqueak
Yarn in White. I used Caron’s Simply Soft in Gold for the belt.


This
is a good advanced beginner pattern. I include A LOT of tips and tricks
for those new to amigurumi and can be helpful for those who already
love it! I include many photos for each step of the process. Written
using U.S Crochet terms.
Please note this pattern is only for PERSONAL USE. Please feel free to make as many
items as you wish for yourself, or as gifts. You may sell items made with this pattern but
PLEASE LINK BACK OR GIVE CREDIT TO ME AS DESIGNER. In no way can you
share, reproduce, or sell this pattern. Please respect my rights as designer.

Read through the entire pattern and the amigurumi tips and tricks before you begin.
You will need:
Approx 100 g total of size 4 yarn in red, black, white and a tiny bit of gold
Bernat Pisqueak Yarn in White
Crochet Hook in Size 3.75 and 5.00
Tapestry Needle
Polyfil or preferred stuffing
8 mm safety eyes
stitch marker
Abbreviations
SC– single crochet
SC INC– single crochet increase (2 SC in each stitch)
INV DEC– Invisible decrease (put hook through the FRONT LOOP ONLY of two consecutive stitches [two loops on hook] Yarn over pull through both loops. [two loops on hook] Yarn over pull through two loops)
Magic Circle– Make a loop, leaving a long tail to work with. Insert hook in center of loop, yarn over and draw up a loop. Yarn over, pull through to make the first chain (this does not count as a stitch!). Continue to crochet over the loop and tail with the number of stitches called for. (If you need 6 SC, then crochet 6 SC inside the ring.) Pull the tail to close the circle.
Always move your stitch marker to the last stitch in the round. This pattern is worked in continuous rounds.

*Lightly Stuff as you go!
I highly recommend watching this video on how to change colors in amigurumi.
Legs
USING BLACK
Round 1: In a magic circle, SC 6
Round 2: SC INC in each stitch around (12)
Round 3: SC in first, SC INC in next. Repeat around. (18)
Round 4-10: SC in each stitch around. (18)
CHANGE TO WHITE
Rounds: 11-12: SC in each stitch around. (18)
CHANGE TO RED
Rounds: 13-22: SC in each stitch around. (18)
Fasten off.
Repeat for the second leg but do not fasten off. Instead, chain 3 and then SC in the next stitch of the other leg. Take care to crochet over the tail left over by fastening off. SC around the entire leg. When you come to the three chains, SC in each chain around the next leg. SC over the chain back to the other leg. In the last SC on the last chain place your stitch marker. (This is round 23.)
Please watch this video on how to attach the legs.
Round 23: SC around. (42)
Rounds 24-28: SC around (42)
CHANGE TO BLACK
Rounds 29-31: SC around (42)
CHANGE TO RED
Rounds 32-38: SC around (42)
Round 39: 4 SC, INV DEC, repeat around. (35)
Round 40: 3 SC, INV DEC, repeat around. (28)
Round 41: 2 SC, INV DEC, repeat around.(21)
Round 42: 1 SC, INV DEC, repeat around. (14)
INV DEC until you have 12 stitches on the round
Round 43: SC in each stitch around. (12)
From here we will be increasing the head. From this point I am resetting the number on the rounds. Round 44 of the body is now Round 1 of the head. It will be easy to see.
Head
Round 1: SC in first, SC INC in next. Repeat around. (18)
Round 2: SC in first 2, SC INC in next. Repeat around. (24)
Round 3: SC in first 3, SC INC in next. Repeat around. (30)
Round 4: SC in first 4, SC INC in next. Repeat around. (36)
Round 5: SC in first 5, SC INC in next. Repeat around. (42)
Round 6: SC in first 6, SC INC in next. Repeat around. (48)
Round 7: SC in first 7, SC INC in next. Repeat around. (54)
Round 8-20: SC in each stitch around. (54)
Place the safety eyes in between rows 13 and 14, eleven stitches apart. This is also a good time to place the foam roller or dowel if you are using one. Make sure to stuff the neck around the dowel as well as you can.
Round 21: SC in the first 7, INV DEC in the next. Repeat around. (48)
Round 22: SC in the first 6, INV DEC in the next. Repeat around. (42)
Round 23: SC in the first 5, INV DEC in the next. Repeat around. (36)
Round 24: SC in the first 4, INV DEC in the next. Repeat around. (30)
Round 25: SC in the first 3, INV DEC in the next. Repeat around. (24)
Round 26: SC in the first 2, INV DEC in the next. Repeat around. (18)
Round 27: SC in the first, INV DEC in the next. Repeat around. (12)
Round 28: INV DEC around. (6)
Fasten off and carefully sew the remaining hole closed. Leave a long tail to make the nose.
Arms
USING BLACK
Round 1: In a magic circle, SC 6. (6)
Round 2: SC INC in each around. (12)
Rounds 3-5: SC in each stitch around (12)
CHANGE TO WHITE
Rounds 6-7: SC in each stitch around (12)
CHANGE TO RED
8-25: SC in each stitch around (12)
Stuff lightly and attach to body. I sew them on between rows 41 and 42.
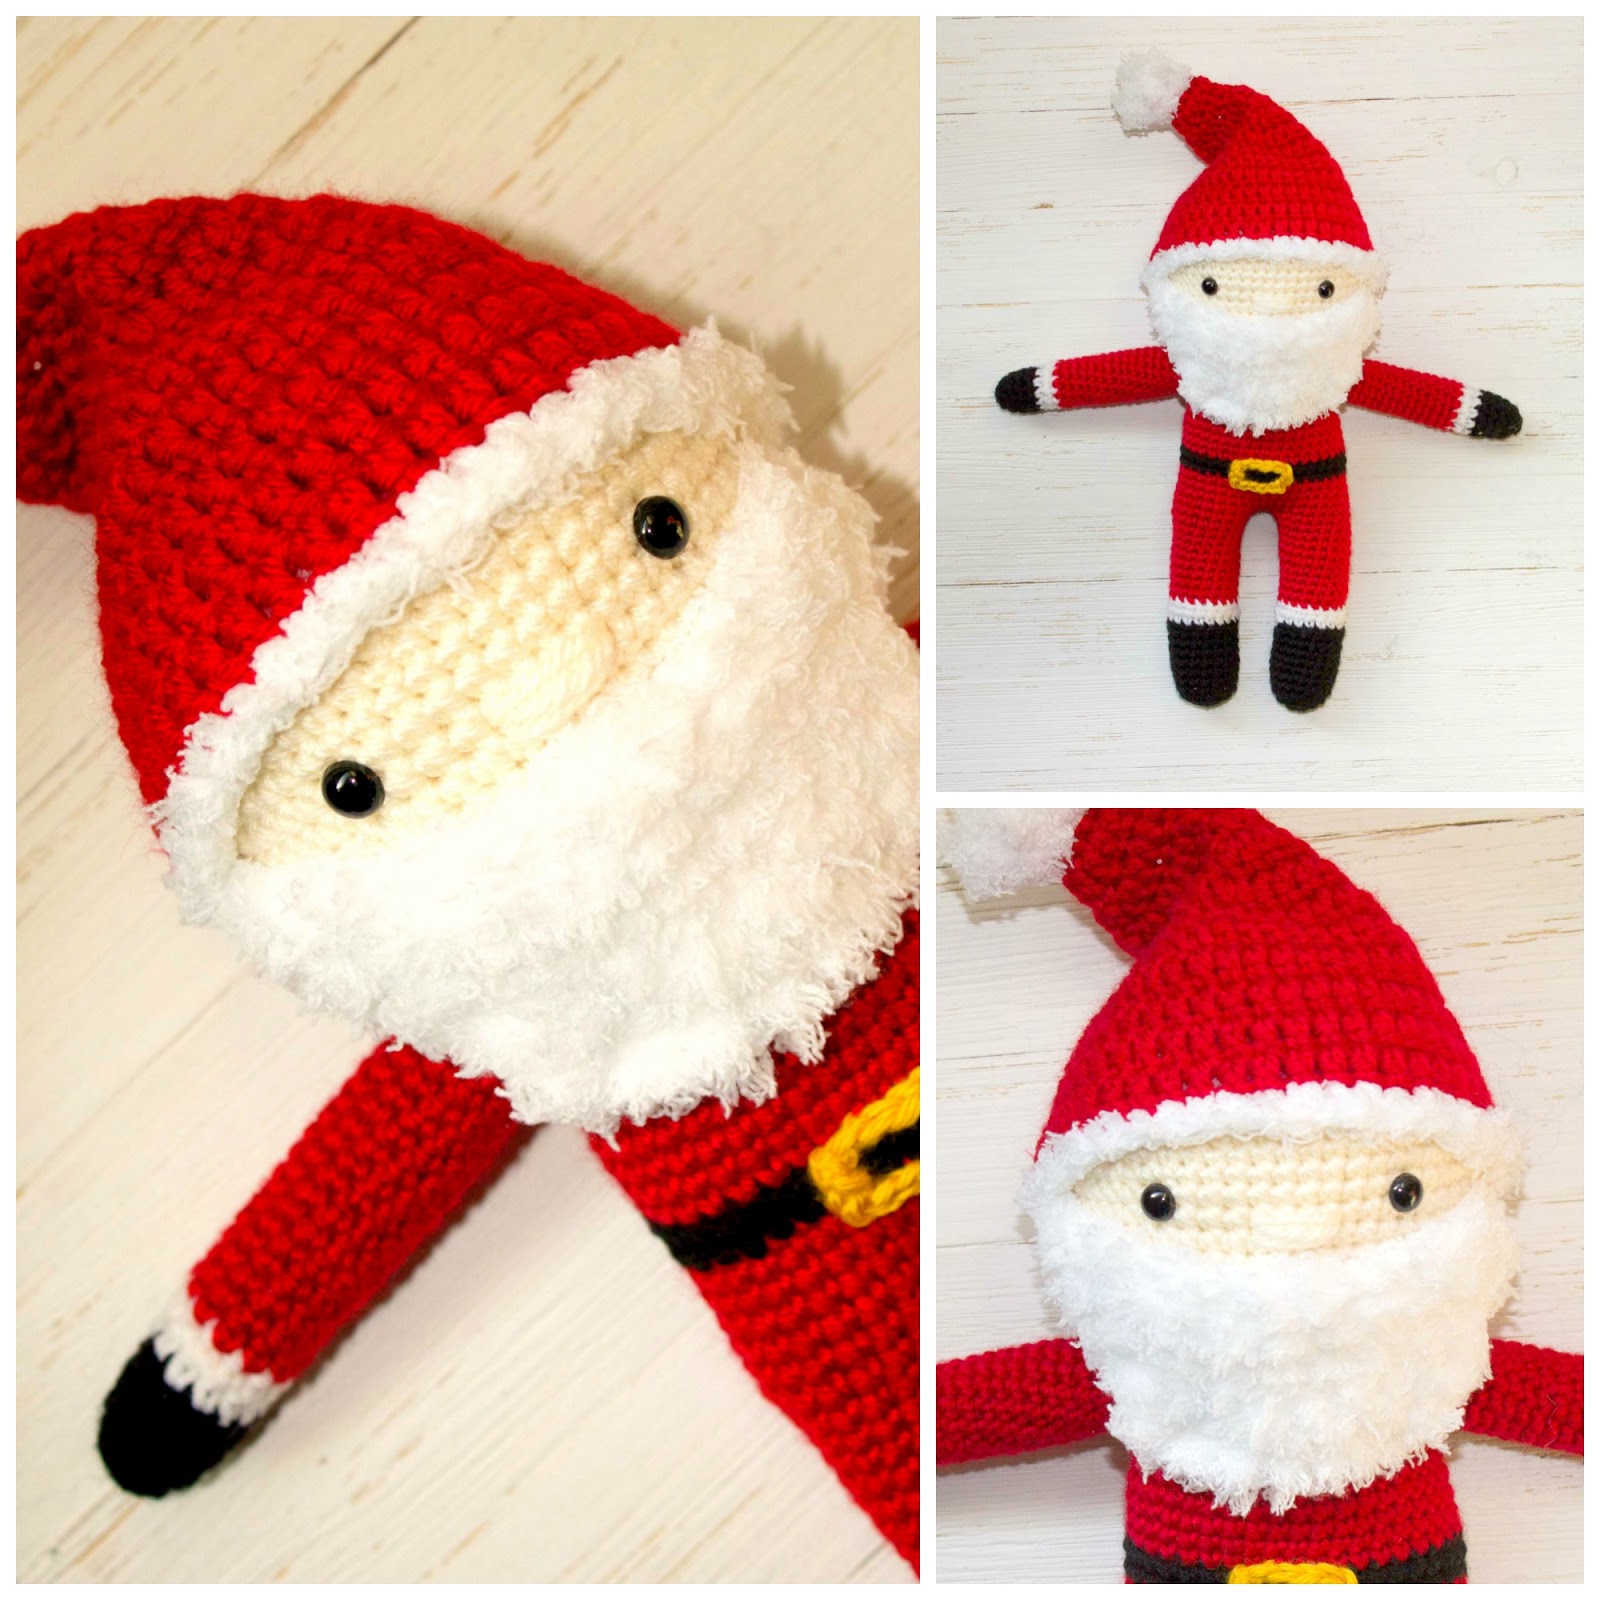
Beard
(The yarn may seem a little intimidating but it is really forgiving and comes out so cute! It is super soft and fluffy. Use a 5.0 hook for the beard.)
Row 1: Using the Pipsqueak Yarn, chain 22.
Row 2: In the 2nd chain from hook DC. DC in each stitch across. Chain 1 and turn. (20)
Row 3: DC DEC. DC in the next 16. DC DEC in the last two stitches. (18)
Row 4: DC DEC. DC in the next 14. DC DEC in the last two stitches. (16)
Row 5: DC DEC. DC in the next 12. DC DEC in the last two stitches. (14)
Row 6: DC DEC. DC in the next 10. DC DEC in the last two stitches. (12)
Fasten off and leave a long tail to sew onto the face. Sew up along the side of the beard to the top corner. Attach the beard to the face directly under nose using pins. Sew along the top. Fasten off.
Hat
(Use the 3.75 hook and red yarn.)
Round 1: In a magic circle crochet 10 DC. *Slip stitch to first DC. Chain 2.* (do * * for the remainder of the rounds.)
Round 2: DC in each around. (10)
Round 3: DC in the first, INC next. Repeat around. (20)
Round 4: 2 DC in the first, INC next. Repeat around. (20)
Round 5: 3 DC in the first, INC next. Repeat around. (20)
Round 6: 4 DC in the first, INC next. Repeat around. (20)
Round 7: 5 DC in the first, INC next. Repeat around. (20)
Round 8: 6 DC in the first, INC next. Repeat around. (20)
Round 9: 7 DC in the first, INC next. Repeat around. (20)
Rounds 10-14: DC in each around.
Attach the pipsqueak yarn.
Round 15: SC in each around.
Fasten off and weave in ends.
Attach a fluffy pom pom to the top.
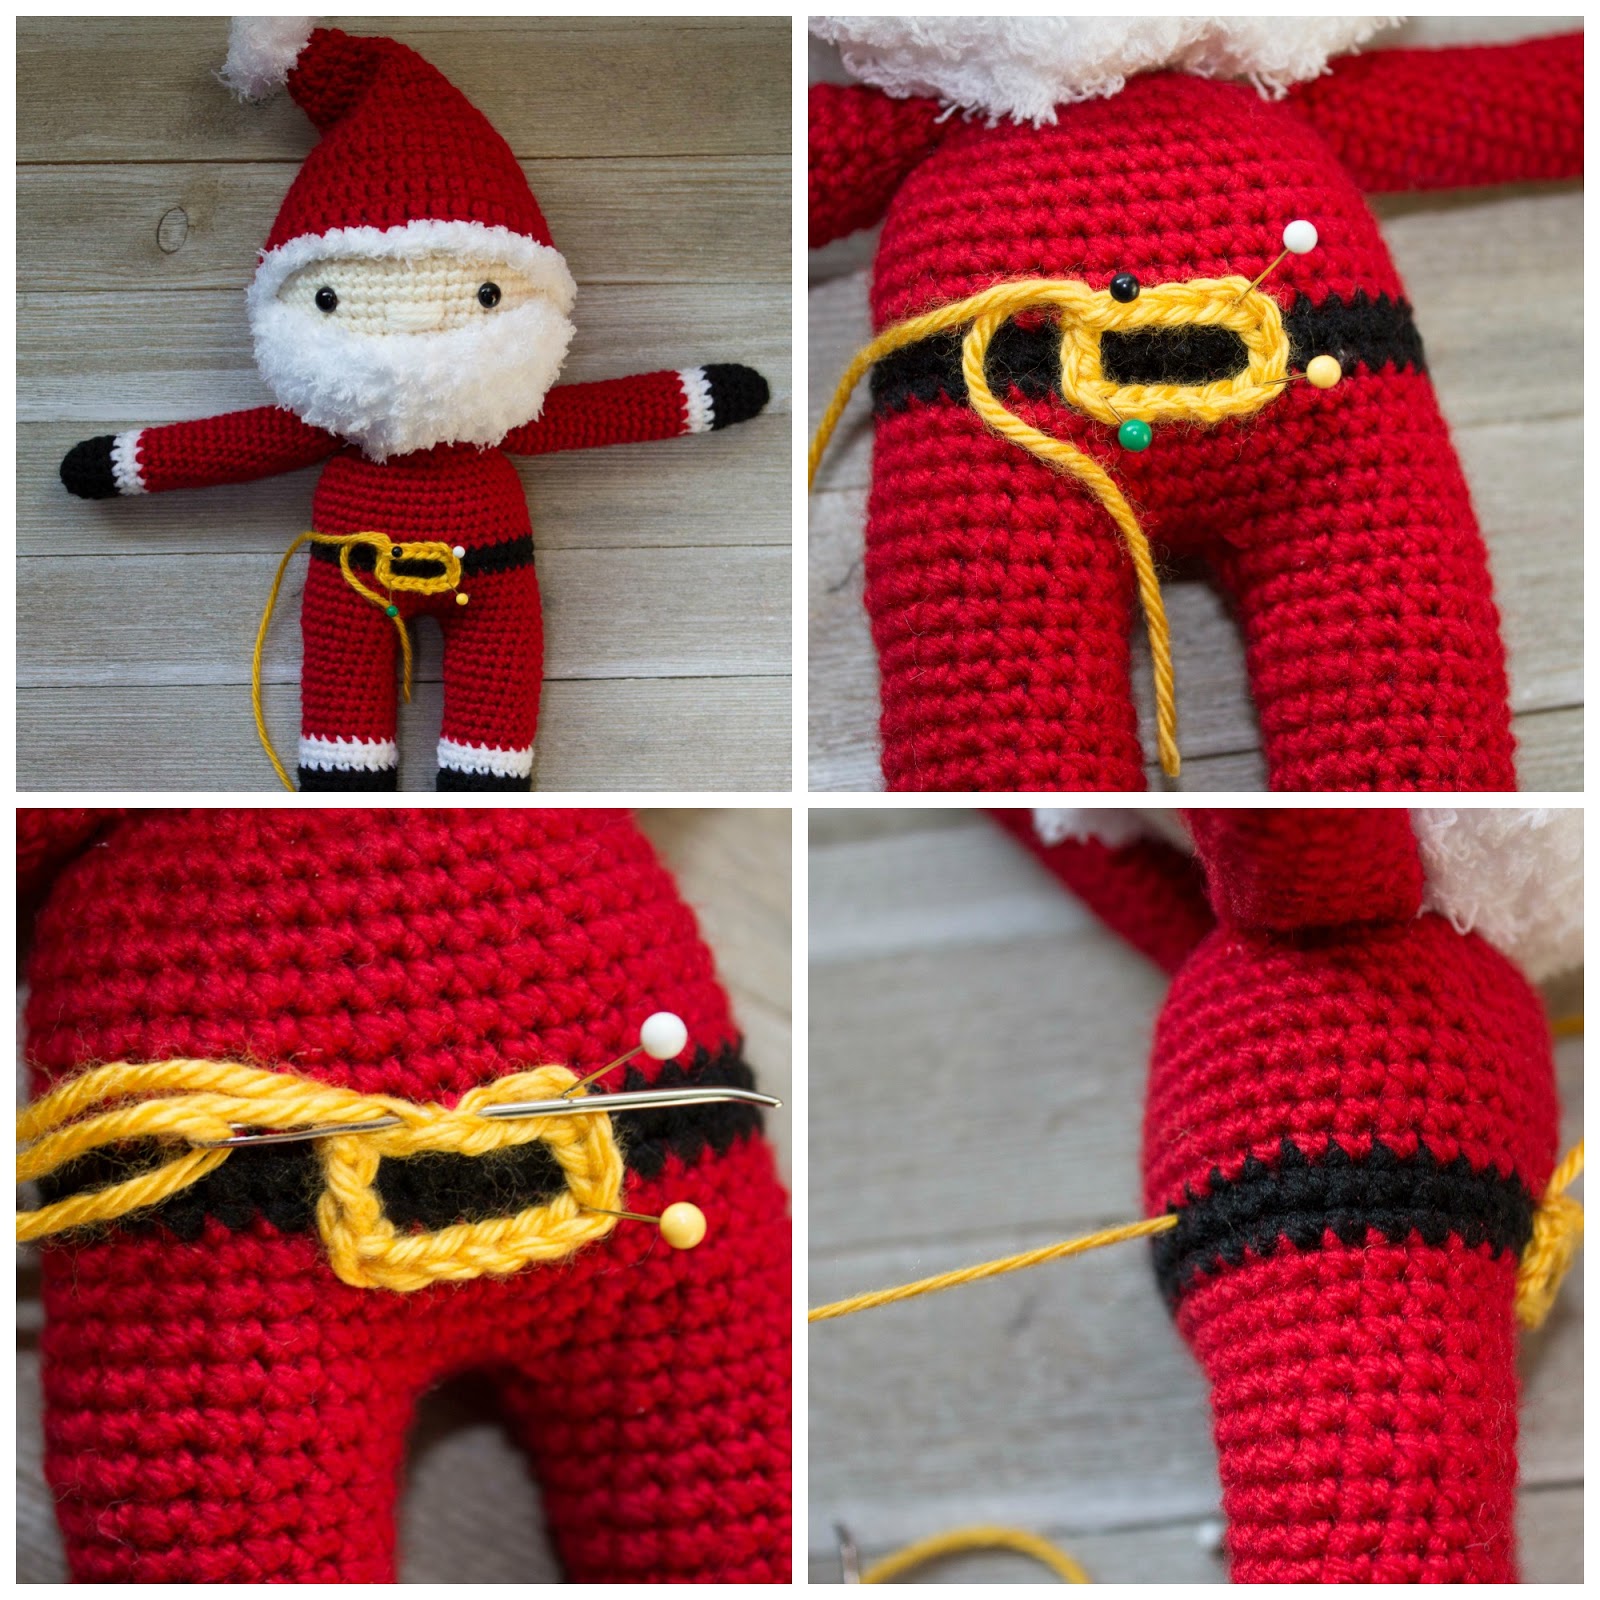
Attach the Belt
Using gold yarn chain 15. Fasten off and leave a long tail. You will use it to sew on.
Arrange on the belt with pins. Sew through each chain with the needle. Remove the pins as you go. Weave through the last little bit. Then stick the needle through the whole body. Pull that yarn tight tight and snip off at the base. The yarn end should stay in the body.