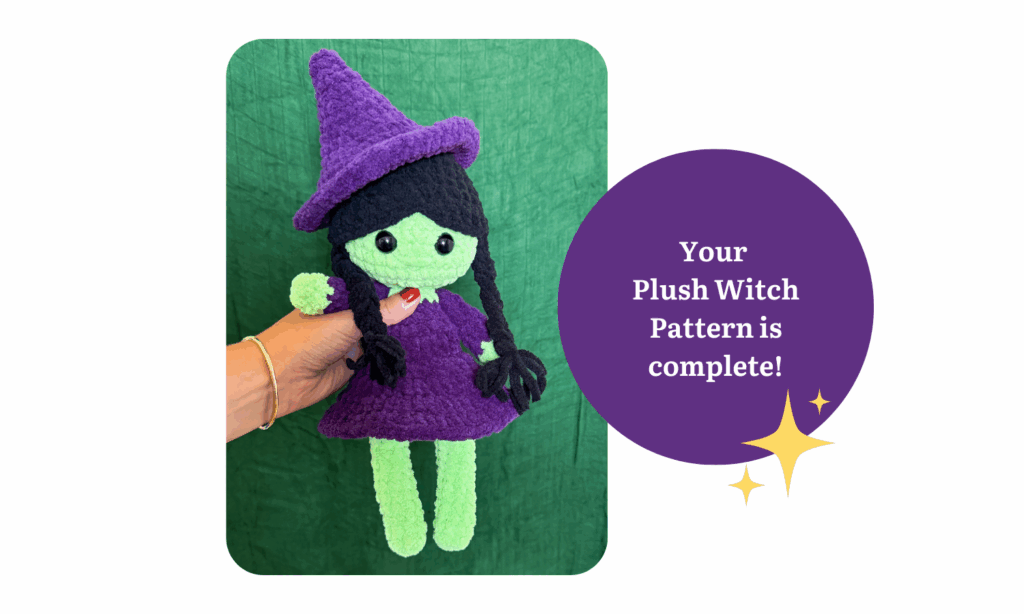
Plush Witch Doll Crochet Pattern
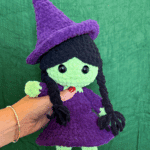
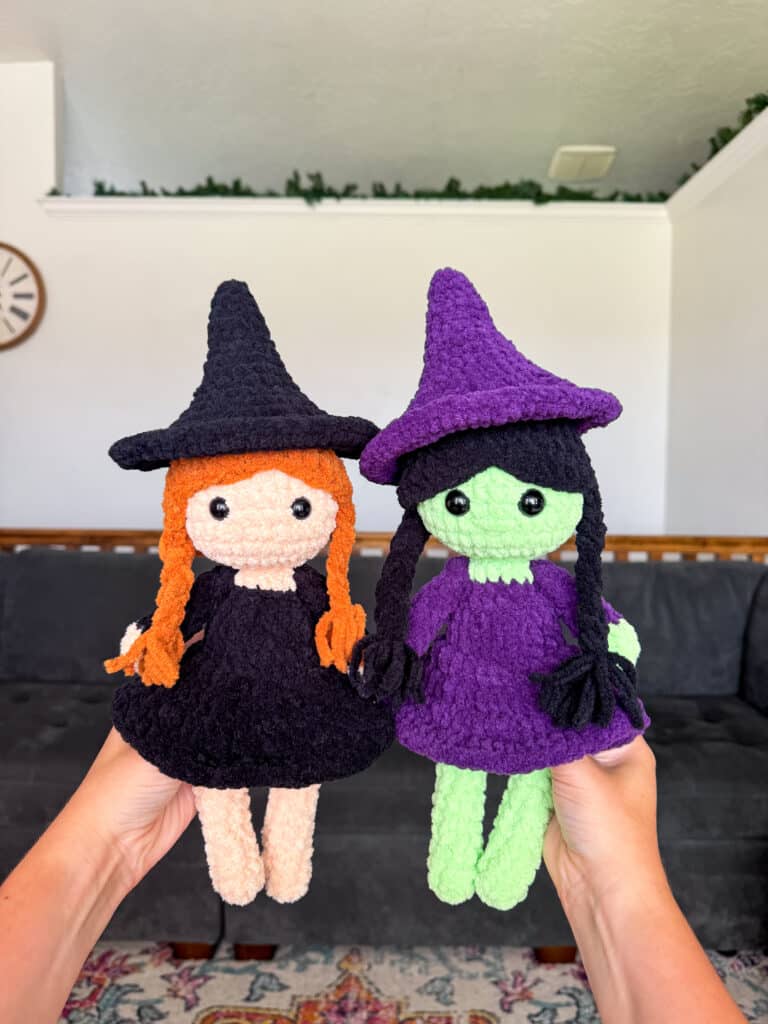
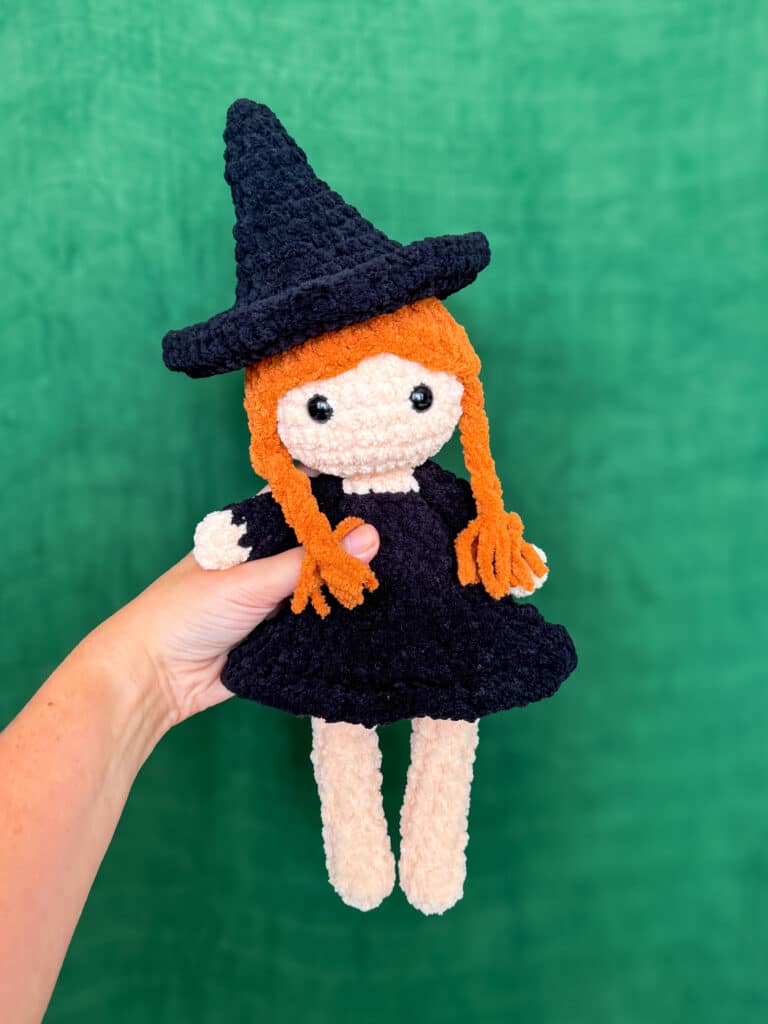
Meet Agatha, the spooky and sweet plush witch! This free crochet doll pattern is perfect for fall markets, Halloween gifts, or just a magical make for fun.

Crochet Plush Witch Amigurumi Pattern Notes
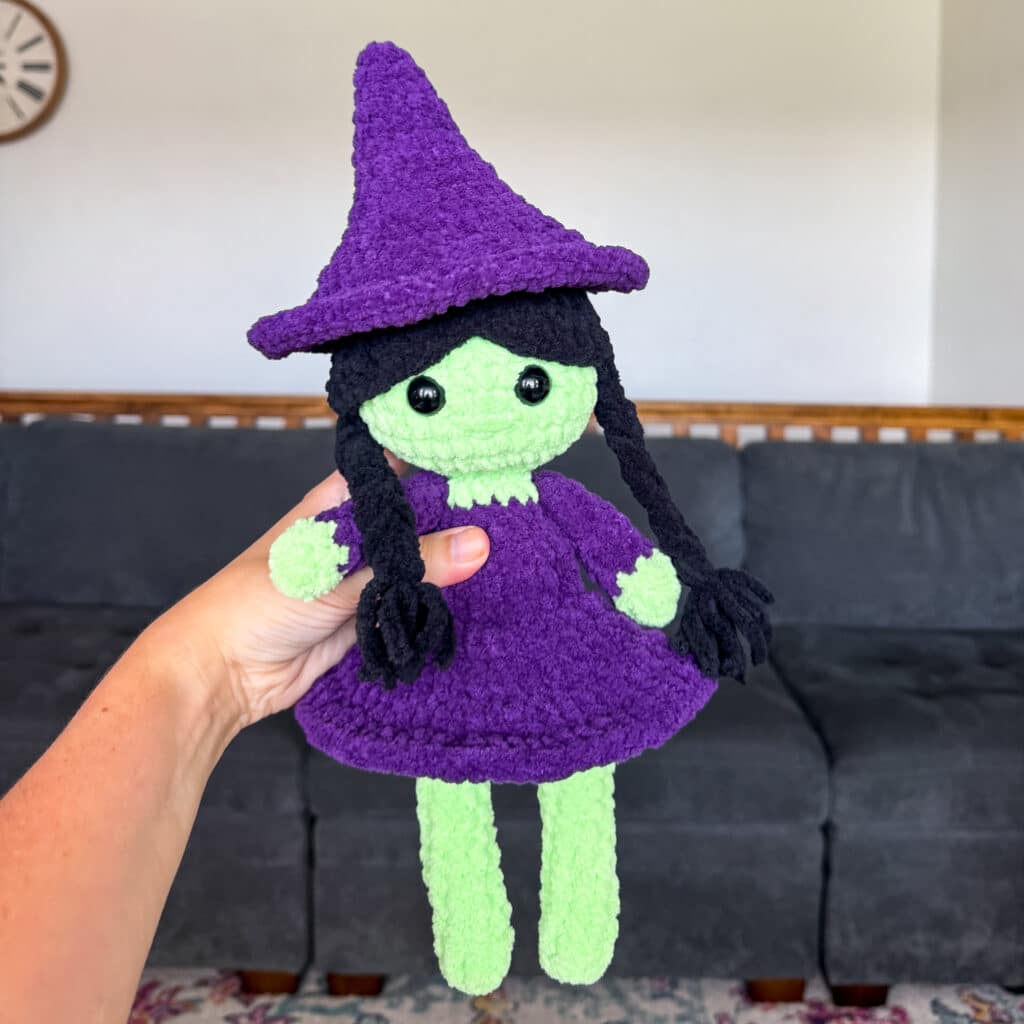
The other day, I decided this sweet witch needed a name. So… I asked you all what to name her, and Agatha it is! So, please meet Agatha the Plush Witch, my newest doll in the Friendly Collection.
This witch is just so classic and cute. Her pigtail braids are just absolutely perfect. And her HAT! Her hat sits perfectly on top of her head, though if you want it to stay there, you’ll have to sew it down. (Or use hot glue, or a combo!) I would say this is more of an intermediate pattern, but I do think a brave or advanced beginner could try it! I do share a few video tutorials that will help you!
I used Premier Basix Chenille for this pattern- one of my favorites! But you can sub a different yarn if you would like. Just keep in mind that different types of yarn, even if they say they are the same size, work up differently. If you want to see some of my other doll patterns, you can find them here.

JOIN MY NEWSLETTER TO RECEIVE…
A free email course-Amigurumi 101
This free amigurumi email course gives you what you need to master the basics of amigurumi, along with some extra tips and tricks!
Ad-free, Printable PDF Full Pattern
My patterns are free on my website, but if your prefer a printable copy, you can find them in my shop!
Plush Witch Pattern
$6

Bear Snuggler Pattern
$6
Baby Princess Pattern
$6
Free Crochet Plush Witch Pattern Materials
To get started making this free Plush Witch crochet pattern, you’ll want to gather all your materials first.
You will need:
- 65g blanket yarn for the skin color (see THIS webpage for other inspirations from my other patterns)
- 110g blanket yarn for the dress and hat
- 35g plush yarn for the hair
- Crochet Hook in Size 4.5mm (or hook size that keeps stitches tight and feels comfortable)
- 14mm safety eyes (Black Dress Witch)
- 16mm safety eyes (Green Witch)
- Tapestry Needle
- Polyfil
- stitch marker
video tutorials
These methods are used in this pattern!

Notes:
This standing witch doll is made by crocheting two legs and then attaching them. This way, the legs, body and head are all made in one piece. The arms are attached at the end. The hair is made like a wig, and then attached to the head. The skirt is attached to the body. You will insert a neck strengthener which will help with the shape and stability of the head. You can keep her hat unattached for playing/props or attach it to keep it as a permanent part of her wardrobe!
You can use safety eyes or try out embroidered eyes so it would be safe for a baby/toddler.
I have a collection of embroidery videos here.
For this particular pattern, I only used the yarn over/yarn over single crochet. However, if you’d prefer, for the skin-colored (body/head/arms), you could use the yarn under/yarn over single crochet. This helps keep the stitches extra tight. This is optional, of course. If you don’t like the under/over, you could also size down half a size hook.
I used blanket yarn for this pattern, a size 6 weight. I typically use Premier Basix Chenille, Bernat Blanket and Bernat Baby Blanket. I think these are interchangeable size wise. I use a 4.5mm hook for the Premier Basix Chenille and a 5mm for Bernat, which is much smaller than the recommended size on the label, but I want nice, tight stitches for this type of pattern. If this is too tight for you, size up a hook size until you can crochet comfortably but still have tight stitches.
Please be aware that even though the label may say it is size 6, some materials and brands work up much differently. Keep that in mind as you are choosing your yarn.
Suitable yarns could be regular Bernat Blanket, Premier Basix Chenille yarn or Demi Purl from Michaels (formerly Big Twist from Joann’s).
Agatha the Plush Witch Crochet Pattern
Neck Strengthener
Using the Skin Color:
In a magic circle, SC 7. SC in each around for a total of 7 rows. Fasten off and leave a long tail. You will need this before you stuff the head. You can check out the video here!
Legs (make 2)/Body
VERY LIGHTLY stuff the legs as you go.
Start with skin tone.
Round 1: In a magic circle, SC 8.
Rounds 2-14: SC in each around. (8)
Change to Dress Color
Round 15: SC in each around. (8)
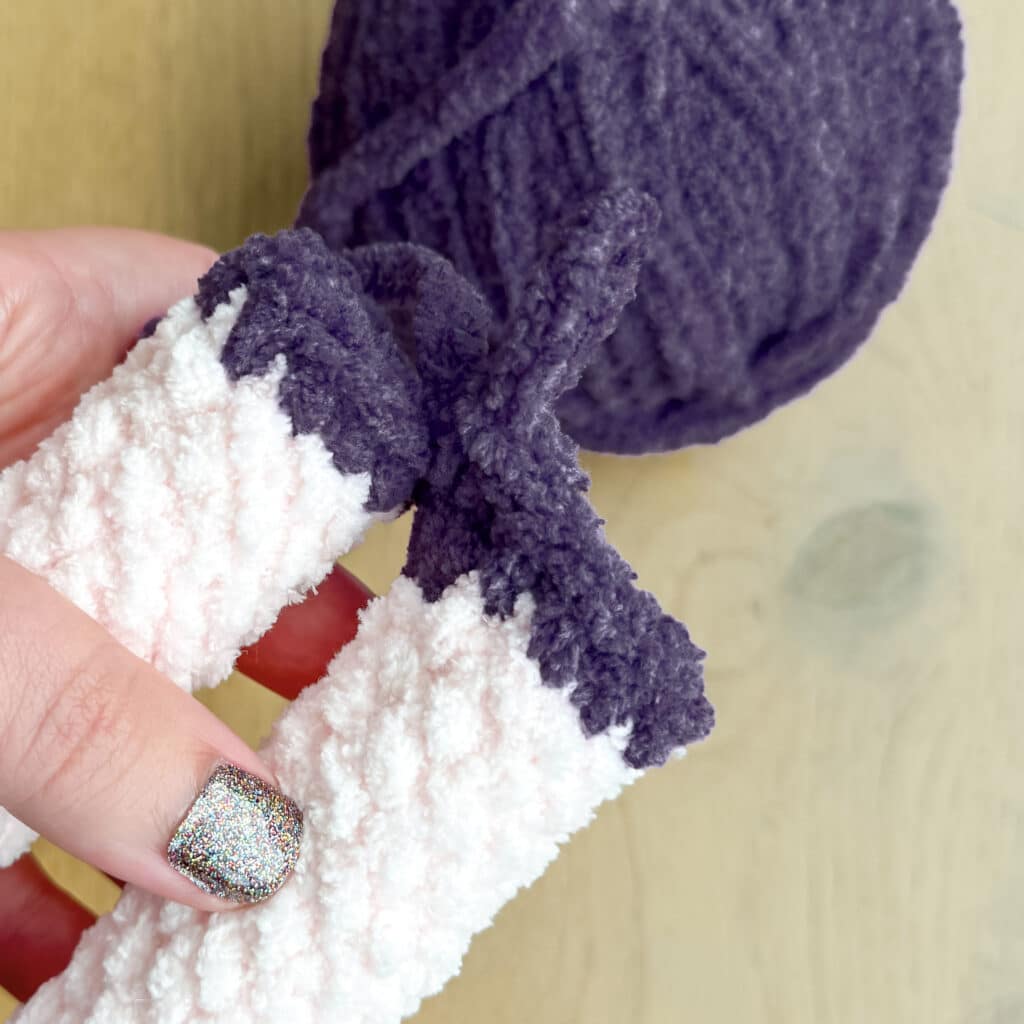
Fasten off the first foot. On the second foot, chain 4 and slip stitch to the first leg where you fastened off.
Round 16: SC in each stitch around the first leg (8). SC in each chain across. (4) SC in each stitch around the second leg. (8) SC on the other side of the chain. (4) Attach to the first SC with a slip stitch. (a total of 24)

Body (cont’d) to Head
Rounds 17-21: SC in each around. (24) *5 rounds*
Round 22: SC in the first, INV DEC in the next. Repeat around. (16)
Rounds 23: SC in each around. (16)
Change to skin color in the next round. Make sure that you are changing color in the back. Begin to stuff here. Continue to stuff as you close.
Round 24: SC in each around. (16)
Round 25: INV DEC 8 times. (8)
Round 26: In the front loop only, SC INC. (16)
Round 27: SC in the first, SC INC in the next. Repeat around. (24)
Round 28: SC in the first two stitches, SC INC in the next. Repeat around. (32)
Rounds 29-33: SC in each around. (32) *5 rounds*
Insert the neck strengthener here. See video for help! Attach the eyes between rounds 32 and 33, about 6 stitches apart. Stuff as you close.
Round 34: SC in the first 2, INV DEC in the next. Repeat around. (24)
Round 35: SC in the first. INV DEC in the next.. Repeat around. (16)
Round 36: INV DEC 8 times. (8)
Finish stuffing well here. Fasten off and sew the remaining hole closed.
Embroider the nose with the skin color yarn, between the eyes, one round down. I only do two passes 2-3 stitches wide with this thick yarn.
Arms (make 2)
Leave unstuffed
In skin color:
Round 1: 7 SC in a magic circle. (7)
Round 2: SC in each around. (7)
Change to dress color.
Rounds 3-10: SC in each around. (7) *8 rounds*
Fasten off and leave a long tail to sew the arms on. Close the opening and sew them on between rounds 23 and 24. My favorite method for attaching can be found here!
Hair
You may need to adjust your hook size here. Different types of yarn work up differently. Stretch the hair out as you try it on OR size up if it works up too tightly. If you need to, add or subtract a row before round 9.
Round 1: In a magic circle, SC 8.
Round 2: SC INC in each around. (16)
Round 3: SC in the first, SC INC in the next. Repeat around. (24)
Round 4: SC in the first 2, SC INC in the next. Repeat around. (32)
Rounds 5-8: SC in each around. (32)
Round 9: HDC, HDC INC, DC, DC INC, DC, DC INC, skip a stitch and slip stitch in the next. Skip a stitch and DC INC, DC , DC INC, HDC. SC in the remaining stitches.
Fasten off and attach with the “part” on an angle.
Note: I sometimes use a hot glue gun to glue the top so it doesn’t shift and then sew the bottom edge.
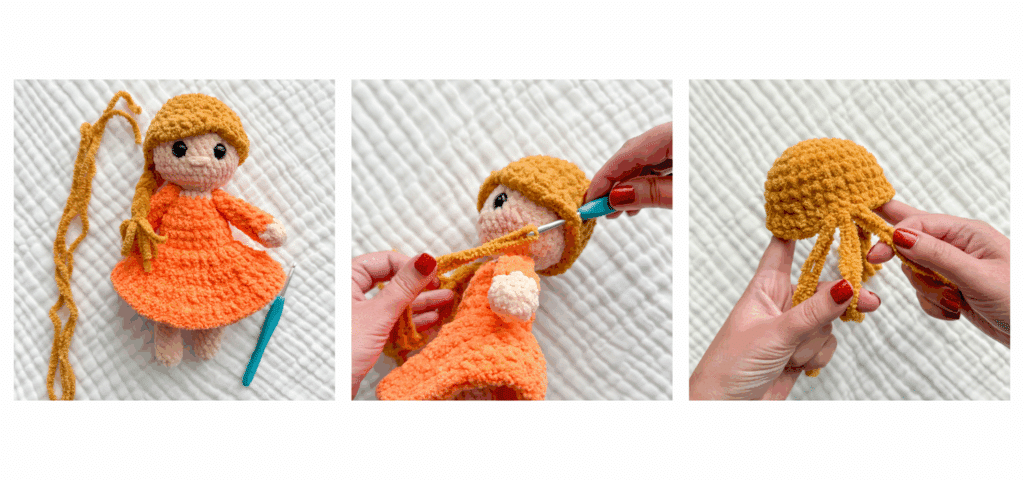
Braids
Cut 6 pieces of the same colored yarn into 14-15 inch pieces. Pull one piece through a stitch, just to the side of the “bangs.” Bring the strand through so the ends are even. Pull the other two through the next two stitches, so that you have three strands. Braid the strands, and tie the end with a 5-6 inch piece of yarn. Do the same on the other side of the bangs, about 16 stitches apart. Double check that you like the distance between them, before you braid and tie them off.
Skirt
Row 1: On round 19 of the body, DC around a post from the back of the doll. DC in each post around, making sure that the feet of the doll point up, so that the DC points outward, like a skirt would. DC twice in the final stitch and slip stitch to the first DC. (24)
Row 2: Chain 2 and DC in the first. Then INC in the next. Repeat in each around. Once you reach the first DC, slip stitch to it and fasten off. (36)
Row 3: Chain 2 and DC in the first two. Then INC in the next. Repeat in each around. Once you reach the first DC, slip stitch to it and fasten off. (48)
Row 4: DC in the first three. Then INC in the next. Repeat in each around. Once you reach the first DC, slip stitch to it and fasten off.
Fasten off and weave in the end. (60)
Hat
Round 1: 6 SC in a magic circle (6)
Round 2: SC in each around (6)
Round 3: Inc in each around (12)
Rounds 4-5: SC in each around (12) *2 rounds*
Round 6: *SC 1, Inc* around (18)
Round 7: SC in each around (18)
Round 8: *SC 2, inc* around (24)
Round 9: SC in each around (24)
Round 10: *SC 3, inc* around (30)
Round 11: *SC 4, inc* around (36)
Round 12: *SC 5, inc* around (42)
Round 13: In the front loop only, *SC 6, inc* around (48)
Round 14: *SC 7, inc* around (54)
Round 15: *SC 8, inc* around (60)
Round 16: SC in each around. (60)
Options to attach- You can sew it on to the head, using the same color as the hat. You could also use a hot glue gun to glue it to the head. You can also add a string to each side and tie them under the chin, party hat style.

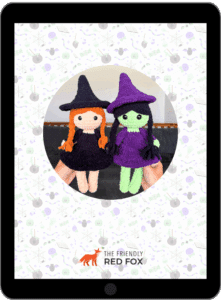
Want the Ad-free, Printable PDF?
You can find it in one of my stores!
Did you make this pattern?
Mention me @thefriendlyredfox so I can see your Plush Witch Crochet Pattern creations! You can also leave a comment below!