
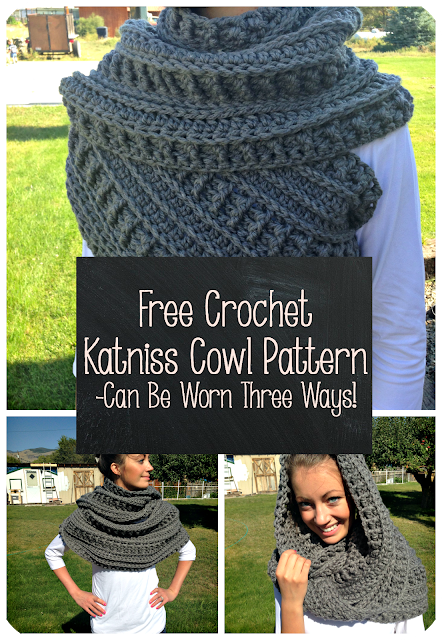
Free Crochet Katniss Cowl Pattern

EDIT: I HIGHLY recommend you read the FAQ page HERE before you begin this project! Please look at it if you are having any questions… chances are they are answered there!
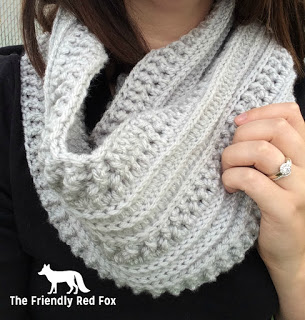
If you love the look but not the bulk, check out my Ribs and Ridges Scarf. Same pattern, worsted weight yarn!
(this post contains affiliate links. For more information please check out my policy page)
When I first watched Hunger Games: Catching Fire and I saw Katniss’s knitted cowl my DIY mind immediately began making a pattern for it. I never attempted it, mostly because I did not feel like I would ever really NEED a one armed vest thing. It just did not seem very practical. (Does her other arm get cold? Is it an archery thing? I just don’t know…)
Then not too long ago, my volleyball coach from the good old days sent me a pin to this scarf and asked if I could whip up something similar. I loved that it is just a giant infinity scarf rather than a one armed t-shirt thing. This means you can wear it multiple ways, but still achieve that “awesome” look sported by the Hunger Games victor. However, that particular pattern was knitted and my knitting skills are sadly lackluster. But I spent some time and developed my own crochet pattern.
This is seriously a mega scarf, measuring just over 60 inches long and 13.5 inches high (this seems to be the magic length for the perfect “wrap”), and made from almost 600 yards of yarn. If you are worried about the length for yourself, measure it by wrapping around yourself after the first row of post stitches because that is essentially the finished length.
This is a beautiful piece with a lot of detail, and can be worn 3 ways!
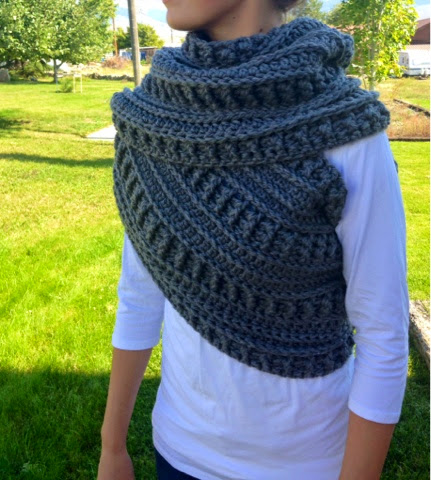
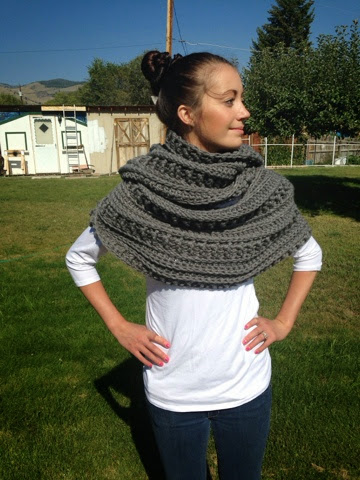
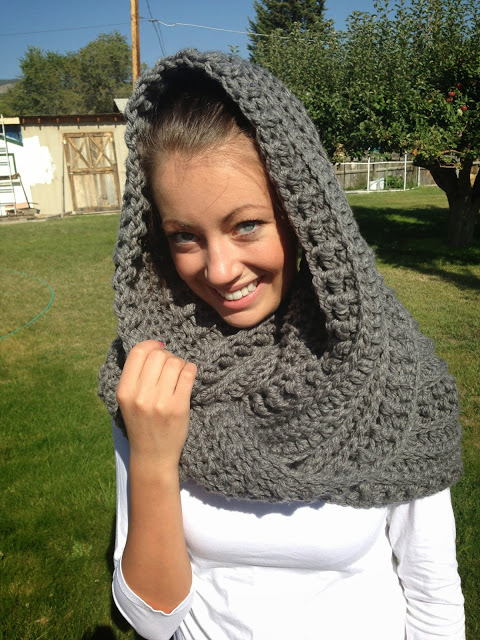
This is an intermediate pattern, but a beginner could figure it out with some determination.
You will need to know how to front and back post double crochet, front post single crochet and the double crochet. If you don’t know these stitches, there are a lot of great youtube videos to help. (And do not be scared to try them– they are the same basic stitches, just put in a different spot!)
If you want to try out these stitches on an easier (read “smaller”) project try out my Free Katelyn Ear Warmer Pattern.
This scarf is also crocheted in the round to prevent some uneven sewing. The pattern is ridged and so can be hard to make the attached line look very neat. I found it was better to attach in the round. It may still be a little “gappy.” I suggest leaving a long end and sewing the gaps together just a little bit. There is nothing wrong with a little sewing manipulation! And because of the many ways to wrap and wear this, it is easy to hide that section.
Again, please read the FAQ page before you begin!
Ready? Here is what you will need to get started.
Size M Hook (9.0)
**I used to recommend a P hook but the majority do better with an M**
Large sewing needle for sewing in ends
600 yards of size 6 bulky yarn (I used Bernat Collegiate Chunky in Grey)
EDIT: I have had many people end up with scarves that are TOO big when using an extra bulky yarn. I would stay away from thick, wooly yarns like Wool-Ease Thick and Quick. Some size 5 yarns would work, and some size 6 yarns will not. I stay by my recommendation of the Bernat yarn. Also, be sure to try on your scarf after a few rows. Because we are not all the same shape and size, you may need to adjust. And if you need to start over, well better after 2 or 3 rows than after the whole thing. The nice thing with this scarf is that you do not need to have a certain number of chains- you can customize it to your own size!
Row 1: Chain until you reach 65 inches (I am sorry– I could not force myself to make an actual count.) You will want to crochet over the end length of 61 inches because the post stitches pull it together. Connect to form a giant ring.
Row 2: Chain 2, DC across, Join.
Row 3: Chain 2, DC in first stitch, FPDC alternating with BPDC until you reach the last stitch. DC in last St, Join. Chain 2.
Row 4: This next row will depend on the number of stitches you made… But essentially you will FPDC or BPDC on the post crochets you already made. Line up the FPDC with a FPDC and a BPDC with a BPDC (to achieve that nice ridged look!) until you reach the end.Join.
Row 5: Repeat row 4.
Row 6: Chain one, FPSC in every stitch across. Do not alternate like the PDC. This will give you that straight line. Join to the first FPSC when you reach that point.
THEN slip stitch to the DC made in row 5. The FPSC sit in front of those stitches making that pretty line. But you will want to crochet over the DC BEHIND the line made in Row 6. The slip stitch back just helps for a smoother transition.
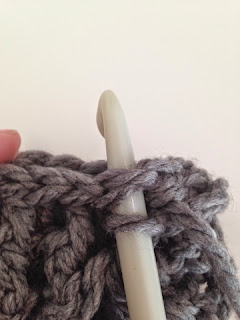
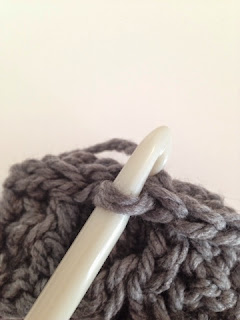
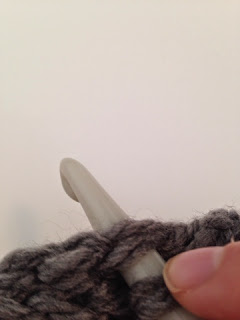

Row 7: Chain 2, DC in each stitch across, slip stitch. (Remember this row is not done in the FPSC you did in the last row but the DC from Row 5)
Row 8: Chain one, FPSC across. Follow the same technique as in row 6.
Row 9: Chain 2, DC across, slip stitch.
Row 10: Chain one, FPSC across. Follow the same technique as in row 6.
Repeat Rows 2-10 twice more.
Then Repeat Rows 2-5.
Finish off and weave in ends (remember to leave that long tail to weave in between the few gaps of your seam!)
I would love to see any of your finished scarves! Post them to my Facebook page and show them off! And if you would like to see some of my inspiration follow me on Pinterest! Do you prefer Instagram? (So do I!)
I do not have a problem with individuals making and
selling items using this pattern. I do have a problem if you take my
photos and the credit:) No big deal, just use your own pictures and link
back to this page if you are selling online! Thanks so much!
Have any questions?? Please read the FAQ page HERE!
This pattern is influenced by an original copyrighted pattern by Bo Peep’s Bonnets. You can find the original pattern at https://www.etsy.com/listing/170787987/instant-download-knitting-pattern-the?ref=shop_home_active_4 You can also purchase the original product here –https://www.etsy.com/listing/169791485/huntress-cowl-hand-knit-cowl-infinity .

What do you mean by, "magic 61 inches" in the second part of row 1?
Michelle, sorry that was confusing! But the magic 61 inches is what I think the perfect length is for the scarf. So just chain to 65 inches because the post stitches shrink it back to 61. Let me know if you have any more questions!
Kali–do you chain to 65" FIRST, before attaching in a loop, or make it 65" long AFTER attaching to make loop? If the latter is true, then shouldn't we chain about 120" first, then attach? I have made this thing twice. I did it the first way first, and it was too small–it wouldn't twist to go over a head–it was 30" tall because I chained 65" like the pattern said. The second time I made it (just finished), I chained about 120" before attaching. The finished scarf is 65-70" tall–too big/long. I am discouraged.
Hi!
I LOVE this, and would like to know when you chose your length, did you measure anything on your body? I would like to make sure that the over the shoulder way would fit me.
Christina I am so glad that you like it! The way I did it may seem silly… but I just chained to the length I thought would work and wrapped that around me, and then adjusted. If you measure that way, keep in mind that the height will need a certain amount just to "twist" (it is pretty hefty!) Also, if you have to choose between snug or loose go with snug. If it is too long it does not wrap as well, unless you are going for the "Katniss Hunchback Look." Hope this helps!
Congrats on starting your blog – I arrived here via pinterest. I love this pattern and am going to get me some more chunky yarn so I can make a start on it – it really is a lovely pattern.
Thank you Julie! I am so glad you like it:) It has been one of my favorites! Enjoy!
Do you Chain 2 before the DC in the beginning of Row 3?
…and are the FPDC and BPDC supposed to line up after you turn?
Melissa,
Sorry that was confusing! Yes, always chain 2 before starting the DC. And for sure line up the FPDC and BPDC! That is what gives it the nice ridged look. Sorry again for the confusion! Good luck with the rest of it!
Thank you! I just wanted to double check 🙂 I am making it in navy and it is turning out beautifully!
Hi I am also just beginning this and I was wondering if in Row 2, did you start the DC in the fourth stitch like a standard DC?
Hi there, I just chained roughly 65" in 120 stitches. How did you measure for fit? did you go right around your neck or leave some slack?
I would leave some slack. The finished scarf is tall (if that makes sense) and also it will shrink down because of the post stitches. What seemed to work for me was to measure again once I got through the first row of post stitches. That takes a while (and is a huge pain if you have to undo it!!) but that will be the finished length. But I feel pretty confident that the 65 inches will fit most people.
Great, thanks!
This is beautiful!!!!! Thank you so much for sharing this pattern, I am definitely going to have to attempt making this. I think I made about 25 scarves last year, mostly for presents but I kept quite a few. I coudn't find a crochet pattern that was quite right for this Katniss scarf and I love yours! As a fairly new blogger myself, I'm so glad I found you! After I make this, I'll have to show you how it turns out!
Thank you so much! As a blogger yourself, you might know how wonderful it is to hear that others like you work! Please do share:)
Kali, do you by any chance have a video tutorial on this pattern? I'm a beginner and a visual learner. Still not able to read patterns much. However, I really want to try and make this. Thank you
I do not at this time, but look at youtube! If you are comfortable with the stitches I am sure that you will be able to do this! With this long scarf you will have a lot of practice!
I really luved it n I tried making it…n it came out so well
I'm beginning this as we speak…it's beautiful! I sell finished items on etsy and donate proceeds to a girls Orphanage in India. Can we sell the finished product provided the pattern is credited to you?
Yes to all above 🙂 Please feel free to sell them (and what a wonderful cause!) just make sure that there is a link back. Thank you for checking!
Absolutely! I altered the pattern a little but it's so close that I will certainly link. It's beautiful, thank you for sharing your expertise! Struggling to not keep this one for myself. 🙂
Finished product of?…
Hi there. I am just finishing up row 6. I have two rows (wide) now, is this forrect? If so when moving onto row 7, what stitch should i be working in, back or front of the two rows?
I am not sure what you mean by rows, but you will want to be working in the back of the scarf. So if the front is toward you, you will want to crochet in the part farthest from you! Hope this helps!
I love this pattern and am going to buy the yarn and make it for my 18 year old granddaughter who loves the Catching Fire books and movies. thank you!
This is beautiful and was really fun to make. Just one thing: how the heck did you wrap it around to get the one shoulder look? I just keep choking myself…I know I'm missing something, it should be simple, but it's SO tall every time I wrap it around to go over my head the second time I end up with a huge twist that tightens the whole thing.
I wont lie to you Lisa… it takes some practice! But it does seem to help if you put it over your shoulder, and pull it right under your armpit. Then twist it way up before you loop it over your head! It also helped me to do it in front of the mirror a few times! Make sure the back isn't caught on something too… sometimes it gets tangled. Hope this helps!
I am currently working on this piece and I love the way it is turning out, but I am very confused by the instructions at the end of row 6 where it says THEN slip stitch to the back stitch. If you crochet on top of the line you just made, there will be no line. You must crochet in the back part !
Can you please help me with that? I am almost to that part and I don't want to have to put this down !!!
Thank you in advance and thank you for such a wonderful piece !!!
When you do the post stitches they will stick out a bit. If you continue to go over those new stitches there wont be a line, the scarf will just come forward a little bit! So slip stitch to connect like you normally would and then slip stitch BACK to the row of DC. I am hoping to update with a picture soon!
Oh boy, I'm just getting here too and got tripped up on this. So is row 7 a round of regular DCs into the row 5 DCs (behind the row 6 FPSCs), or basically BPDCs around the row 6 FPSCs?
Thank you for any clarity you can provide and thank you for sharing this amazing pattern!
Lana…you are correct, row 7 will be a row of DC into the row 5 DC. I hope you are loving this piece as much as I did !!!
Thank you! And yes I am! Can't wait to finish it!
I'm stuck on row 6 as well any help???
I updated the pattern with some pictures and a few more details! Hope this helps!
Just curious, are we supposed to turn every row or just row 3??
Thank you so much for your reply Kali =) I did get it figured out..it just took me looking at it. My grandmother taught me to crochet over 25 years ago, but it didn't stick with me very long. I just started again about 6 mobths ago, so this was my first time doing FPDC and BPDC, so it took me finishing row 6 and seeing the double row of stitches to get it. As soon as I can get my model to stand still for 2 seconds, I will send you a pic of mine.
Thank you for such a wonderful pattern !!!
Thank you so much for this pattern! I have been obsessed with the " Katniss-cowl " look ever since I saw it. I'm in the process of making this right now and I have a question: where it says "row 4-5 " does it mean to go around the work once, or should there be a total of two rounds? The numbers suggest twice but the instructions seemed to be for one round. Thanks for the clarification!
You will repeat row 4. This will make a total of 3 FPDC and BPDC rows. Sorry that it was misleading!
Thank you very much! 🙂
"Row 2: Chain 2, DC across, attach with a slip stitch." Sorry I haven't read a pattern in quite some time, or crocheted for that matter. I am a little confused on what the across part means. I am sorry if this is super simple. But thank you in advance!!
Hi there! In case you haven't figured it out yet: "DC across" means that you crochet in every stitch of that round.