Free Hippo Crochet Pattern – Squishy
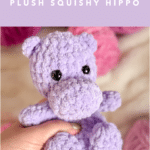
Looking for a lovable, squishy friend? This free hippo crochet pattern works up quickly with blanket yarn—perfect for gifts or your own collection!

Free Hippo Crochet Pattern Notes
Meet the Squishy Hippo crochet pattern! Designed to work up quickly with blanket yarn, he’s part of my popular “Squishy” series, which also includes the Squishy Axolotl and Squishy Platypus patterns. Standing about 8 inches tall, he is the perfect size for small hands and cuddly play, making him a quick and fun project for anyone looking to add some whimsical charm to their amigurumi collection.
His body is intentionally understuffed to give that signature “squishy” feel.
JOIN MY NEWSLETTER TO RECEIVE…
A free email course-Amigurumi 101
This free amigurumi email course gives you what you need to master the basics of amigurumi, along with some extra tips and tricks!
Whether you’re looking to whip up a quick and unique gift or you’re adding to your squishy animal collection, this squishy hippo is the perfect project. He’s the perfect mix of cuddly and fun, with the right amount of detail to make him stand out while still being easy to create. Grab your yarn and hooks, and get ready to fall in love with this squishy hippo!

Ad-free, Printable PDF Squishy
My pattern’s are free on my website, but if your prefer a printable copy, you can find them in my shop!
Squishy Hippo
$6

Buddy Bear
$6

Silly Chicken
$6
Materials you’ll need
To get started making this free hippo crochet pattern, you’ll want to gather all your materials first.
You will need:
- 80g Bernat Blanket in Lavender
- 12mm safety eyes
- Crochet Hook in Size 4.5mm
- Tapestry Needle
- Polyfil
- stitch marker

Notes:
This hippo is made from the bottom to the head, all in one piece. You will intentionally understuff the body for a more floppy, silly look. Over-stuffing will change the look dramatically. You will insert a neck strengthener which will help with the shape and stability of the head, while allowing you to understuff the bottom and stuff the head a little more.
The ears, snout, feet and arms are attached at the end. The feet are attached flat against the body.
The arms are attached with a long needle. The video for that is here.
You can use safety eyes or try out embroidered eyes so it would be safe for a baby/toddler. I have a collection of embroidery videos here.
Substitute yarns could be Premier Basix Chenille yarn or Big Twist from Joann’s. You may need to change the hook size if you change the yarn.
Squishy Hippo Crochet Pattern
Neck Strengthener
*Click here for a video and picture tutorial on how this works*
In a magic circle, SC 7. SC in each around for a total of 7 rows. Fasten off and leave a long tail to sew the hole closed and sew through the neck. You will need this before you stuff the head.
Body/Head
Round 1: In a magic circle, SC 8.
Round 2: SC INC in each around. (16)
Round 3: SC in the first, SC INC in the next. Repeat around. (24)
Round 4: SC in the first 2, SC INC in the next. Repeat around. (32)
Round 5: SC in the first 3, SC INC in the next. Repeat around. (40)
Round 6: SC in the first 3, INV DEC in the next. Repeat around. (32)
Round 7: SC in each around. (32)
Round 8: SC in the first 2, INV DEC in the next. Repeat around. (24)
Round 9: SC in each around. (24)
Begin to stuff here. Remember to stuff lightly.
Round 10: SC in the first, INV DEC in the next. Repeat around. (16)
Round 11: SC in each around. (16)
Round 12: INV DEC in each around. (8)
Round 13: In the front loop only, SC INC in each around. (16)
Round 14: SC in the first, SC INC in the next. Repeat around. (24)
Rounds 15-19: SC in each around. (24)
Insert safety eyes between rounds 17 and 18, about 4 stitches apart. Insert neck strengthener. Remember to watch this video if you haven’t yet! And this one to help your head be nice and round!
Round 20: SC in the first, INV DEC in the next. Repeat around. (16)
Stuff the head.
Round 21: SC in each around. (16)
Round 22: INV DEC in each around. (8)
Fasten off and sew the remaining hole closed.
Hippo Amigurumi Parts
Arms (Make 2)
Round 1: SC 7 in a magic circle
Rounds 2-6: SC in each around.
Fasten off and leave a long tail to sew on. Sew on between rounds 10 and 11.
Feet (make 2)
Round 1: 12 SC in a magic circle (12)
Rounds 2-4: SC in each around.(12)
Round 5: INV DEC in each around. (6)
Fasten off and leave a long tail to attach. Sew the remaining hole closed.
Sew the feet on flat to to the body, with the bottom of the foot touching Round 4.
Nose
Round 1: 6 SC in a magic circle. (6)
Round 2: SC INC in each around. (12)
Round 3: SC INC in the first three. SC in the next 3. SC INC in the next 3 stitches. SC in the remaining 3 stitches. (18)
Round 4: SC in the first two, SC INC in the next. Repeat around. (24)
Round 5: SC in the first 2, INV DEC in the next. Repeat around. (18)
Fasten off and leave a long tail to sew on. Sew it on with the bottom of the snout on round 13 and the top on round 16. You may want to gently stretch it so it is a more oval shape. Stuff as you sew it on.

Ears (make 2)
In a magic circle, SC 5x. Pull the circle tight, and fasten off, leaving a long tail to sew on.
Attach the ears around rounds 19-20.


Want the Ad-free, Printable PDF?
You can find it in one of my stores!

Did you make this pattern?
Mention me @thefriendlyredfox so I can see your Squishy Hippo Crochet Pattern creations! You can also leave a comment below!


How adorable is this!! Thank you so much for sharing the pattern.
The hippo squish is adorable and unique. Thanks for sharing.🩷🦛🩷
Adorable! Thank you so much for all that you do. You have inspired me to try amigurumi, and I’m sure others would agree how very generous you are with the time it takes to give us so many free patterns.
Merry Christmas to all!
Chelena
Thank you for your kind words!! I hope you have a happy holiday!
I agree
Made mine in pink and it’s so adorable!!
I just finished making a hippo, it turned out really cute! It turned out smaller than yours, I didn’t have the right size yarn, I am wondering if there directions for the nose is missing a row. It didn’t look like yours, so I did a 6th row with inv dec around and, thanks for sharing the pattern, I plan on making another one when I get the right yarn.
Hi! Round 5 has invisible decreases! So, rounds 1-4 are increases, and then the 5th round pulls it back in. Hope that helps! I’m glad you enjoyed the pattern and can’t wait to see them both!
I just started the Hippo it looks great !!!