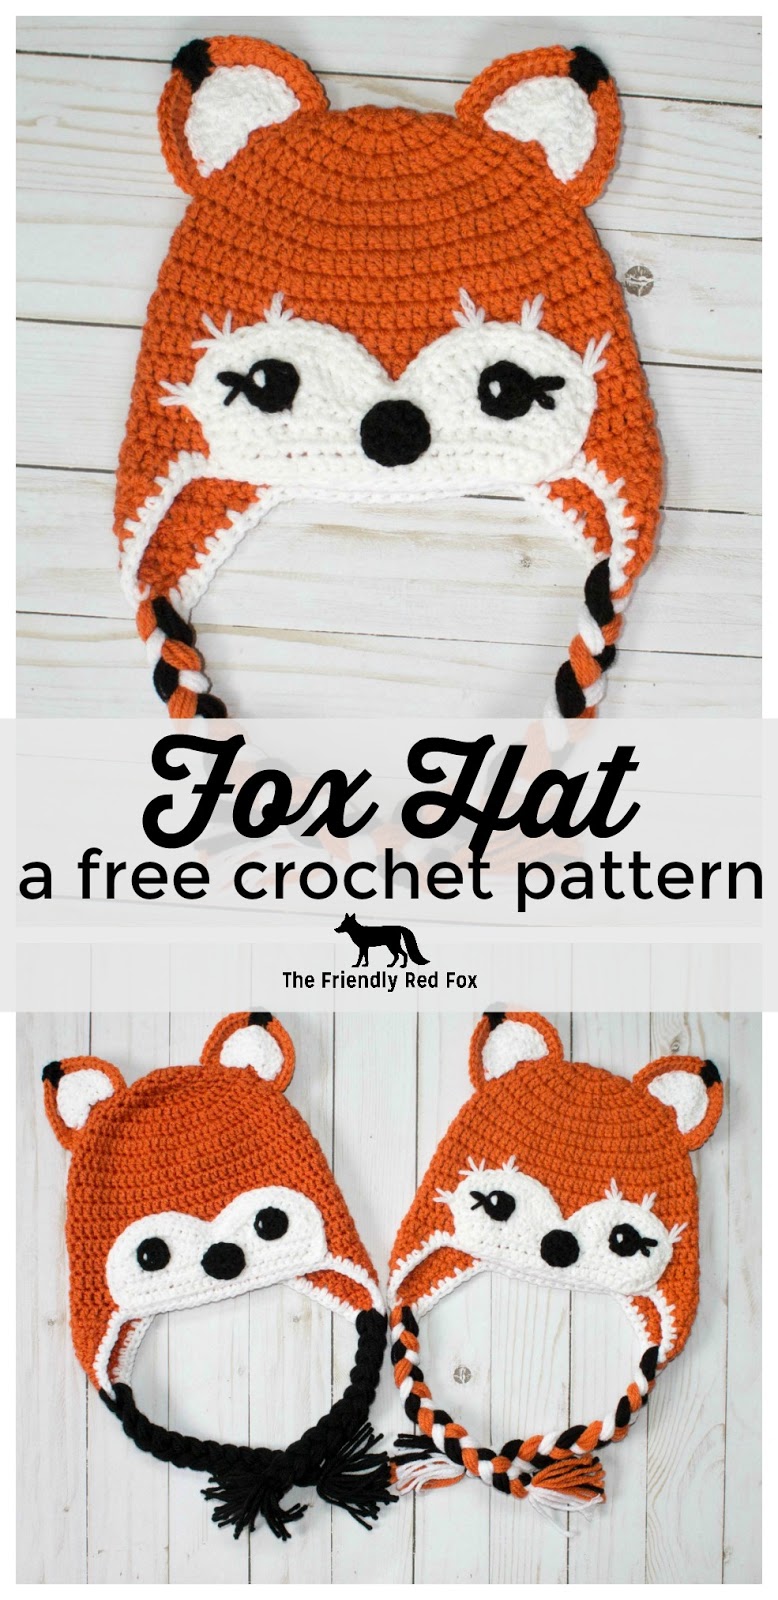
Free Crochet Hat Friendly Fox
I love foxes. This free crochet fox hat pattern is therefore one of my favorites! This is the worsted weight version of this bulky hat pattern and has been much asked for! A cute little cover for your (or your little one’s!) head, perfect for the other fox fans out there. You can make it as decorative or simple as you want. I include the instructions for the basic and “furry” face. You can make sizes toddler, child and teen/adult.
Purchase the ad-free, PDF copy here or scroll on down for the free pattern!
[thrive_leads id=’2591′]
Then join the Friendly Crochet Club on facebook! You can go here to ask questions, get inspiration and share your project!
Do you love instagram? Me too! Come follow me over there and see some behind the scenes!
This post contains affiliate links. For more information see my policies page. Thank you for supporting The Friendly Red Fox!
You will need:
Orange Worsted Weight yarn (I used Red Heart with Love and I Love this Yarn)
5.0 or a 5.5 hook (depending on what size of hat!)
White yarn
Small amount of black yarn
Yarn needle
Check out my Favorite Tools and Resources for what I recommend!

Start with my pattern for a Double Crochet Beanie with Ear Flaps.
Eyes
10 HDC in a magic circle. Pull
tight and slip stitch to the first stitch. Sew on a light reflection
with scrap white yarn. Fasten off and leave a long tail to sew on. Sew
onto face before you attach it to the hat. If you want to include the eyelashes, I just used black yarn and sewed them on.
For Eye Lashes Only
In
black, chain the length you desire (I usually go about 10 chains).
Position on the hat and sew on. Every other stitch make a small lash by
coming up in the desired spot and then sewing down on to the chains. Sew onto face before you attach it to the hat.
Nose
10
HDC in a magic circle. Pull tight and slip stitch to the first stitch.
Pull the stitches so it is more like an oval than a circle. Fasten off
and leave a long tail to sew on. Sew onto face before you attach it to the hat.

The Face
Use a 4.5 or 5.0 hook. If you crochet very loose, I recommend using the smaller hook.
Row 1: Chain 24
Row 2: Skip the first stitch and HDC. HDC in each stitch across. Chain 1 and turn. (23)
Row 3: HDC in each stitch across. Chain 1 and turn. (23)
(Each comma represents the next stitch. The 3TRC will all be in one stitch.)
Row
4: HDC, DC in the next 3, TRC, 3 TRC in same stitch, TRC, DC in the
next 3, HDC, SC, HDC, DC in the next three, TRC, 3 TRC in the same
stitch, TRC, DC in the next 3, HDC. Chain 1 and turn. (27)
Row
5: Skip one stitch, HDC, DC in the next 4, 3 DC in the same stitch, DC
in the next 3, HDC, SC in the next 5, HDC, DC in the next 3, 3 DC in
the same stitch, DC in the next 4, skip one stitch
and HDC in next. Chain 1 and turn. (29)
Row 6: Skip one stitch. In the next 12 HDC. SC, SLST, SC. HDC in the next 11, skip one and HDC. (27)
Now
single crochet around the piece for the toddler size. HDC for the child
and adult size. Remember to crochet two stitches around the corner.
(I didn’t go around the top, just the sides and bottom to clean up the edges.)
Leave an extra long tail to sew on to hat. Make sure to apply eyes and nose before sewing.
Position the face so that the bottom lines up with the bottom front part of the hat. Use pins to keep in place. If you want the “fluffy” embroidered lines of the girly hat follow the tutorial I shared on the bulky yarn version here.

Ears
With orange and 5.5 hook:
Round 1: 7 DC in a magic ring. Chain 2 and turn.
Round 2: DC INC in the first 3. TRC. DC INC in the last three. Chain 2 and turn (13)
Round 3: DC INC in the first 5. DC INC in the next, but change from orange to black on the second DC. TRC. DC INC in the next, but change from black to orange on the second DC. DC INC in the last 5. (23) Weave the black ends in and tie off. Hide any ends with the inner white piece.
Fasten off and leave a long tail to sew onto the hat. I sew them on the top, lined up on the third round from the middle.
Inner Ear
With white:
Round 1: 7 DC in a magic ring. Chain 2 and turn.
Round 2: DC INC in the first 3. TRC. DC INC in the last three. (13)
Attach to the orange with the long orange tail by sewing along the outside stitches.
The ear won’t be a perfect triangle; you gently curve the ear when you attach to the hat. I use pins to pin both ears where I like them before I sew them.
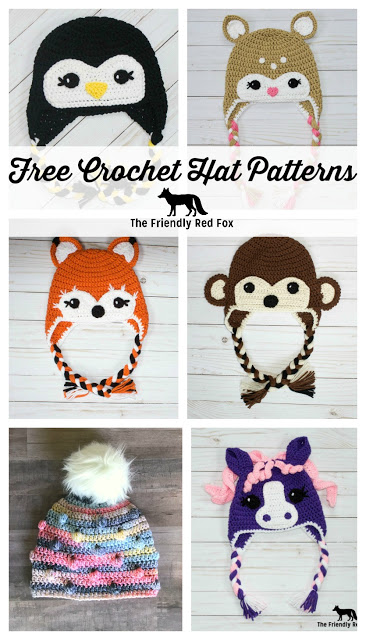
And there you have it! If you loved this hat be sure to check out my other free hat patterns.


Would you by any chance have a pattern for a Coyote? I have a great-grandson named Coyote who will turn one year old the end of October, and would love to crochet a snuggle, stuffed toy, or hat for him. But I’m having trouble finding a pattern. A fox is as close as I’ve found. Thanks..
I don’t have a coyote, but maybe you could change the coloring of a fox to be more coyote like!