
Free Lion Snuggler Crochet Pattern- Mix & Make, Big Footed Snuggler Version
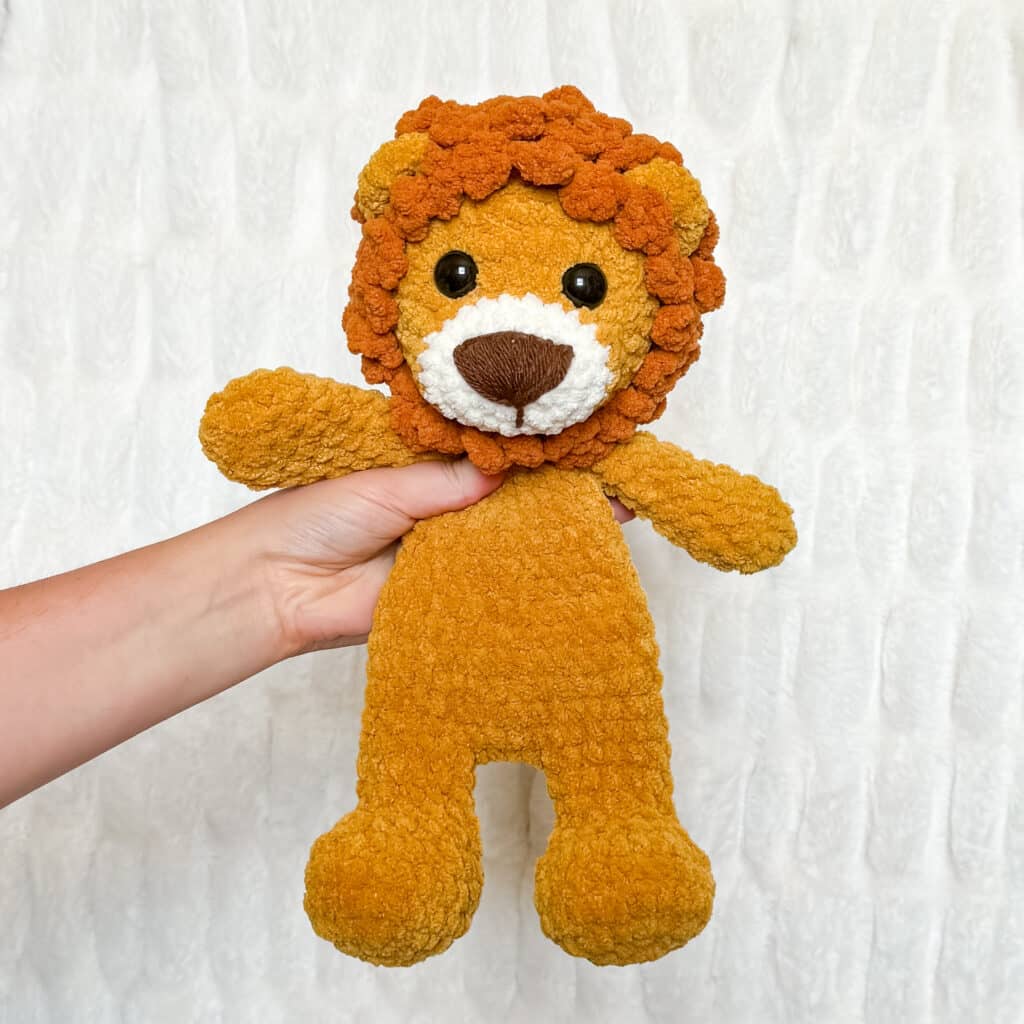
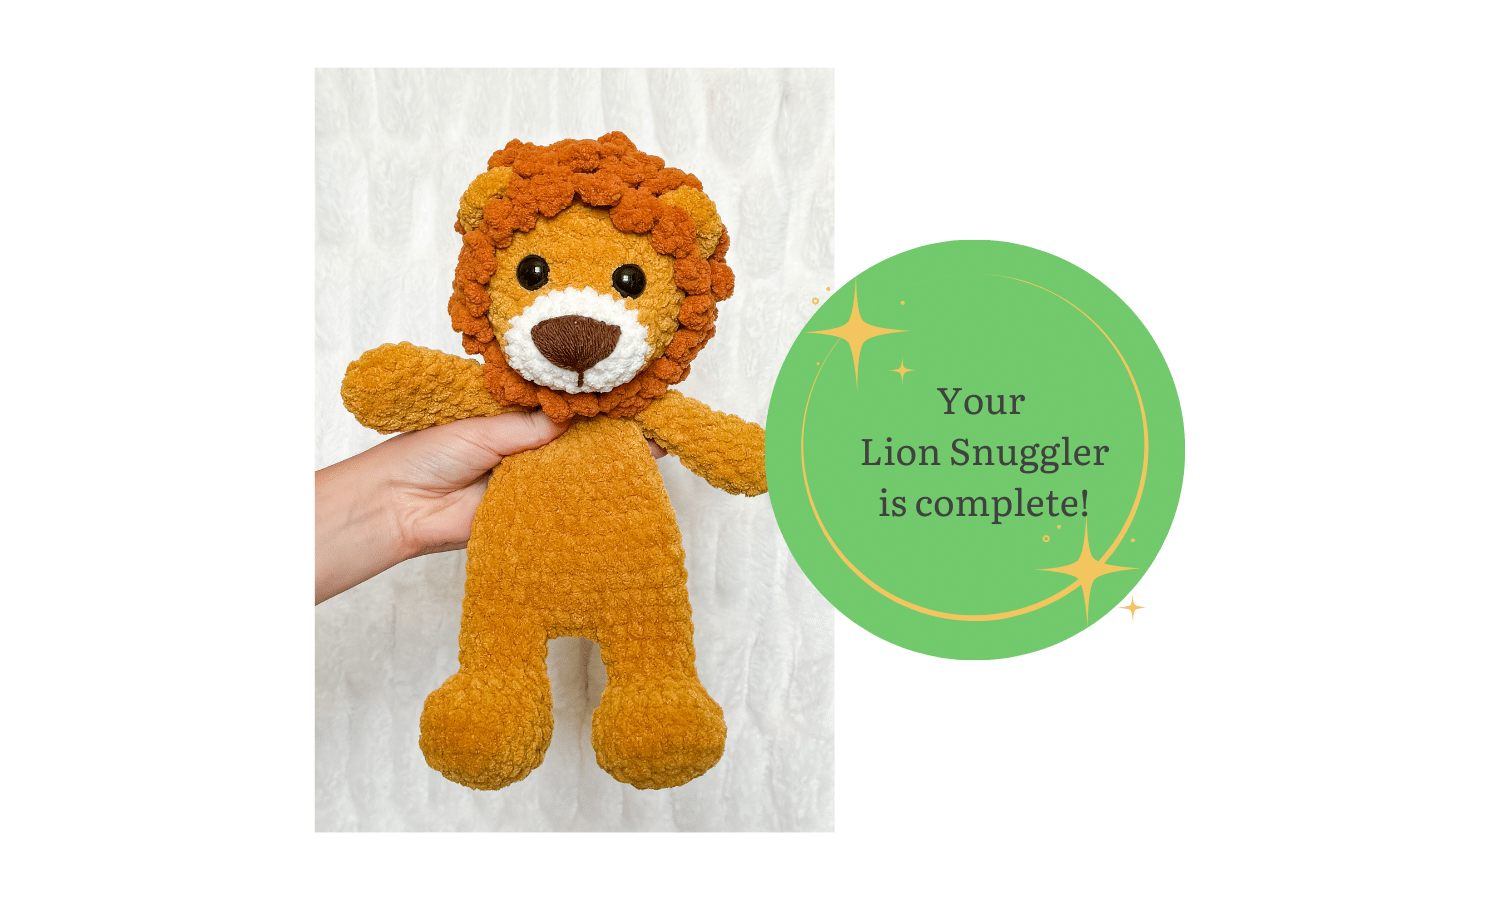
This free lion snuggler crochet pattern is extra cuddly and a great size! The plush yarn helps it work up quickly, while still being extra snuggly.
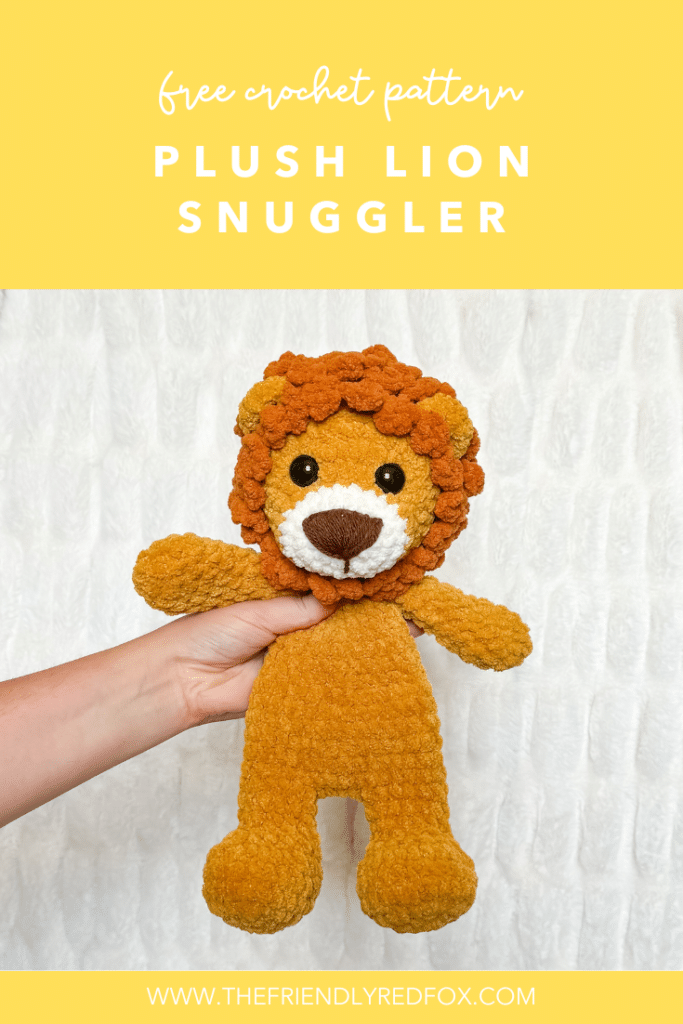
Free Lion Crochet Snuggler Pattern Notes
I am so happy to share this free lion snuggler crochet pattern! I love a good snuggler, and this version is extra fun. I came up with a way to keep the foot shape, without using knots or stuffing that would leak into the unstuffed body. It stands about 13 inches tall.
This is one of my Mix & Make patterns, because you can mix up the body and make something completely different! There are three different bodies for one head, so if you don’t love this snuggler version you can also make it in a Long-Legged Stuffy Version, or in the fun Chubby Standing Body!
I used Premier Basix Chenille in Mustard or Sand for the body and Rust or Caramel for the mane. You can also use Bernat Blanket in Mustard and Terracota. I also made an adorable smaller version in Big Twist Posh using the colors Croissant and Brown Butter.
You can choose to work with different yarn, just keep in mind that although many yarns are classified the same, they can work up much differently.
JOIN MY NEWSLETTER TO RECEIVE…
A free email course-Amigurumi 101
This free amigurumi email course gives you what you need to master the basics of amigurumi, along with some extra tips and tricks!
The Big Footed Snuggler has a super cool trick to keep the feet “stuffed” but it doesn’t use traditional stuffing. This way you can get the shape but also keep the cuddly snuggler feel and not have the stuffing move into the body!
Ad-free, Printable PDF Full Pattern
My patterns are free on my website, but if your prefer a printable copy, you can find them in my shop!

Mix & Make Lion Bundle
$9

Squishy Platypus Pattern
$6

Mix & Make Unicorn Bundle
$9
Free Lion Crochet Pattern Materials
To get started making this free Lion Snuggler crochet pattern, you’ll want to gather all your materials first.
You will need:
- 6g of Premier Basix Chenille in Winter White
- 140g of Premier Basix Chenille in Mustard
- 35g of Premier Basix Chenille in Rust (or 35g in Lion’s Brand Go for Faux if you want a furry mane)
- small amount of brown worsted weight for the nose
- 15mm or 18mm safety eyes
- Crochet Hook in Size 4.5mm
- Tapestry Needle
- Polyfil
- Stitch Marker

Notes:
This lion is made from the feet up. You will make two feet, fastening off one and then attaching them together from the second one. You will use a method to keep the feet’s shape but won’t leak into the open body like regular stuffing will.
The body will decrease and then increase into a flat disc. This is what you will use to sew on the head. Because of the nature of this pattern, the head will still “flop” but that is what I expect of the lovey/blanket form. The head and mane are attached at the end. When made with the recommended yarn, this snuggler is about 13 inches tall.
If you attach the arms, they are movable!
You can use safety eyes or try out embroidered eyes so it would be safe for a baby/toddler.
I have a collection of embroidery videos here.
Substitute yarns could be regular Bernat Blanket, Premier Basix Chenille yarn or Big Twist from Joann’s. You may need to change the hook size if you change the yarn.
Mix & Make Plush Lion Snuggler Pattern
Head
Starting in Winter White
Round 1: SC 8 in a magic ring (8)
Round 2: INC in each around. (16)
Round 3: INC in the first 4. SC in the next 4. INC in the next 4. SC in the final 4. (24)
Round 4: SC in each around. (24)
Change to Mustard
Round 5: SC in each around. (24)
Round 6: SC in the first 16. SC INC in the remaining 8. (32)
Round 7: SC in the first 16. *SC in the first, INC* 8x. (40)
Rounds 8: SC in each around. (40)
SC in the BLO from rounds 9-14. Change to Mane Color.
Rounds 9-10: SC in each around. (40)
Insert eyes on round 6, using the 8 INC of row 6 to help center them. There should be about 6 stitches between the eyes.
Round 11: SC in the first 16. *SC, INV DEC in the next* for a total of 8x. (32)
Start stuffing here.
Round 12: SC in the first 2, INV DEC. Repeat around. (24)
Round 13: SC in the first, INV DEC. Repeat around. (16)
Round 14: INV DEC around. (8)
Fasten off and weave in the end.
Optional: I lightly shaped the front of the nose by using a piece of the body colored yarn. Going from the bottom of the head gently “pinching” the top of the nose, I went up and down through each stitch on round 4. It helps if you do not pull the yarn too tightly, because that makes the shaping more visible. You can check out the the video here!

Ears (make 2)
In Mustard:
Row 1: Sc 8 in a magic circle.
Row 2: Chain 1 and turn. SC in each around. (8)
Note: If you are not getting the “curve” on the second row, tighten your tension or use a size smaller hook.
Fasten off and leave a long tail to sew on.
Attach them after you do the mane, behind the first row of the mane (between rounds 9 and 10), right above the eyes.


Embroidering the Nose
Watch my nose embroidery tutorial video for this lion here.

Snuggler Feet/Body
This snuggler pattern uses a fun technique that helps the foot keep its shape without needing any stuffing. Watch this video to see the technique before you begin.
Beginning with the feet and using the body color:
THE FEET ARE STUFFED WITH POM POMS AND THE BODY IS LEFT UNSTUFFED
Round 1: In a magic circle, SC 8.
Round 2: SC INC in each around. (16)
Round 3: SC in the first, SC INC in the next. Repeat around. (24)
Round 4: SC in the first two, SC INC in the next. Repeat around (32)
Rounds 5: SC in each around. (32)
Round 6: SC in the first two, INV DEC in the next. Repeat around. (24)
Round 7: Sc in the first 8. INV DEC 8x. (16)
Round 8: Sc in the first 8. INV DEC 4X. (12)
Rounds 9-11: SC in each around. (12)
Stuff the feet with the pom pom method. Stop here and fasten off for the
first foot. The second foot will have:
Round 12: SC 6x. Chain 4 and slip stitch to the first leg, in the stitch after the place you fastened off. SC in each stitch around on the leg (12). SC in each chain across. (4) SC in each stitch around the second leg. (12) SC on the other side of the chain. (4) Attach to the first SC with a slip stitch. (a total of 32) You can see the video for this process here.
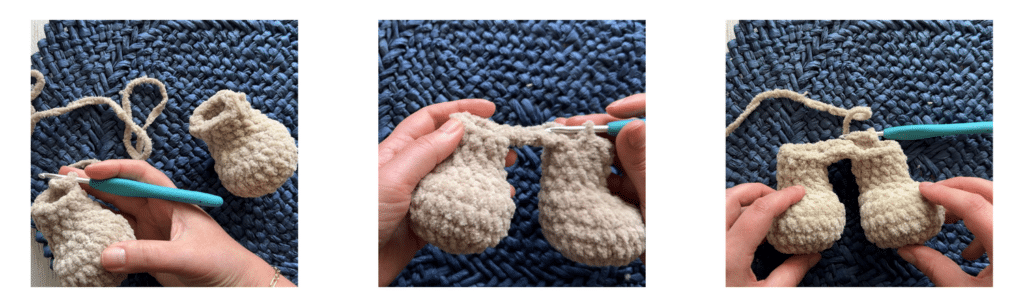
Rounds 13-18: SC in each around. (32) *6 total rows*
Round 19: SC in the first two. INV DEC in the next. Repeat around. (24)
Rounds 20-23: SC in each around. (24) *4 total rows*
Round 24: SC in the first. INV DEC in the next. Repeat around. (16)
Round 25: INV DEC in each around. (8)
Round 26: SC INC in each around. (16)
Round 27: SC in the first stitch, SC INC in the next. Repeat around. (24)
Finish off and leave a long tail for sewing.
Arms (make 2)
In Mustard:
Round 1: In a magic circle, SC 7.
Round 2: SC INC in each around. (14)
Round 3-4: SC in each around. (14)
Round 5: INV DEC in the first. SC in the next 5. INV DEC. SC in the remaining 5. (12)
Round 6: SC in each around. (12)
Begin to stuff here, and then continue to stuff as you go. I usually only stuff the bottom half.
Round 7: INV DEC in the first. SC in the next 4. INV DEC. SC in the remaining 4. (10)
Round 8: SC in each around. (10)
Round 9: INV DEC in the first. SC in the next 3. INV DEC. SC in the remaining 3. (8)
Rounds 10-13: SC in each around. *4 rounds*
Fasten off and leave an extra long tail. Sew the opening closed.
Attach the arms between rows 22 and 23 of the body. Watch a tutorial here!
Attaching the Head to the Body
Watch the video tutorial here.
Once you are ready to attach the head to the body, pin the flat disc that is at the top of the body where you want it on the head. Try to center it as best you can. I prefer mine to be slightly close to the nose so that the head flops forward more than backwards.
As you sew, go through the front loop on the SC at the top of the disc. Pull tightly each time. Try to pull the disc out as you go, so that it lies as flat to the head as you can.
Mane
Note: If you are interested in using fuzzy yarn for the mane, you will attach the yarn and follow the same directions. However, instead of chaining 7, I do a simple DC. Everything else is the same. It took about 35g of Lion Brand Go for Faux yarn.
Watch the full video tutorial on creating the mane.


Tail (optional)
In Mustard:
Chain 8. Turn and SC in each stitch back (7)
Fasten off and leave a long tail to sew on.
Using Mane Color
Attach the yarn to the top of the tail. *Chain 6 and slip stitch through the same stitch.* Repeat for a total of three loops. Fasten off, tie off and weave in the end through the loops.


Want the Ad-free, Printable PDF?
You can find it in one of my stores!

Did you make this pattern?
Mention me @thefriendlyredfox so I can see your Plush Lion Crochet Pattern creations! You can also leave a comment below!



In the instructions for head: Round 7: SC in the first 16. SC in the first, INC 8x. (40) doesn’t make sense. Can you explain what I should be doing please? Thanks
Yes- you’ll single crochet in the first 16 stitches and then for the remaining stitches, you’ll single crochet 1, then increase in the next. then repeat pattern (sc 1, inc) that until the end of the round – a total of 8 times.
Hey! Just wondering, could I make this in thinner yarn, like not bulky? Thanks for the patterns Kali!
Hi! You could certainly try it in a smaller yarn. I haven’t personally tested it in a lighter weight, so let me know how it turns out!