Free Crochet Lion Pattern
Free Crochet Lion Pattern
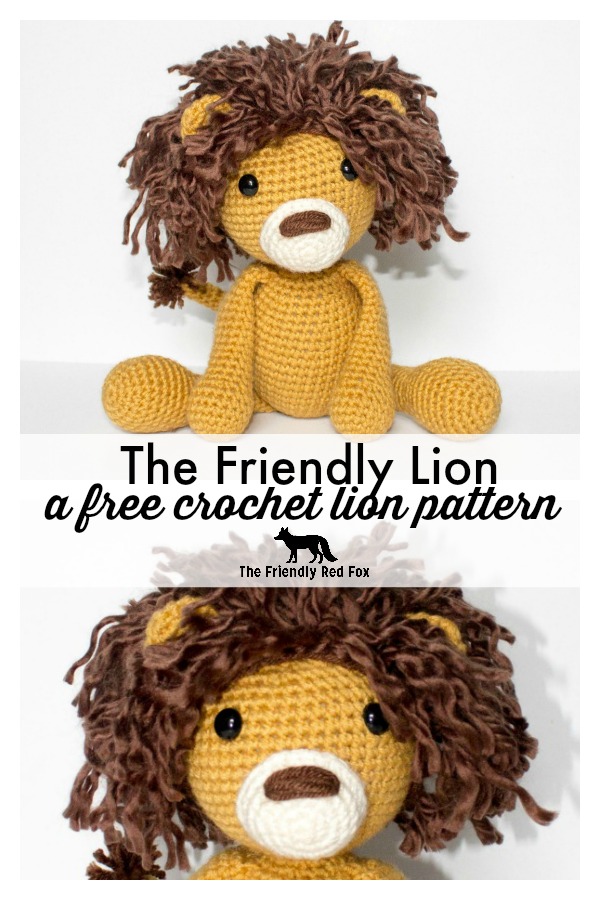
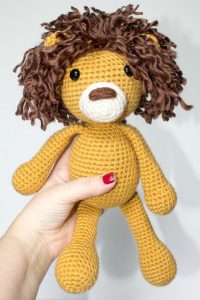
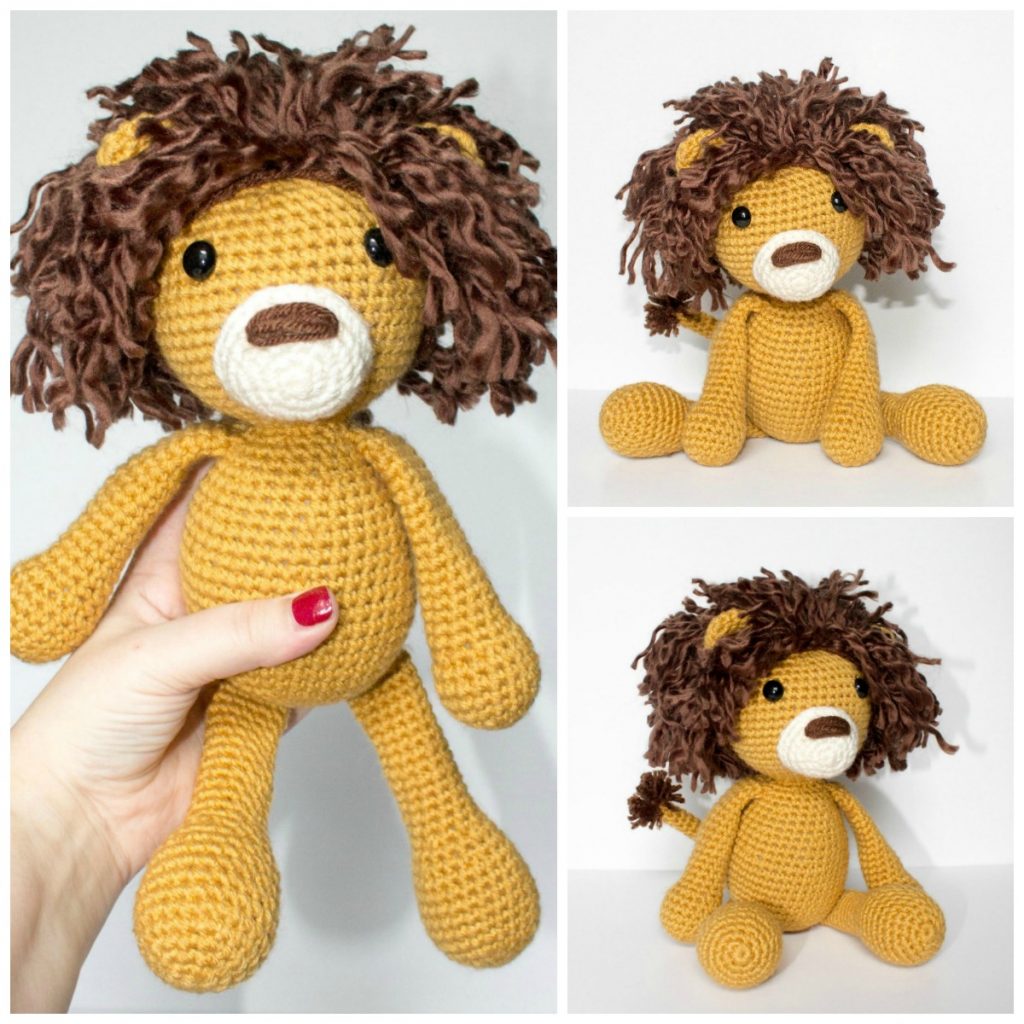
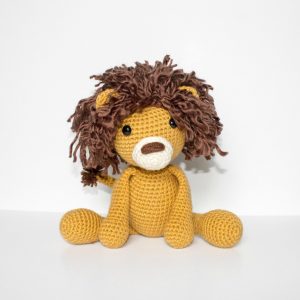
Lionel is the Letter L pattern in my Amigurumi A to Z series! He takes a lot of time keeping up with his mane, and always in search of the perfect hair product. He is about 12 inches tall (a little less when he is sitting) and the perfect size for cuddling. This is a great pattern for an advanced beginners, but even a determined beginner can make this work! This lion was made so his legs could sit out, in, or “stand up!” Either way you pose him, he is the best little play buddy!
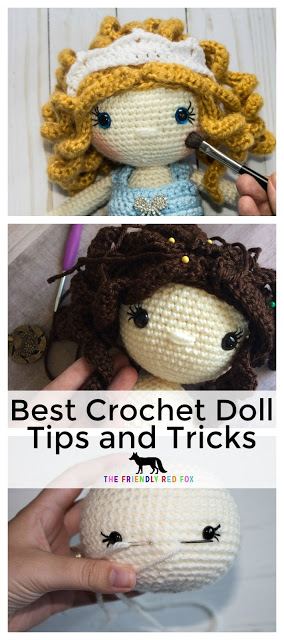
See the other patterns in the series here. Also, take a minute and read my amigurumi tips and tricks post. It will help a lot with all the details and how to get your amigurumi lion just right!
You can scroll down for the free pattern, or purchase the ad-free printable PDF here.
If you enjoy the use of this free crochet lion pattern, please take a minute to follow me on Instagram and join my Friendly Crochet Club on Facebook! If you want to follow along, sign up for the Friendly Newsletter!
Crochet Lion Pattern Details and Materials

Please note this pattern is only for PERSONAL USE. Please feel free to make as many
items as you wish for yourself, or as gifts. You may sell items made with this pattern but
PLEASE LINK BACK OR GIVE CREDIT TO ME AS DESIGNER. In no way can you
share, reproduce, or sell this pattern. Please respect my rights as designer, this pattern belongs to The Friendly Red Fox.
You will need:
Approx 120 g size 4 yarn in main color (I used I Love this Yarn in Sungold)
Small amount of Ivory and Dark Brown worsted weight (for nose and mouth)
Bulky yarn in Brown for the Mane (I used Lion Brand Hometown USA in Billings Chocolate) For more information on what to look for in the mane yarn, please read my instructions below!
Crochet Hook in Size 3.75
Tapestry Needle
Polyfil
12mm safety eyes
stitch marker
Abbreviations
SC- single crochet
SC INC- single crochet increase (2 SC in each stitch)
INV DEC- Invisible decrease (put hook through the FRONT LOOP ONLY of two consecutive stitches [two loops on hook] Yarn over pull through both loops. [two loops on hook] Yarn over pull through two loops)
Magic Circle- Make a loop, leaving a long tail to work with. Insert hook in center of loop, yarn over and draw up a loop. Yarn over, pull through to make the first chain (this does not count as a stitch!). Continue to crochet over the loop and tail with the number of stitches called for. (If you need 6 SC, then crochet 6 SC inside the ring.) Pull the tail to close the circle.
Please take a minute and read through the whole pattern before you begin, especially about the mane and ears. I provide a lot of tips and tricks that will be helpful to know, and make it easier on you as you begin!
Crochet Lion Pattern
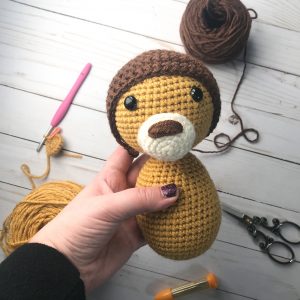
Nose/Mouth
Round 1: SC 5 in magic circle.
Round 2: SC INC in each around. (10)
Round 3: SC in the first, SC INC in the next. Repeat around. (15)
Round 4: SC in the first 2, SC INC in the next. Repeat around. (20)
Rounds 5-6: SC in each around. (20)
Slip stitch in the next 3 stitches. Fasten off and leave a long tail to sew on to the face. Get a long piece of brown yarn. Sew the nose on about row 4. You will see 5 sides of the nose, try to get the nose to be lined up on one of the sides. When you are ready to attach it, the bottom of the piece will be on row 27 and the top about row 35. Use pins to attach it. Sew it around and lightly stuff it.
Body and Head
Round 1: In a magic circle, 6 SC.
Round 2: SC INC in each around. (12)
Round 3: SC in first, SC INC in next. Repeat around. (18)
Round 4: SC in first 2, SC INC in next. Repeat around. (24)
Round 5: SC in first 3, SC INC in next. Repeat around. (30)
Round 6: SC in first 4, SC INC in next. Repeat around. (36)
Round 7: SC in first 5, SC INC in next. Repeat around. (42)
Rounds 8-13: SC in each around. (42)
Round 14: SC in first 5, INV DEC in the next. Repeat around. (36)
Rounds 15-16: SC in each around. (36)
Round 17: SC in first 4, INV DEC in the next. Repeat around. (30)
Rounds 18-19: SC in each around. (30)
Begin stuffing here.
Round 20: SC in first 3, INV DEC in the next. Repeat around. (24)
Rounds 21-22: SC in each around. (24)
Round 23: SC in first 2, INV DEC in the next. Repeat around. (18)
Round 24: SC in the first, INV DEC in the next. Repeat around. (12)
From here we are increasing the head.
Round 25: SC in first, SC INC in next. Repeat around. (18)
Round 26: SC in first 2, SC INC in next. Repeat around. (24)
Round 27: SC in first 3, SC INC in next. Repeat around. (30)
Round 28: SC in first 4, SC INC in next. Repeat around. (36)
Round 29: SC in first 5, SC INC in next. Repeat around. (42)
Round 30: SC in first 6, SC INC in next. Repeat around. (48)
Rounds 31-41: SC in each around. (48)
Attach eyes between rows 37 and 38, about 6 stitches apart. Begin to stuff here. I also stretch the base of the head a little bit so it is more defined, more round than oval. Sew on the nose at this time as well.
Round 42: SC in the first 6, INV DEC in the next. Repeat around. (42)
Round 43: SC in the first 5, INV DEC in the next. Repeat around. (36)
Round 44: SC in the first 4, INV DEC in the next. Repeat around. (30)
Round 45: SC in the first 3, INV DEC in the next. Repeat around. (24)
Round 46: SC in the first 2, INV DEC in the next. Repeat around. (18)
Round 47: SC in the first, INV DEC in the next. Repeat around. (12)
Round 48: INV DEC around. (6)
Fasten off and carefully sew the remaining hole closed.
Stuff the first half of the leg only.
Leg
Round 1: 6 SC in a magic ring
Round 2: SC INC in each around. (12)
Round 3: SC in first, SC INC in next. Repeat around. (18)
Round 4: SC in first 2, SC INC in next. Repeat around. (24)
Rounds 5-10: SC in each around. (24)
Round 11: SC in first 2, INV DEC in the next. Repeat around. (18)
Round 12: SC in each around. (18)
Round 13: SC in the first, INV DEC in the next. Repeat around.(12)
Rounds 14-28: SC in each around. (12)
I attached the legs to the bottom, placing the inside of the leg on approx round 2 of the body, angling them just slightly. I recommend pinning them to make sure you are happy with how they sit.
Stuff the first half of the arm only.
Arm
Round 1: 6 SC in a magic ring
Round 2: SC INC in each around. (12)
Round 3: SC in first, SC INC in next. Repeat around. (18)
Rounds 4-7: SC in each around. (18)
Round 8: SC in the first, INV DEC. Repeat around. (12)
Round 9: SC in each around. (12)
Rounds 10-25: SC in each around. (12)
Fasten off and leave a long tail to sew the arm onto the body. Attach between rows 22 and 23.
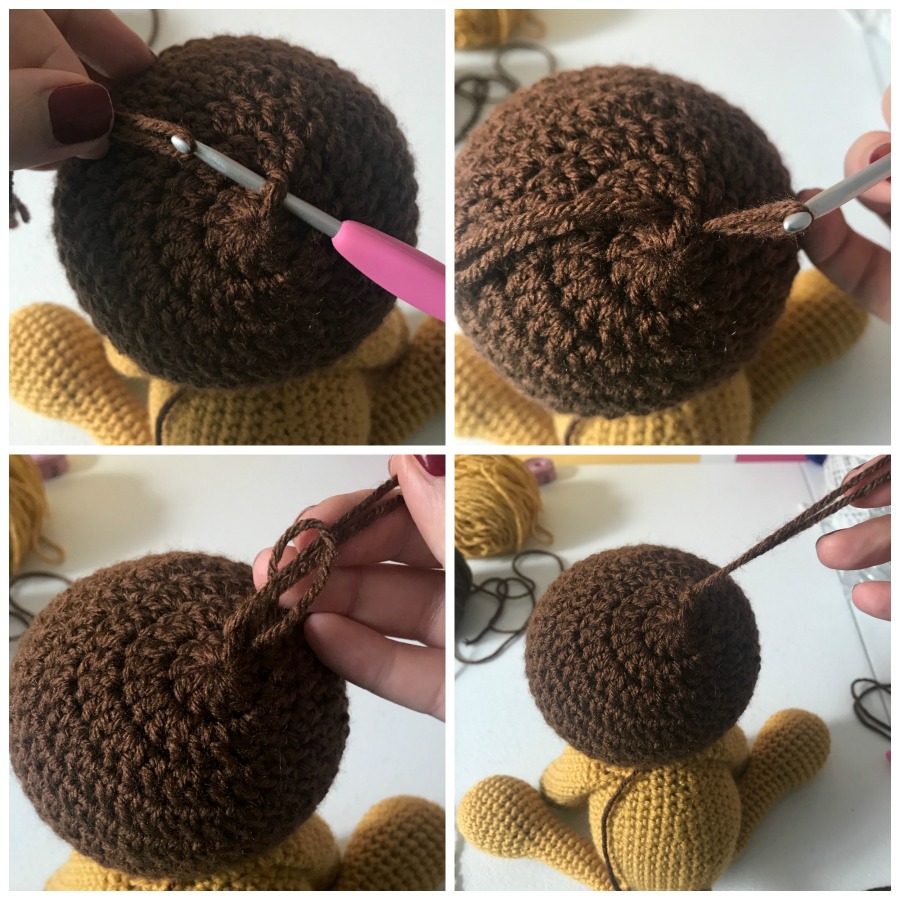
The Mane and Ears
I begin by making a “hair hat.” This is what you will attach the individual pieces of yarn hair to. It also helps to cover up the color of the head so you don’t have to attach quite so much hair. I used a worsted weight (I Love this Yarn from Hobby Lobby in Brown) and a size 6 bulky yarn. I used a brown Lion Brand Hometown USA but a similar bulky yarn, such as Bernat Chunky could also work. It is best if you use one that has multiple strands. I pulled these apart to make that curly, wavy look. You definitely can use worsted weight if you would like. But I would double up the strands as you attach them.
Hair Hat
Using worsted weight yarn and a size 4 hook.
You will connect each round with a slip stitch and chain 2, except for the last round.
Round 1: DC 10 in a magic circle.
Round 2: DC INC in each around.
Round 3: DC in the first, DC INC in the next. Repeat around.
Round 4: DC in the first two, DC INC in the next. Repeat around.
Rounds 5-8: DC in each around.
Fasten off a leave a long tail. You will use this to attach to the head.
Ears (make 2)
Round 1: 6 SC in a magic ring
Round 2: SC INC in each around. (12)
Round 3: SC in first, SC INC in next. Repeat around. (18)
Rounds 4-6: SC in each around. (18)
Fasten off and leave a long tail. Sew onto the hair hat, about two rows back and 6 stitches apart. Place them on with pins to make sure they are where you like them. Attach the ears before the hair!
Attaching the Hair
I begin by cutting yarn about 5 inches long. It was about perfect to wrap the yarn repeatedly around my hand and cut it at one end. Put your hook under one of the double crochets. Put the ends together so that it is halved, and put the end loop on the hook. Pull it through. Go through the loop and pull the ends back though and tighten it.
I attached one in every stitch around the front of the hat. Then every other stitch in the row behind. Then every two stitches. You won’t need as much as you think, although I do tend to go back and fill in where I would like it. Like I said before, I separated the strands. Then go through a trim it down. The front pieces are about 2 inches long, and the rest are about 3 or 4 inches long. Be sure not to begin too short! You can cut more, but not add more!
Tail
Round 1:In a magic ring SC 8.
Rounds 2-20: SC in each around.
Leave a long tail to attach to the body. I attached it centered in the back around row 7.
Attach worsted weight yarn similar to how you attached the mane for the tuft of tail. About 7 pieces.