Crochet Cow Pattern
Crochet Cow Pattern
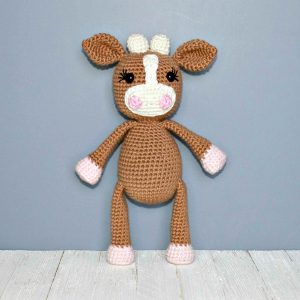
This crochet cow pattern makes an amigurumi cow about 11 inches tall. The head and the body are worked in one piece. The legs, arms, horns and ears are sewed on. This is an advanced beginner pattern.
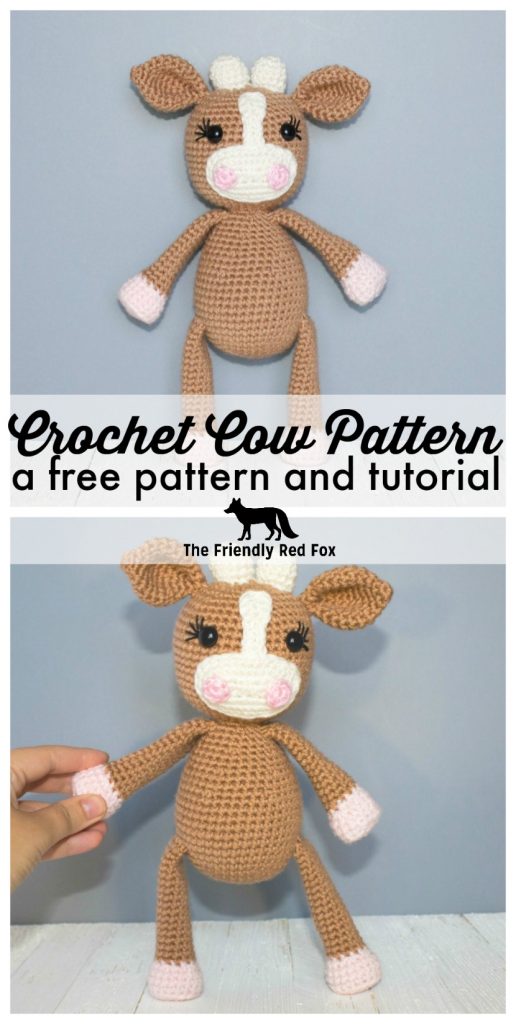
Chloe the Cow loves to graze near the fence and watch the cars go by. She dreams about being a race car driver and traveling the world, but she really is content to spend the day with her family. When she isn’t watching the road, Chloe loves to get ice cream with her friends. Her favorite kind is Huckleberry ice cream in a waffle cone. It’s messy to eat ice cream from a cone when you have hooves, but Chloe feels like it is totally worth it.
I created Chloe in the brown color of the cows that I was used to growing up. But I think it would be very easy to create her in the black and white dairy cow coloring, like Craft Passion did here!
You can purchase the printable, ad-free, PDF copy here or on Etsy

Crochet Cow Pattern Details
Please note this pattern is only for PERSONAL USE. Please feel free to make as many
items as you wish for yourself, or as gifts. You may sell items made with this pattern but
PLEASE LINK BACK OR GIVE CREDIT TO ME AS DESIGNER. In no way can you
share, reproduce, or sell this pattern. Please respect my rights as designer, this Crochet Cow pattern belongs to The Friendly Red Fox. This post contains affiliate links. For more informtion check my policies page.
You will need:
Approx 120 g size 4 yarn in main color, approx 50g in accent ( I used I Love this Yarn in Toasted Almond, Ivory, and soft pink)
Crochet Hook in Size 3.75
Tapestry Needle
Polyfil
12mm safety eyes
stitch marker
Embroidery thread for eye lashes
Abbreviations
SC– single crochet
SC INC– single crochet increase (2 SC in each stitch)
INV DEC– Invisible decrease (put hook through the FRONT LOOP ONLY of two consecutive stitches [two loops on hook] Yarn over pull through both loops. [two loops on hook] Yarn over pull through two loops)
Magic Circle– Make a loop, leaving a long tail to work with. Insert hook in center of loop, yarn over and draw up a loop. Yarn over, pull through to make the first chain (this does not count as a stitch!). Continue to crochet over the loop and tail with the number of stitches called for. (If you need 6 SC, then crochet 6 SC inside the ring.) Pull the tail to close the circle.
Crocheting in the back loops only
See how the hooves are flat? That is created by crocheting in the back loop only. So, instead of crocheting through the entire top of the stitch, you split the stitch and crochet in the back loop. That gives you that nice, solid line.
Please read this post on my best tips for amigurumi!
You will want to watch this video on how to sew on limbs.
And check this one out for the best way to change colors in the round.
Crochet Cow Pattern
Nose Strip
Each comma separates a stitch. You will be crocheting up the chains, around, the back down the other side.
Chain 7. Turn. SC in the second stitch from the hook. SC, SC, HDC, DC, 3 DC in the same stitch, DC, HDC, SC, SC, SC. Fasten off and leave a long tail to sew on.
Nose
Round 1: Chain 7. In the second chain from the hook SC. SC in the next 4. Place 3 SC in the last stitch on the row. On the other side of the chain, SC in the next 4. Then 2 SC in the end stitch (the first stitch you SC on the chain). Place stitch marker (14)
Round 2: SC INC in each around. (28)
Rounds 3-4: SC in each around.
Slip stitch twice. Fasten off and leave a long tail to sew on.
Nostrils (make 2)
6 SC in a magic circle. Slip stitch to the first stitch. Fasten off and sew onto the nose.
Body and Head
With main color:
Round 1: In a magic circle, 6 SC.
Round 2: SC INC in each around. (12)
Round 3: SC in first, SC INC in next. Repeat around. (18)
Round 4: SC in first 2, SC INC in next. Repeat around. (24)
Round 5: SC in first 3, SC INC in next. Repeat around. (30)
Round 6: SC in first 4, SC INC in next. Repeat around. (36)
Round 7: SC in first 5, SC INC in next. Repeat around. (42)
Rounds 8-13: SC in each around. (42)
Round 14: SC in first 5, INV DEC in the next. Repeat around. (36)
Rounds 15-16: SC in each around. (36)
Round 17: SC in first 4, INV DEC in the next. Repeat around. (30)
Rounds 18-19: SC in each around. (30)
Begin stuffing here.
Round 20: SC in first 3, INV DEC in the next. Repeat around. (24)
Rounds 21-22: SC in each around. (24)
Round 23: SC in first 2, INV DEC in the next. Repeat around. (18)
Round 24: SC in the first, INV DEC in the next. Repeat around. (12)
From here we are increasing the head.
Round 25: SC in first, SC INC in next. Repeat around. (18)
Round 26: SC in first 2, SC INC in next. Repeat around. (24)
Round 27: SC in first 3, SC INC in next. Repeat around. (30)
Round 28: SC in first 4, SC INC in next. Repeat around. (36)
Round 29: SC in first 5, SC INC in next. Repeat around. (42)
Round 30: SC in first 6, SC INC in next. Repeat around. (48)
Rounds 31-41: SC in each around. (48)
Round 42: SC in the first 6, INV DEC in the next. Repeat around. (42)
Round 43: SC in the first 5, INV DEC in the next. Repeat around. (36)
Round 44: SC in the first 4, INV DEC in the next. Repeat around. (30)
Round 45: SC in the first 3, INV DEC in the next. Repeat around. (24)
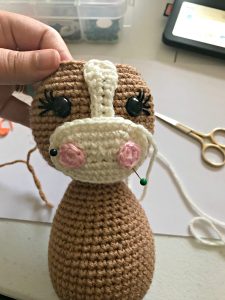
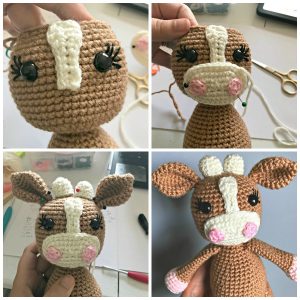
Pin the nose and strip here. The strip will be under the nose part. Attach eyes between rows 38 and 39, about 8 stitches apart. Make sure the face is lined up how you want and then carefully sew the strip on, then the nose piece. Sew on the eyelashes with the embroidery thread. Begin to stuff here. I also stretch the base of the head a little bit so it is more defined, more round than oval.
Round 46: SC in the first 2, INV DEC in the next. Repeat around. (18)
Round 47: SC in the first, INV DEC in the next. Repeat around. (12)
Round 48: INV DEC around. (6)
Fasten off and carefully sew the remaining hole closed.
Horns (using the ivory)
Round 1: In a magic circle, 6 SC.
Round 2: SC INC in each around. (12)
Rounds 3-5: SC in each around. (12)
Fasten off and leave a long tail to sew on. I attached at the very top.
Ears
Round 1: In a magic circle, 6 SC.
Round 2: SC in each around. (6)
Round 3: SC INC in each around. (12)
Round 4: SC in first, SC INC in next. Repeat around. (18)
Round 5: SC in the first 2, SC INC in next. Repeat around. (24)
Rounds 6-8: SC in each around. (24)
Round 9: SC in first 2, INV DEC in next. Repeat around. (18)
Round 10: SC in first, INV DEC in next. Repeat around. (12)
Round 11-12: SC in each around. (12)
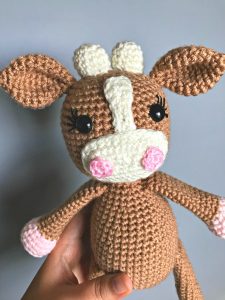
Fasten off, leaving a tail to sew on the head. Pinch the bottom of the ear to make a little crease and sew a few stitches to hold the shape. I sewed them on about 4 rows out from the top circle. Sew them on an angle so they stick out.
For the legs and the arm I only stuff the hoof part and not the leg.
Legs (make 2)
Using pink:
Round 1: In a magic circle, 6 SC.
Round 2: SC INC in each around. (12)
Round 3: SC in first, SC INC in next. Repeat around. (18)
Round 4: In the back loop only SC in each around. (18)
Rounds 5-6: SC in each around. (18)
Round 7: SC in the first, INV DEC in the next. Repeat around. (12)
Change to brown.
Round 8-25: SC in each around. (12)
Fasten off and leave a tail to sew on. I attached on the sides of the body between rows 8 and 9.
Arms (make 2)
Using pink:
Round 1: In a magic circle, 6 SC.
Round 2: SC INC in each around. (12)
Round 3: SC in first, SC INC in next. Repeat around. (18)
Round 4: In the back loop only SC in each around. (18)
Rounds 5-6: SC in each around. (18)
Round 7: SC in the first, INV DEC in the next. Repeat around. (12)
Change to brown.
Round 8-23: SC in each around. (12)
Fasten off and leave a tail to sew on. I attached the arms between 23-24.
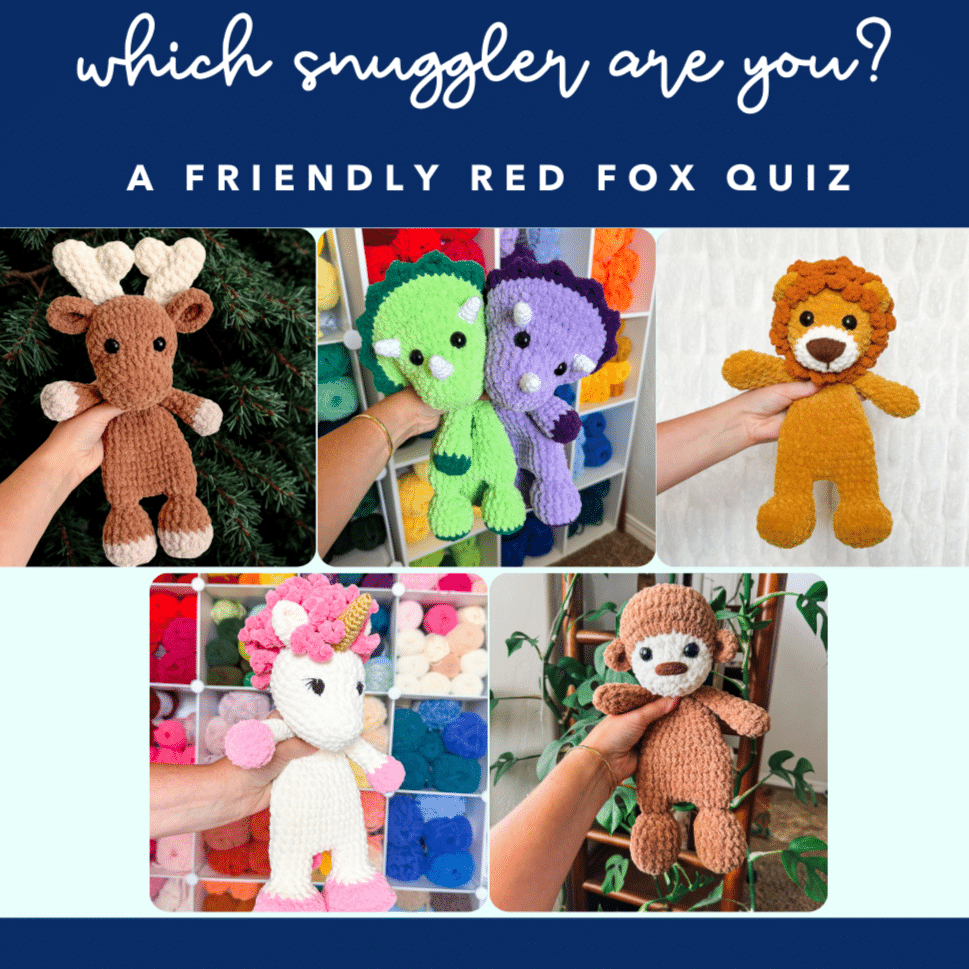
Chloe is part of my Amigurumi from A to Z series! You can read more about that here and see the other animals in the series!