
Plush Superhero Doll Crochet Pattern
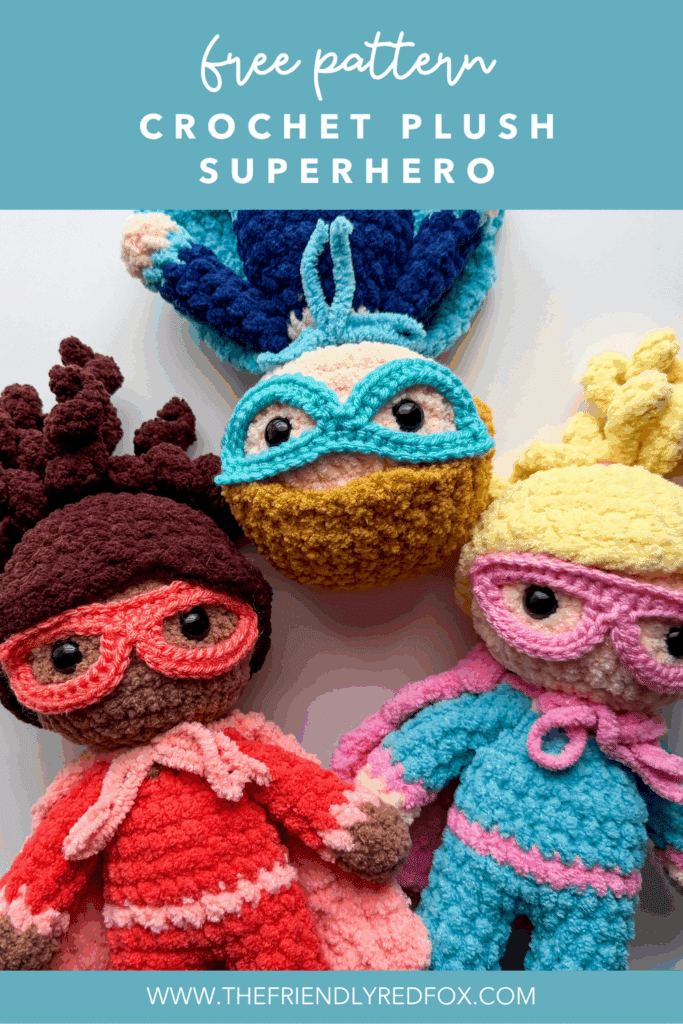
Meet your new cuddly crime-fighter! This plush superhero pattern is easy to follow, fun to customize, and perfect for quick handmade gifts.
Crochet Plush Superhero Amigurumi Pattern Notes
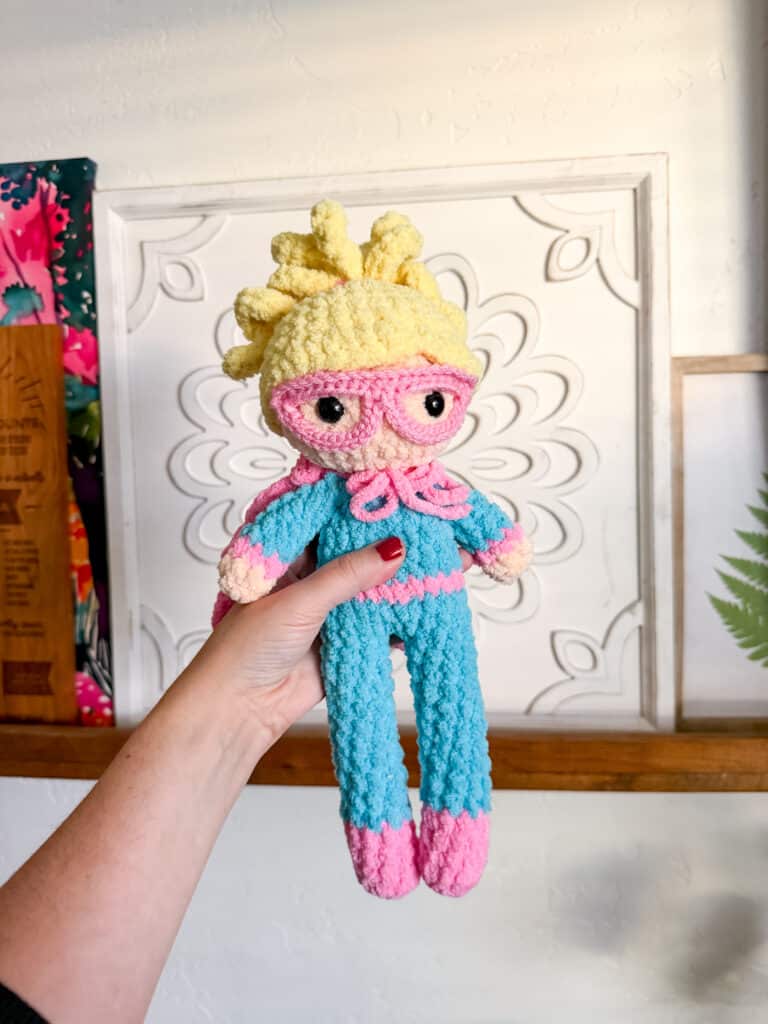
Most of the time, whenever I have a new pattern fresh off my hook, my boys will instantly claim it as theirs. Puppies, dinosaurs, even my capybara. But… not usually my princesses or mermaids. So, I decided it was time to make an updated version of my original Friendly Superhero Crochet Doll and turn it into the Plush Superhero Doll!
This crochet plush superhero crochet pattern is just the cutest. The cape is removable for extra fun play, and the mask is attached using hot glue (you can sew it on, but it’s easier to glue!) I would say this is more of an intermediate pattern, but I do think a brave or advanced beginner could try it! I do share a few video tutorials that will help you!
I used Premier Basix Chenille for this pattern- one of my favorites! The color possibilities are endless! You can substitute a different yarn if you would like. Just keep in mind that different types of yarn, even if they say they are the same size, work up differently. If you want to see some of my other doll patterns, you can find them here.
JOIN MY NEWSLETTER TO RECEIVE…
A free email course-Amigurumi 101
This free amigurumi email course gives you what you need to master the basics of amigurumi, along with some extra tips and tricks!
Ad-free, Printable PDF Full Pattern
My patterns are free on my website, but if your prefer a printable copy, you can find them in my shop!
Plush Superhero Pattern
$6

Mini Puppy
Snuggler Pattern
$6
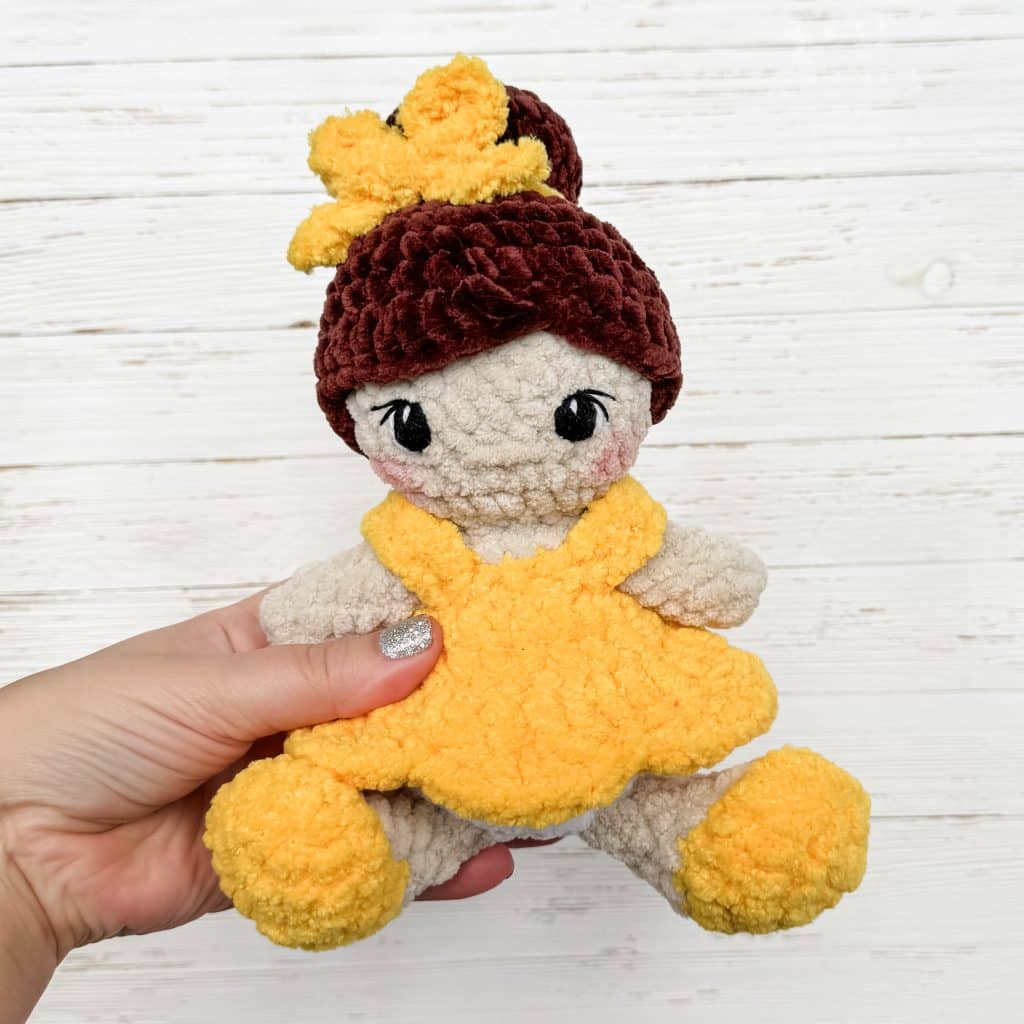
Baby Princess Pattern
$6
Free Crochet Plush Superhero Pattern Materials
To get started making this free Plush Superhero crochet pattern, you’ll want to gather all your materials first.
You will need:
- 30g skin color (see this post for color combos)
- 55g main color
- 40g accent color
- 30g hair color
- small amount of worsted weight yarn in matching color
- 4.5mm hook for plush yarn (or hook size that keeps stitches tight and feels comfortable)
- 3.75mm hook for worsted weight yarn
- glue gun and glue sticks (to attach the mask)
- 14mm safety eyes
- Tapestry Needle
- Polyfil
- stitch marker
video tutorials
These methods are used in this pattern!


Notes:
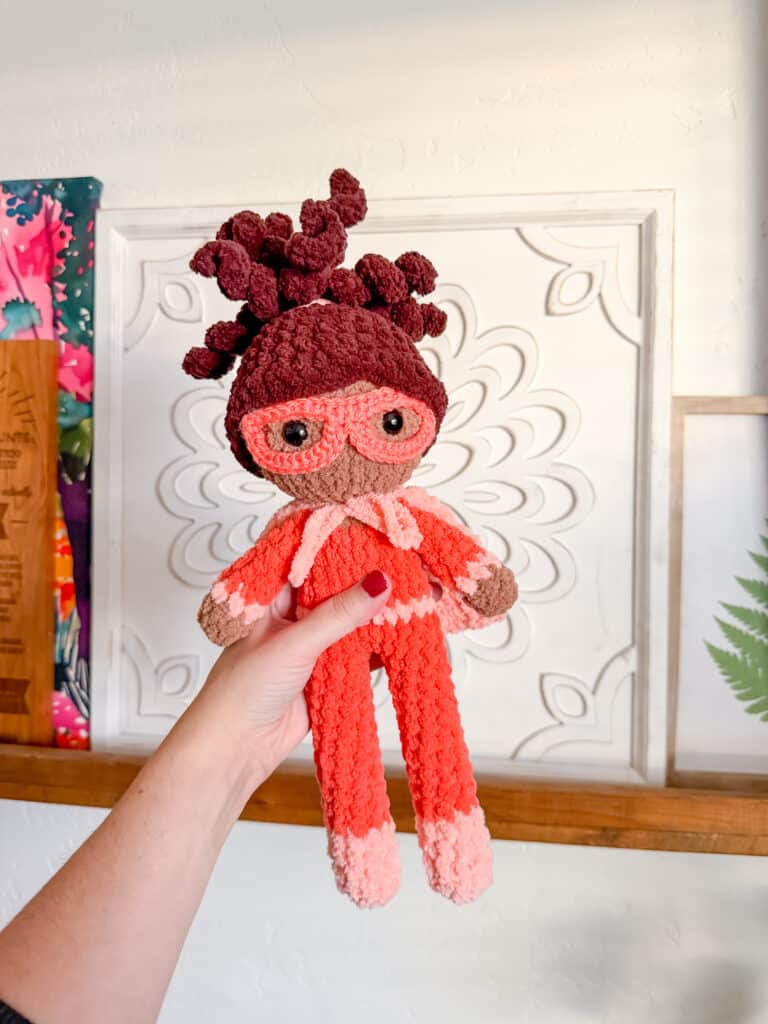
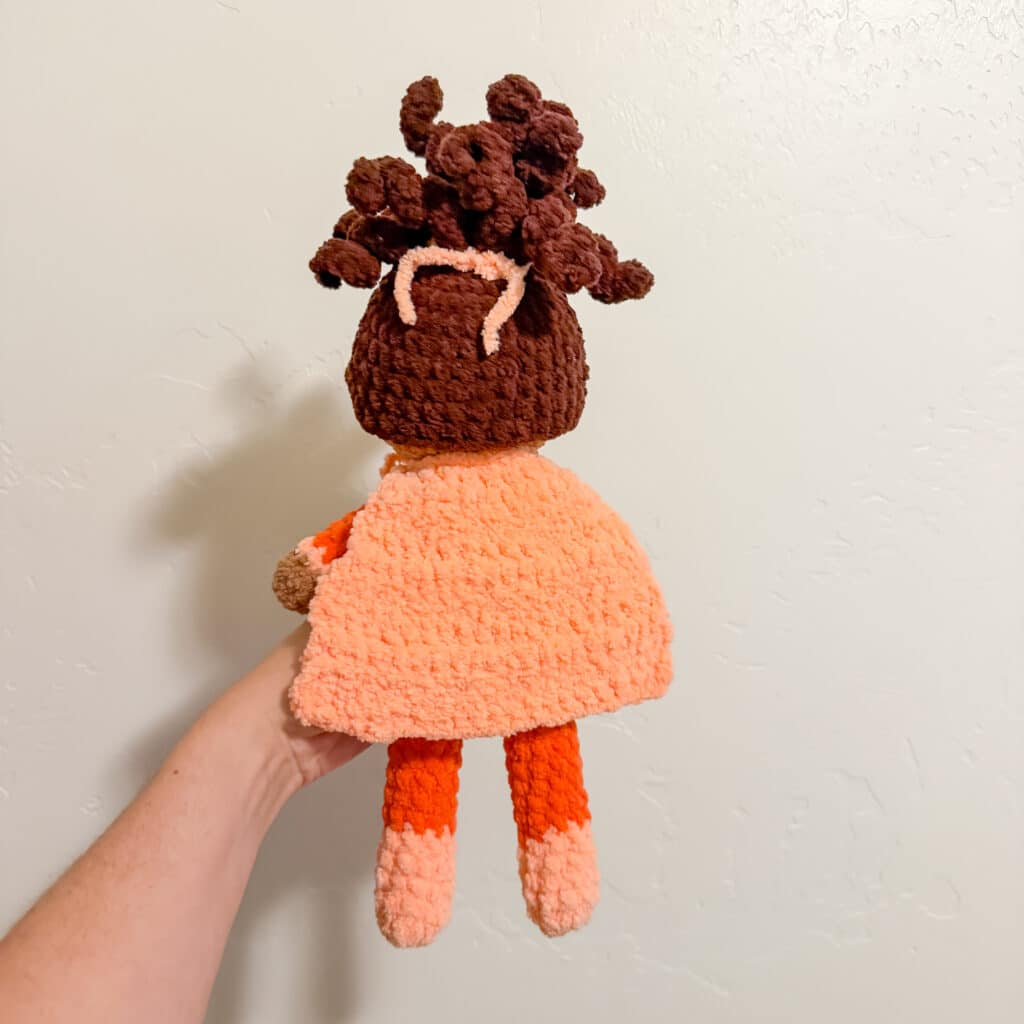
This standing superhero doll is made by crocheting two legs and then attaching them. This way, the legs, body and head are all made in one piece. The arms are attached at the end. The hair is made like a wig, and then attached to the head. You will insert a neck strengthener which will help with the shape and stability of the head. You can keep their masks and capes unattached for playing/props or attach it to keep it as a permanent part of their wardrobe!
You can use safety eyes or try out embroidered eyes so it would be safe for a baby/toddler.
I have a collection of embroidery videos here.
For this particular pattern, I only used the yarn over/yarn over single crochet. However, if you’d prefer, for the skin-colored (body/head/arms), you could use the yarn under/yarn over single crochet. This helps keep the stitches extra tight. This is optional, of course. If you don’t like the under/over, you could also size down half a size hook.
I used blanket yarn for this pattern, a size 6 weight. I typically use Premier Basix Chenille, Bernat Blanket and Bernat Baby Blanket. I think these are interchangeable size wise. I use a 4.5mm hook for the Premier Basix Chenille and a 5mm for Bernat, which is much smaller than the recommended size on the label, but I want nice, tight stitches for this type of pattern. If this is too tight for you, size up a hook size until you can crochet comfortably but still have tight stitches.
Please be aware that even though the label may say it is size 6, some materials and brands work up much differently. Keep that in mind as you are choosing your yarn.
Suitable yarns could be regular Bernat Blanket, Premier Basix Chenille yarn or Demi Purl from Michaels (formerly Big Twist from Joann’s).
Plush Superhero Crochet Pattern
Mask
Using worsted weight yarn in the accent color and a 3.75 hook
(even though you are making the mask, you won’t attach it until the end. It will help to place the eyes and hair however, so I recommend making it first.)
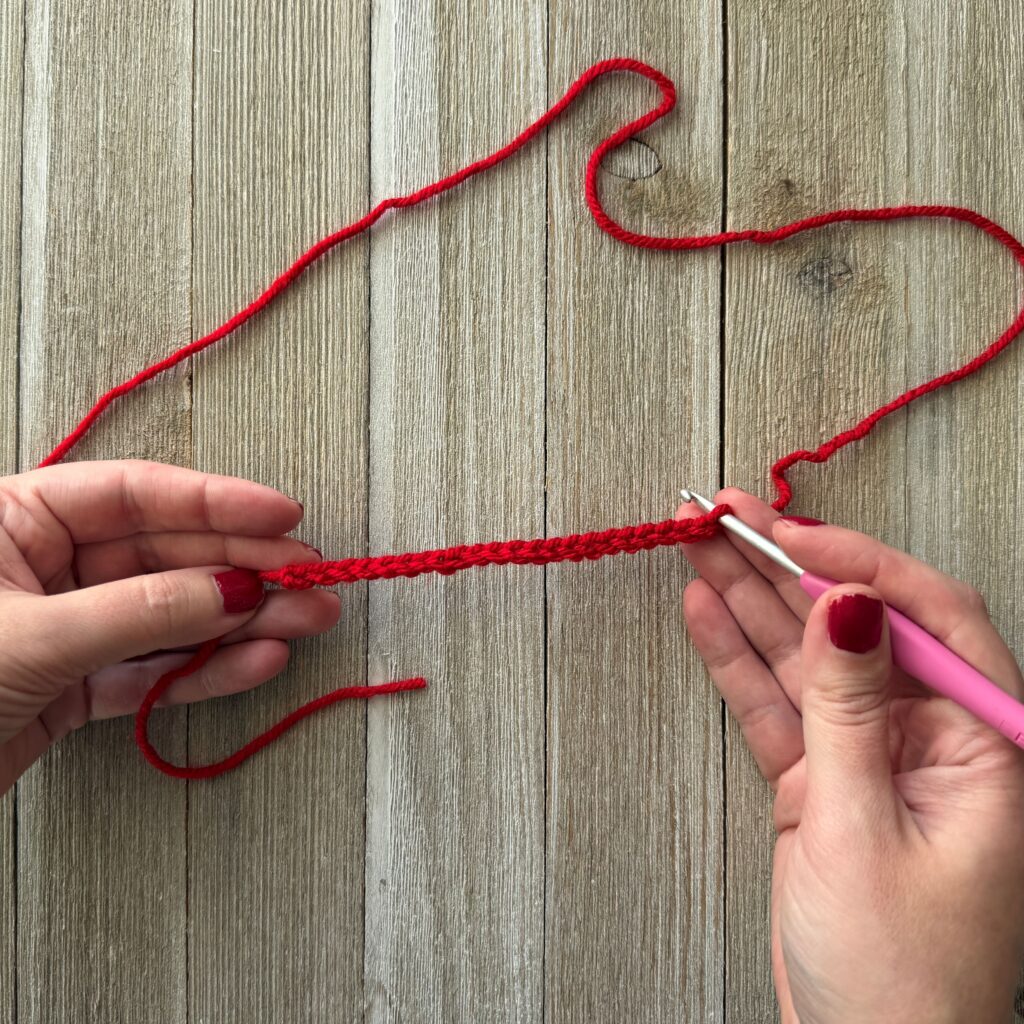
Chain 22.
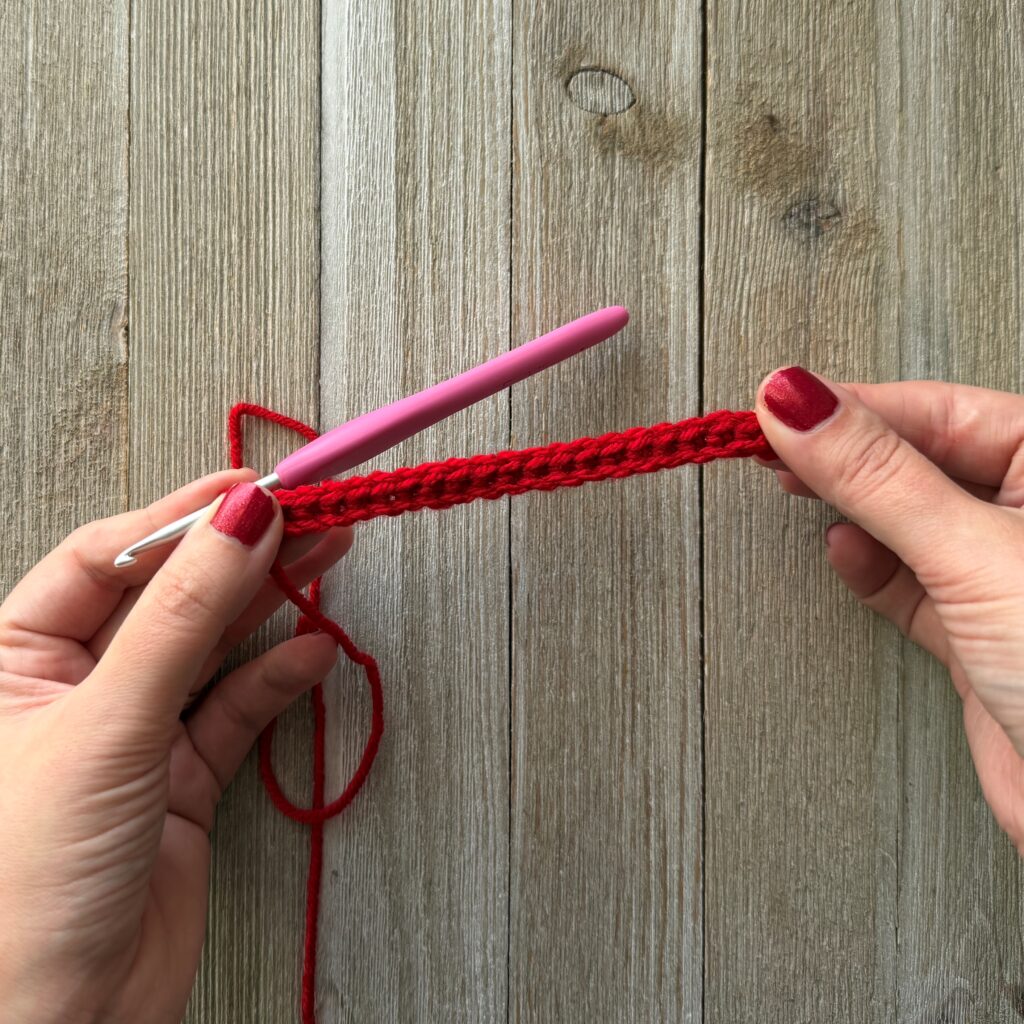
SC in the 3 chain from hook. SC in each across. Turn. (20 SC)
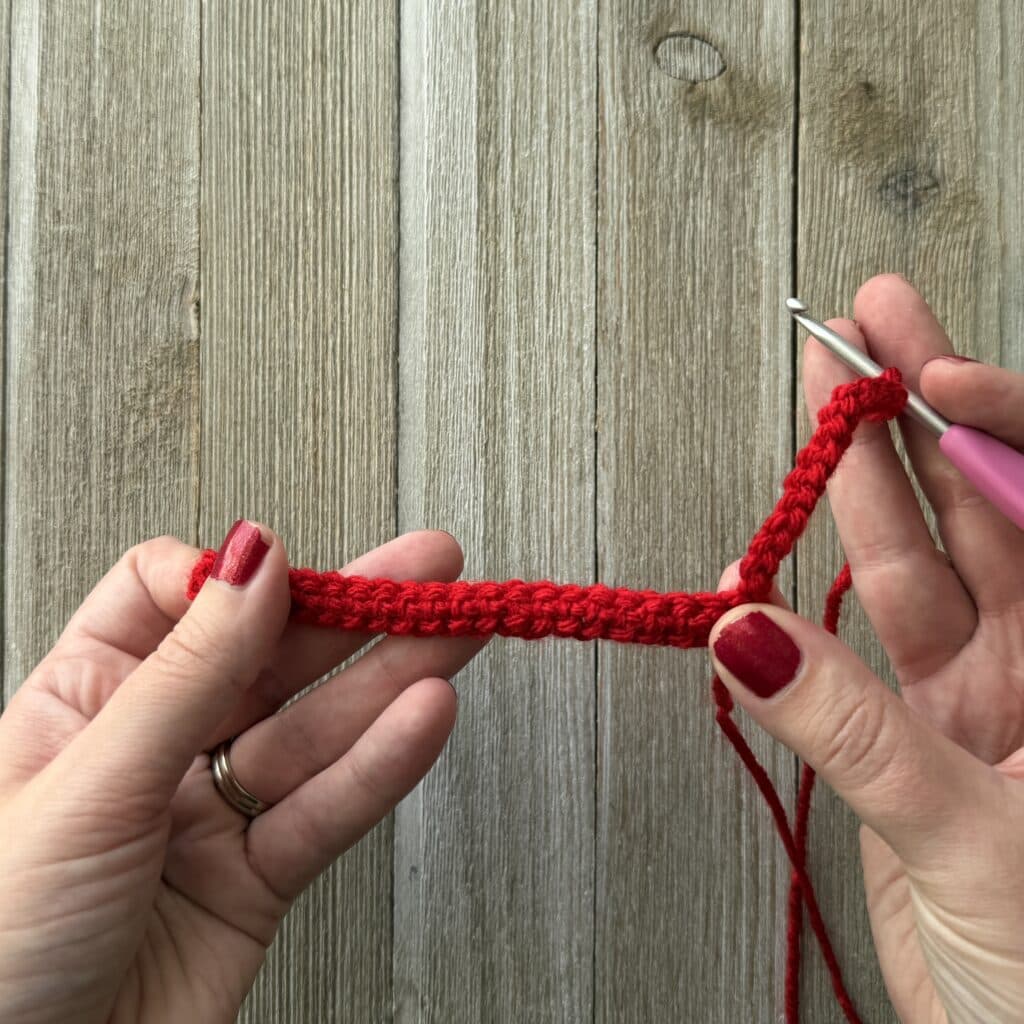
Chain 15. Count 9 SC over.
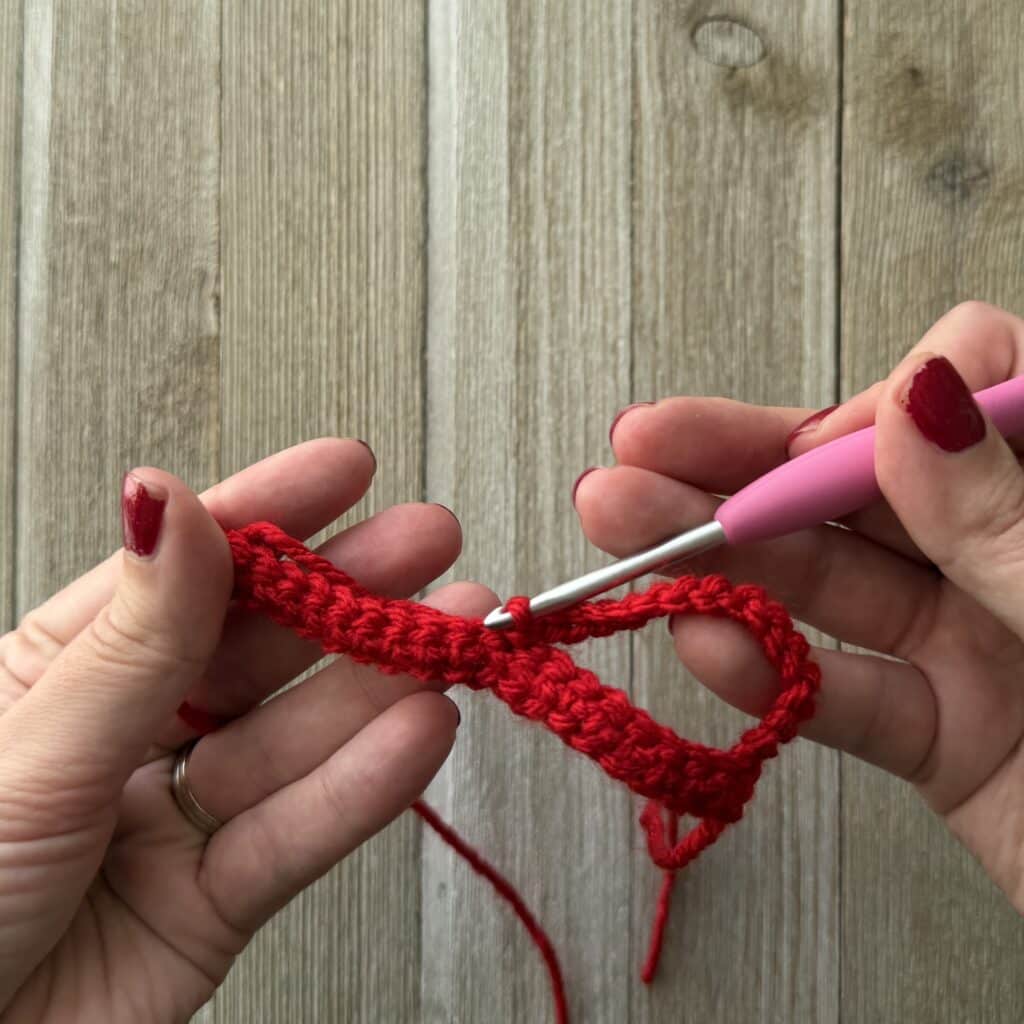
Slip stitch to that 9th SC. Slip stitch in the next 2.
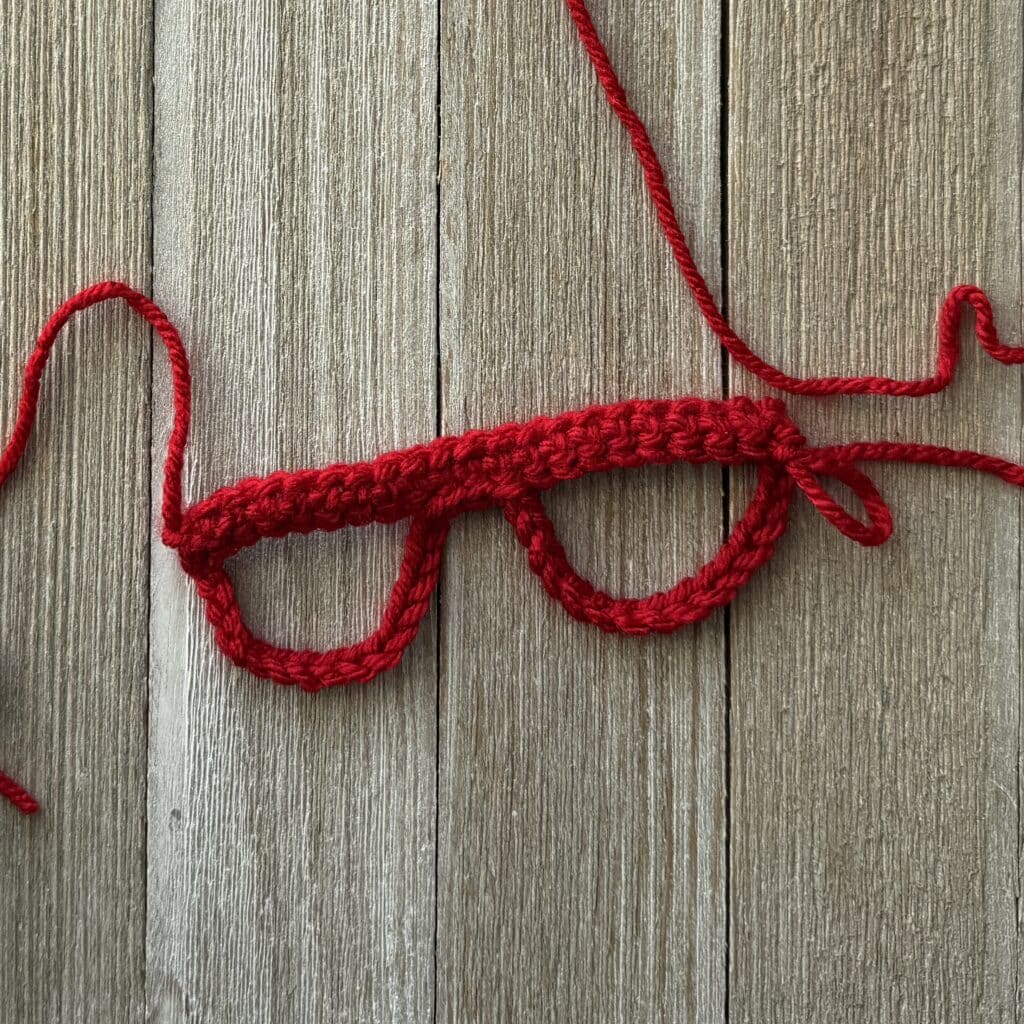
Chain 15 more and connect it with a slip stitch to the last SC.
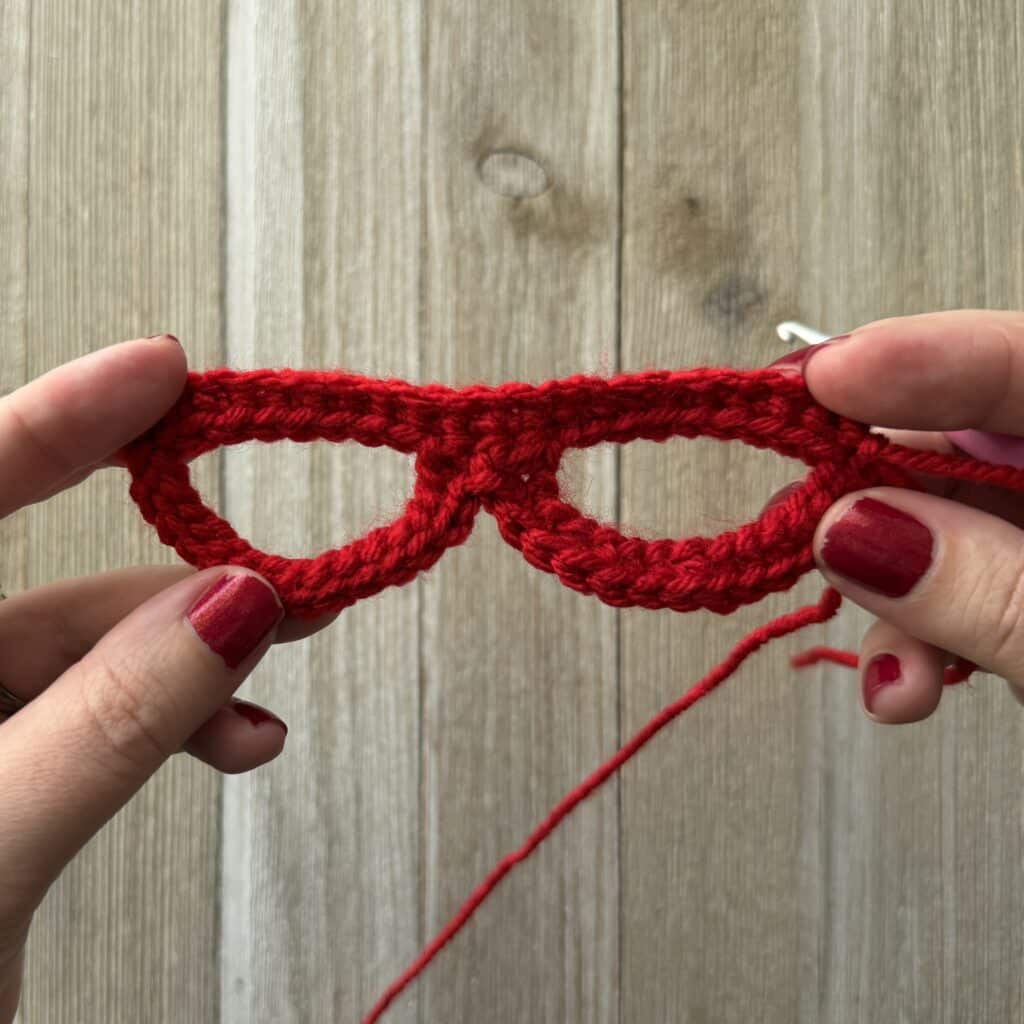
Chain 1 and turn. SC in the next 15 chains. Then slip stitch in the middle. SC in the last 15 chains and then slip stitch to the last SC.
Neck Strengthener
Using the Skin Color:
In a magic circle, SC 7. SC in each around for a total of 7 rows. Fasten off and leave a long tail. You will need this before you stuff the head. You can check out the video here!
Legs (make 2)/Body
Starting with the legs and using the accent color:
Round 1: 10 in a magic circle.
Rounds 2-5: SC in each around. (10) *4 rounds*
Change to body color.
Stuff the legs as you go. It is easier to do it a little at a time, rather than stuffing at the very end.
Rounds 6-15: SC in each around. (10) *8 rounds*
(15 rounds total for each leg)
Fasten off the first foot. On the second foot, chain 2 and slip stitch to the first leg where you fastened off.
Round 16: SC in each stitch around the first leg (10). SC in each chain across. (2) SC in each stitch around the second leg. (10) SC on the other side of the chain. (2) Attach to the first SC with a slip stitch. (a total of 24)


Body (cont’d) to Head
Rounds 17-18: SC in each around. (24)
Change to accent color.
Round 19: SC in each around. (24)
Change back to main color.
Rounds 20-22: SC in each around. (24)
Round 23: SC in the first, INV DEC in the next. Repeat around. (16)
Rounds 24: SC in each around. (16)
Change to skin color in the next round.
Make sure that you are changing color in the back, the opposite of what side the shoes and belt look the best.
Begin to stuff here. Continue to stuff as you close.
Round 25: SC in each around. (16)
Begin to stuff here the body here. Continue to stuff as you close.
Round 26: INV DEC 8 times. (8)
Round 27: SC in each around. (8)
Round 28: In the front loop only, SC INC. (16)
Round 29: SC in the first, SC INC in the next. Repeat around. (24)
Round 30: SC in the first two stitches, SC INC in the next. Repeat around. (32)
Rounds 31-35: SC in each around. (32) *5 rows*
Insert the neck strengthener here. See video for help! Attach the eyes between rounds 33 and 34, about 6 stitches apart. Stuff as you close. (see this video for how to make the head more round)
Round 36: SC in the first 2, INV DEC in the next. Repeat around. (24)
Round 37: SC in each around. (24)
Round 38: SC in the first. INV DEC in the next.. Repeat around. (16)
Round 39: INV DEC 8 times. (8)
Finish stuffing well here. Fasten off and sew the remaining hole closed.
Nose (optional)
Embroider the nose with the skin color yarn, between the eyes, one round down. I only do two passes 2-3 stitches wide with this thick yarn.
Arms (make 2)
In skin color:
Leave unstuffed
Round 1: 8 SC in a magic circle. (8)
Round 2: SC in each around. (8)
Change to accent color
Round 3: SC in each around. (8)
Change to main color.
Rounds 4-10: SC in each around. (8)
Fasten off and leave a long tail to sew the arms on. Close the opening and sew them on between rounds 23 and 24.
My favorite limb attachment method can be found here!
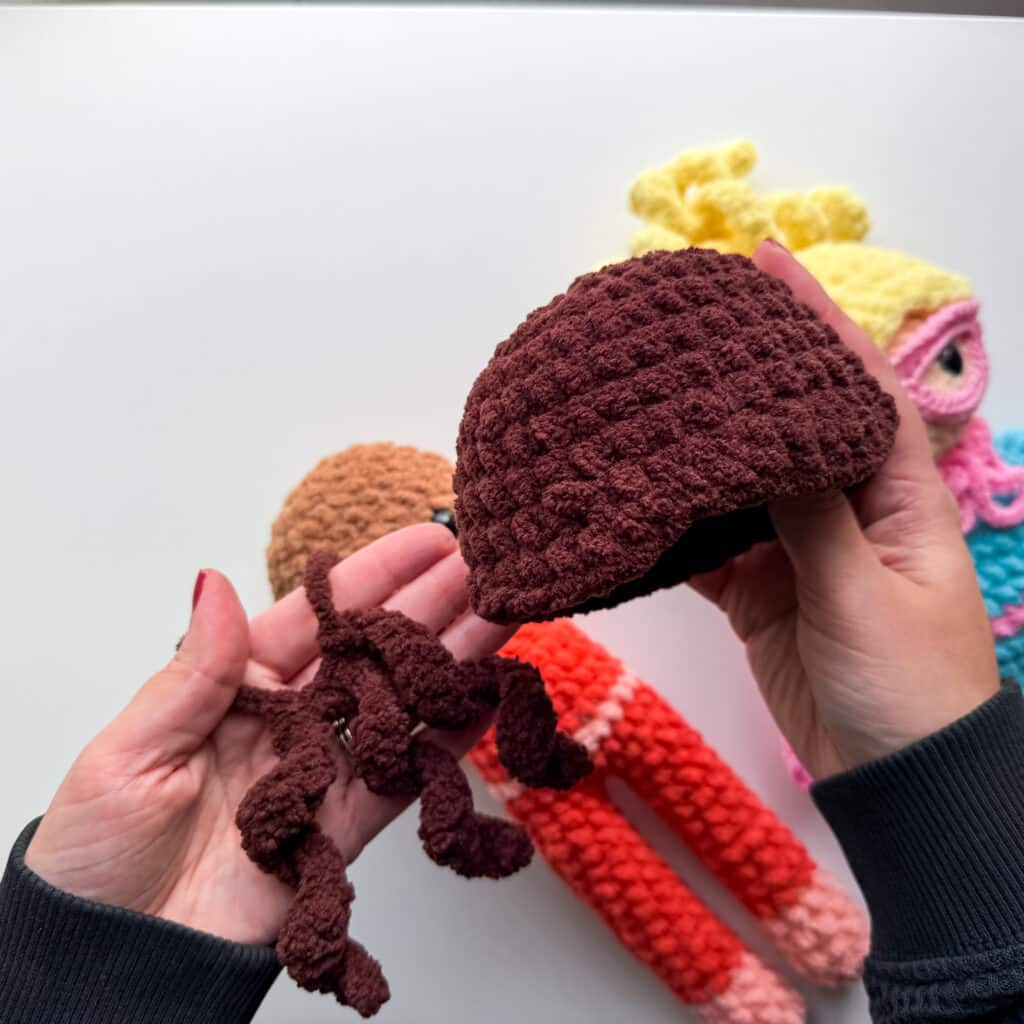
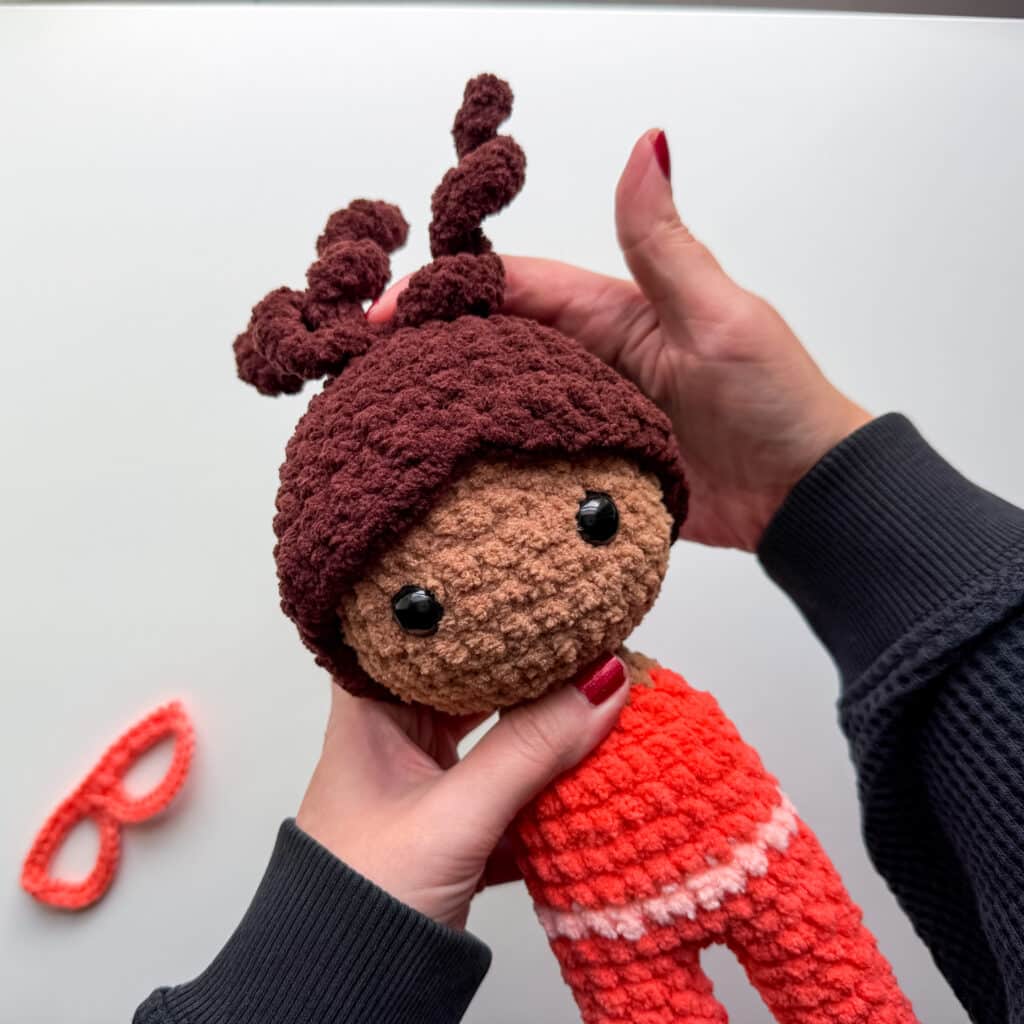
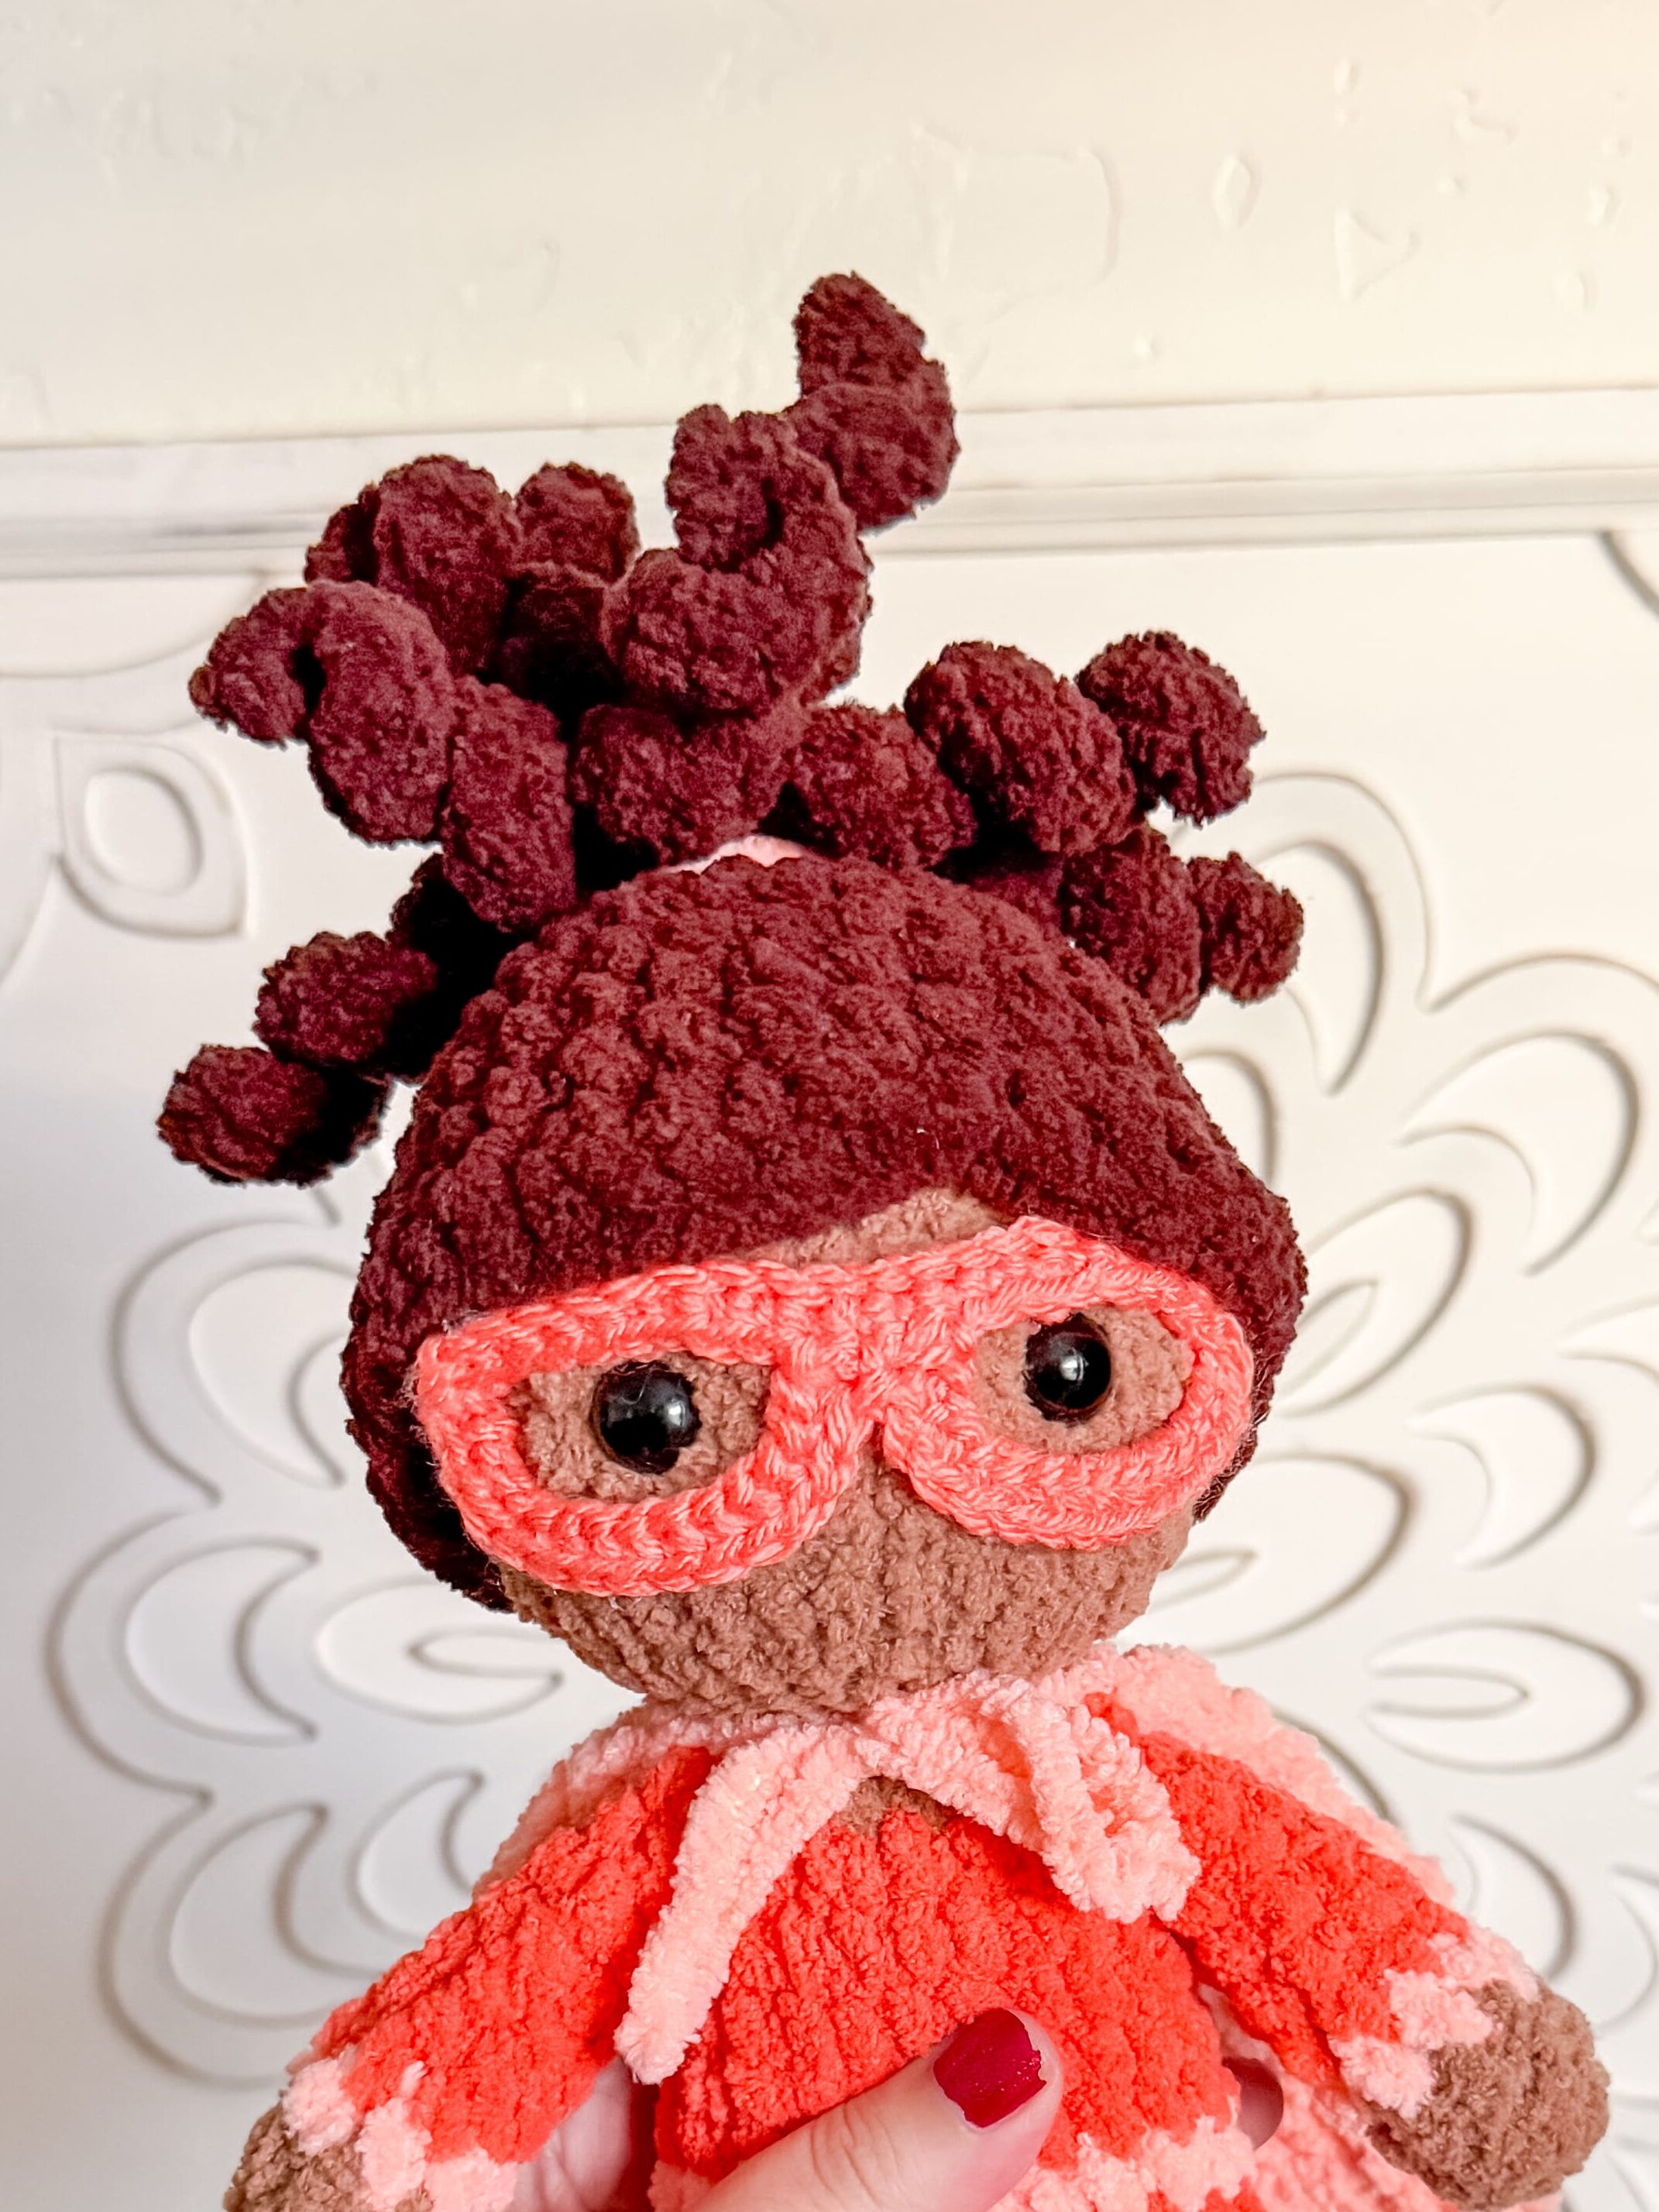
Girl’s Hair
You may need to adjust your hook size here. Different types of yarn work up differently. Stretch the hair out as you try it on OR size up if it works up too tightly. If you need to, add one more row before you get to round 8.
Round 1: In a magic circle, SC 8.
Round 2: SC INC in each around. (16)
Round 3: SC in the first, SC INC in the next. Repeat around. (24)
Round 4: SC in the first 2, SC INC in the next. Repeat around. (32)
Rounds 5-7: SC in each around. (32)
Round 8: HDC, HDC INC, DC, DC INC, DC, DC INC, skip a stitch and slip stitch in the next. Skip a stitch and DC INC, DC , DC INC, HDC. SC in the remaining stitches.
Fasten off and attach with the “part” on an angle.
Note: I sometimes use a hot glue gun to glue the top so it doesn’t shift and then sew the bottom edge.
Pony Tail
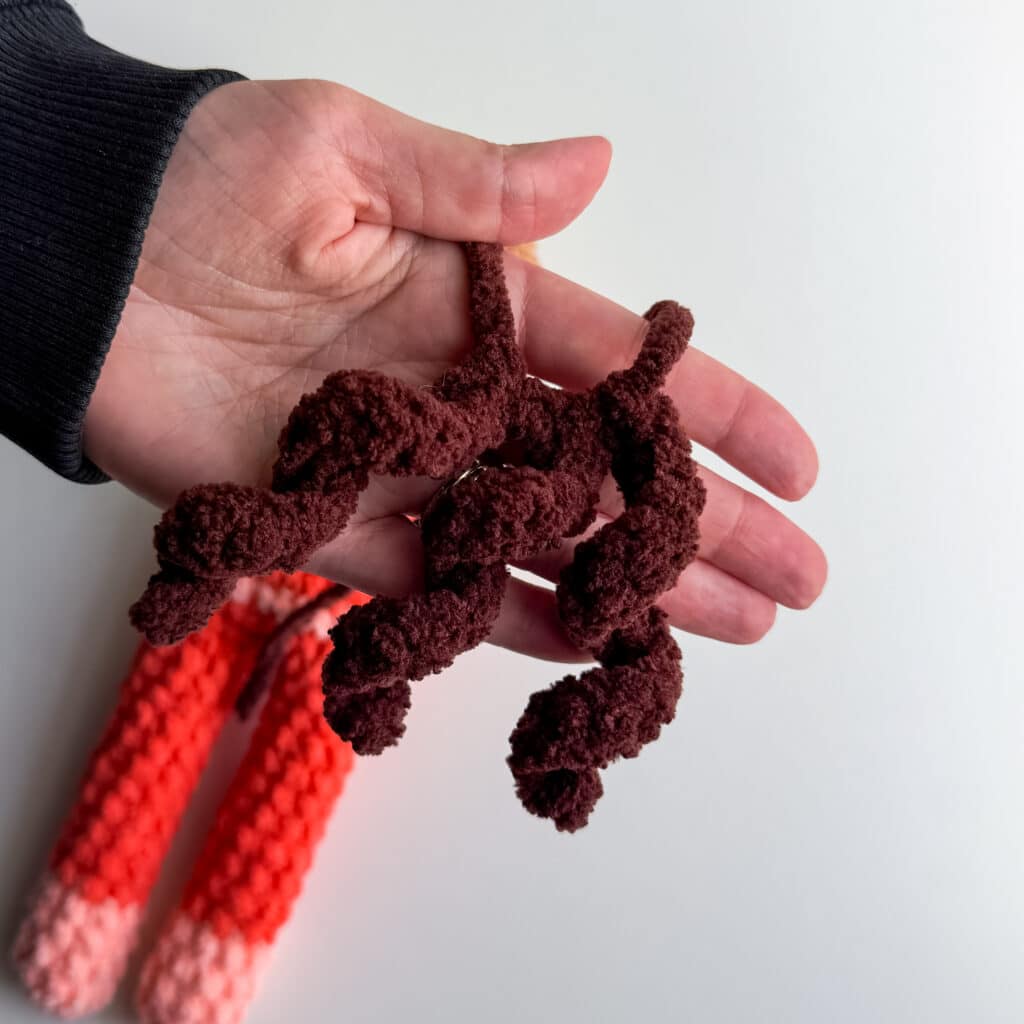
Leaving a small tail, chain 20 times. Turn and SL ST in each chain back to the top. Chain 20 again and repeat, until you have 3 tails. Fasten off and leave a tail.
Then make four of these. Pull the tails of each set through the “hair wig” and sew them on in a circle. I place the cap on the head first to make sure I like the placement. I sewed them a couple rounds up from the center.
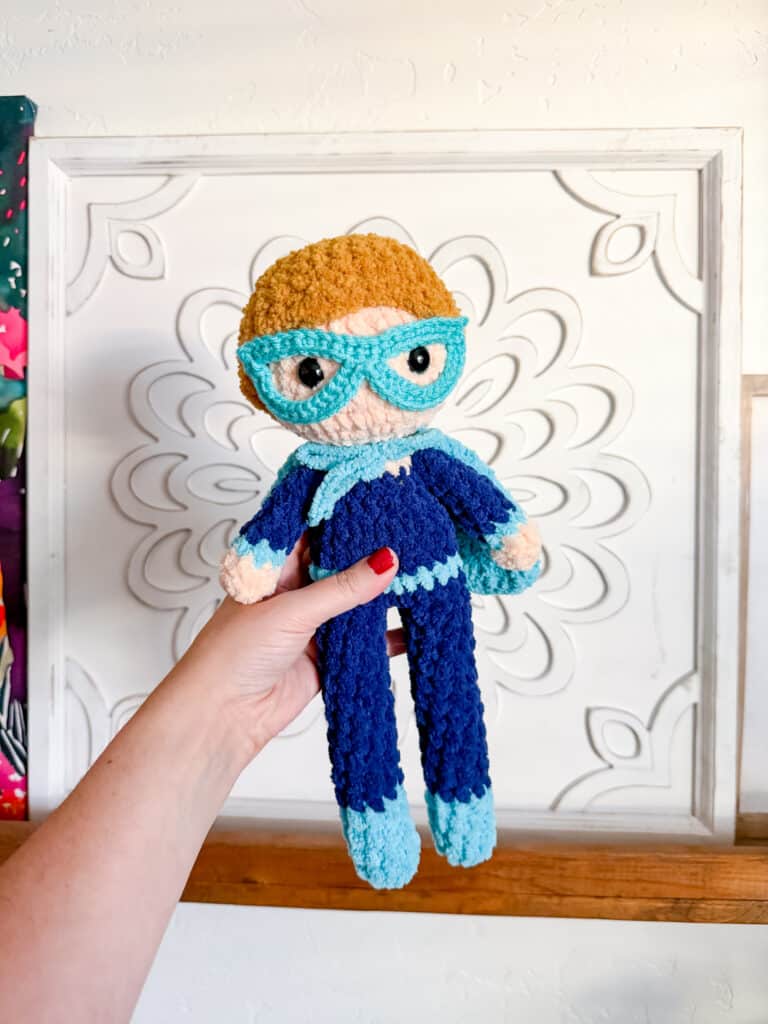
Boy’s Hair
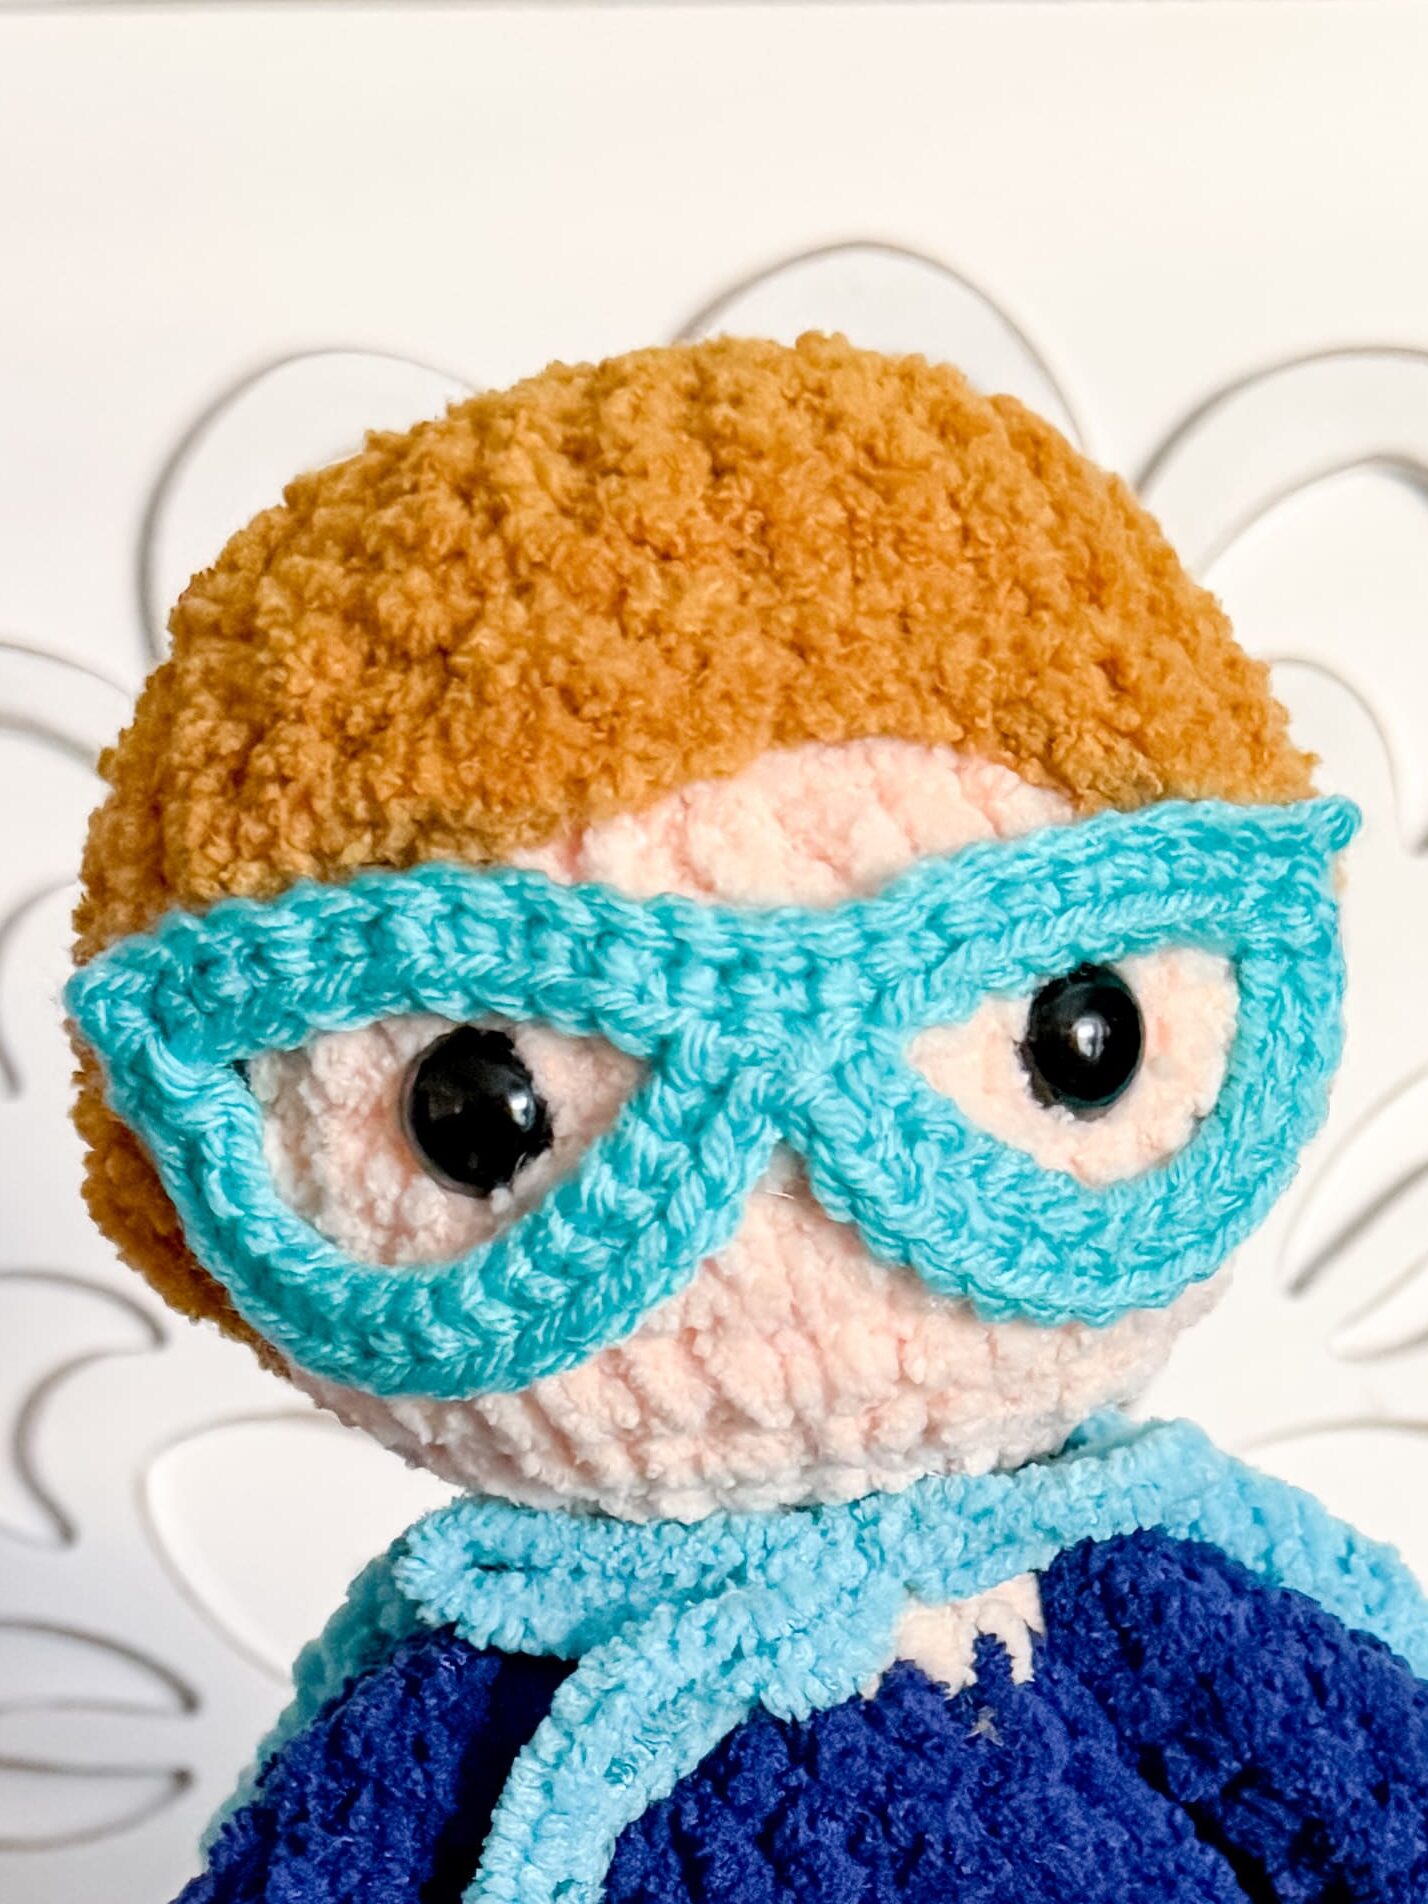
You may need to adjust your hook size here. Different types of yarn work up differently. Stretch the hair out as you try it on OR size up if it works up too tightly. If you need to, add one more row before you get to round 8.
Round 1: In a magic circle, SC 8.
Round 2: SC INC in each around. (16)
Round 3: SC in the first, SC INC in the next. Repeat around. (24)
Round 4: SC in the first 2, SC INC in the next. Repeat around. (32)
Rounds 5-7: SC in each around. (32)
Round 8: SC, SC INC, HDC, HDC INC, HDC, HDC INC, skip a stitch and slip stitch in the next. Skip a stitch and HDC INC, HDC , HDC INC, HDC. SC in the remaining stitches.
Fasten off and attach with the “part” on an angle.
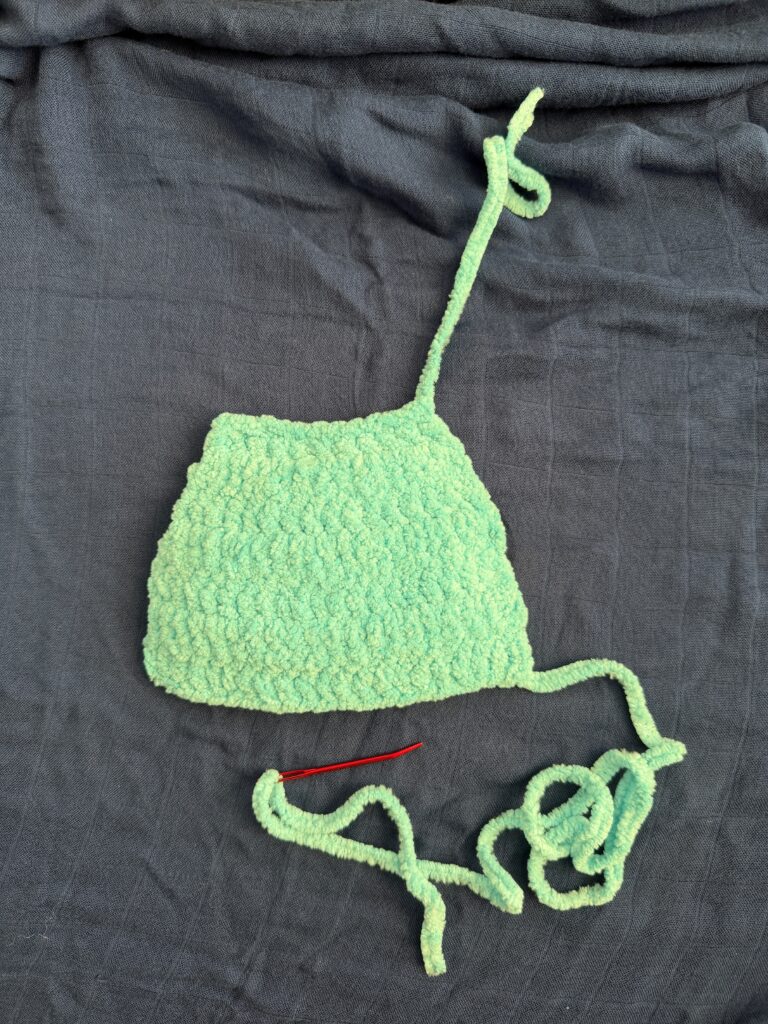
Cape
Chain 12.
Row 1: In the third chain from the hook, DC. DC in the remaining 9 chains. Chain twice and turn. (10)
Row 2: DC in the first, DC INC in the next stitch. Repeat to the end. Chain twice and turn. (15)
Row 3: DC in each across. (15)
Row 4: DC in the first two, DC INC in the next stitch. Repeat to the end. Chain twice and turn. (20)
Rows 5-7: SC in each across. (20)
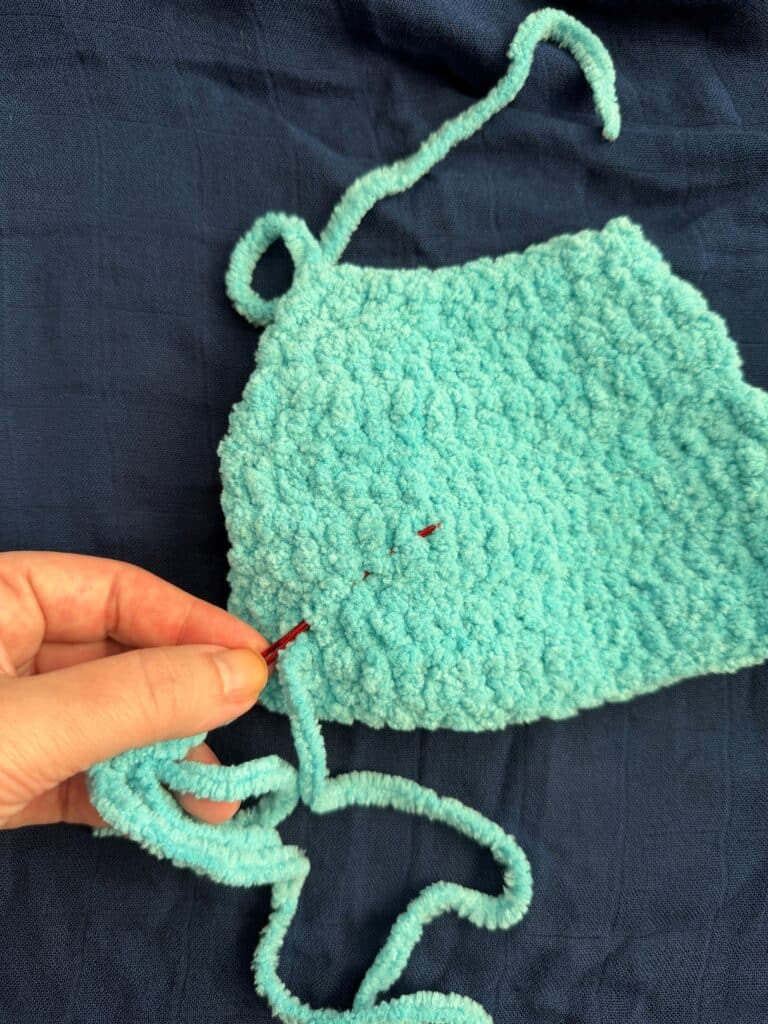
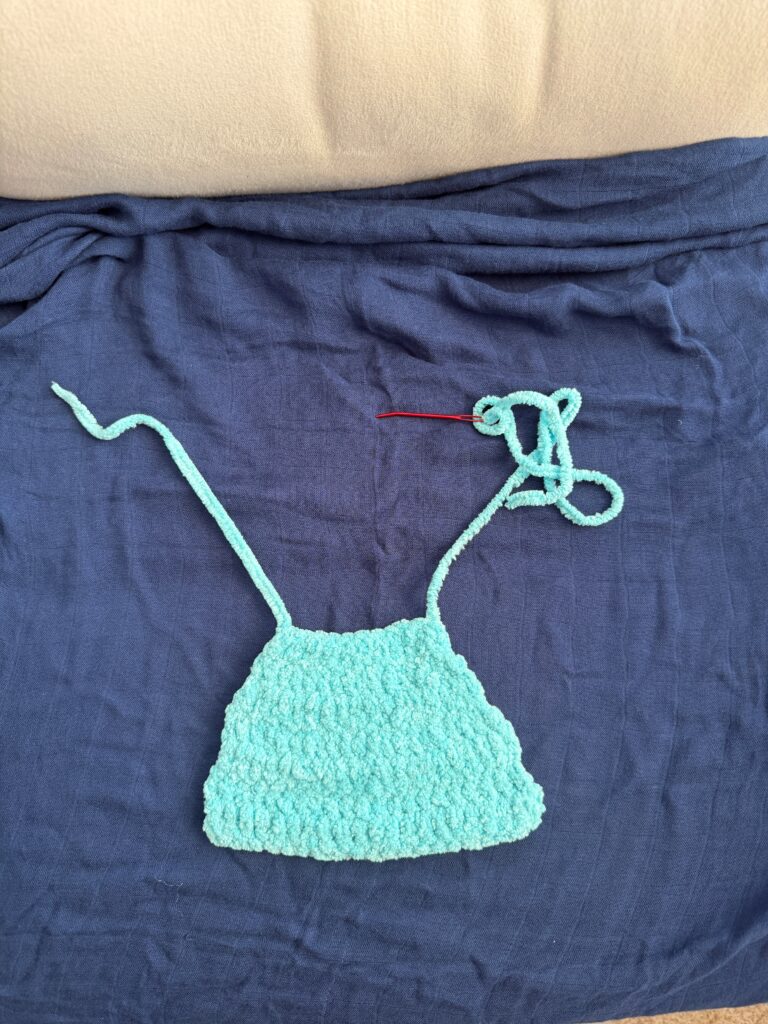
Leave a LONG tail and finish off. Weave your bottom tail through to the opposite corner on top. Use as the other string and tie it on your superhero!
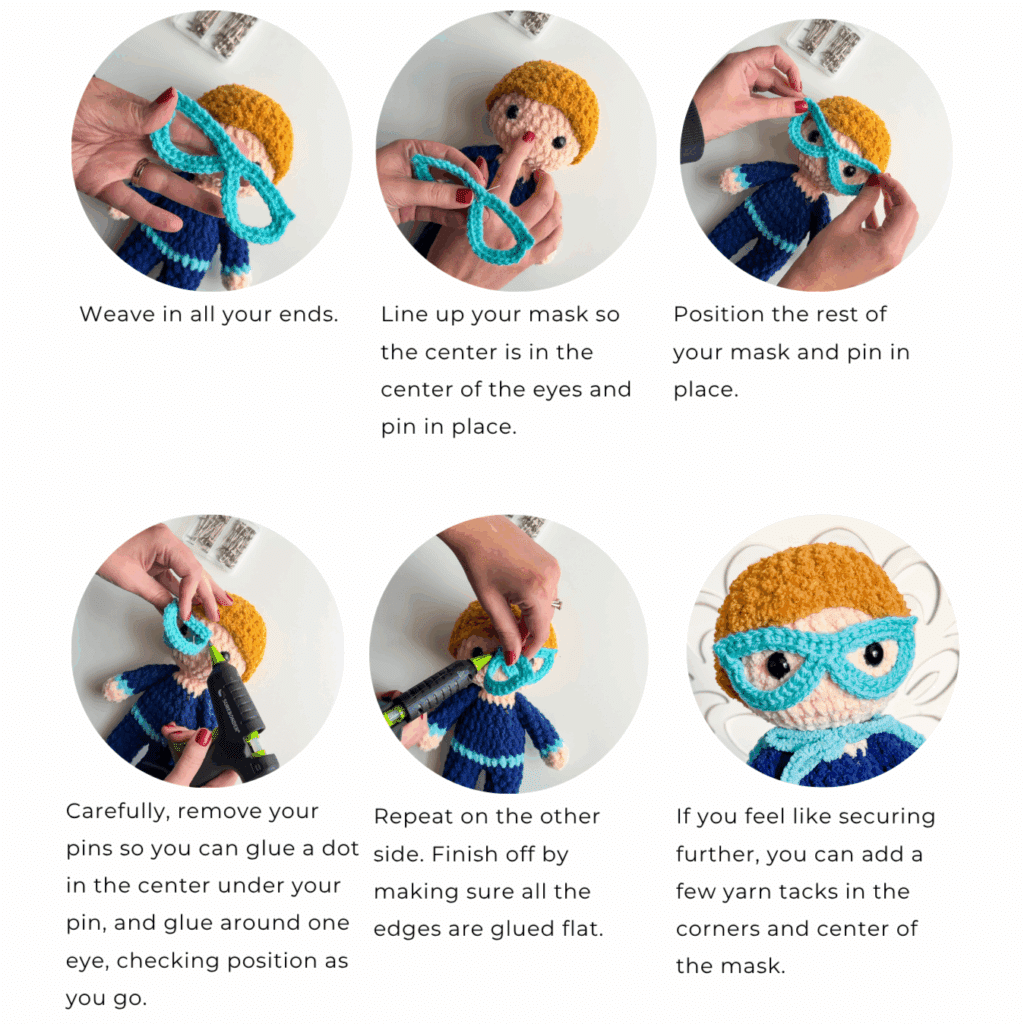
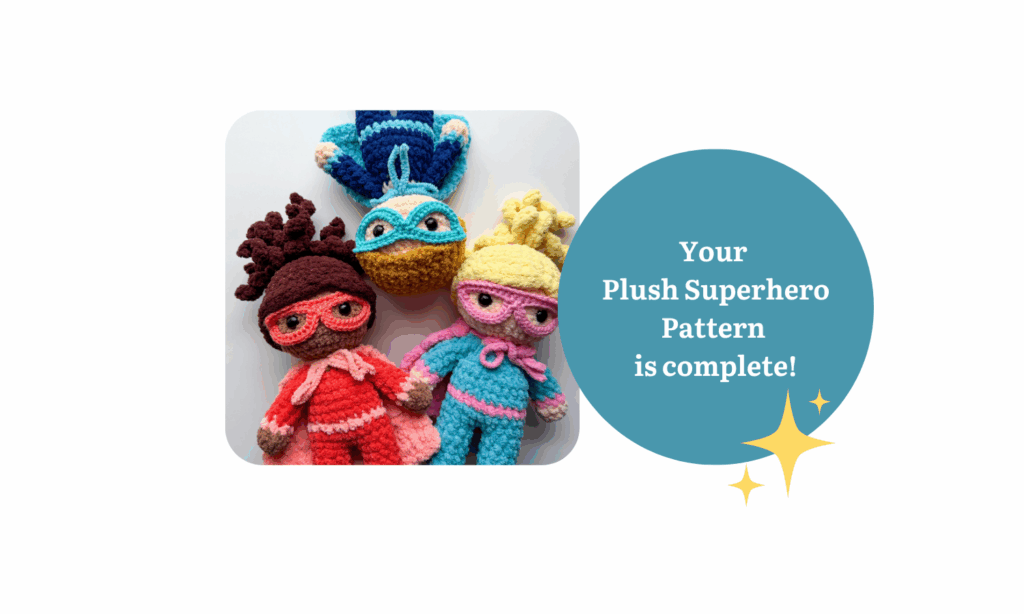
Attaching the Mask (see video here)
Want the Ad-free, Printable PDF?
You can find it in one of my stores!
Did you make this pattern?
Mention me @thefriendlyredfox so I can see your Plush Superhero Crochet Pattern creations! You can also leave a comment below!
Just love these superheros. Thank you for creating this pattern and that you’ve made it easy to red nd creat. 💜
oh! they look lovely! <3 thank you for inspiration and sharing the pattern :* – saved on my 'to do list' 🙂