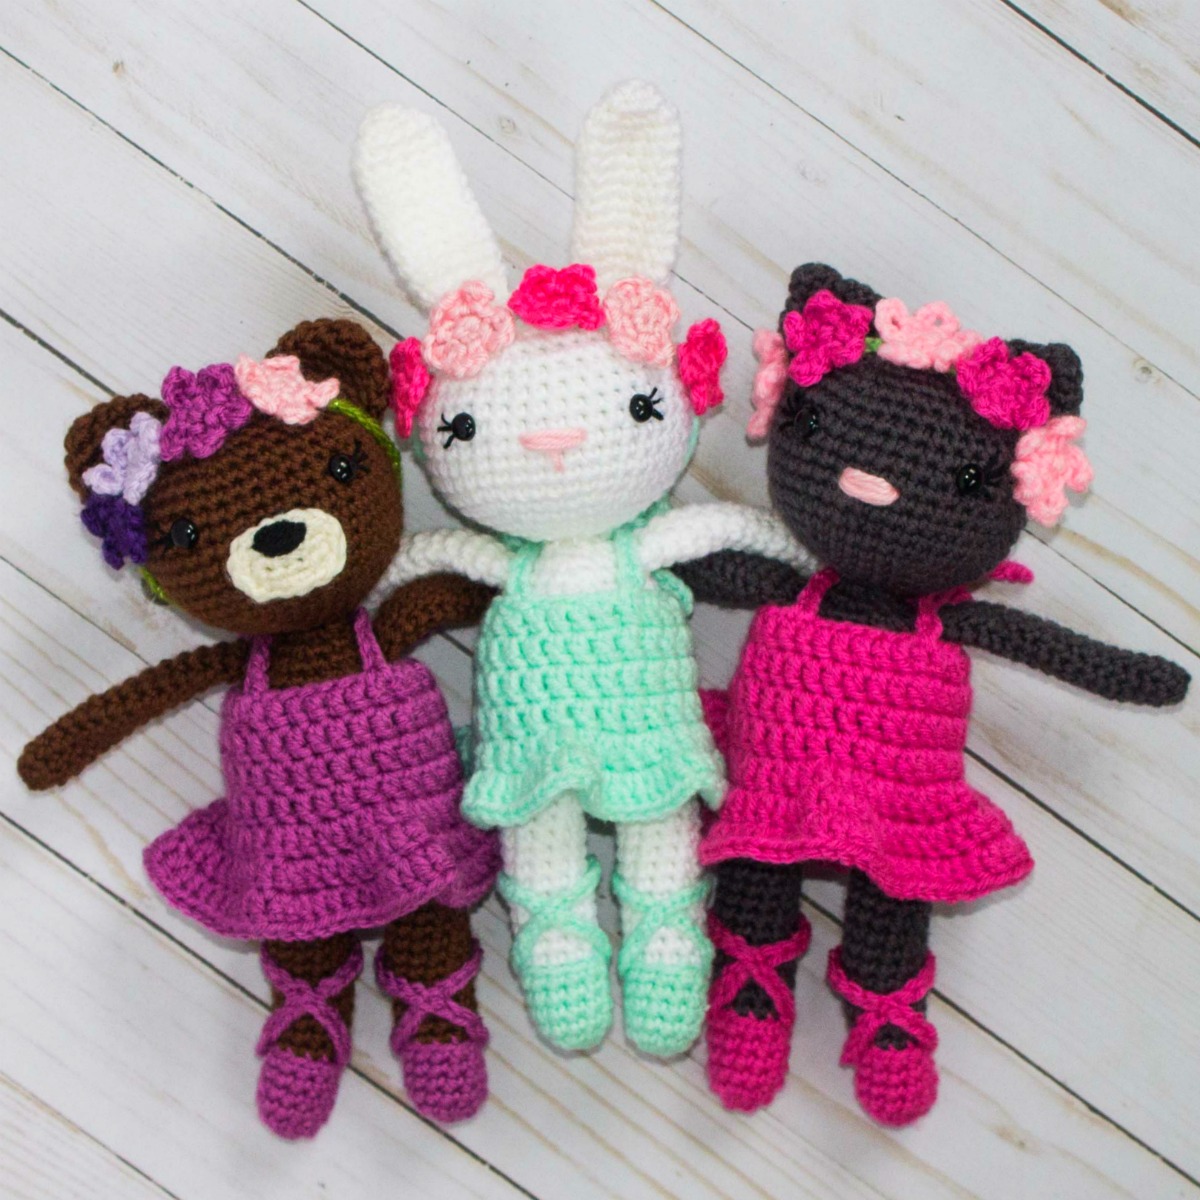
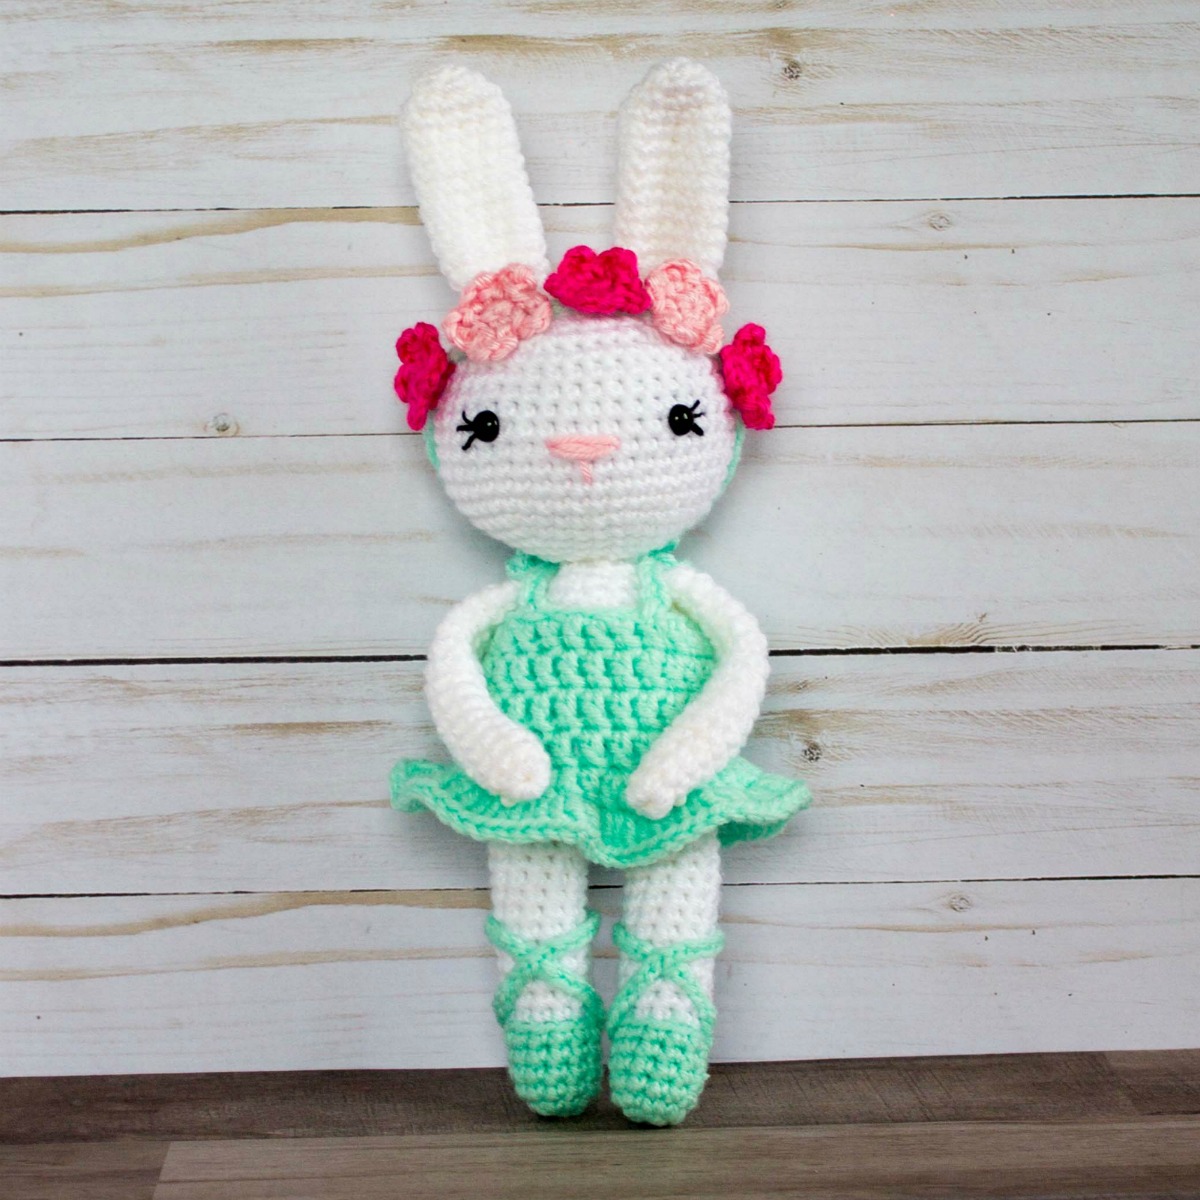
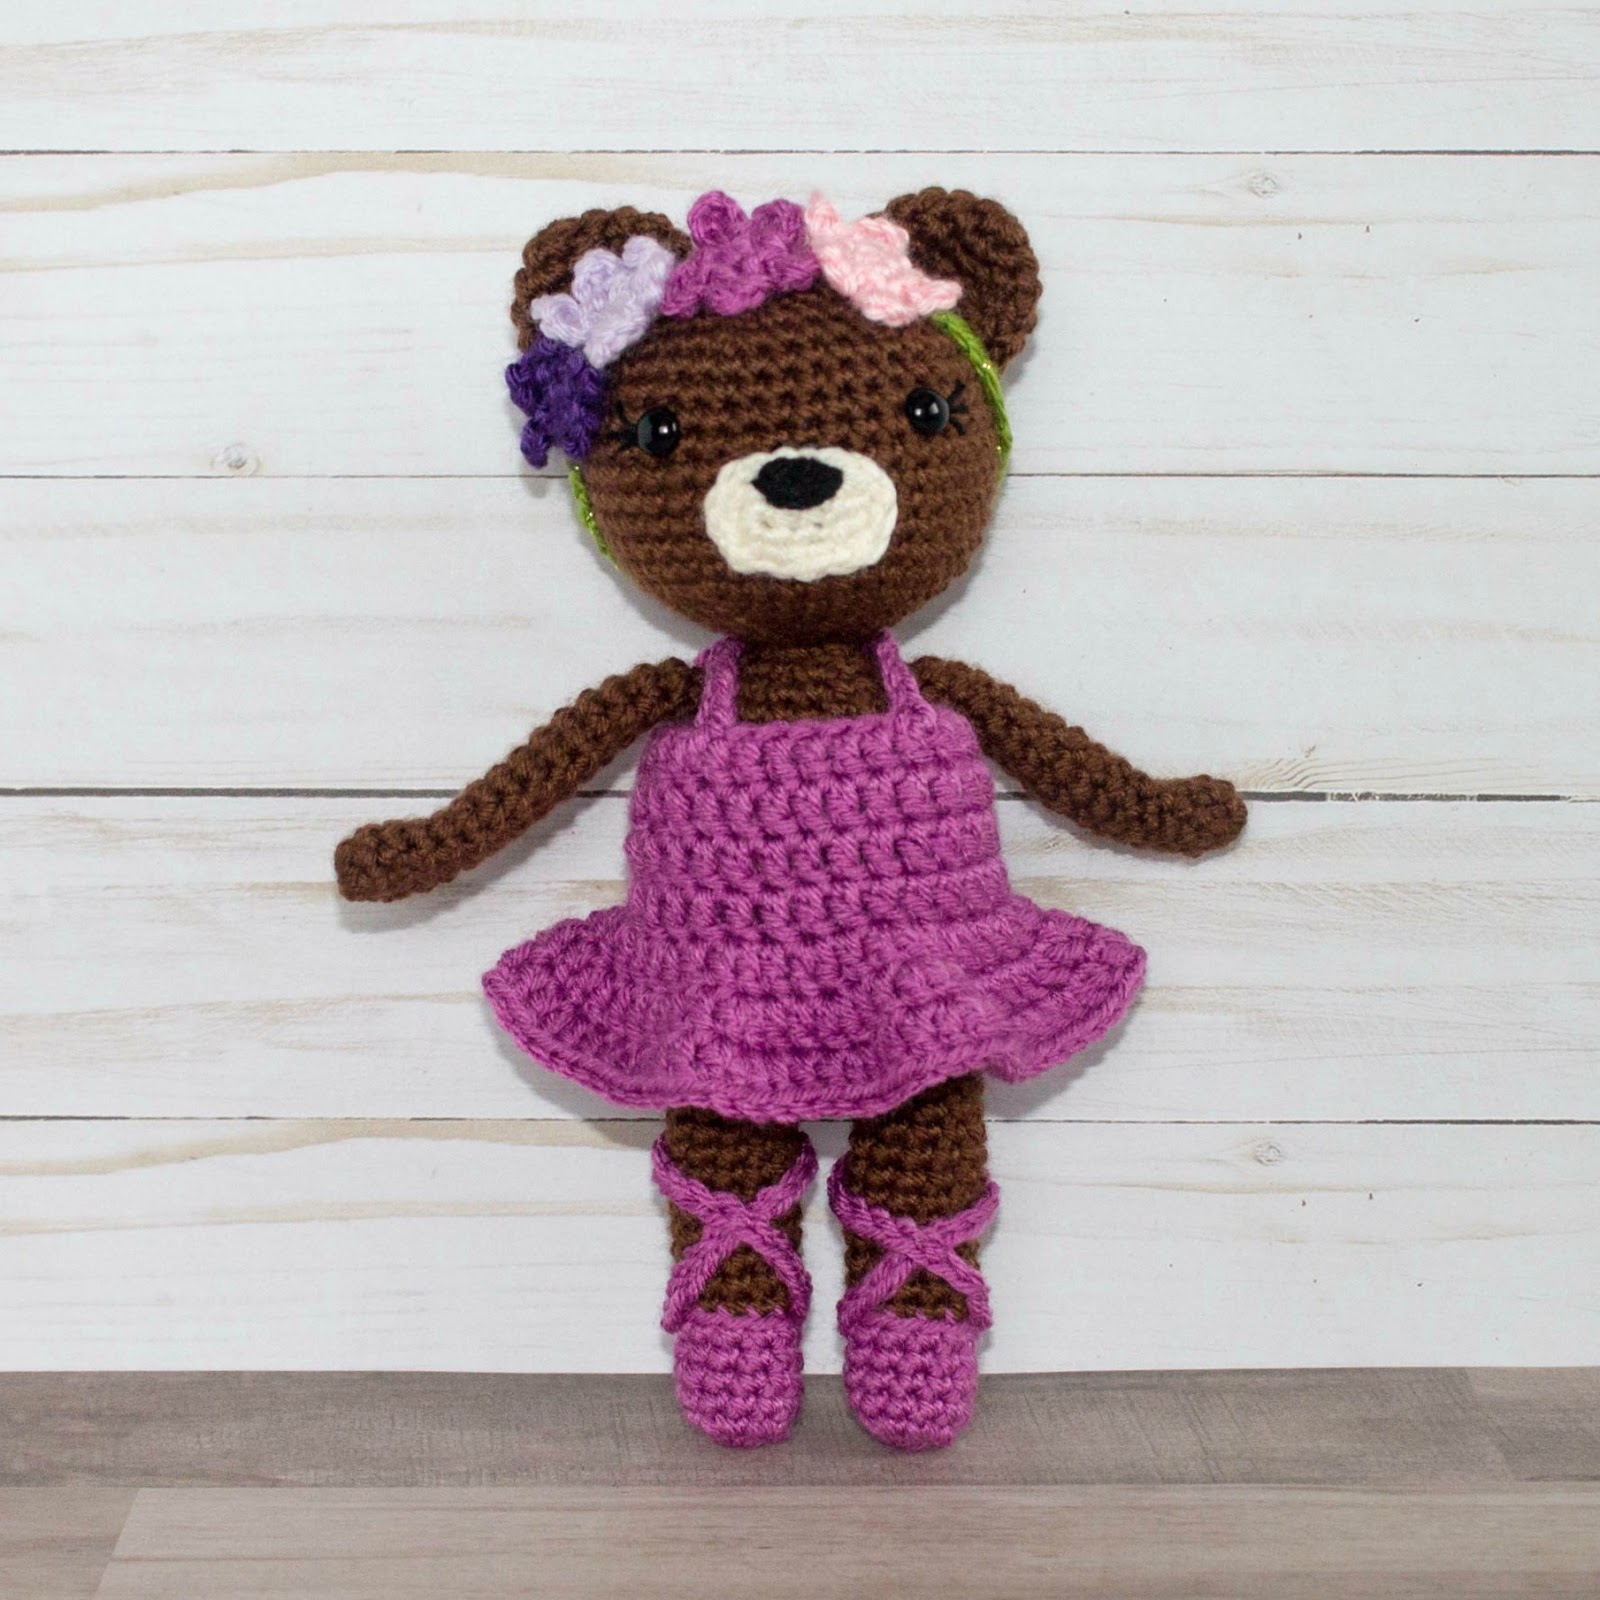
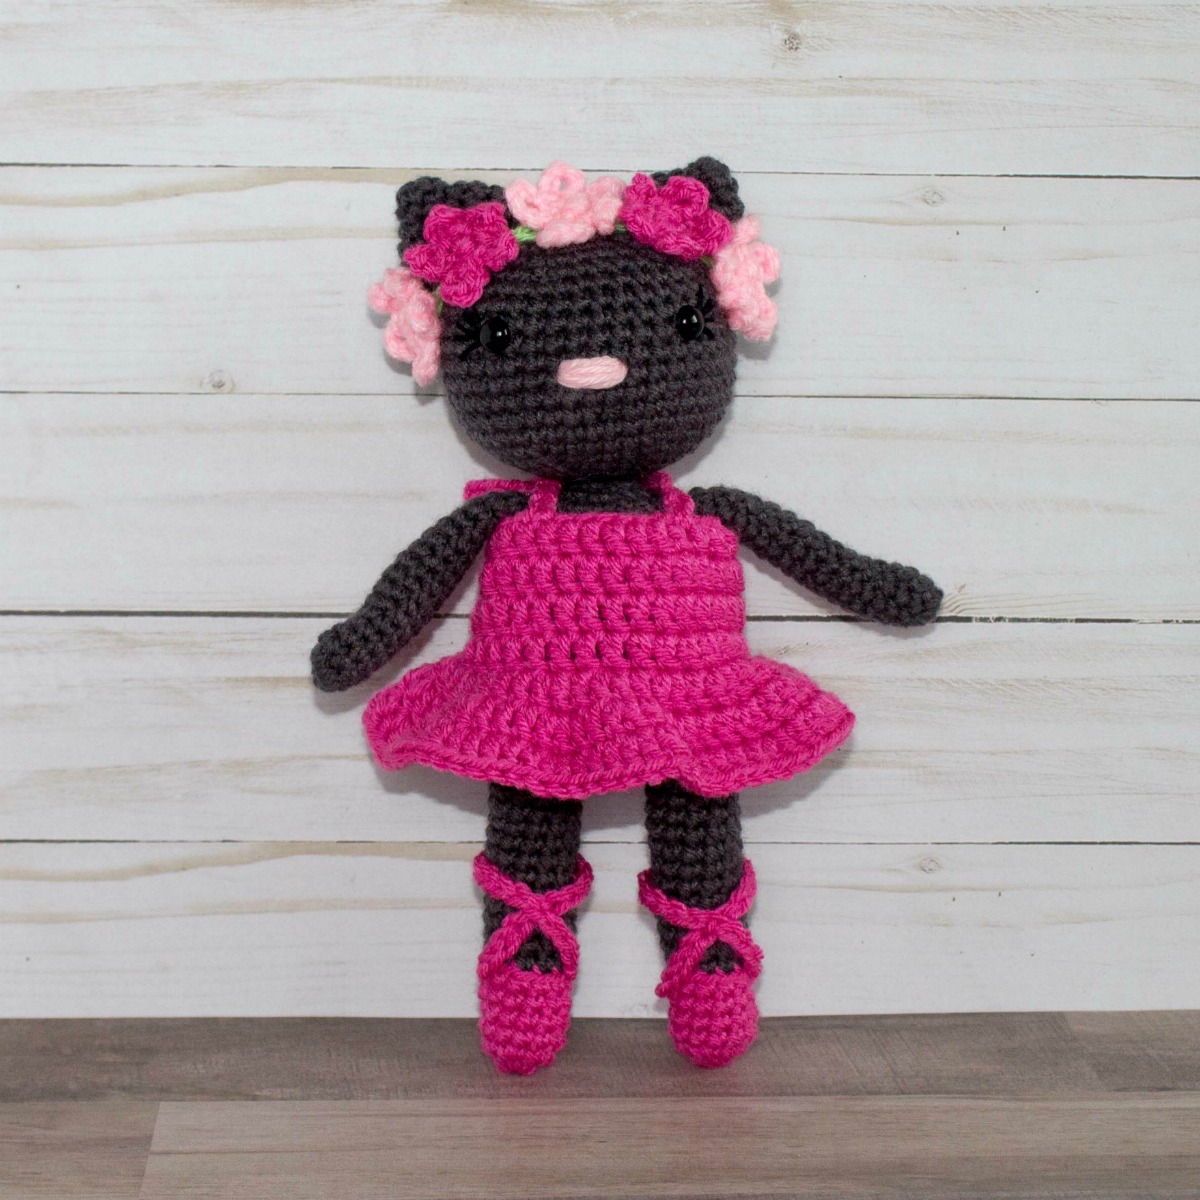
Free Pattern Mini Ballerina Animal Crochet Dolls
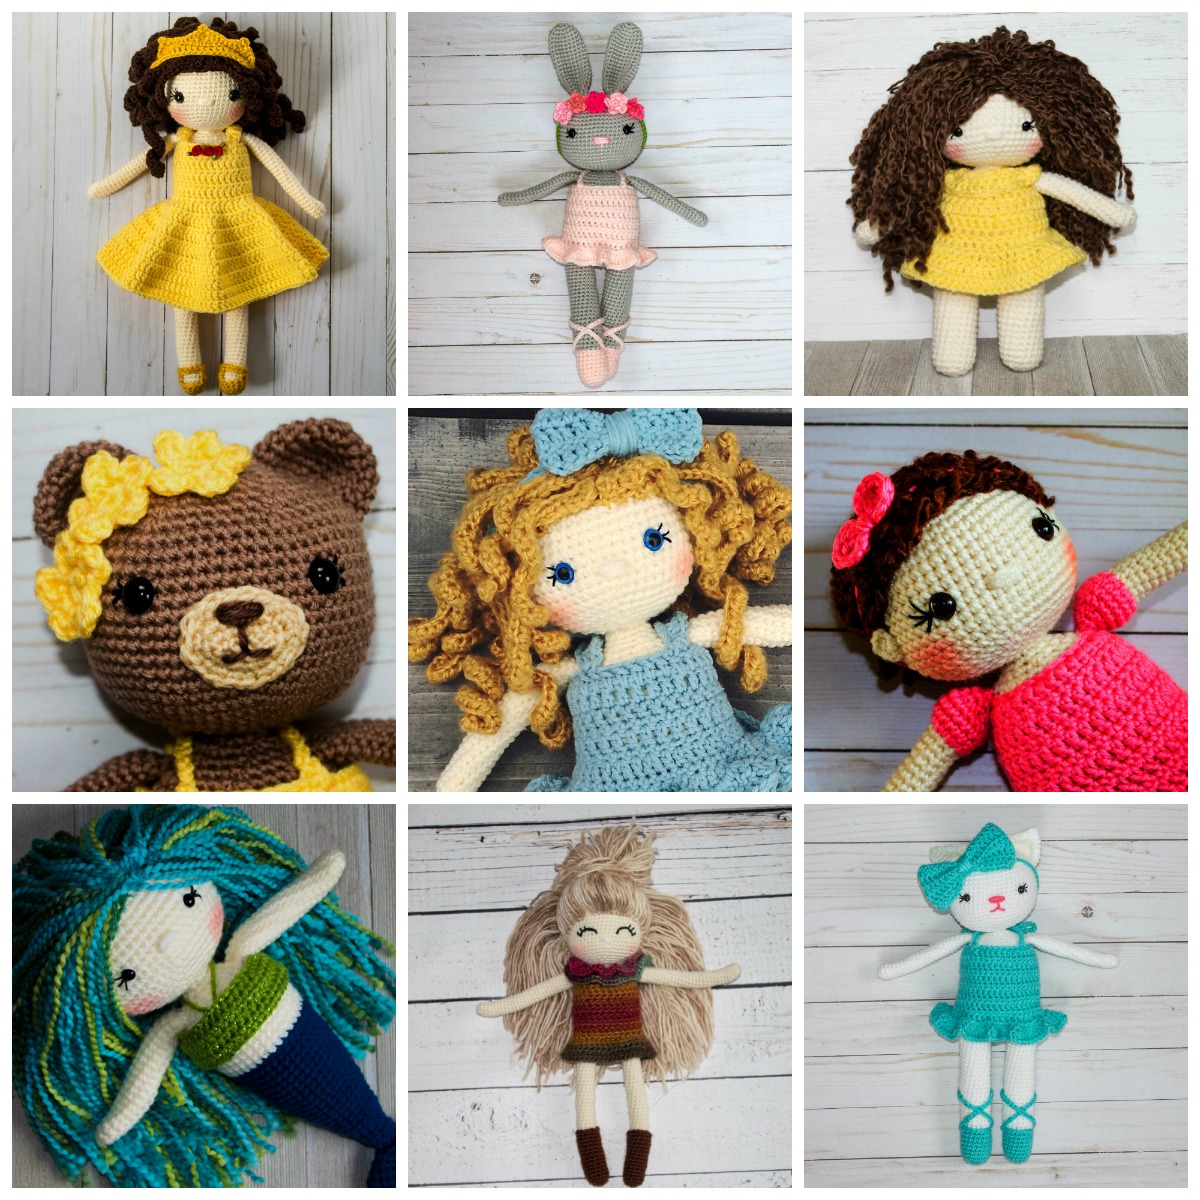
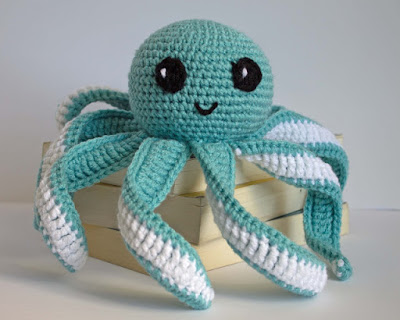
These little crochet dolls came to be by a happy accident… I was playing around with the idea of a smaller bunny, my facebook group told me they needed the pattern, and I am a sucker for anything mini! (see my mini octopus and giraffe!) but I couldn’t stop there and next thing I knew, there was a bear and a kitty.
The Mini Ballerina Animals are about 9 inches tall from slipper to ear and 3 inches wide. These animals are the perfect dolls for little girls who dream of being a ballerina. For this pattern, I recommend using size 4 worsted weight yarn in whatever color you prefer. This pattern comes with the bunny, bear, kitty, dress, flowers and slippers.
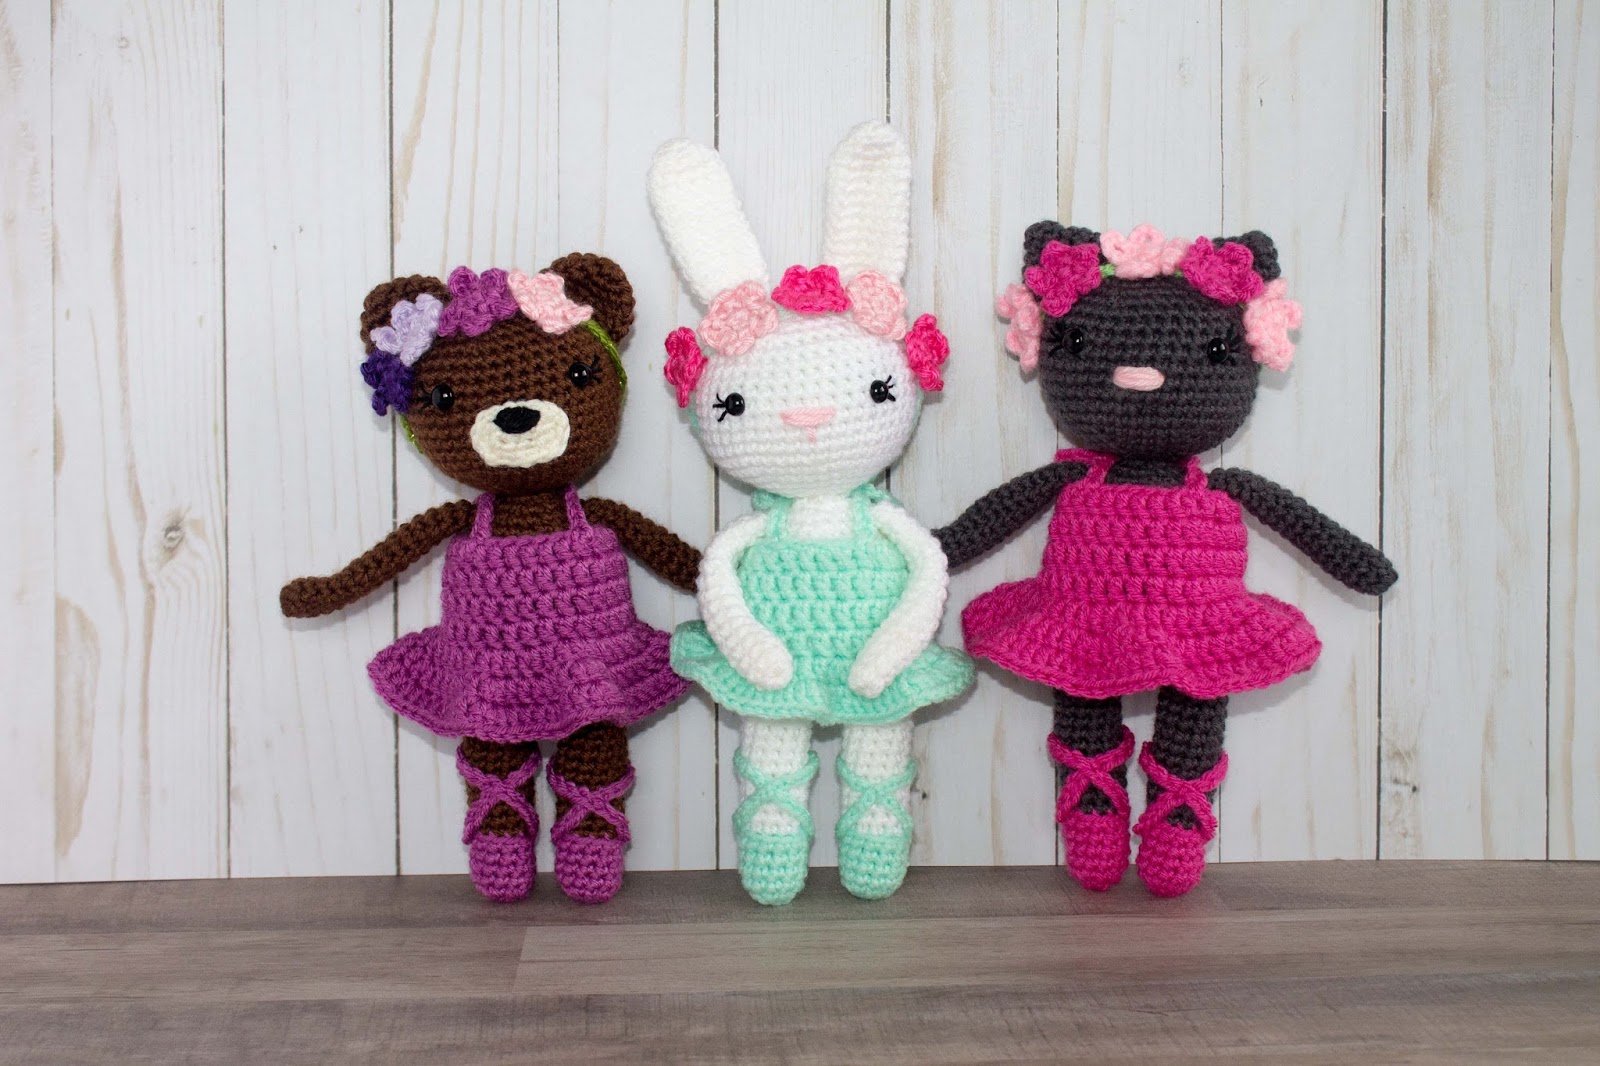
You will love how quickly these work up… much faster than the original Ballerina Animals but with all the cute! You can make them all and in all the colors. Now I love the originals, I think they are the perfect size for a doll, but sometimes you need something quick! 🙂

[thrive_leads id=’2591′]
Please note this pattern is only for PERSONAL USE. Please feel free to make as many
items as you wish for yourself, or as gifts. You may sell items made with this pattern but
PLEASE LINK BACK OR GIVE CREDIT TO ME AS DESIGNER. In no way can you
share, reproduce, or sell this pattern. Please respect my rights as designer.
Read through the entire pattern and the amigurumi tips and tricks before you begin.
You will need:
Approx 100 g size 4 yarn
Crochet Hook in Size 3.75
Tapestry Needle
Polyfil
9mm safety eyes
stitch marker
Yarn for bow and clothes
Abbreviations
SC– single crochet
SC INC– single crochet increase (2 SC in each stitch)
INV DEC–
Invisible decrease (put hook through the FRONT LOOP ONLY of two
consecutive stitches [two loops on hook] Yarn over pull through both
loops. [two loops on hook] Yarn over pull through two loops)
Magic Circle–
Make a loop, leaving a long tail to work with. Insert hook in center of
loop, yarn over and draw up a loop. Yarn over, pull through to make the
first chain (this does not count as a stitch!). Continue to crochet
over the loop and tail with the number of stitches called for. (If you
need 6 SC, then crochet 6 SC inside the ring.) Pull the tail to close
the circle.
Always move your stitch marker to the last stitch in the round. This pattern is worked in continuous rounds.
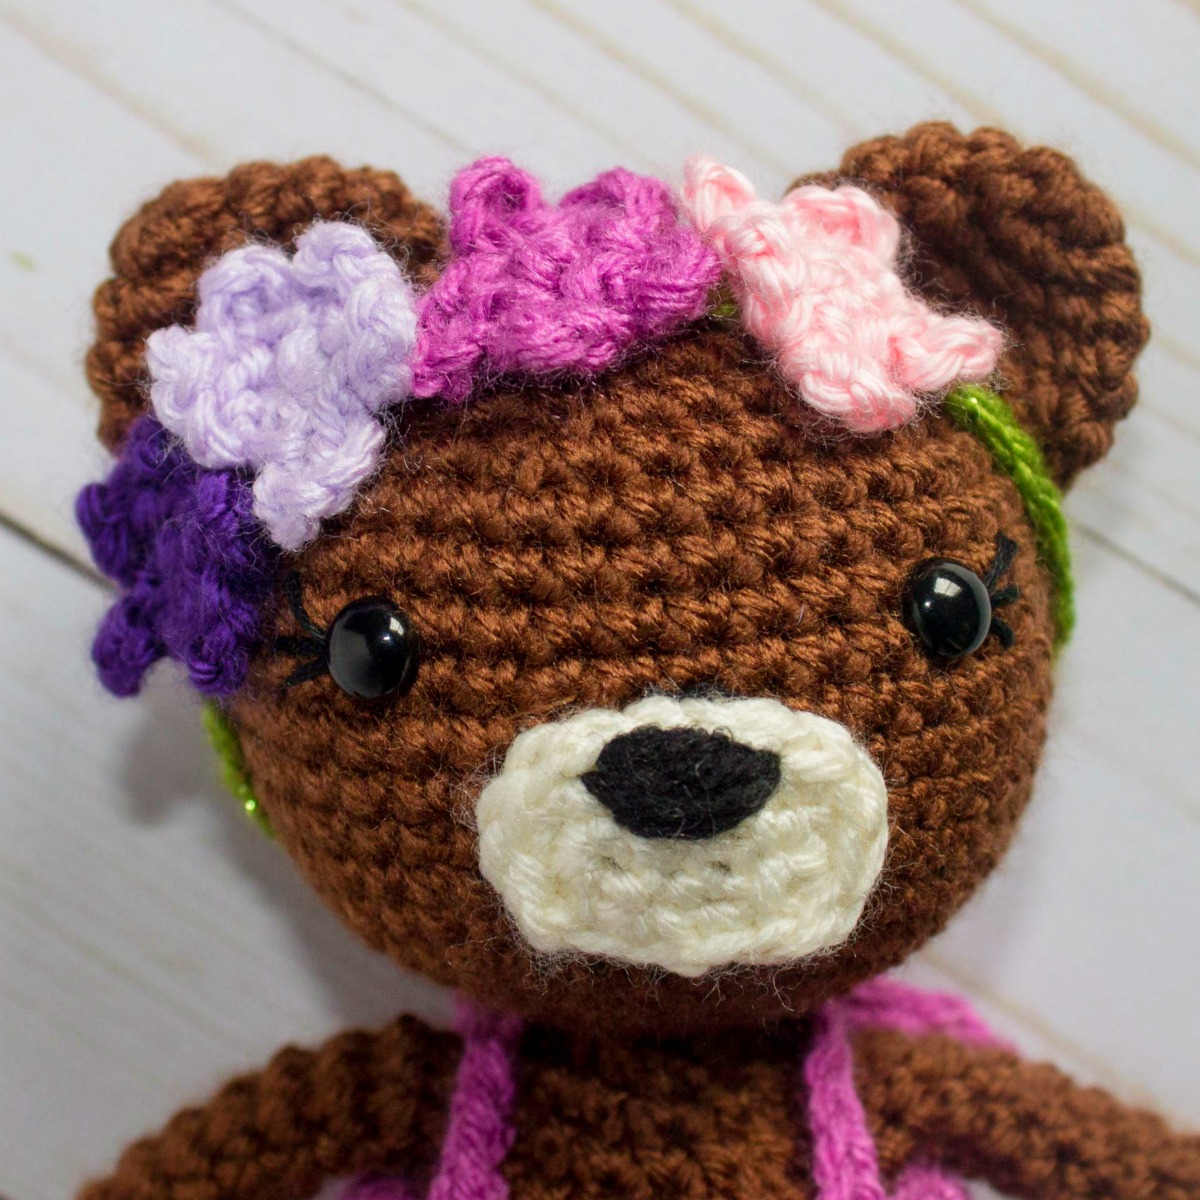
Nose/Mouth/Snout (If you are making the bear)
Using
tan, chain 5. In the second chain from the hook SC. SC in the next 2.
Place 3 SC in the last stitch on the row. On the other side of the
chain, SC in the next 2. Then 2 SC in the end stitch (the first stitch
you SC on the chain). Place stitch marker (10)
HINT: It should look like this (every comma represents a stitch)
SC, SC, SC, 3 SC, SC, SC, 2 SC.
There
will be 3 SC on the chain, with 3 SC on the end, 3 SC on the opposite
side of the chain, and 3 SC total (first SC and then the 2 SC as you
come back around) on the other end.
From here on we will be working in the round.
Round 2: *SC in first, SC INC in next*. Repeat * * around. (15)
Slip stitch in the next 3. SC in the next 2. Fasten off. (this will balance the nose better from working in the round)
Using
dark brown (or black) yarn sew on the nose by passing over three
stitches, multiple times (I usually do three or four passes.) Finish off
with the lines for the mouth (optional).
*Lightly Stuff as you go!
Legs (Using Ballet Slipper Color)
Round 1: In a magic circle, SC 6
Round 2: SC INC in each stitch around (12)
Rounds 3-6: SC in each stitch around. (12)
Change to skin color. Please watch this video on how to change color in amigurumi!
Rounds 7-18: SC in each stitch around. (12)
Fasten off.
Repeat
for the second leg but do not fasten off. Instead, chain 3 and then SC
in the next stitch of the other leg. Take care to crochet over the tail
left over by fastening off. SC around the entire leg. When you come to
the three chains, SC in each chain around the next leg. SC over the
chain back to the other leg. In the last SC on the last chain place your
stitch marker. (This is round 19.)
Check out this video on how to attach the legs.
Round 20: SC around. (30)
Rounds 21-33: SC around (30)
Round 34: 3 SC, INV DEC, repeat around. (24)
Round 35: 2 SC, INV DEC, repeat around.(18)
Round 36: 1 SC, INV DEC, repeat around. (12)
Round 37: INV DEC in each around. (6)
Now
we will start the increase for the head. I am going to start the round
count over to make it a little easier as you place the eyes, nose, etc.
You will count from where you increase at the neck. It is very easy to
see.
Head
Round 1: SC INC in each around. (12)
Round 2: SC in first, SC INC in next. Repeat around. (18)
Round 3: SC in first 2, SC INC in next. Repeat around. (24)
Round 4: SC in first 3, SC INC in next. Repeat around. (30)
Round 5: SC in first 4, SC INC in next. Repeat around. (36)
Round 6: SC in first 5, SC INC in next. Repeat around. (42)
Rounds 7-15: SC in each stitch around. (42)
Sew
on the nose if you are doing the bear. I place mine around row 7 and it
will reach to about row 11. For all animals place the eyes between rows
12 and 13, about 9 stitches apart. For the bunny and the kitty sew on
the nose. Using pink yarn, place the needle to the space you want to
have the nose. I go one row down from the eyes, and three stitches in.
Pull the yarn through. Go over four more stitches and insert needle.
Pull through. Repeat until you have the size nose you want (I usually do
3-4 passes.) Make one pass down from the center of the nose, about 2
stitches. Push up under the nose, then pull through and tie. Cut yarn.
Begin stuffing. Make sure the neck is fully stuffed. (For pictures more
details on the nose see the Best Tips and Tricks for Crochet dolls)
Round 16: SC in the first 5, INV DEC in the next. Repeat around. (36)
Round 17: SC in the first 4, INV DEC in the next. Repeat around. (30)
Round 18: SC in the first 3, INV DEC in the next. Repeat around. (24)
Round 19: SC in the first 2, INV DEC in the next. Repeat around. (18)
Round 20: SC in the first, INV DEC in the next. Repeat around. (12)
Round 21: INV DEC around. (6)
Fasten off and carefully sew the remaining hole closed.
Arms
Round 1: In a magic circle, SC 8 . (8)
Rounds 2-15: SC in each stitch around (8)
Stuff VERY lightly and attach to body. I sew them on between rows 35 and 36.
Bear Ears
Round 1: In a magic ring, crochet 6 SC.
Round 2: SC INC in each around. (12)
Round 3: SC in first, SC INC in next. Repeat around. (18)
Rounds 4-5: SC in each around. (18)
Fasten off and leave a long tail to sew onto head.
Gently
curve the ear when you attach to the head. This will make the indention
of the ear. I use pins to pin both ears where I like them before I sew
them. Each ear starts out 2 rows from the center of the head. I pin the
ear so it spans about 6 rows.
Bunny Ears
Round 1: In a magic ring, crochet 6 SC.
Round 2: SC INC in each around. (12)
Rounds 3-15: SC in each around. (12)
Round 16: INV DEC in each around. (6)
Fasten off and sew onto head. Each ear starts about 2 rows from the center of the head.
Kitty Ears
Round 1: In a magic ring, crochet 6 SC.
Round 2: SC in each around. (6)
Round 3: SC INC in each around. (12)
Round 4: SC in first, SC INC in next. Repeat around. (18)
Rounds 5-6: SC in each around. (18)
Fasten off and leave a long tail to sew onto head.
Gently
curve the ear when you attach to the head. This will make the indention
of the ear. I use pins to pin both ears where I like them before I sew
them. Each ear starts out 2 rows from the center of the head. I pin the
ear so it spans about 6 rows.
Dress
To
make the dress, chain to a length that will just barely reach around the
body. Due to the variations of yarn, amount of stuffing, and which hook
you use, it is really difficult to give an exact number. (As a starting
point, I chained 30 with my 3.75 hook) The amount of stitches will not
affect the pattern. Just make sure it will go around the doll. Double
check after a few rows that you can pull it up her body. Better to frog
now than cry later!
(HINT: You could also do a foundation double crochet here.)
Chain to desired length. Slip stitch together to form a ring. Double check that you did not twist the chain.
Row 1: DC in each stitch across. Sl st to the first stitch.
Row 2-4: Chain 2. DC in the same stitch. DC in each across..
Row 5: *DC INC in the first, DC in the next.* Repeat * * to the end of the row.
Row 6: *DC INC in the first DC in the next 2,.* Repeat * * to the end of the row.
Row 7: *DC INC in the first, DC in the next 3.* Repeat * * to the end of the row.
Fasten off and weave in ends. Then put onto the doll.
Chain
25. Fasten off and weave in the tail on one side. Sew the other side to
the front of the dress. Repeat for the other side. Tie the two chained
pieces in a bow in the back.
Flower crown Headband: Chain to 50 (or long enough to reach around the head and tie.) Set aside.
Flowers (use a smaller hook if you want them dainty. I used my 3.0)
In
a magic circle SC 5. Slip stitch to the first stitch. *Chain 5. Slip
stitch in the same stitch. Slip stitch over the next.* Repeat * * 4 more
times for a total of 5 petals. Fasten off and sew onto headband.
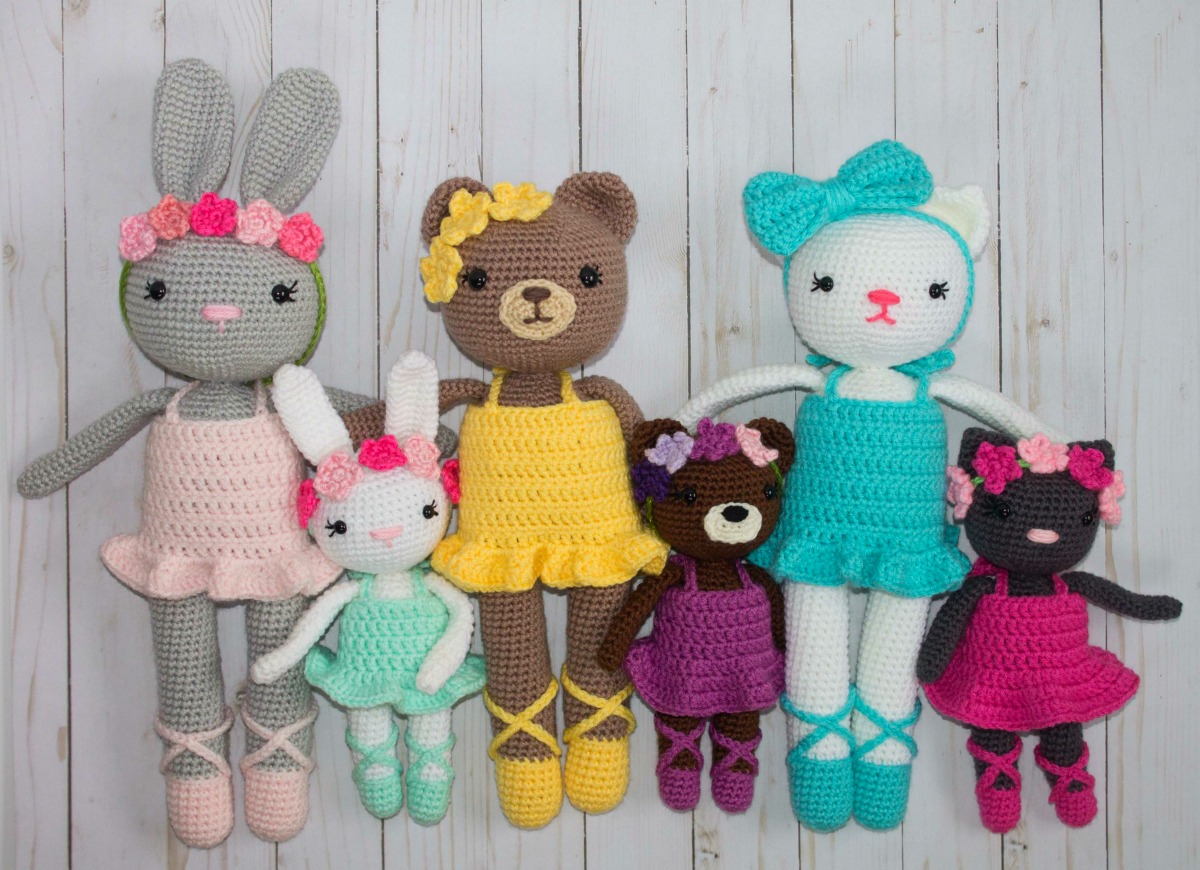
If you are wondering how the larger Animal Ballerinas compare…
Interested in more of the Friendly Dolls? Be sure to check out the whole collection!