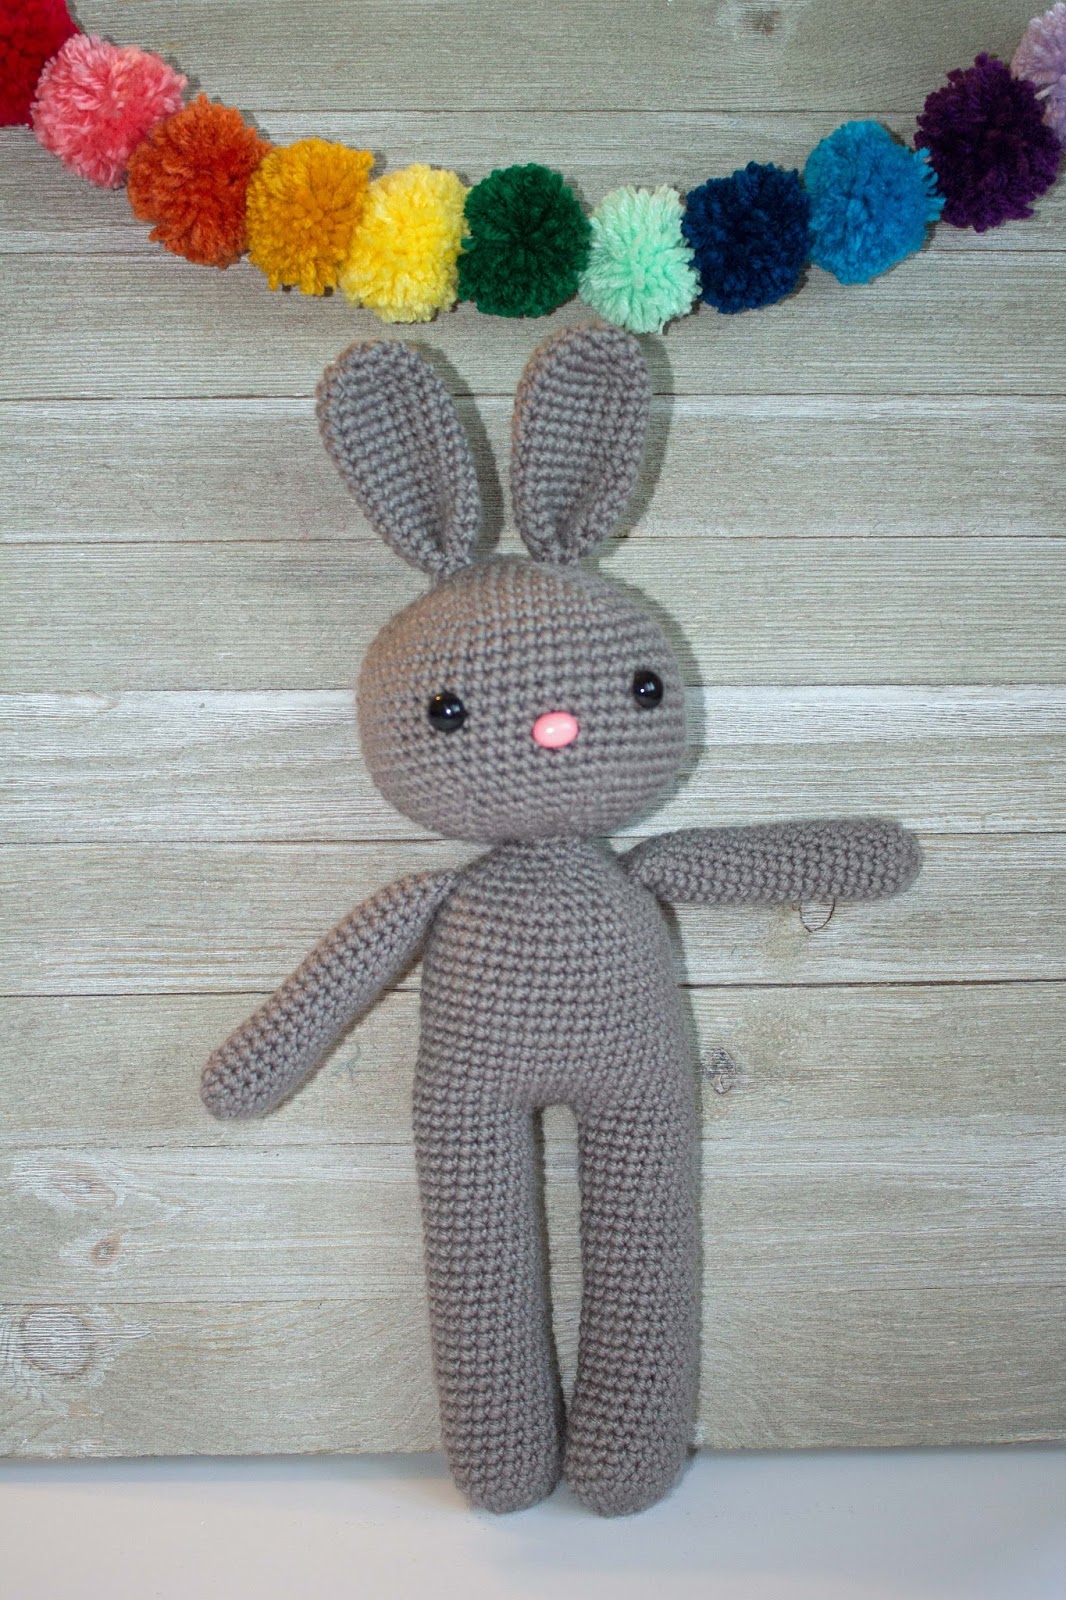
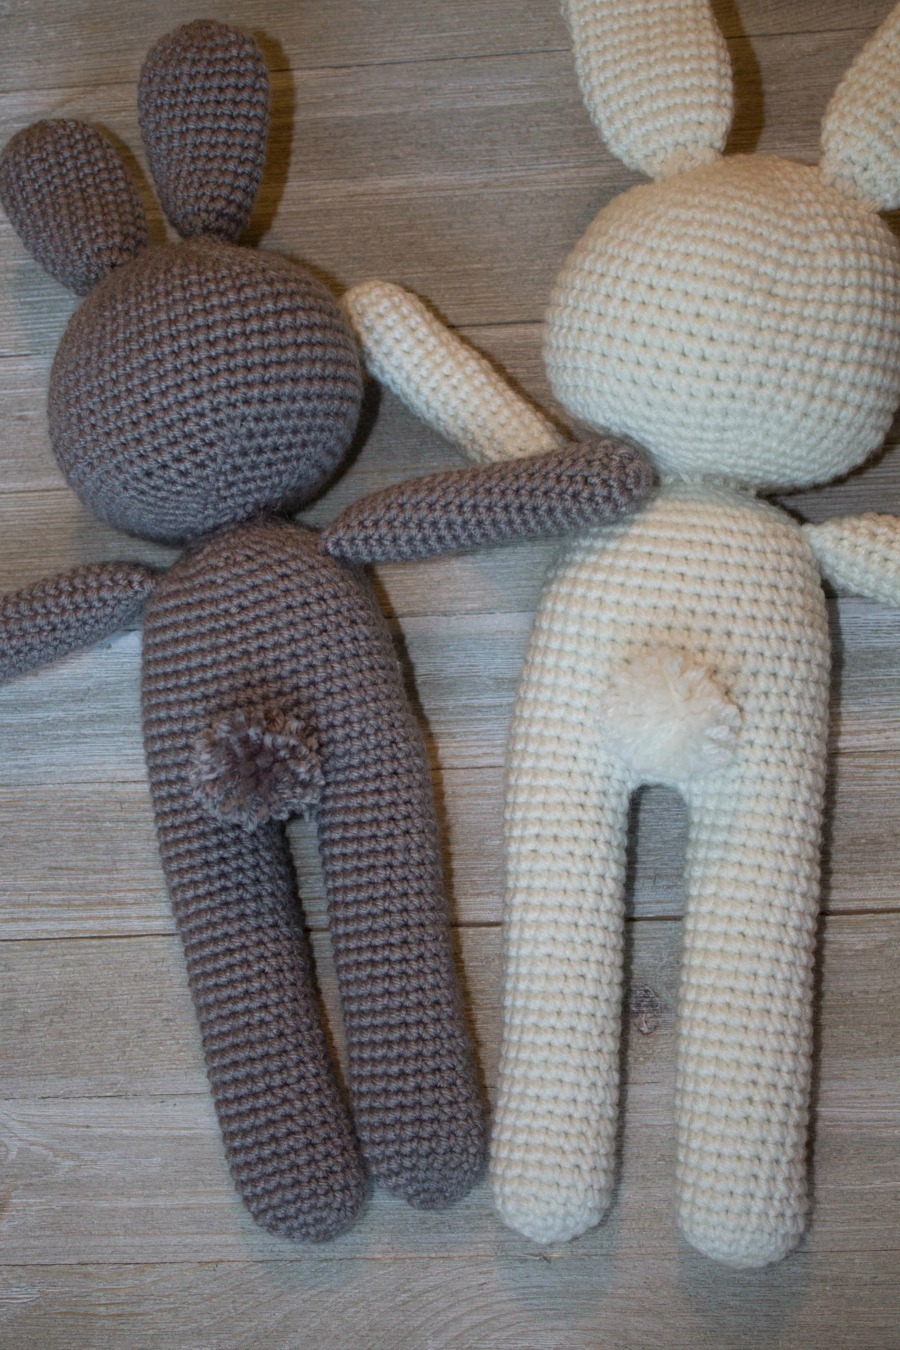
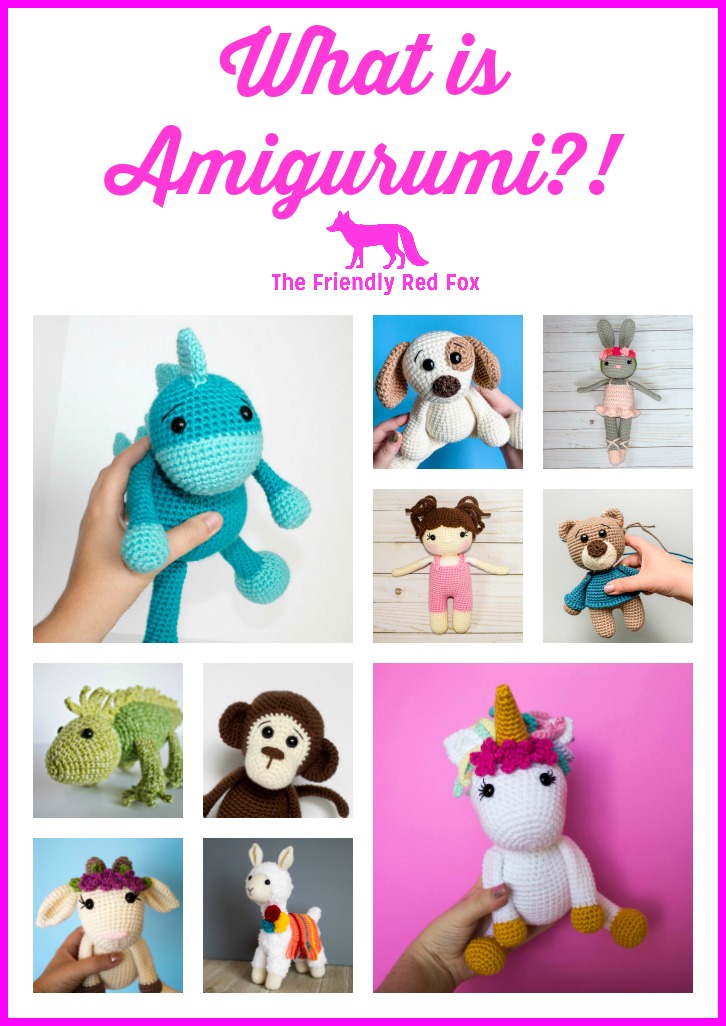
Free Crochet Pattern Bunny Amigurumi

This little crochet bunny pattern is so sweet and cuddly! I love how simple it is- perfect for dressing up or enjoying as is! My favorite is the little pom pom tail!

If you are interested in buying this crochet bunny pattern so you can have an ad-free, printable pdf copy with additional pictures and tips you can buy it HERE!
And if you are new to amigurumi projects, check out this post that has a ton of great tips and tricks to help you out! (And add some adorable details!)
Let’s get started!
For your Friendly Crochet Bunny Pattern, you will need:
Approx 100 g size 4 yarn (I used Red Heart with Love and I Love this Yarn)
Crochet Hook in Size 4.0 or 3.75
Tapestry Needle
Polyfil or preferred stuffing
12 mm safety eyes
12 mm safety nose (you can also use yarn!)
stitch marker
glue gun
Always move your stitch marker to the last stitch in the round. This pattern is worked in
continuous rounds.
*Lightly Stuff as you go!
Legs
Round 1: In a magic circle, SC 6
Round 2: SC INC in each stitch around (12)
Round 3: SC in first, SC INC in next. Repeat around. (18)
Round 4-28: SC in each stitch around. (18)
Fasten off.
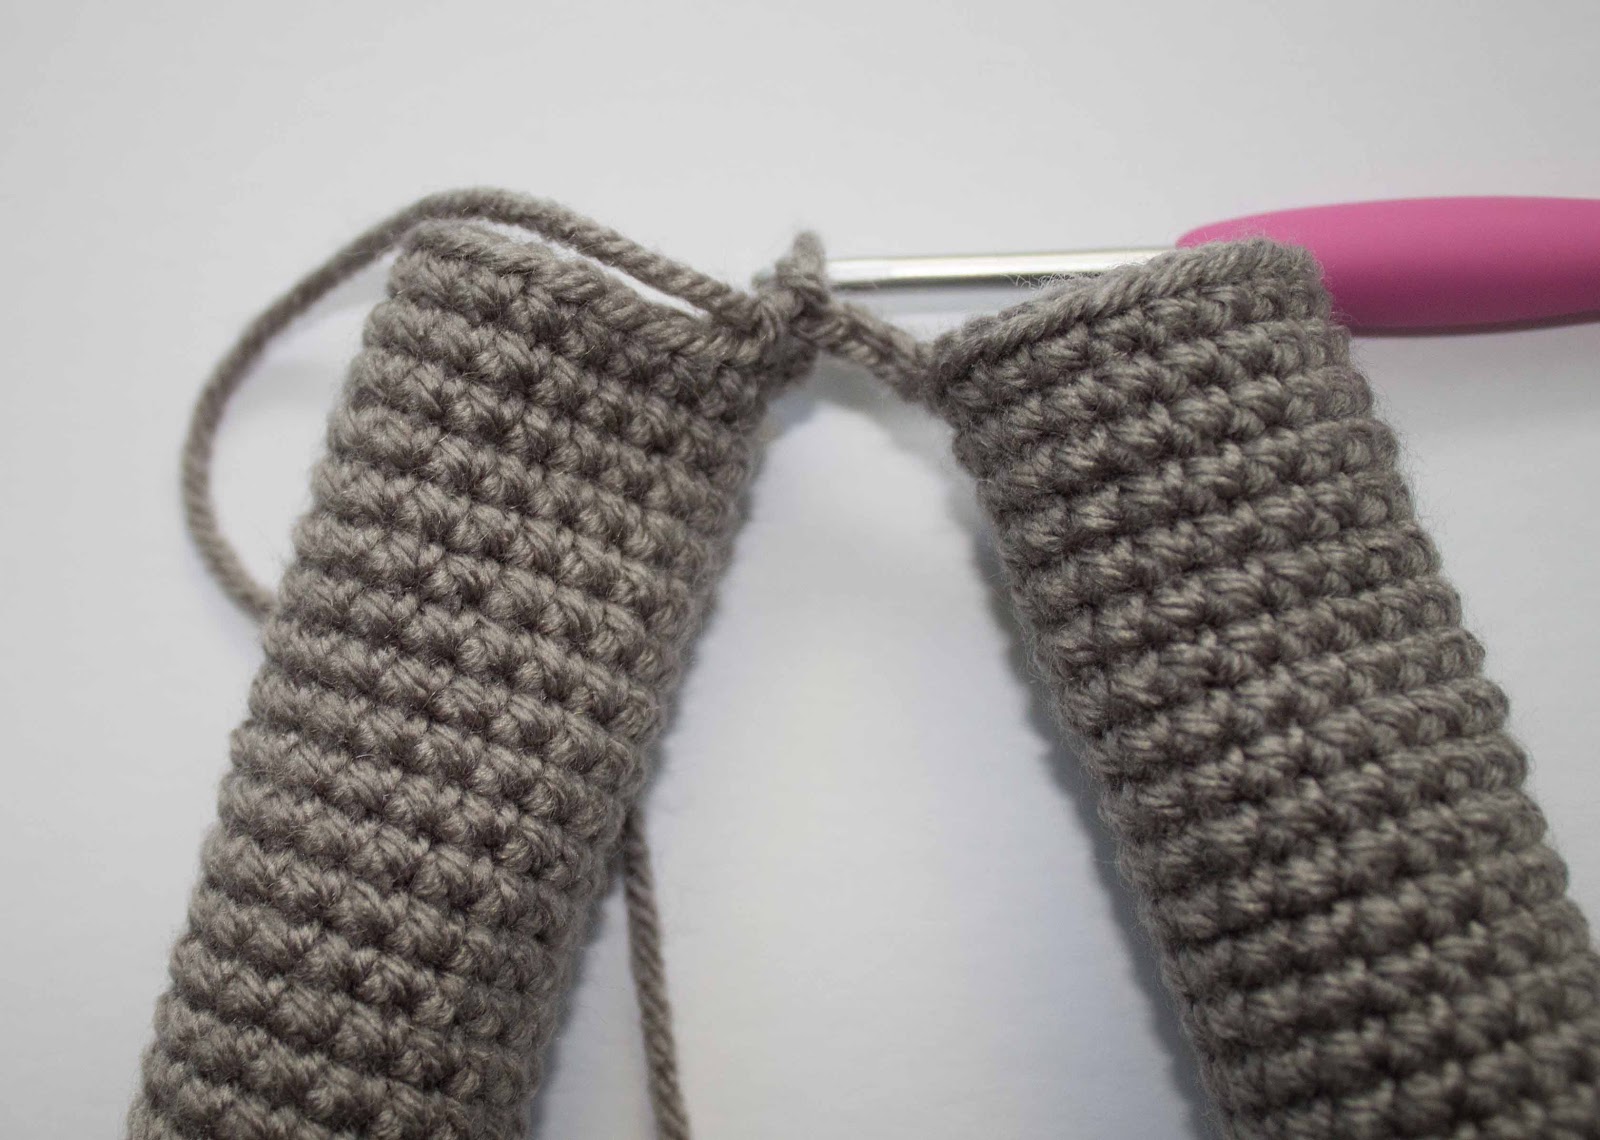
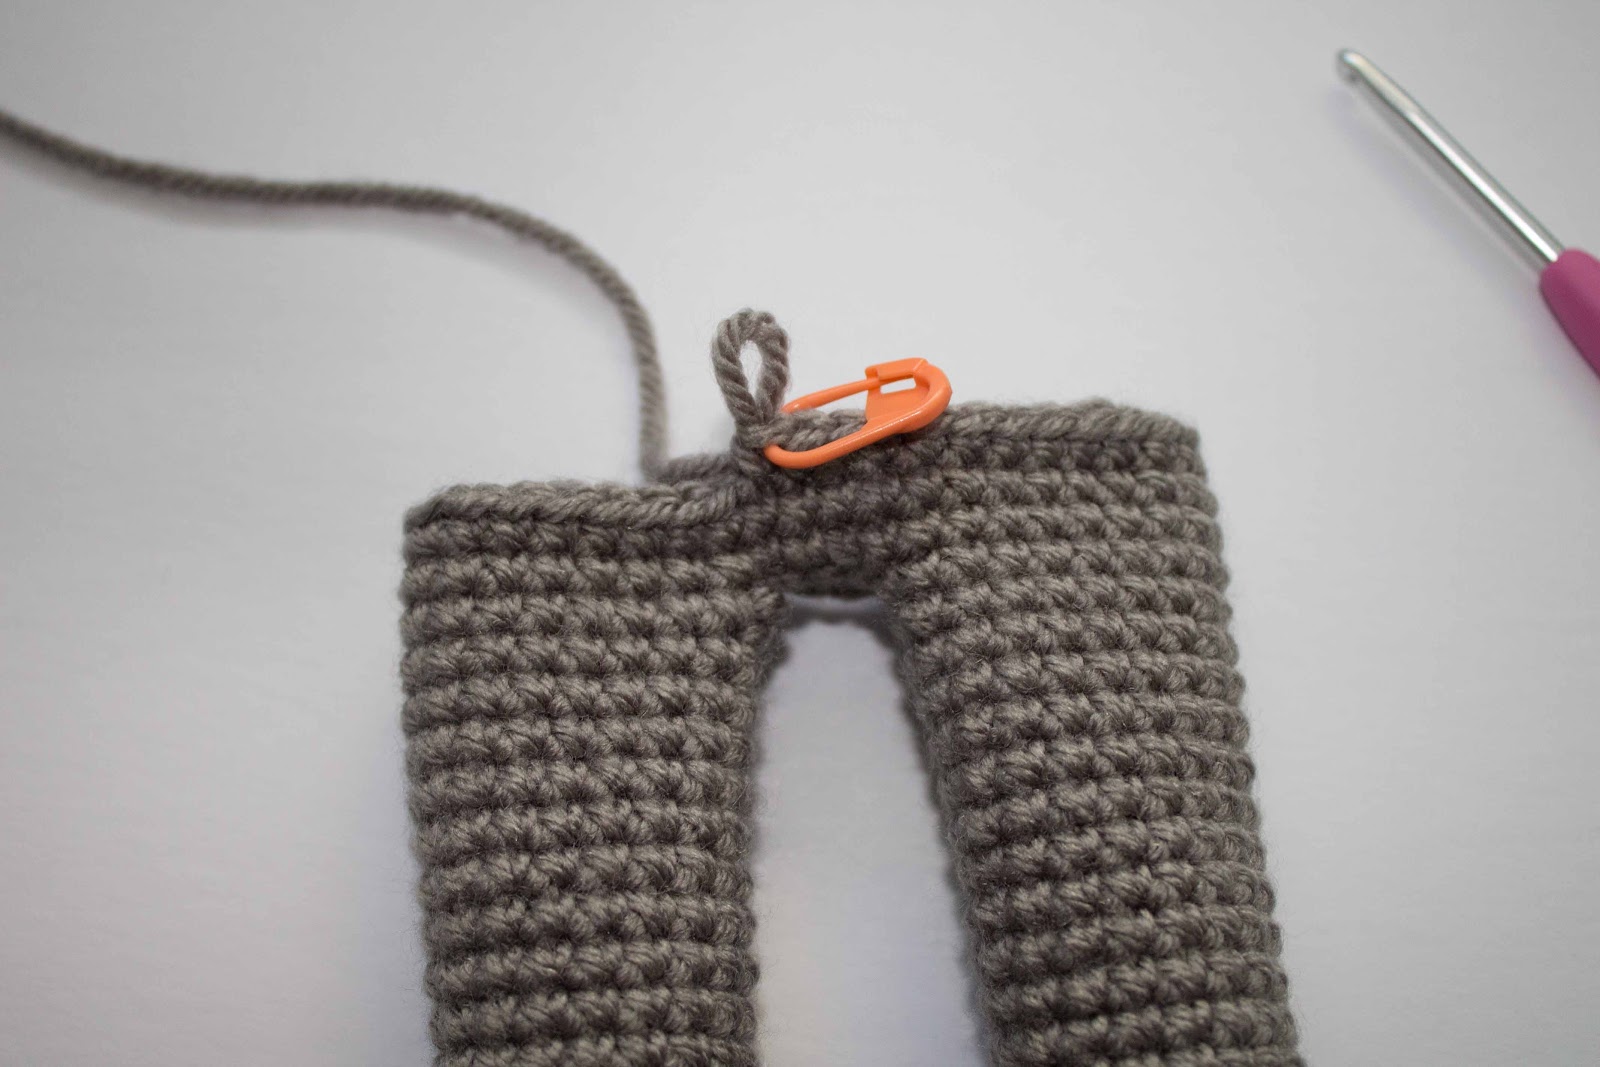
Repeat for the second leg but do not fasten off. Instead, chain 3 and then SC in the next stitch of the other leg. Take care to crochet over the tail left over by fastening off. SC around the entire leg. When you come to the three chains, SC in each chain across. Then around the next leg. SC over the chain back to the other leg. In the last SC on the last chain place your stitch marker. (This is round 29.)
Round 30: SC around. (42)
Rounds 31-45: SC around (42)
Round 46: 4 SC, INV DEC, repeat around. (35)
Round 47: 3 SC, INV DEC, repeat around. (28)
Round 48: 2 SC, INV DEC, repeat around.(21)
Round 49: 1 SC, INV DEC, repeat around. (14)
Round 50: SC in each stitch around. Fasten off and leave a long tail to sew on head. (14)
Head
Round 1: In a magic circle, 6 SC.
Round 2: SC INC in each around. (12)
Round 3: SC in first, SC INC in next. Repeat around. (18)
Round 4: SC in first 2, SC INC in next. Repeat around. (24)
Round 5: SC in first 3, SC INC in next. Repeat around. (30)
Round 6: SC in first 4, SC INC in next. Repeat around. (36)
Round 7: SC in first 5, SC INC in next. Repeat around. (42)
Round 8: SC in first 6, SC INC in next. Repeat around. (48)
Round 9: SC in first 7, SC INC in next. Repeat around. (54)
Round 10-20: SC in each stitch around. (54)
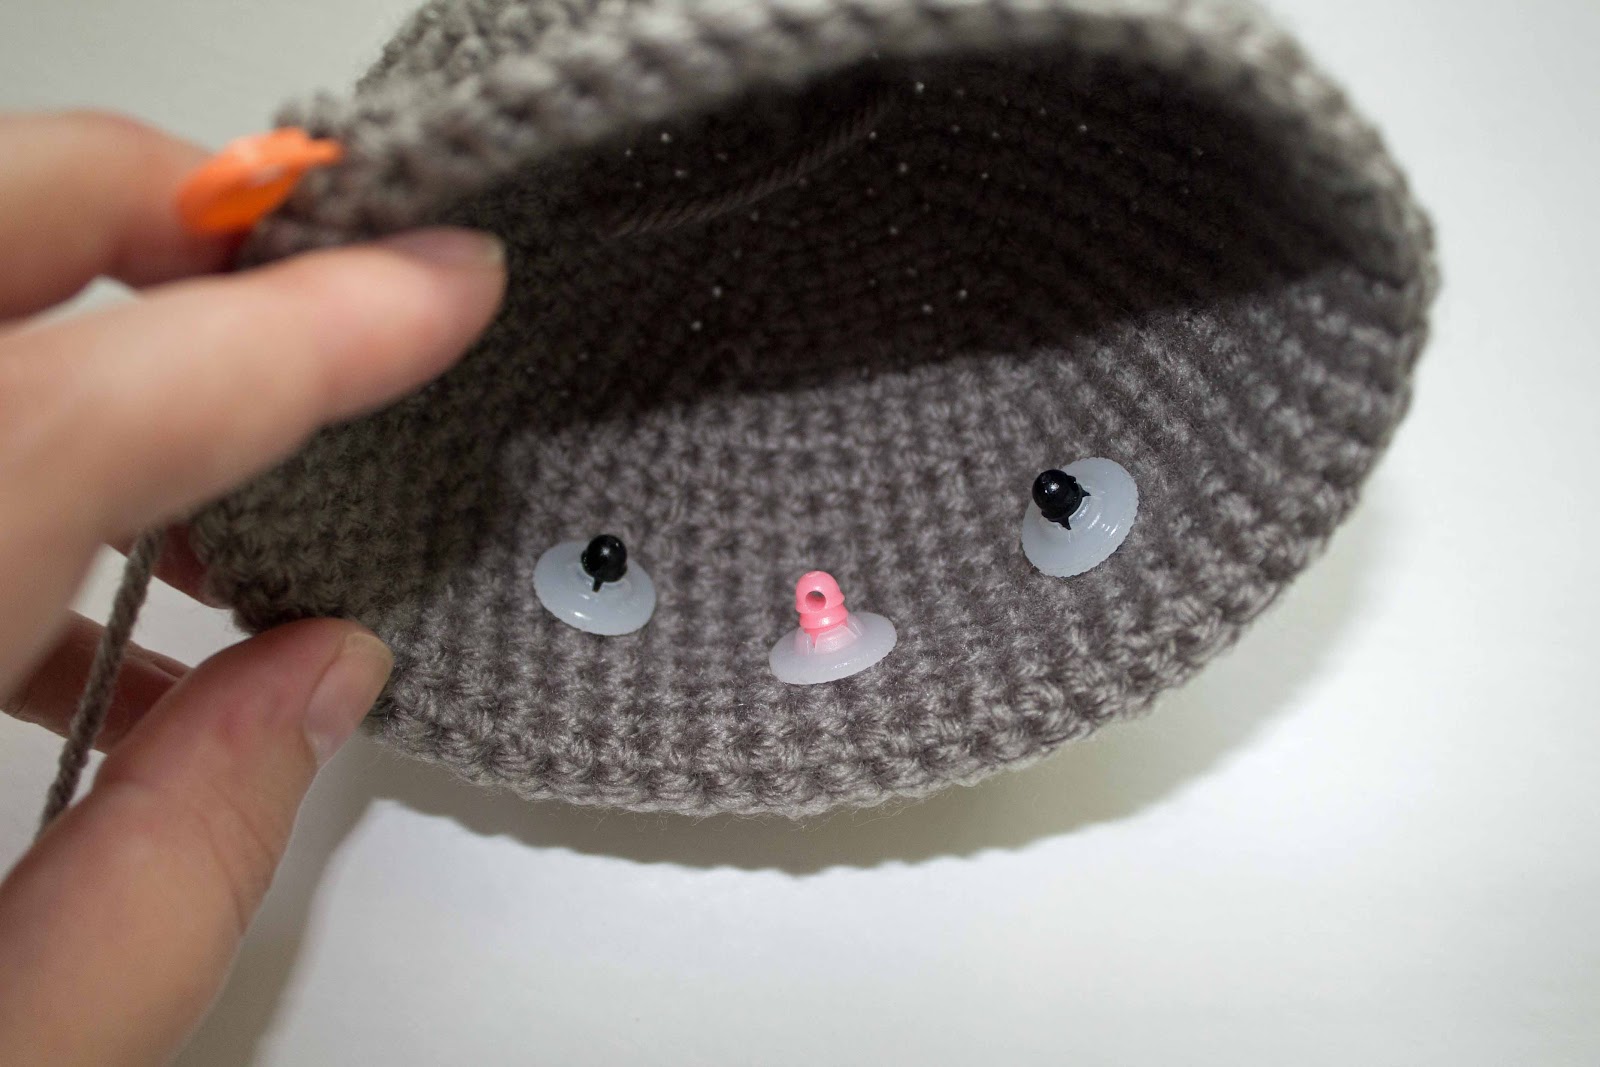
Place the safety eyes in between rows 15 and 16, eight stitches apart. Place the nose (safety or yarn) two rows down and centered between the eyes.
Round 21: SC in the first 7, INV DEC in the next. Repeat around. (48)
Round 22: SC in the first 6, INV DEC in the next. Repeat around. (42)
Round 23: SC in the first 5, INV DEC in the next. Repeat around. (36)
Round 24: SC in the first 4, INV DEC in the next. Repeat around. (30)
Round 25: SC in the first 3, INV DEC in the next. Repeat around. (24)
Round 26: SC in the first 2, INV DEC in the next. Repeat around. (18)
Round 27: SC in the first, INV DEC in the next. Repeat around. (12)
Round 28: INV DEC around. (6)
Fasten off and carefully sew the remaining hole closed. Sew onto body!

Arms (make 2)
Round 1: In a magic ring, crochet 6 SC.
Round 2: SC INC in each around. (12)
Rounds 3-22: SC in each around. (12)
Fasten off and leave a long tail to sew onto body.
Ears (make 2)
Round 1: In a magic ring, crochet 6 SC.
Round 2: SC INC in each around. (12)
Round 3: SC in the first, SC INC in the next. Repeat around. (18)
Round 3: SC in the first, SC INC in the next. Repeat around. (18)
Rounds 4-15: SC in each around. (18)
Round 16: INV DEC
Fasten off and leave a long tail to sew onto head.
Tail
Make a small pom pom, about an inch around. I used the smallest clover pom pom maker, but a fork would work pretty well. Leave two long ends (the yarn you use to tie it together) to sew on. I made multiple passes and double knotted. Use a drop or two of really hot glue from a glue gun to prevent losing yarn.

That is a really lovely pattern. Thank you for sharing it.
So cute ! Love it soon when I have time I will definitely give this pattern a try