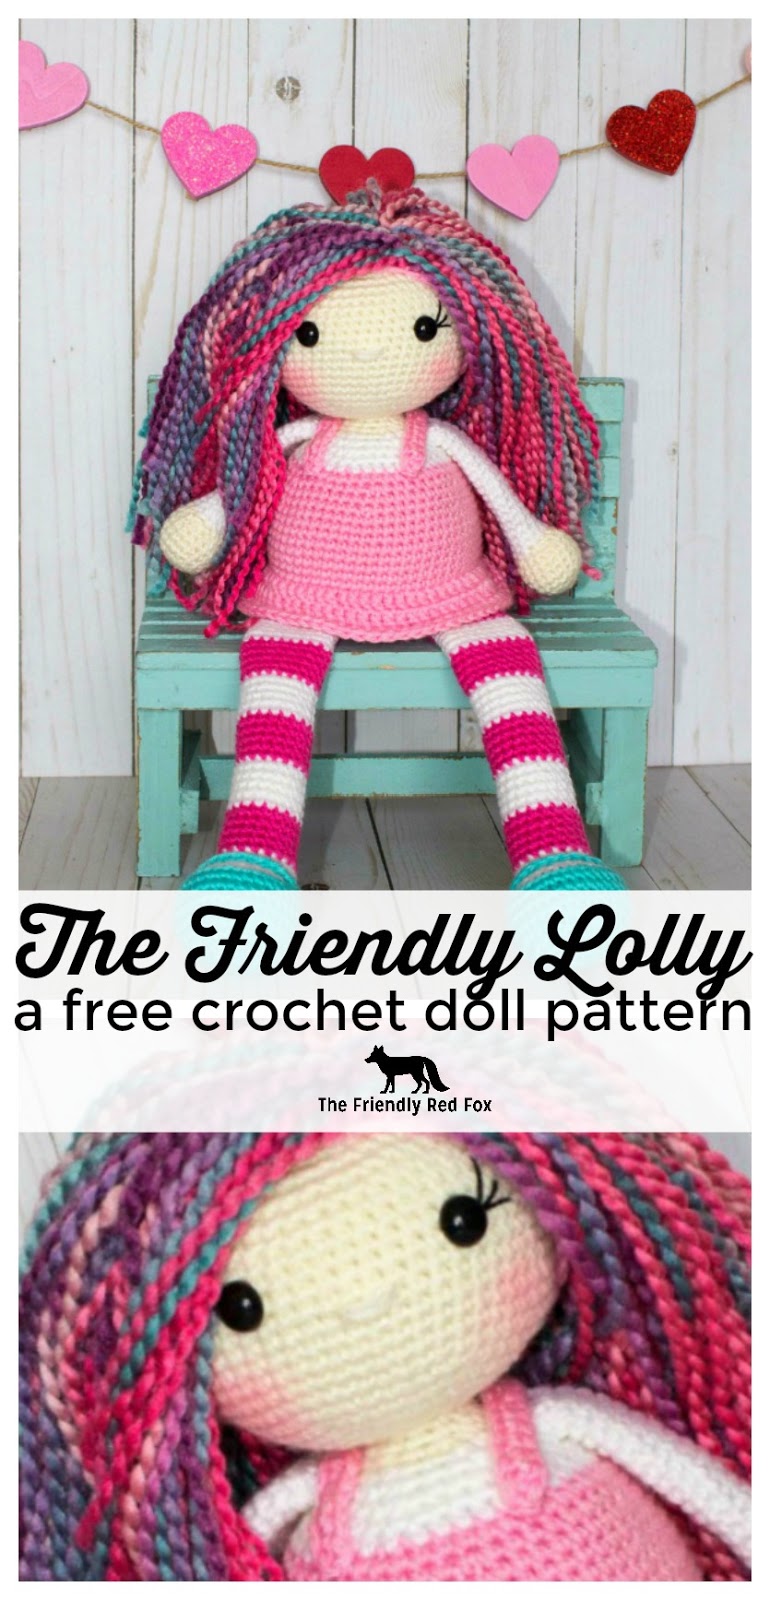
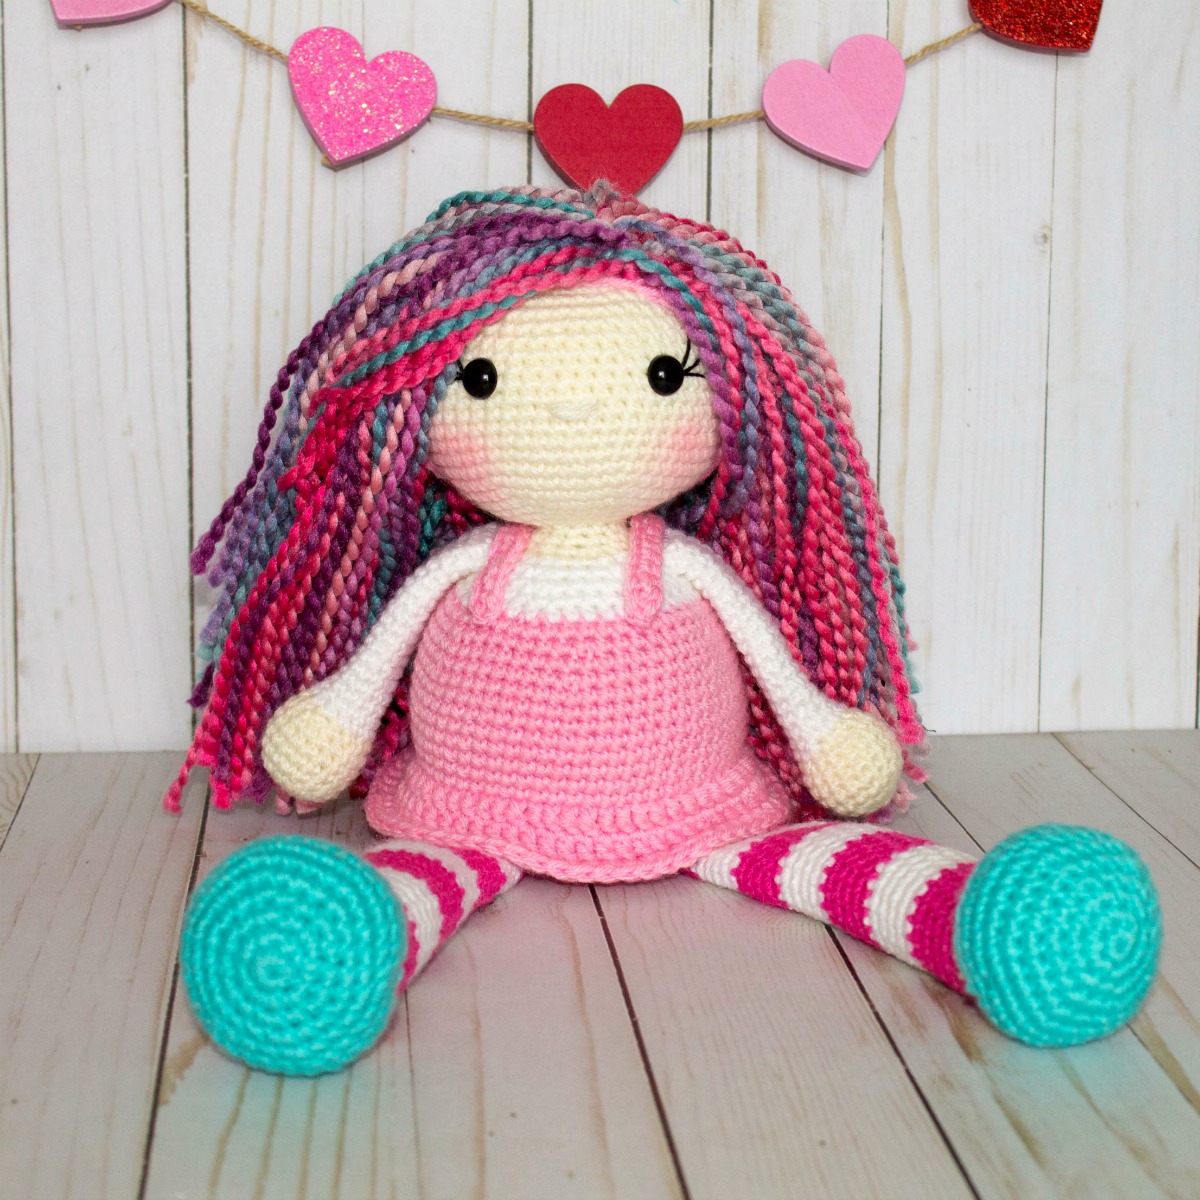
The Friendly Lolly- a Free Crochet Doll Pattern
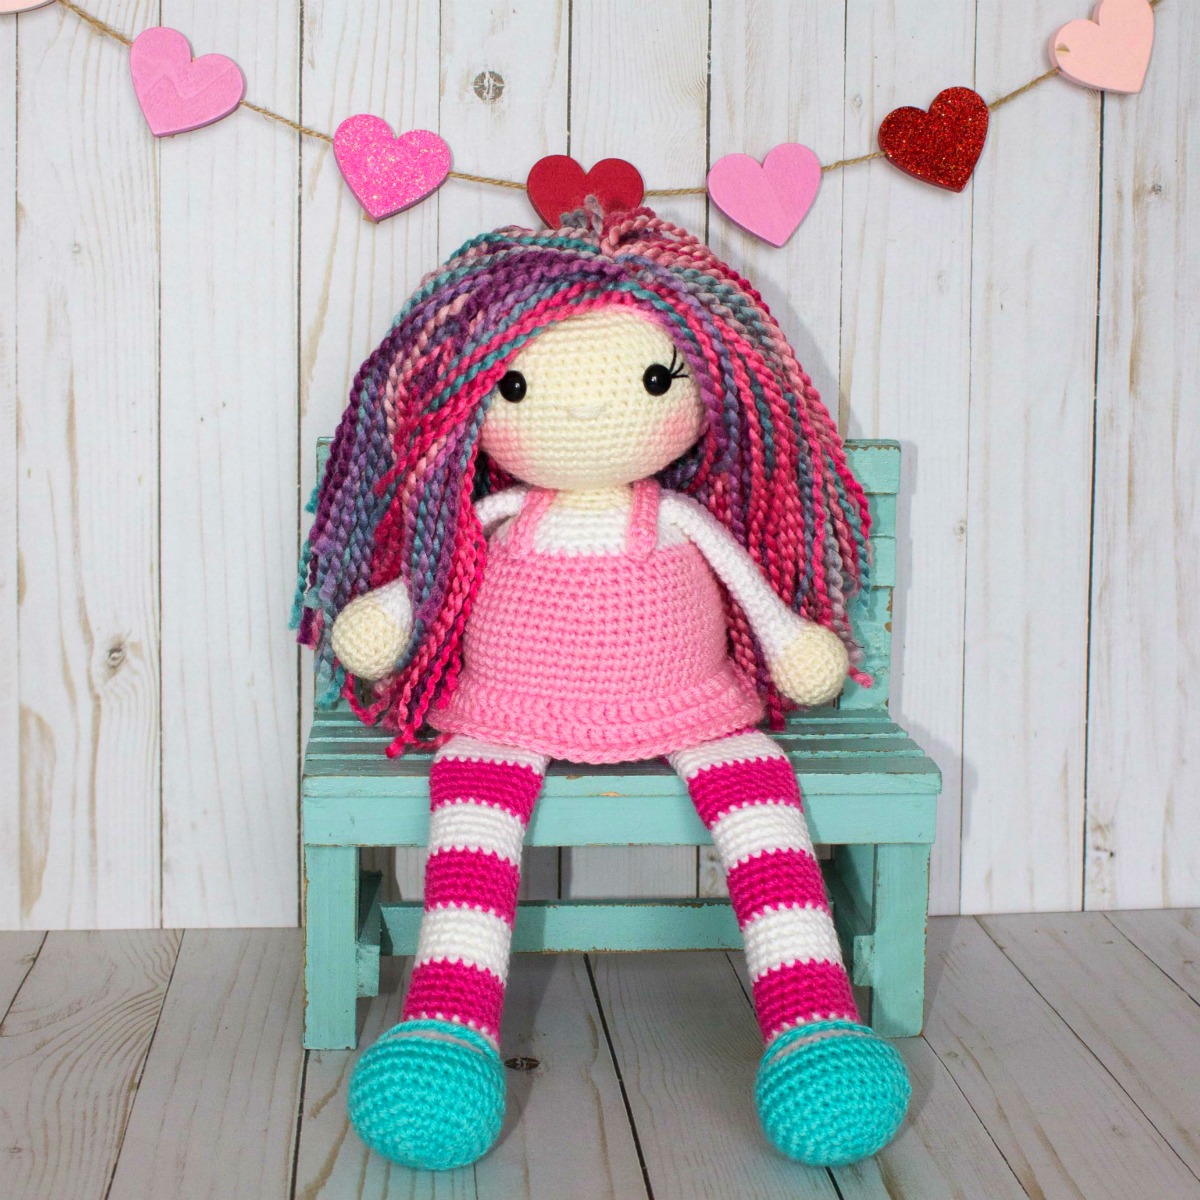
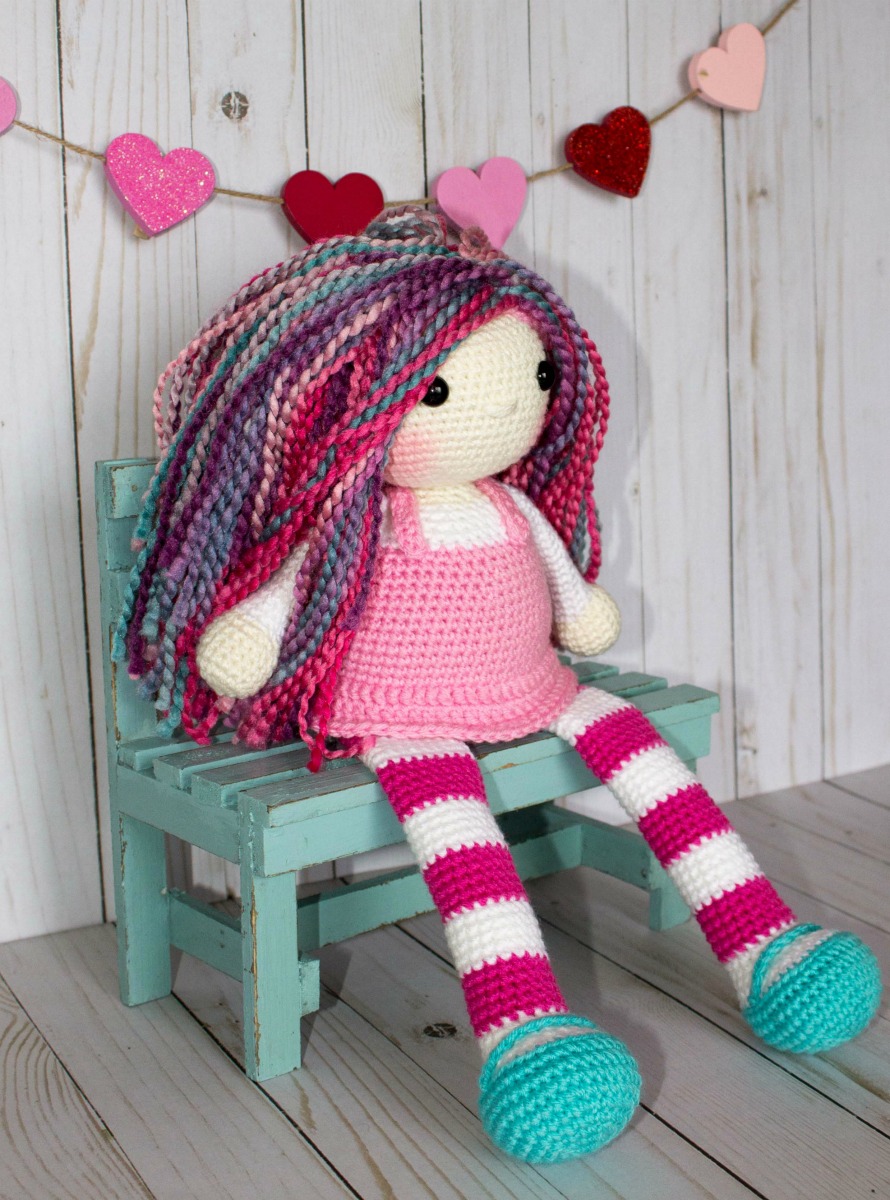
The Friendly Lolly is a sweet dolly designed to sit on a shelf, or a bed, or a bookcase… Or just to be carried around! She is 7 inches from bottom to head, but close to 15 counting the legs. While I had a lot of fun playing with the colors, you can easily adapt this doll to match a little girl’s room, or her favorite colors, or as a look alike doll! The possibilities are endless.
Please note this pattern is only for PERSONAL USE. Please feel free to make as many
items as you wish for yourself, or as gifts. You may sell items made with this pattern but
PLEASE LINK BACK OR GIVE CREDIT TO ME AS DESIGNER. In no way can you
share, reproduce, or sell this pattern. Please respect my rights as designer.
Read through the entire pattern and the amigurumi tips and tricks before you begin.
The pattern is free on the website but if you want an ad-free, printable copy you can purchase it in my Etsy or just below!
You will need:
About 50g each of Size 4 Worsted weight yarn in skin color, sweater color, stripe colors
(I used Hobby Lobby’s I love this yarn for the project in colors ivory, pink, turquoise, and white)
Yarn for the hair (I used Yarn Bee’s First Love in the color Kisses)
12mm safety eyes
Stuffing
E hook (3.5) [I HIGHLY recommend this set. Especially for this time of year. I have had the same set for 4 years and they still look brand new]
Needle for sewing
Stitch marker
1 cup Poly pellets (these are used to weigh down the body so it can sit on the shelf)
The poly pellets are optional, but they do provide a lot of stability. I poured mine into mismatched socks and tied it up, like a bean bag. You can also use a sandwich bag or if you feel like your stitches are tight enough, just pour them into the body. I was more worried about my boys playing rough with them and the pellets working out, so I used the sock.
This post contains affiliate links. For more information see my policies page.
Read my post on the best tips and tricks for amigurumi. This is a lot of the things that I wish I knew before I started! Also check out my specific tips for dolls that are all rounded up HERE. The pattern is written assuming you have this knowledge.
Abbreviations
SC– single crochet
SC INC– single crochet increase (2 SC in each stitch)
INV DEC– Invisible decrease (put hook through the FRONT LOOP ONLY of two consecutive stitches [two loops on hook] Yarn over pull through both loops. [two loops on hook] Yarn over pull through two loops)
Magic Circle– Make a loop, leaving a long tail to work with. Insert hook in center of loop, yarn over and draw up a loop. Yarn over, pull through to make the first chain (this does not count as a stitch!). Continue to crochet over the loop and tail with the number of stitches called for. (If you need 6 SC, then crochet 6 SC inside the ring.) Pull the tail to close the circle.
Always move your stitch marker to the last stitch in the round. This pattern is worked in continuous rounds. Stuff as you go.
PLEASE WATCH THIS VIDEO ON HOW TO CHANGE COLORS IN AMIGURUMI
Arms (I stuff only the hands, not the arms.)
With skin color:
Round 1: 6 SC in a magic circle.
Round 2. SC INC in each around. (12)
Round 3: SC in the first, SC INC in the next. Repeat around. (18)
Round 4-7: SC in each around. (18)
Round 8: SC in the first, INV DEC in the next. (12)
Change to the undershirt color (I used white)
Round 9: SC in each around. (12)
Rounds 10-26: SC in each around. (12)
Fasten off and leave a long tail to sew on. I flatten the tops and sew on between rows 31-32.
Body
Using the jumper color (I used pink)
Round 1: In a magic circle, 6 SC.
Round 2: SC INC in each around. (12)
Round 3: SC in first, SC INC in next. Repeat around. (18)
Round 4: SC in first 2, SC INC in next. Repeat around. (24)
Round 5: SC in first 3, SC INC in next. Repeat around. (30)
Round 6: SC in first 4, SC INC in next. Repeat around. (36)
Round 7: SC in first 5, SC INC in next. Repeat around. (42)
Round 8: SC in first 6, SC INC in next. Repeat around. (48)
Round 9: SC in first 7, SC INC in next. Repeat around. (54)
Round 10: SC in first 8, SC INC in next. Repeat around. (60)
Rounds 11-19: SC in each around. (60)
Round 20: SC in the first 8, INV DEC in the next. Repeat around. (54)
Rounds 21: SC in each around. (54)
Round 22: SC in the first 7, INV DEC in the next. Repeat around. (48)
Round 23: SC in each around. (48)
Change to the undershirt color. (I used white!)
Round 24: SC in the first 6, INV DEC in the next. Repeat around. (42)
Round 25: SC in each around. (42)
Round 26: SC in the first 5, INV DEC in the next. Repeat around. (36)
Round 27: SC in each around. (36)
Change to skin color. Now is a good time to stuff. Make sure you stuff REALLY well. It makes a big difference in the finished doll.
Round 28: SC in the first 4, INV DEC in the next. Repeat around. (30)
Round 29: SC in the first 3, INV DEC in the next. Repeat around. (24)
Round 30: SC in the first 2, INV DEC in the next. Repeat around. (18)
Round 31: SC in the first, INV DEC in the next. Repeat around. (12)
Rounds 32: SC in each around (12)
From here we will be increasing the head. From this point I am resetting the number on the rounds. Round 33 of the body is now Round 1 of the head. It will be easy to see.
Head
Round 1: SC in first, SC INC in next. Repeat around. (18)
Round 2: SC in first 2, SC INC in next. Repeat around. (24)
Round 3: SC in first 3, SC INC in next. Repeat around. (30)
Round 4: SC in first 4, SC INC in next. Repeat around. (36)
Round 5: SC in first 5, SC INC in next. Repeat around. (42)
Round 6: SC in first 6, SC INC in next. Repeat around. (48)
Round 7: SC in first 7, SC INC in next. Repeat around. (54)
Round 8-20: SC in each stitch around. (54)
Place the safety eyes in between rows 13 and 14, ten stitches apart. Sew on eyelashes. This is also a good time to place the foam roller or dowel if you are using one. Make sure to stuff the neck around the dowel as well as you can. I also like to stretch the bottom of the head a little. It makes it more round from the point of the neck.
Round 21: SC in the first 7, INV DEC in the next. Repeat around. (48)
Round 22: SC in the first 6, INV DEC in the next. Repeat around. (42)
Round 23: SC in the first 5, INV DEC in the next. Repeat around. (36)
Round 24: SC in the first 4, INV DEC in the next. Repeat around. (30)
Round 25: SC in the first 3, INV DEC in the next. Repeat around. (24)
Round 26: SC in the first 2, INV DEC in the next. Repeat around. (18)
Round 27: SC in the first, INV DEC in the next. Repeat around. (12)
Round 28: INV DEC around. (6)
Fasten off leaving a long tail for the nose. Find a tutorial on how to make the nose here.
Overall Straps
Chain to 18. Turn and HDC in each across (17) Fasten off and sew over the shoulders of the doll. I use one end to sew on the back where the line of the overalls meets the shirt. Then with the other end I go THROUGH the doll and stitch the end on the front over the line where the shirt meets the overalls. Go back through the doll and weave in the ends in the back.
Jumper Ruffle
Make the sweater edge by attaching the same color of yarn to row 12, with the bottom facing up so that your stitches will be facing down (like the edge of your shirt would.) Go around the stitch, like you were making a post stitch. Chain 2. DC in each around, slip stitching to the first when you meet it. Chain 2 and DC in each around 2 more times, for a total of three rows. Fasten off and weave in the ends.
Legs
Using the shoe color:
Round 1: 6 SC in a magic circle.
Round 2: INC in each around. (12)
Round 3: SC in the first, SC INC in the next. (18)
Round 4: SC in the first 2, SC INC in the next. Repeat around. (24)
Round 5: SC in first 3, SC INC in next. Repeat around. (30)
Round 6: SC in first 4, SC INC in the next. Repeat around. (36)
Rounds 7-9: SC in each around. (36)
Change to the first stripe color (I used white)
Round 10: In the back loops only, SC in each around. (36)
Round 11: INV DEC 12 times. SC in the remaining 12 stitches. (24)
Round 12: INV DEC 6 times. SC in the remaining 12. (18)
Rounds 13-14: SC in each around. (18)
Change to the next stripe color. For the rest of the leg, change colors every 5 rows.
Rounds 15-54: SC in each around. (18)
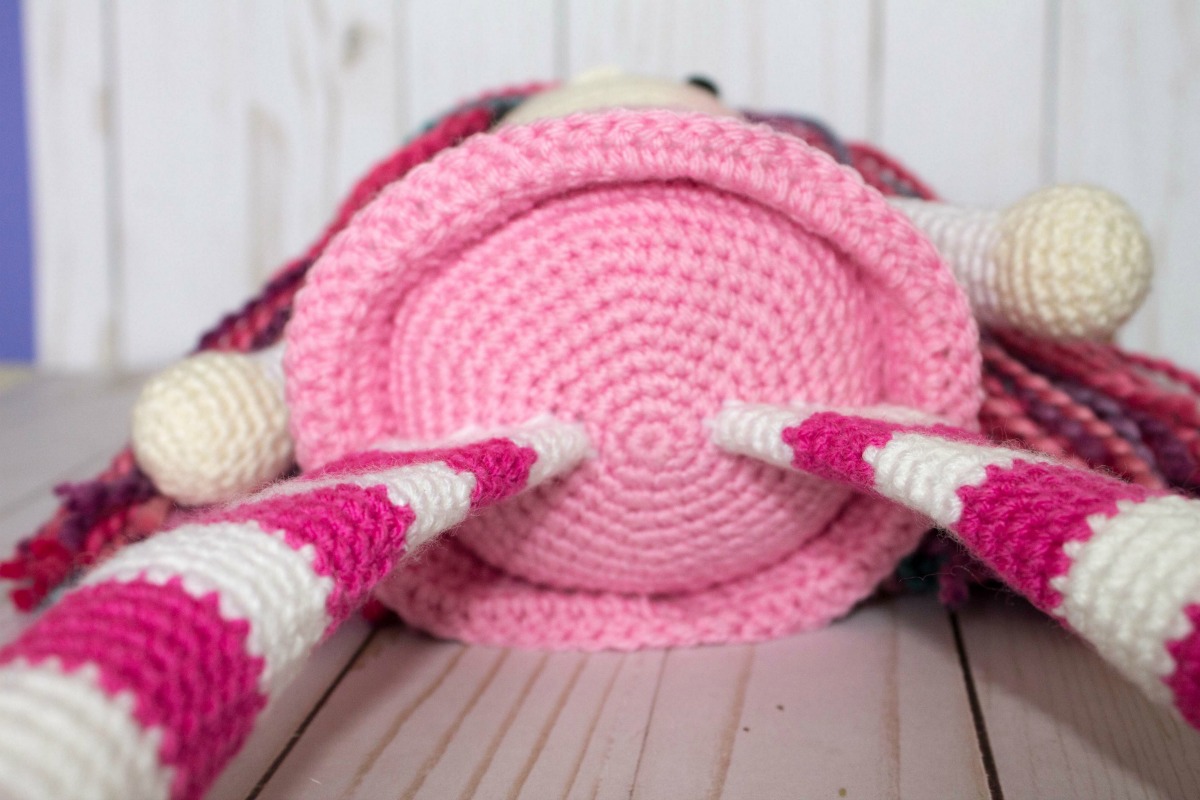
Fasten off leaving a long tail to sew onto the body.
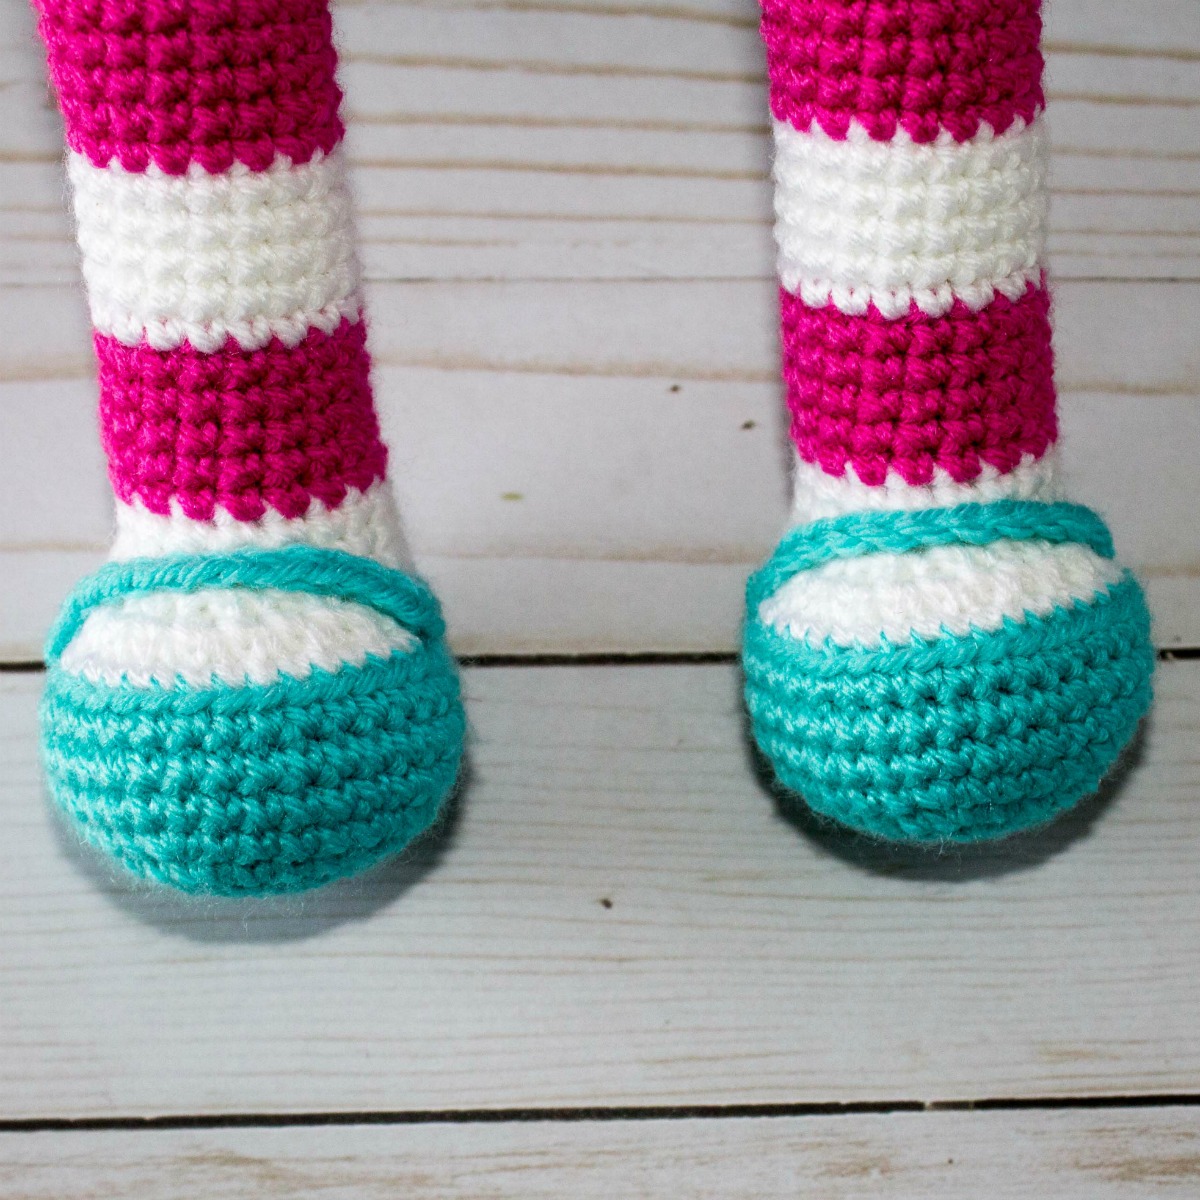
Chain 15 and attach them on either side of the shoe creating the latch. Weave in the ends.
If you want the doll to only sit on a shelf, I recommend sewing the legs in the front, around Round 10. But I attached them to the very bottom because I thought a little girl would rather play with the doll like that. It still sits just fine, but not as flat.
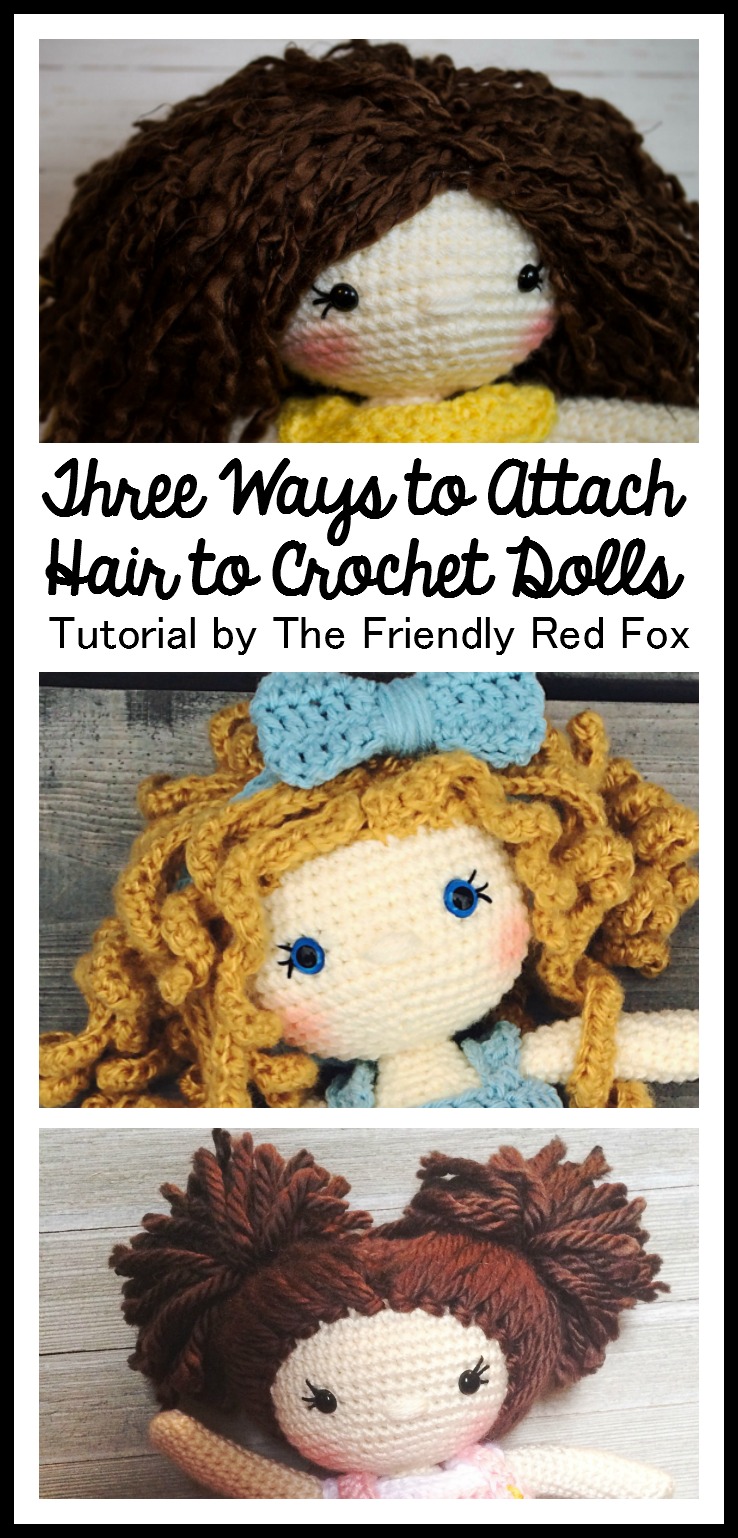
Last, but not least! It is time to make the hair. This tutorial will give you all the details you need to make the doll hair of your dreams!