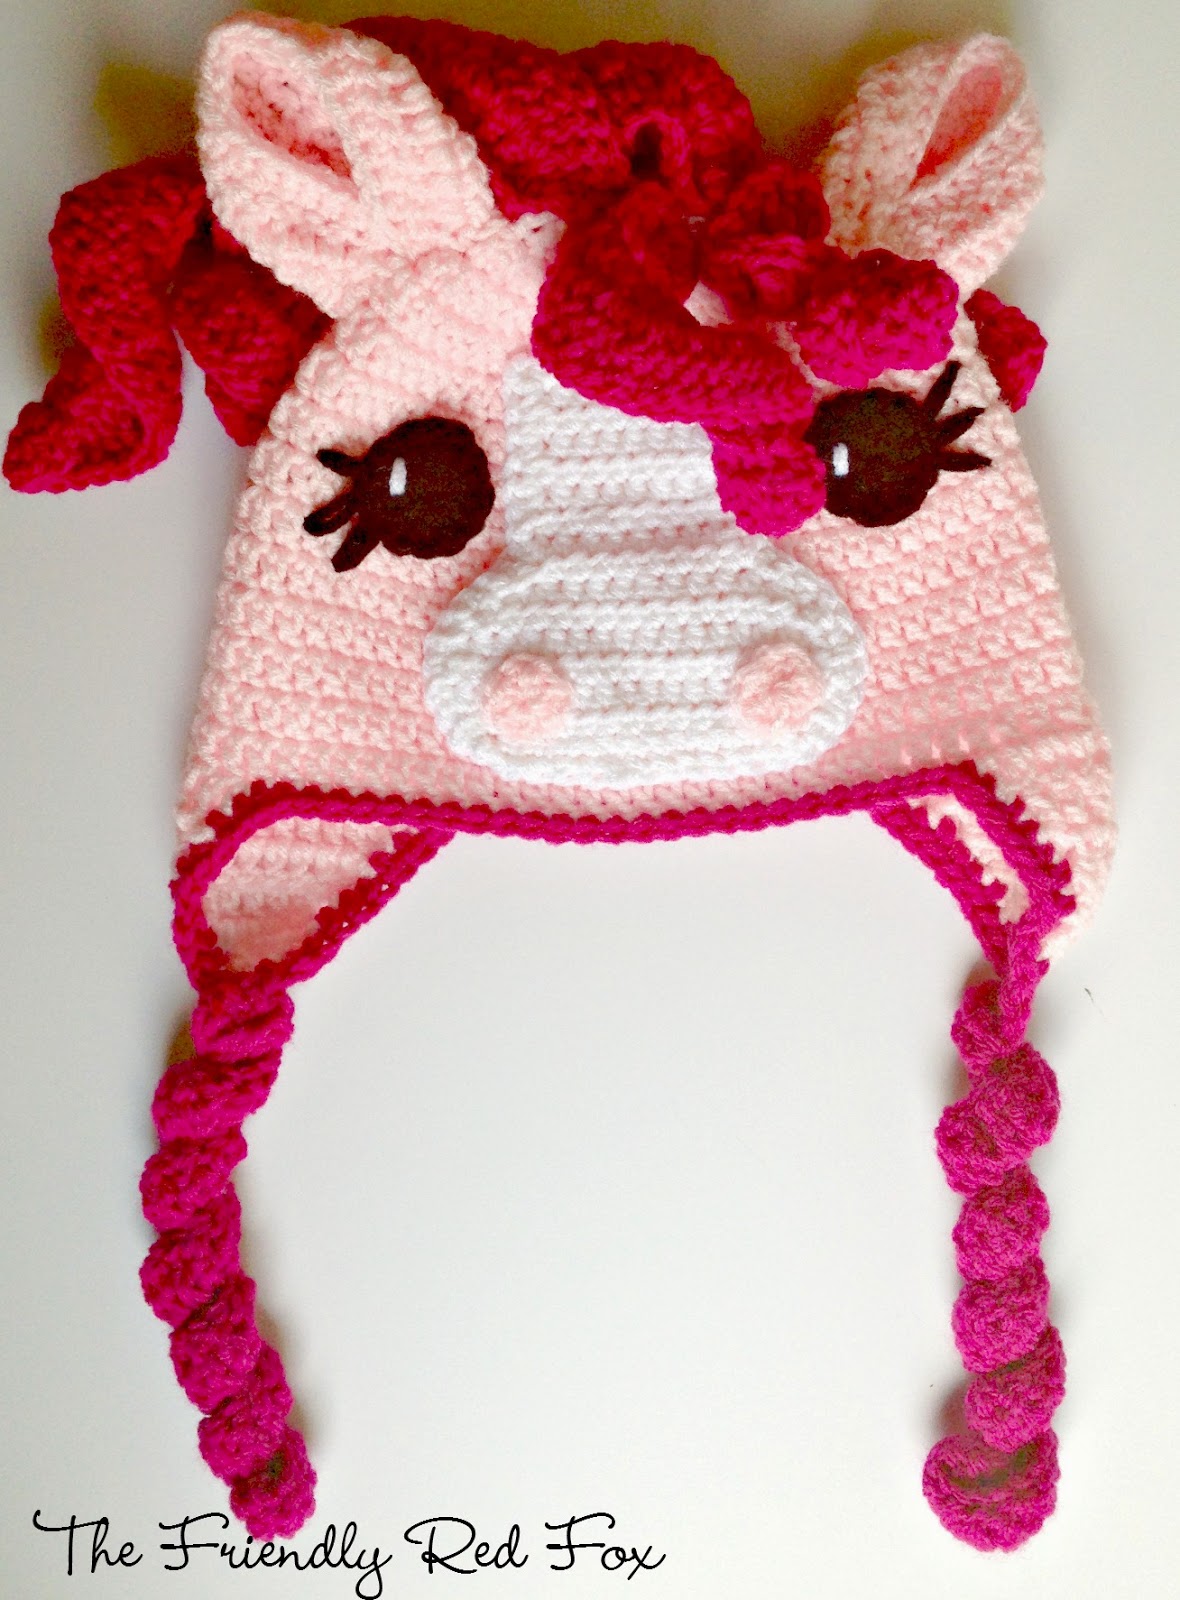
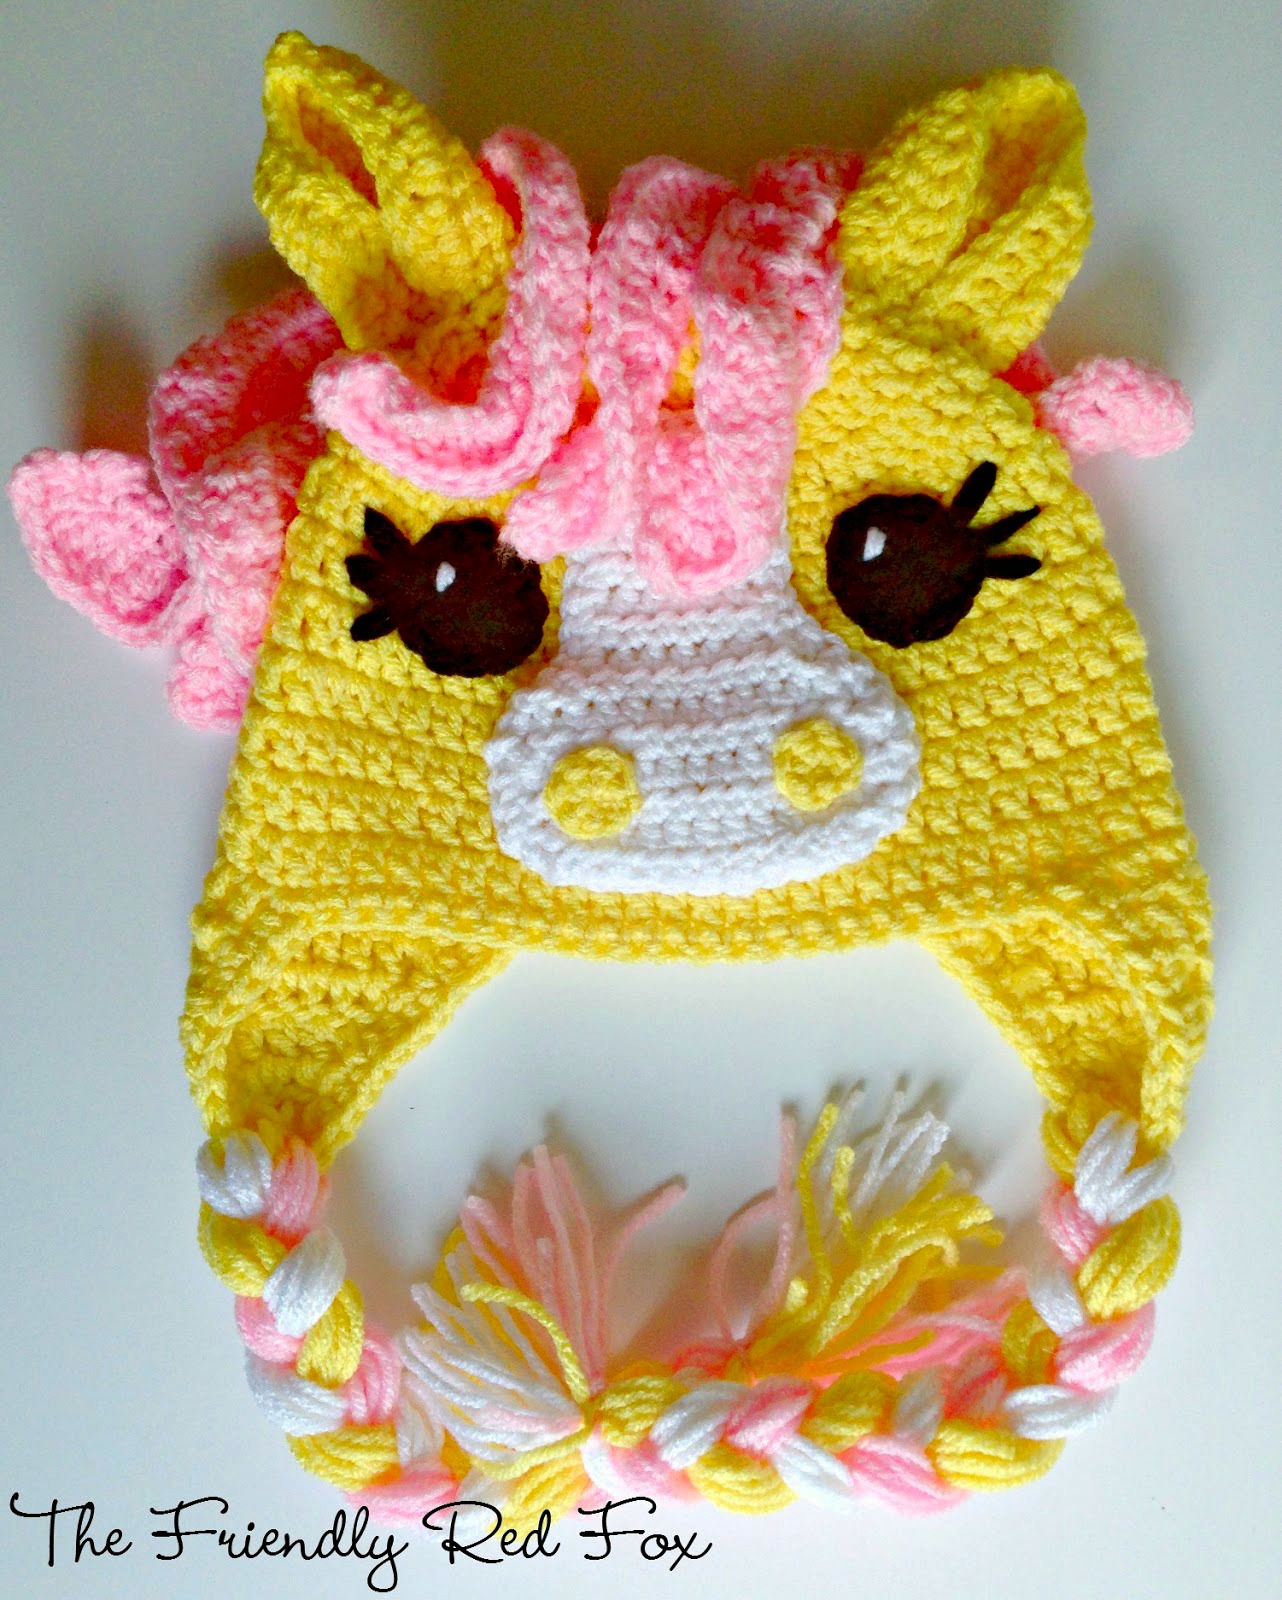
Free Crochet Little Pony Hat

What child doesn’t dream of having a pony? Make them this pony hat and they can BE the pony, and stay warm and look cute at the same time!
You will need:
- size H (5.00mm) hook or I (5.5mm) depending on size
- your choice of size 4 worsted weight yarn (I HIGHLY recommend Red Heart with Love for all of my character hats)
- Yarn needles

Start with the hat. You can find my Double Crochet Beanie Hat with Ear-flaps Here
Face Piece
5.0 (H) hook
Chain 10
Row 1: In second chain from hook 2HDC, HDC in next 7, 2 HDC. Chain 1 and turn. (11)
Row 2: 2HDC, HDC in next 9, 2HDC. Chain 1 and turn. (13)
Row 3: 2HDC, HDC in next 11, 2HDC. Chain 1 and turn. (15)
Row 4: HDC in each stitch across. Chain 1 and turn. (15)
Row 5: HDC DEC, HDC in next 11, HDC DEC. Chain 1 and turn. (13)
Row 6: HDC DEC, HDC in next 9, HDC DEC. Chain 1 and turn. (11)
Row 7: Slip stitch next 3. HDC in next 5. Chain 1 and turn. (8)
Row 8: HDC across, Chain 1 and turn. (5)
Row 9-14: HDC across, chain 1 and turn. (5)
Stop here for Toddler size.
Row 15-16: HDC across, chain 1 and turn. (5)
Stop here for Child/Adult size.
Crochet around the entire piece. SC for toddler size. HDC for Child/Adult. Fasten off and leave a tail long enough to sew on.
Nostrils (make 2)
In a magic ring, 6 SC. Join, fasten off and leave a tail long enough to sew on your nose.

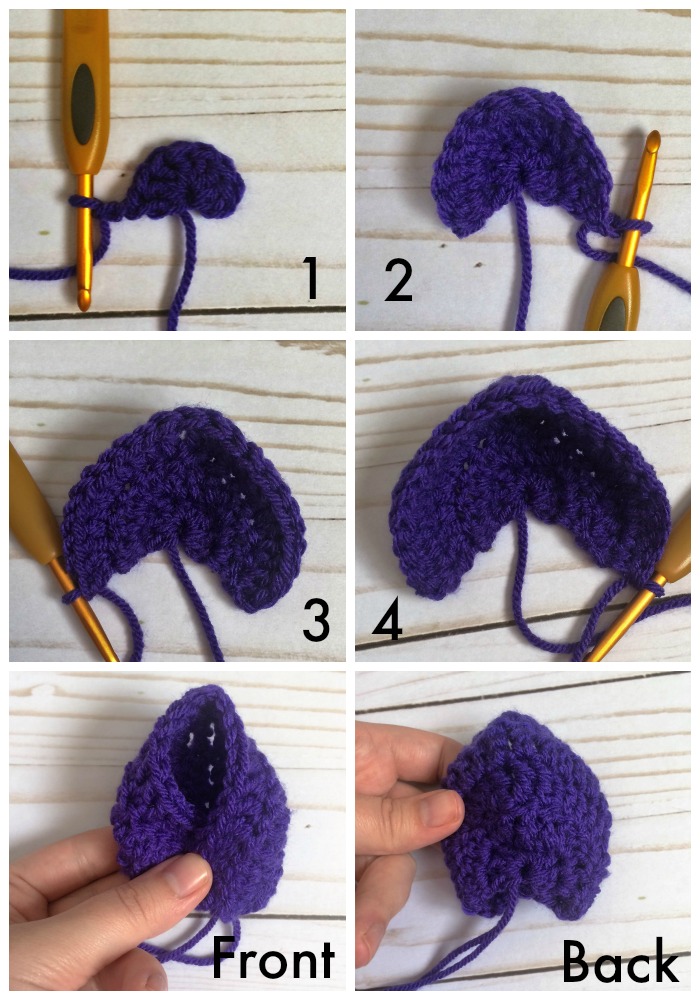
Ears (Make 2)
Round 1: Magic circle, chain 2, DC 7 in magic ring DO NOT JOIN. Chain 2 and turn. (7)
Round 2: 2 INC DC, DC & TR in the same stitch, TR, TR & DC in the same stitch, 2 INC DC chain 2 and turn (13)
Round 3: 5 INC DCs, TR, TR, TR, 5 INC DCs, chain 2, turn (23)
Round 4: DC in next 10 stitches, TR, TR, TR, DC in next 10 stitches (23)
Stop here for Toddler Size.
Round 5: DC in each chain around.
Stop here for Child/ Adult
Fasten off, leaving a tail long enough to sew on.
Bring one corner over the other. Sew them together, then attach the hat. See the pictures for each row, and what the front and back should look like.
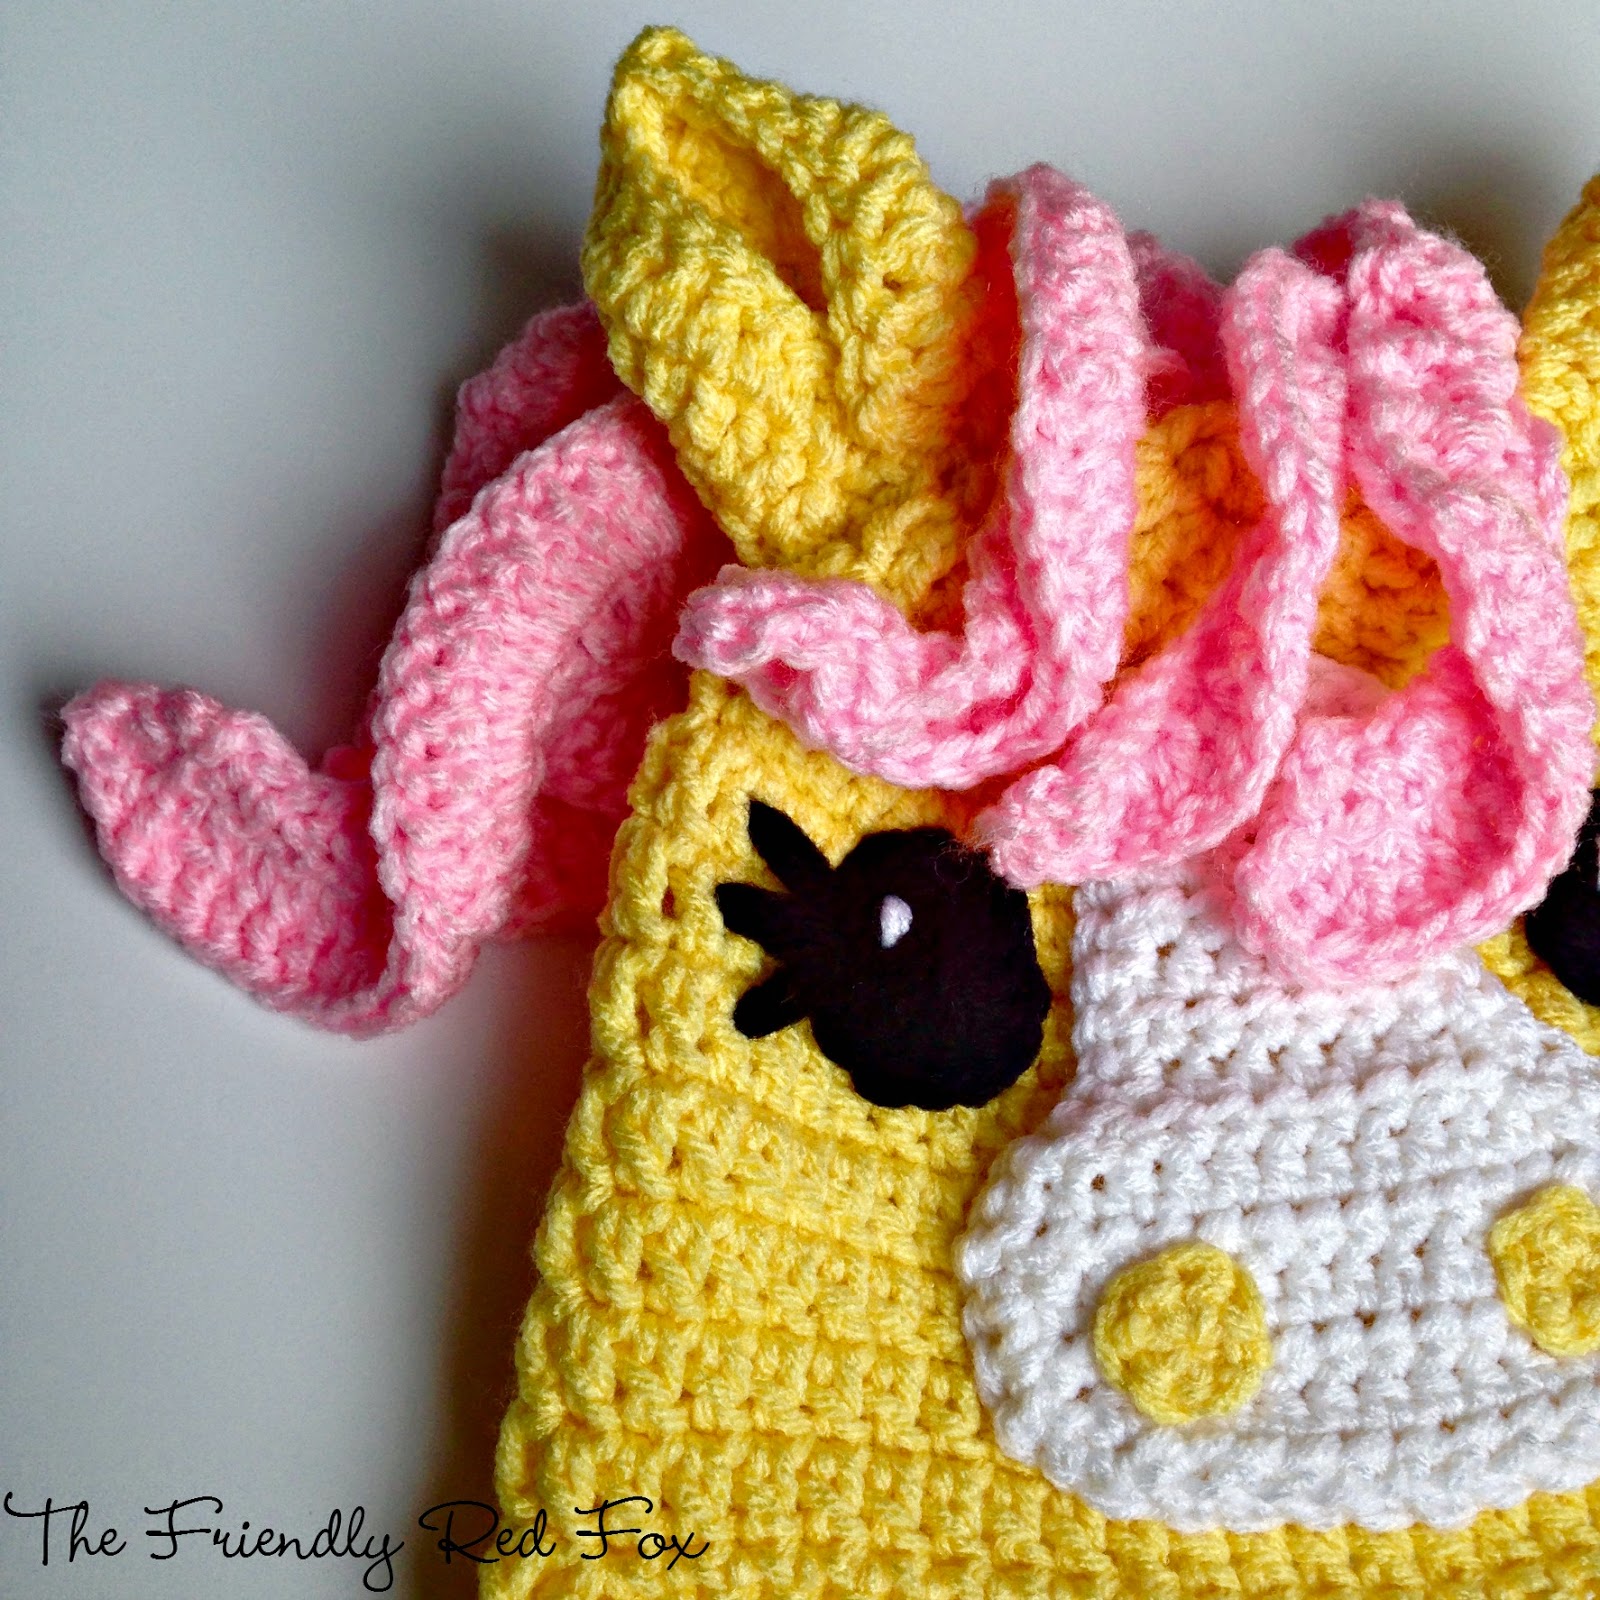
Eyes
Toddler
12 DC in magic circle, join. Leave an extra long tail to sew on and for eyelashes. Sew on little reflection spot with white yarn.
Child/Teen/Adult
14 DC in magic circle, join. Leave an extra long tail to sew on and for eyelashes. Sew on little reflection spot with white yarn.
A few tips on the eyes… When you sew on the eyelashes, determine how long you want it to be and sew down in a loop left by the hat’s pattern. I do two stitches and use the EXACT same holes on both ends to go through. Then do the same for the next three eyelashes. Of course if you are making a boy hat, you can leave the eyelashes off!
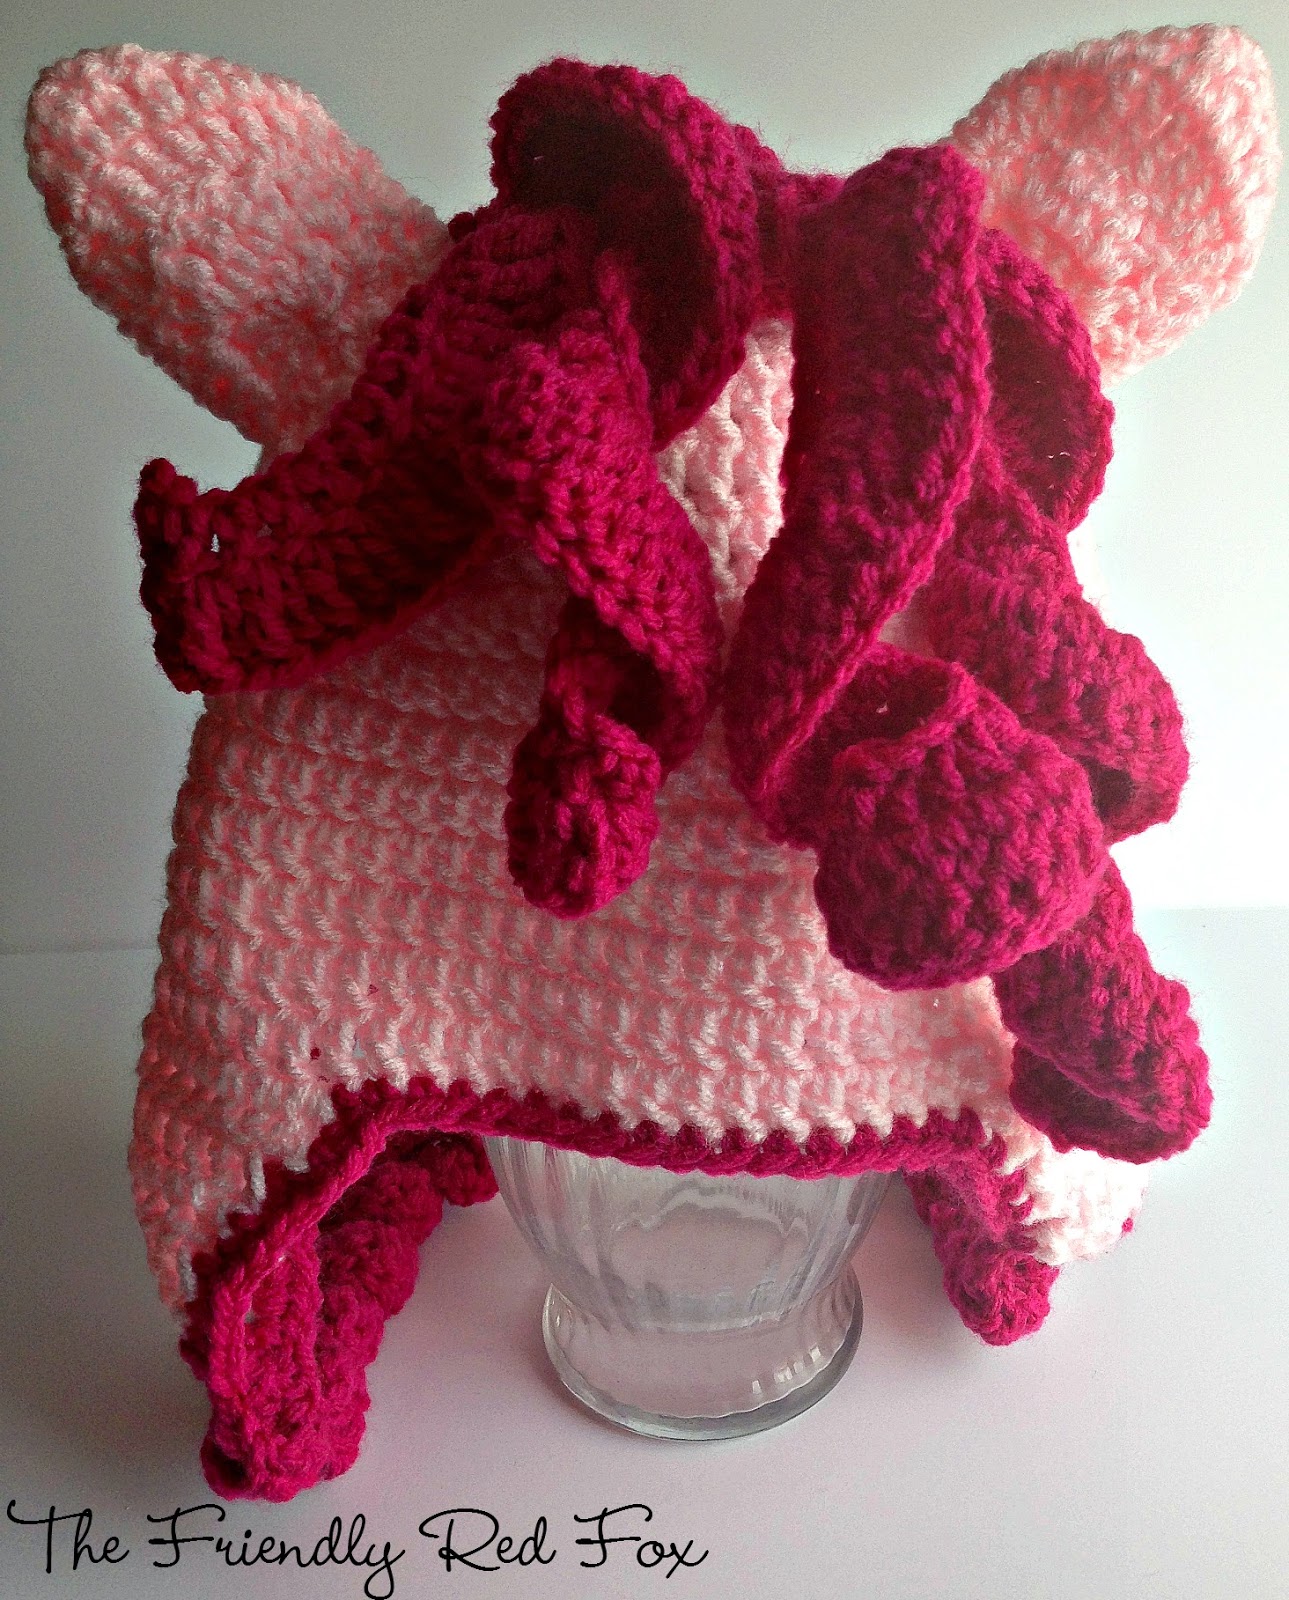
Wavy Hair
Chain to the length desired. DC across the length. Chain 2 and turn. Place 2 DC in each stitch across. Fasten off and sew on.
For tighter curls, chain to desired length, then add 2 DC in each chain across.
To attach the curls to the ear flaps, make two tight curls the same length and attach at the bottom.
For help with the ear flaps watch this video.

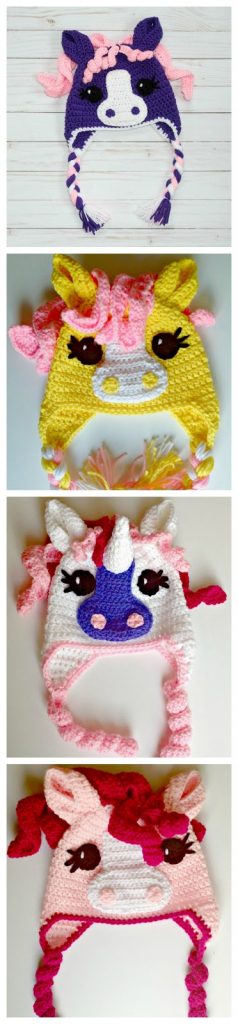
It would be super easy to make this a unicorn hat! I used the horn pattern from Repeat Crafter Me’s blog. Sara is one of my very favorite crochet bloggers and she has a cute pattern for a different type of unicorn over there!
There you have it! A beautiful crochet pony hat! Remember to post any pics of your creations to my Facebook Page! Or use the hashtag #thefriendlyredfox on instagram!


I am having problems with the Ears, on Row 3 after making DC and TRC as required at the end of the row you have 20 stitches, on Row 4 your asked to make 10 dc 3 trc then 10 dc, this amounts to 23 stitches where have the other 3 come from?
I was wondering if you could give me approximate amounts of yarn used for an adult sized hat?
Thanks!
I think there is a miscount on row 3 of the ears. It worked for me to do 5 2DC,(instead of 4)the 3 TC, then 5 2DC, to make 23 stitches and make row 3 end in the right place on row 2. Then row 4 works and the ear looks right to me.
Hi. I love your unicorn hat and I"m going to make one. Could you share how you did the ties as they are different than your other ones. Thanks so much!
I am working on your pattern and I did the one ear flap but how do i do the second one?
ty for your pattern….so very cute and my 3 year old grands gonna love it thanks again
Thank you for the design! I already knew how to do all of this but the face was something new I learned so thank you for the pattern to the face. I made these for my nieces for Christmas and they loved them.face also I found problems with the instructions for the ears so I just made my own but your instructions helped with it
Agree. The instructions for the ears are not correct. Will make up my own lol!
Such a cute pattern! Thanks for sharing!
Can you tell me how to work the ear flaps? Do i join the yarn at a certain point? I'm confused. Tyia!
so many mistakes in pattern i gave up , but yours is darling
For the child hat row 7 ends up with 66 not 64. Is it suppose to be 66?