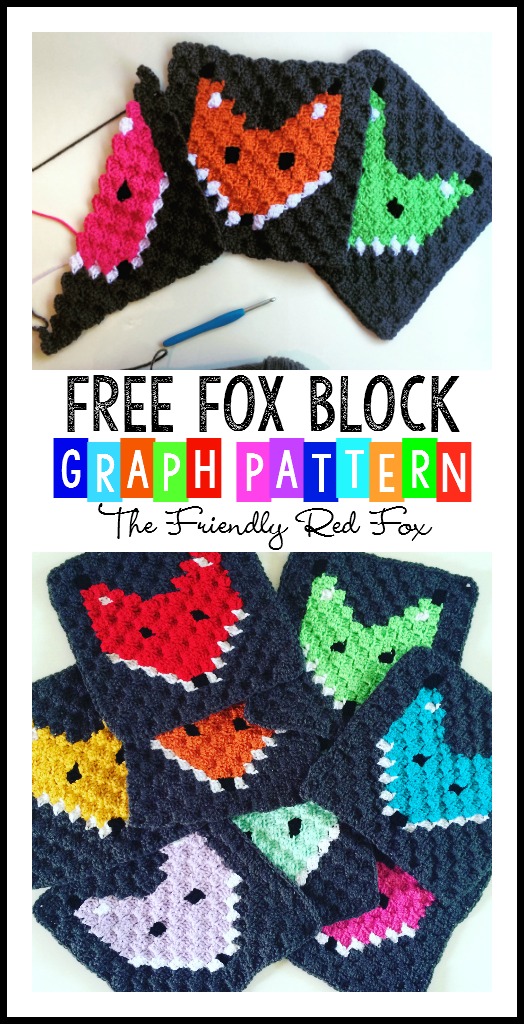
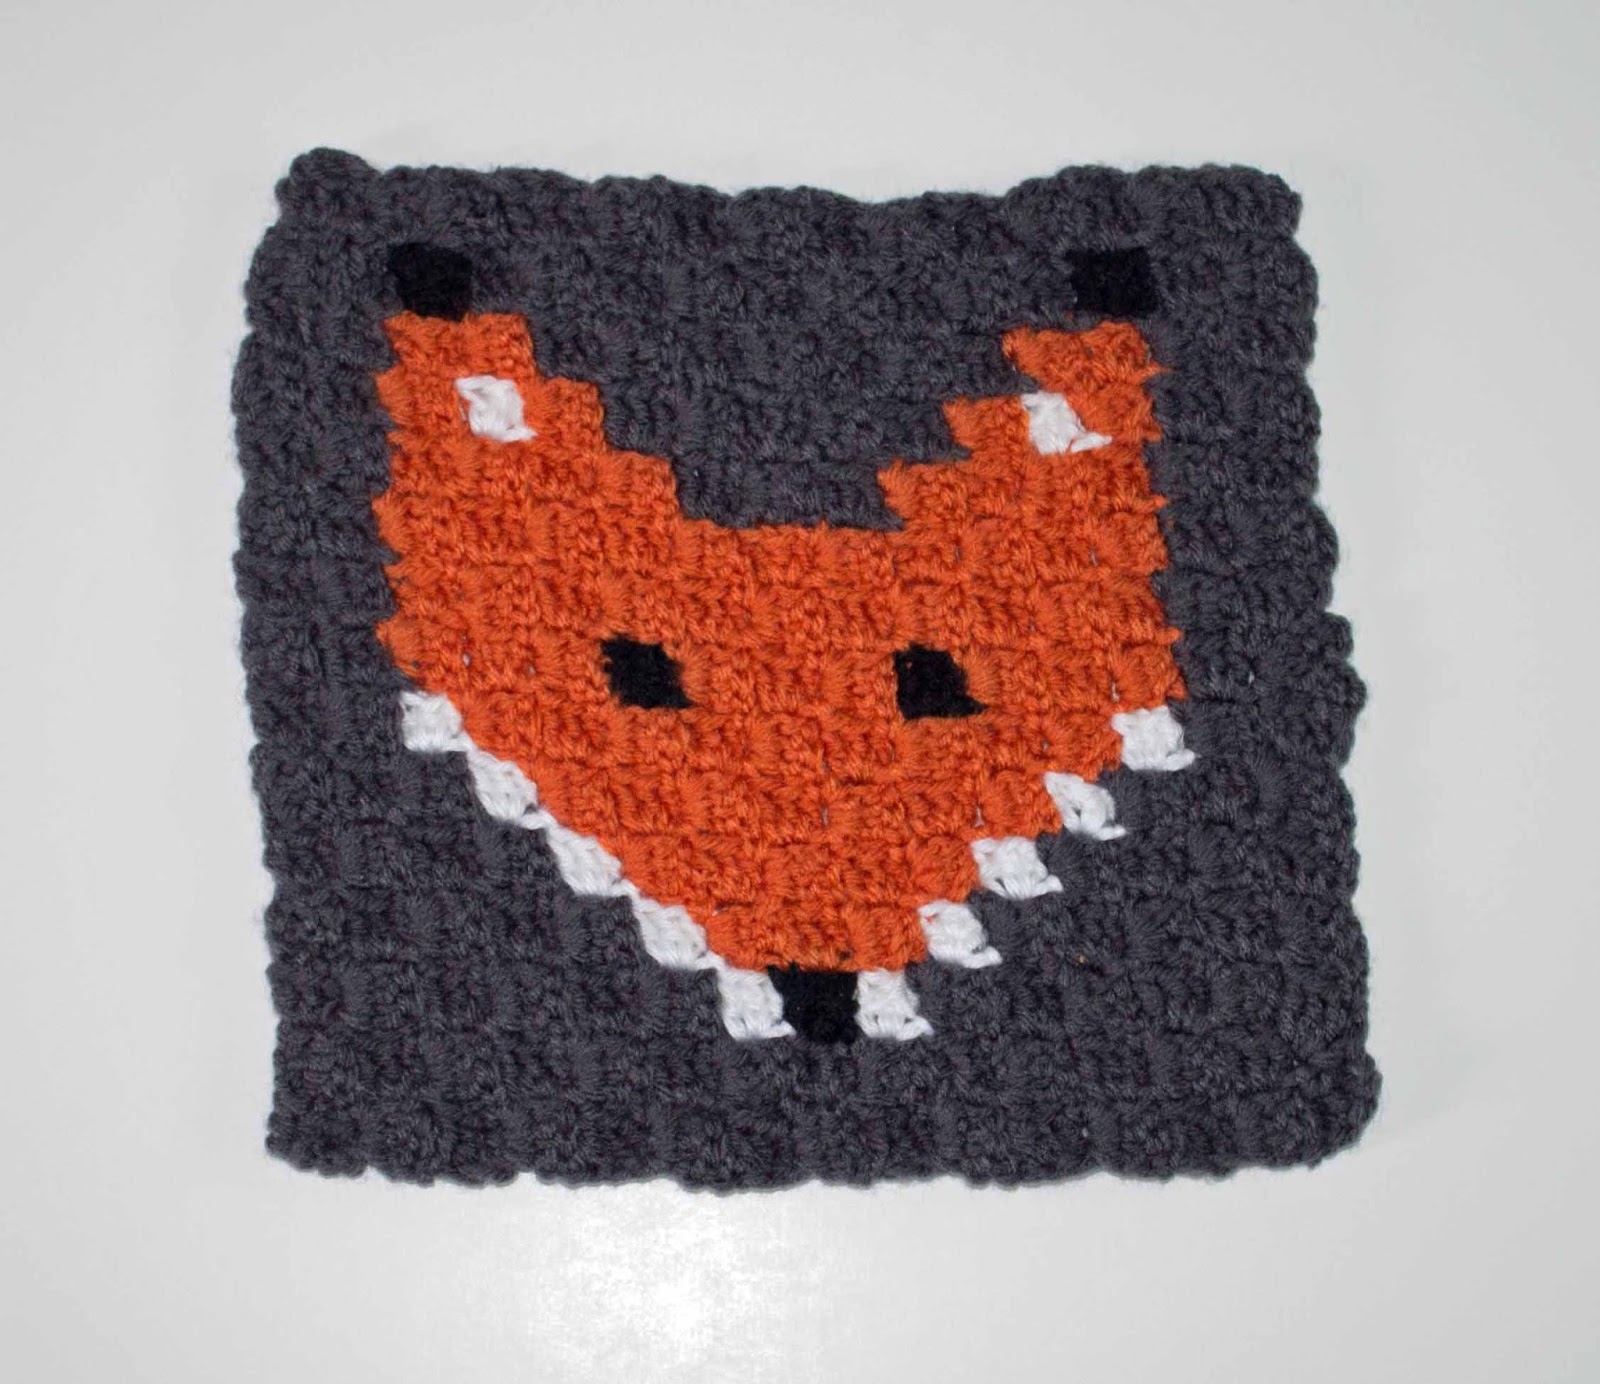
Corner to Corner Crochet Fox Block

little kiddos around so I opted for learning a new crochet method! And I
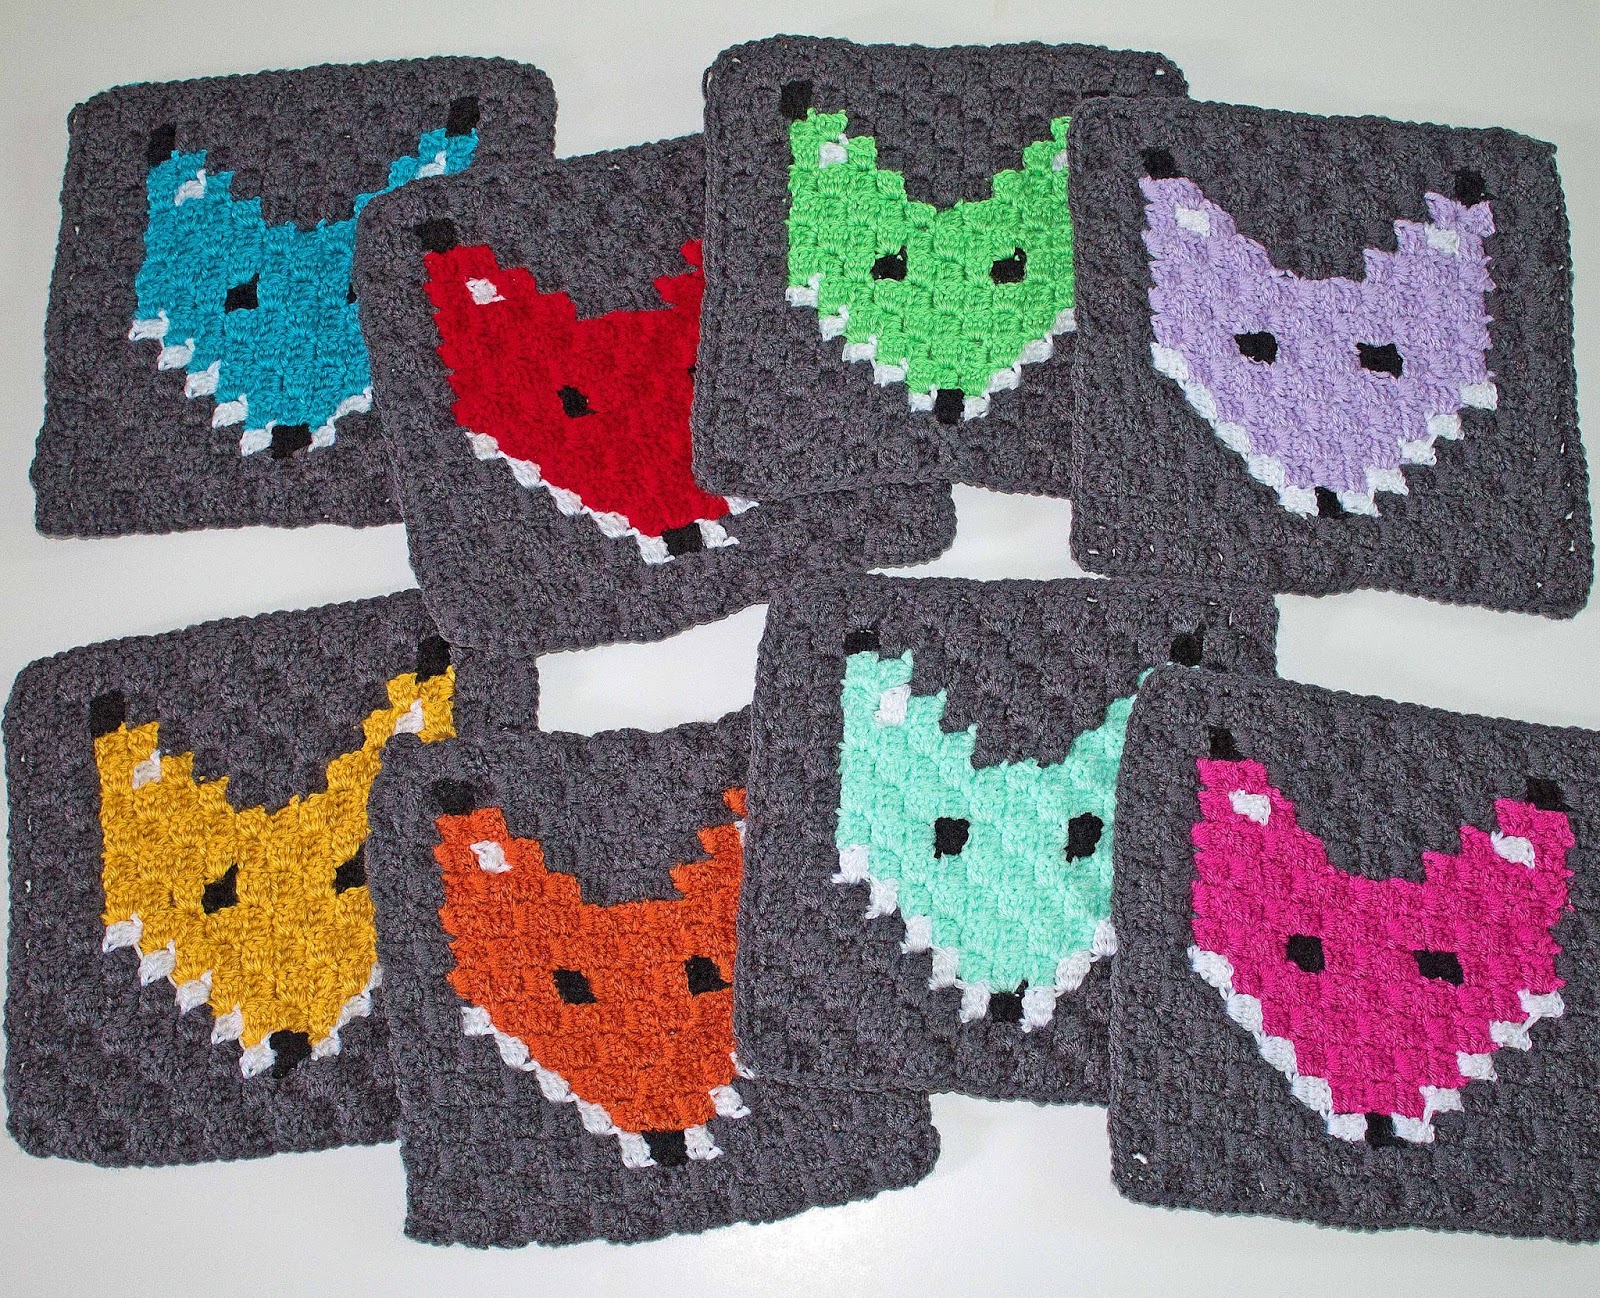
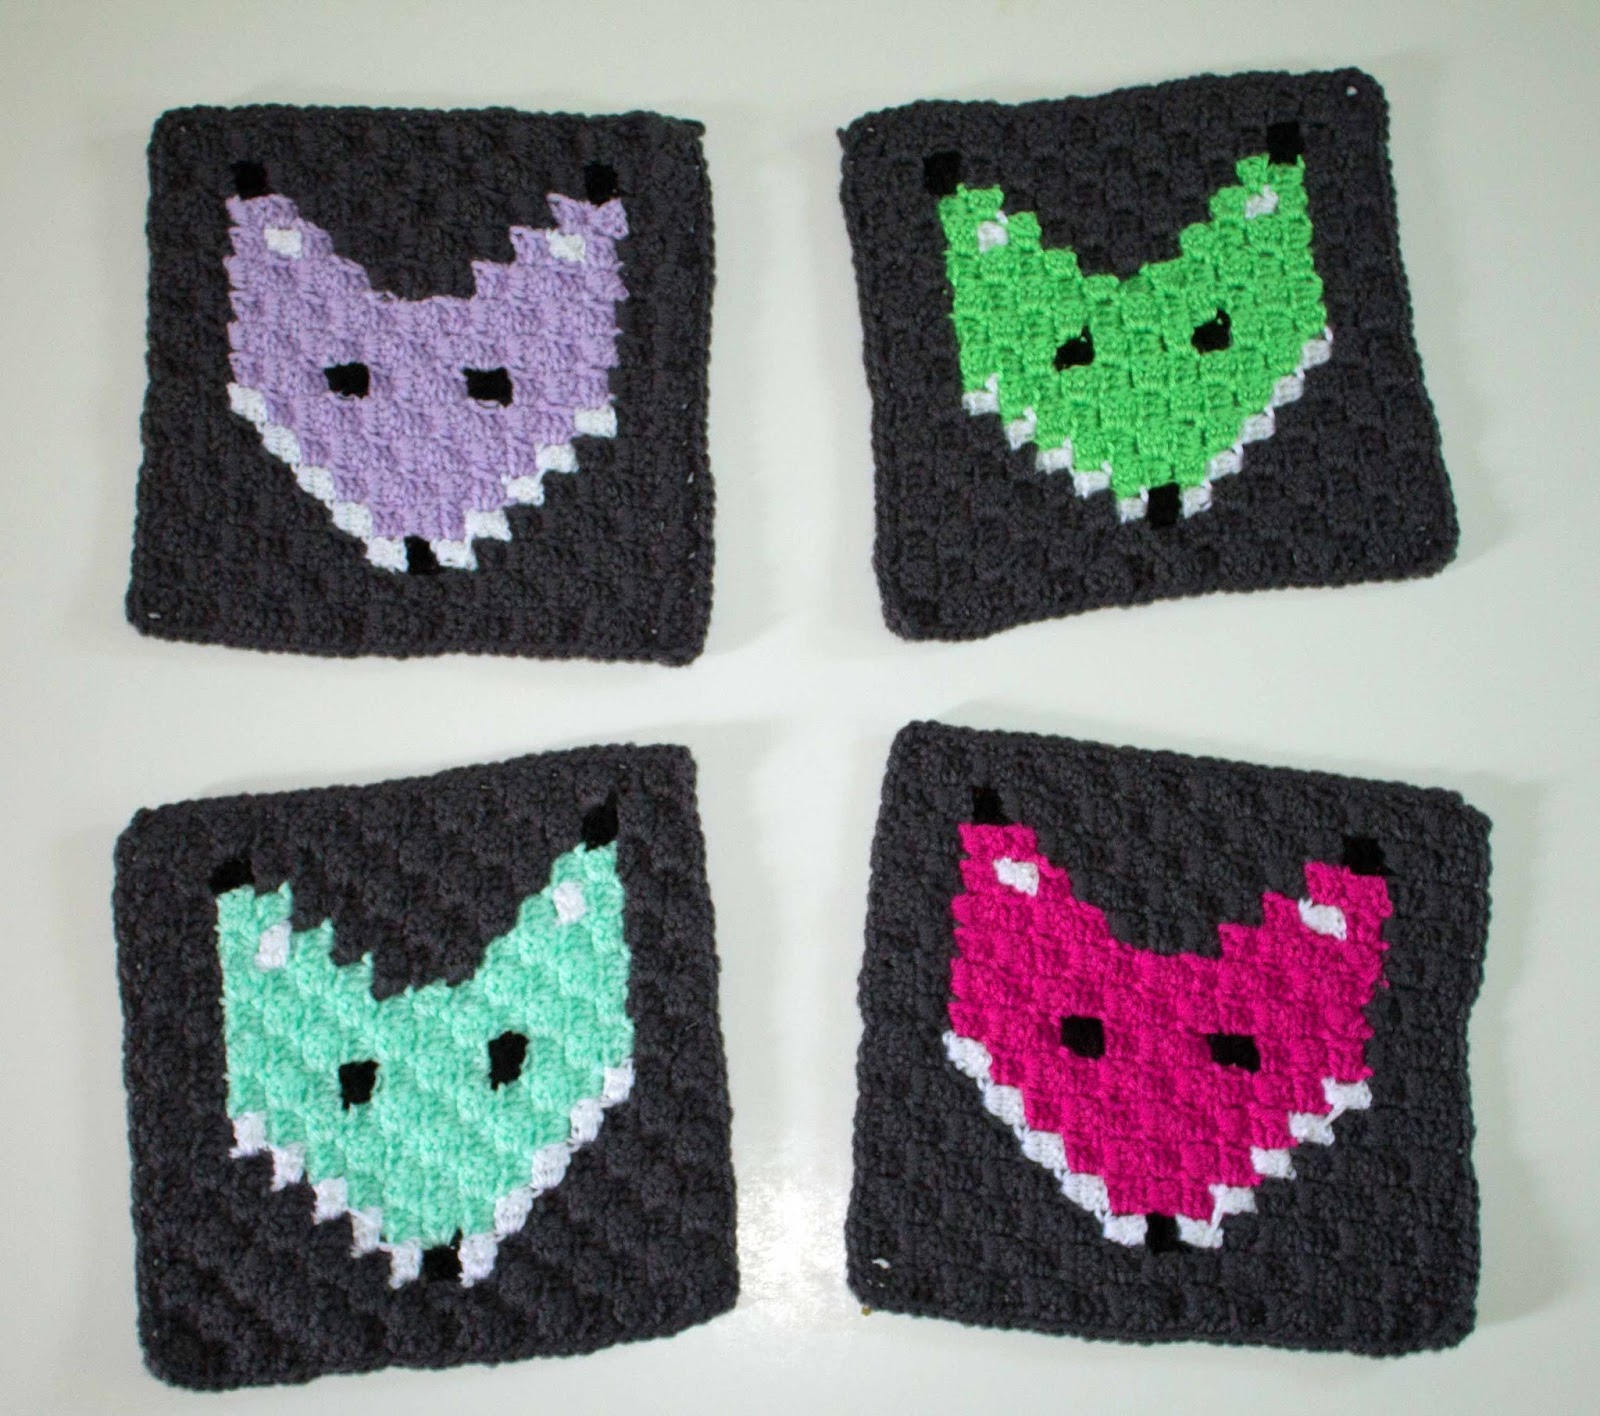
am SO glad I did. This won’t be my last c2c project! I am loving it because I have made so many blocks that I no longer need to look at my graph, but the fun new colors keep it new! Every time I finish one I think “this is my favorite!” until I add it to the pile and think “oh yeah! I love that one too!” So it’s a win win! I’m excited to see how it looks when I sew them all together!
To get started I looked at a lot of different how to’s and watched a lot of videos… I felt that this video from The Crochet Crowd was the best along with this really comprehensive post from One Dog Woof. Check them out if you are new to the corner to corner method!
Through some practice and quite a lot of frogging (do you know why they call it frogging? Because you have to rip it! rip it!) I did pick up a few tips that might help.
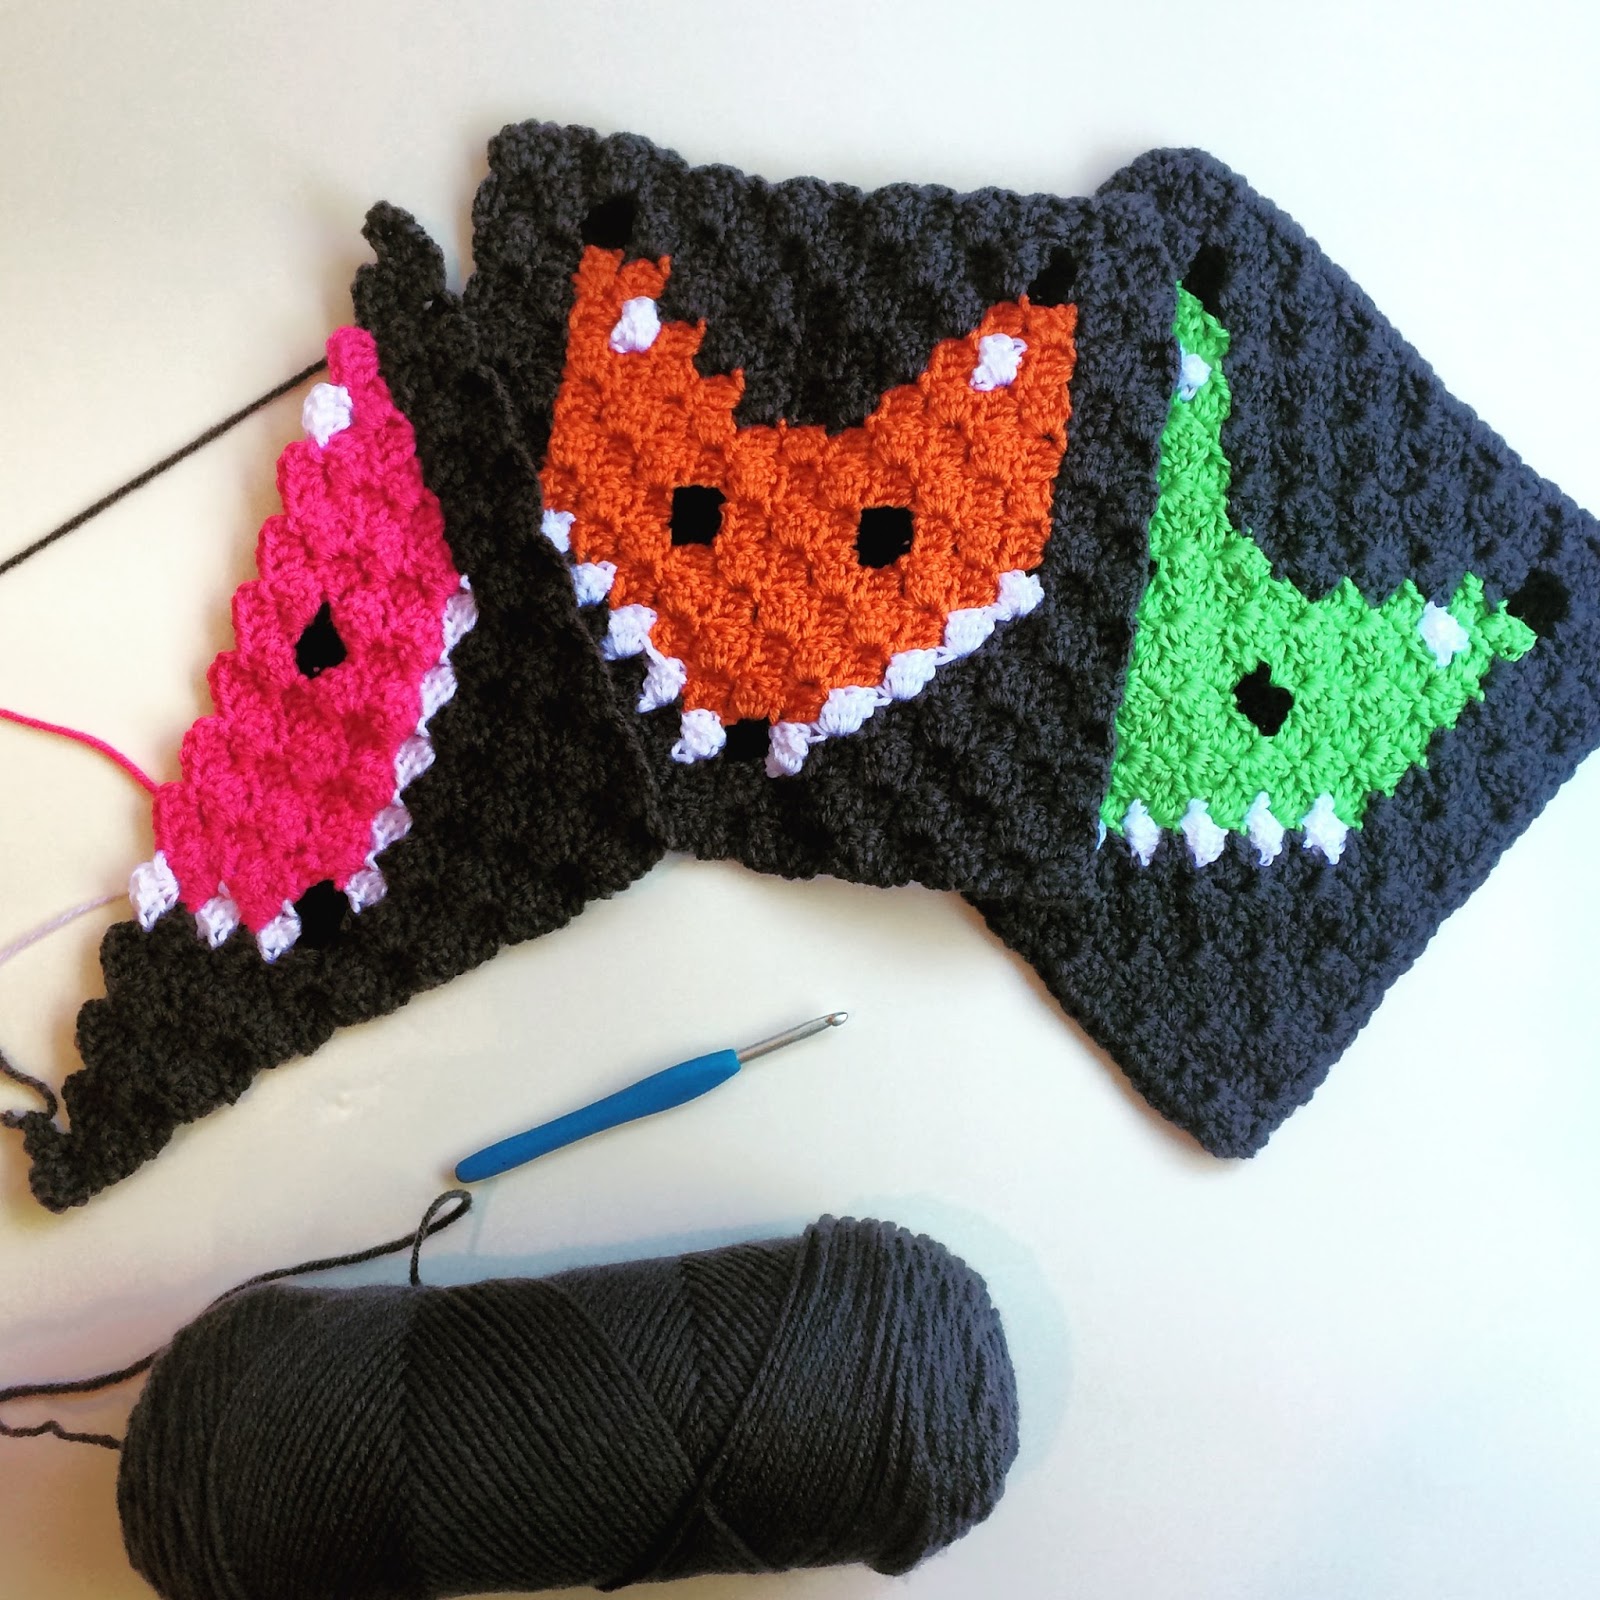
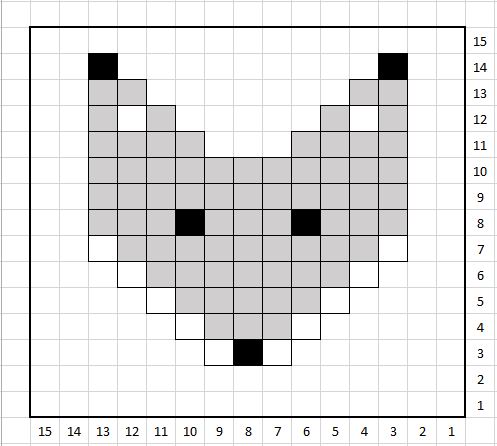
- The hardest part of this isn’t the stitch (that is super easy!) but the way of thinking about it… Your stitches do not go side to side. It’s diagonal. Which isn’t too confusing if you are doing stripes or solid colors, but with a graph you need to know when to change color. So it helps to think that the block you are working on will sit ON TOP.

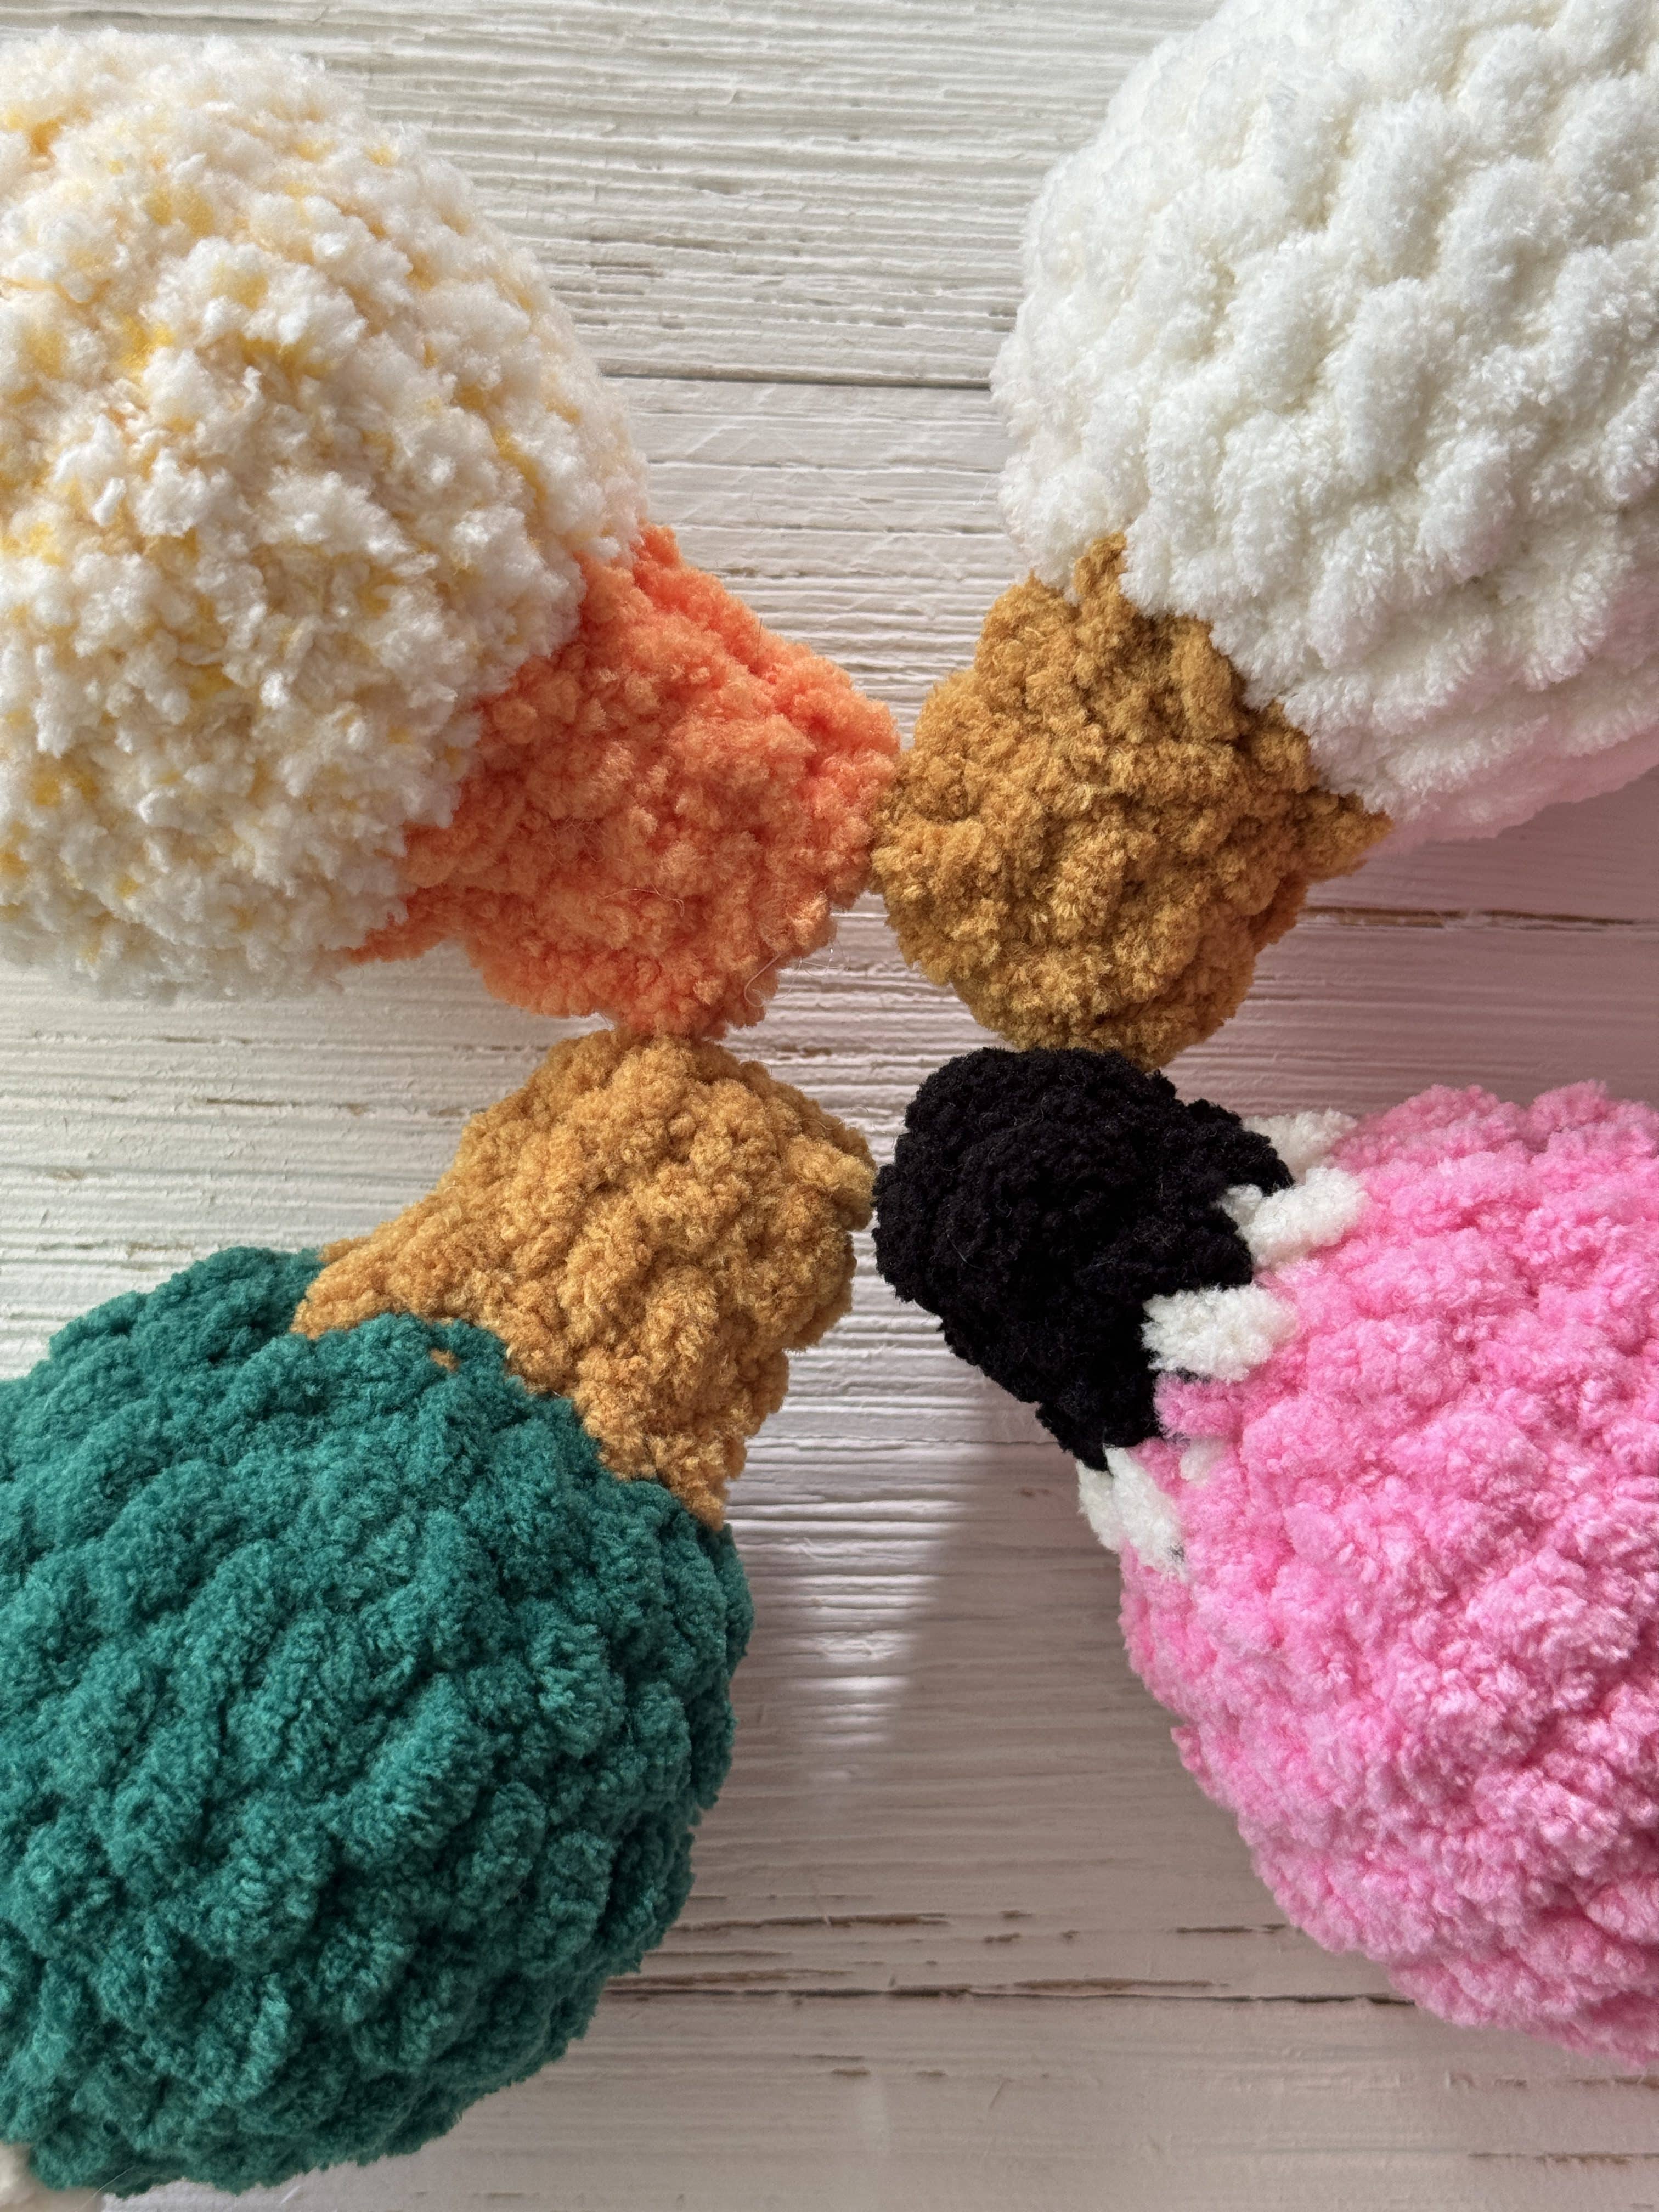
Like the WIP pink one above… the stitch that I am working on in the white loop will sit on top of the white one. So it will need to be pink! This will make sense as you go!
- When you change colors, carry the yarn through as much as possible. This will make for much fewer ends to weave in. I actually don’t mind weaving… but I feel like it is sturdier when I don’t have to weave every single time! I also like to bring the color along BEFORE I slip stitch! Once I learned that, my squares looked much cleaner.
- Remember to count the rows! There were a few times that I kept increasing when I should have started decreasing… It gets tricky on that row fifteen! (or how big your piece is- for this block it is 15×15) I felt like it was time to decrease, but you don’t until AFTER row 15. Seems simple enough, but I had a few blocks that I had to frog much more than I would like because of this!
- I choose to chain 5 and DC 3 which is different than the video. I just felt like it made it tighter and neater. Try both ways out and see what you like best.
- Like I said, these blocks are 15×15. They come out almost perfect to being a square foot. Handy for deciding blanket lengths!

Okay, so now that we have that out of the way, here is what you will need for these blocks.
- worsted weight (size 4) yarn (I used Red Heart charcoal for the background and my leftover yarns in the same weight for the colors. Along with black and white, of course.)
- Size H, 5.0 mm hook
- yarn needle for sewing in ends
I will be posting again when I finish all my squares and attach them. The plan right now is to do a 4×5 lapghan, so 20 squares! And I am still deciding what to do with the border… Any suggestions?

Beautiful and so fun looking!!
This is SO cute! Your work is beautiful,and the color choices are really nice!
Love it!