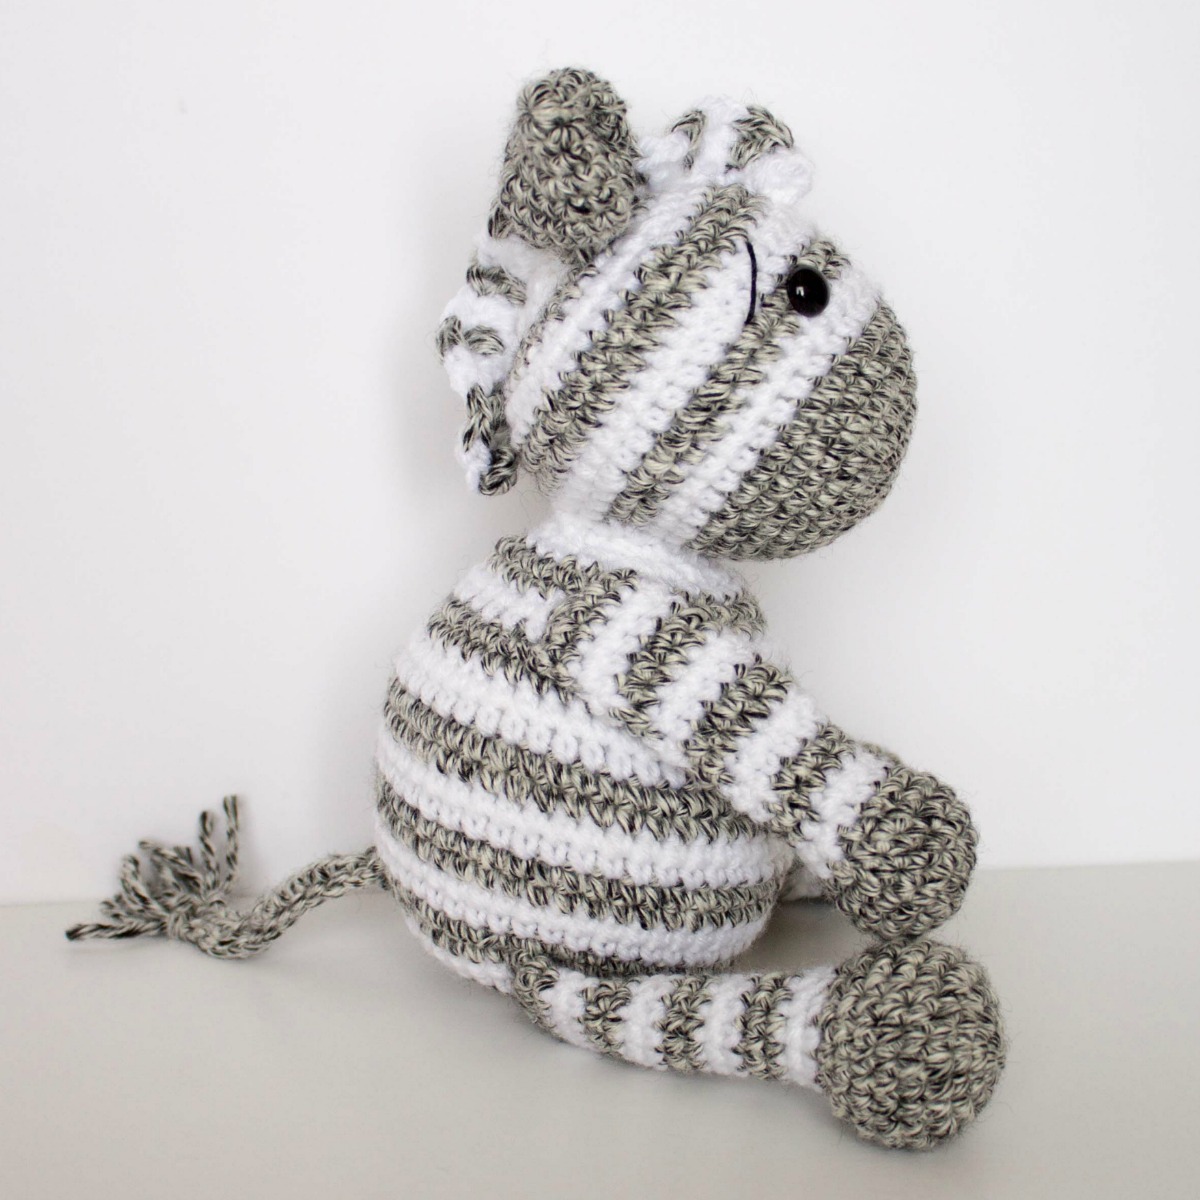
Free Crochet Zebra Pattern
I am SOO excited to share this Free Crochet Zebra Pattern with you in a crochet along! I love how they turned out, and those adorable stripes makes every color change WORTH IT. And if you are thinking “no way, I hate changing colors in amigurumi” you can stop right there because I made a ridiculously in depth video to show you the best and easiest way to do it. In fact, I made quite a few videos on the scariest parts of amigurumi so that even a beginner can make this! I promise. And since this is a crochet along, there will be a lot of hand holding. Are you ready to get started?

Then we will be kicking it off with this FREE crochet zebra pattern. It’s only a week long, but the pattern will remain up forever so no stress! And it will be released in two parts, along with some videos to really help you get it!

There are some things that you can be doing to prepare, though.
Then join The Friendly Crochet Club on Facebook. I will be posting updates in there as well. The best part is that you get to share your adorable zebras (and other projects!) and see what other people make. It’s a solid good time, and really the friendliest.
I also HIGHLY recommend you follow me on Instagram because there are a lot of great behind the scenes stuff (and I share A LOT in my instastories over there. all good things, all good things.)
THEN subscribe to my YouTube channel. I’m making 2018 the year of video and I am planning on sharing some awesome stuff over there, too!
After you have done all that… Get your supplies.
(if you buy from these links I may receive a small commission at no extra cost to you!)
You will need:
About 50g each of Size 4 Worsted weight yarn in white and your chosen accent color. I used Yarn Bee’s Denim in Color in pink and black, and I love this Yarn in White.
12mm safety eyes (there is a reason I recommend these… they are high quality and I have NEVER had a problem.)
Stuffing
E hook (3.25)
H hook (5.0)
Needle for sewing
Stitch marker
embroidery thread
If you are interested in why I recommend these particular tools read about why they are my Absolute Favorite Crochet Items here.

If you would like to purchase the ad-free printable PDF you can find it on Etsy or buy it right here!
I am SO excited to get started! Before you begin make sure you watch this video on how to change colors in amigurumi.
You will be changing colors every 2 rows for almost the entire thing,
so I recommend watching it BEFORE you get started. Once you finish this
pattern you will be a PRO 😉
Confused on how to do the magic circle? There is a video for that, too.
AND if you struggle with sewing on limbs and pieces I made a video showing how I do it.
Without further ado, let us get started!
This
pattern is property of The Friendly Red Fox. Please note this pattern
is only for PERSONAL USE. Please feel free to make as many items as you
wish for yourself, or as gifts. You may sell items made with this
pattern but PLEASE LINK BACK OR GIVE CREDIT TO ME AS DESIGNER. In no way
can you share, reproduce, or sell this pattern. Please respect my
rights as designer. Read through the entire pattern and the amigurumi
tips and tricks before you begin.
Abbreviations
SC- single crochet
SC INC- single crochet increase (2 SC in each stitch)
INV
DEC- Invisible decrease (put hook through the FRONT LOOP ONLY of two
consecutive stitches [two loops on hook] Yarn over pull through both
loops. [two loops on hook] Yarn over pull through two loops)
Magic Circle–
Make a loop, leaving a long tail to work with. Insert hook in center of
loop, yarn over and draw up a loop. Yarn over, pull through to make the
first chain (this does not count as a stitch!). Continue to crochet
over the loop and tail with the number of stitches called for. (If you
need 6 SC, then crochet 6 SC inside the ring.) Pull the tail to close
the circle.
Always move your stitch marker to the last stitch in the round. This pattern is worked in continuous rounds.
Everything but the mane will use the 3.25 hook.
Head
Using the accent color worsted weight yarn:
Round 1: In a magic circle, 6 SC.
Round 2: SC INC in each around. (12)
Round 3: SC in first, SC INC in next. Repeat around. (18)
Round 4: SC in first 2, SC INC in next. Repeat around. (24)
Round 5: SC in first 3, SC INC in next. Repeat around. (30)
Round 6: SC in first 4, SC INC in next. Repeat around. (36)
Rounds 7-9: SC in each around. (36)
Change color. From here on out, change your color every 2 rows.
Rounds 10-12: SC in each around. (36)
Round 13: SC in first 5, SC INC in next. Repeat around. (42)
Round 14: SC in first 6, SC INC in next. Repeat around. (48)
Round 15-18: SC in each around. (48)
Attach
the eyes between rows 12 and 13, 7 stitches apart. Begin to stuff here.
Sew on any eyebrows or eyelashes with embroidery thread.
Round 19: SC in the first 6, INV DEC in the next. Repeat around. (42)
Round 20: SC in the first 5, INV DEC in the next. Repeat around. (36)
Round 21: SC in the first 4, INV DEC in the next. Repeat around. (30)
Round 22: SC in the first 3, INV DEC in the next. Repeat around. (24)
Round 23: SC in the first 2, INV DEC in the next. Repeat around. (18)
Round 24: SC in the first, INV DEC in the next. Repeat around. (12)
Round 25: INV DEC around. (6)
Fasten off and carefully sew the remaining hole closed.
Body
You
will change the color of your yarn every two rows. On round 3 you will
change to black, on round 5 you will change to white, etc.
Round 1: In a magic circle, 6 SC.
Round 2: SC INC in each around. (12)
Round 3: SC in first, SC INC in next. Repeat around. (18)
Round 4: SC in first 2, SC INC in next. Repeat around. (24)
Round 5: SC in first 3, SC INC in next. Repeat around. (30)
Round 6: SC in first 4, SC INC in next. Repeat around. (36)
Round 7: SC in first 5, SC INC in next. Repeat around. (42)
Round 8-20: SC in each around. (42)
Begin to stuff here.
Round 21: SC in the first 5, INV DEC in the next. Repeat around. (36)
Round 22: SC in each around. (36)
Round 23: SC in the first 4, INV DEC in the next. Repeat around. (30)
Round 24: SC in each around. (30)
Round 25: SC in the first 3, INV DEC in the next. Repeat around. (24)
Round 26: SC in the first 2, INV DEC in the next. Repeat around. (18)
Rounds 27-29: SC in each around (18)
Fasten
off, leaving a long tail. This is what you will use to sew on the head.
Attach the head by pinning it in place. The nose will hang off toward
the front, while the back will be mostly attached. Sew around multiple
times. Make sure the neck is firmly stuffed before you attach. Watch this video for extra help.
Legs (make 2)
*I only stuff the very bottom and very lightly. Then not at all through the top half.*
Using accent color:
Round 1: In a magic circle, 6 SC.
Round 2: SC INC in each around. (12)
Round 3: SC in first, SC INC in next. Repeat around. (18)
Round 4: SC in first 2, SC INC in next. Repeat around. (24)
Rounds 5-7: SC in each around. (24)
Round 8: SC in the first 2, INV DEC in the next. Repeat around. (18)
Round 9: SC in the first, INV DEC in the next. Repeat around. (12)
Change to white. Change colors every two rows for the rest of the leg.
Rounds 10-25: SC in each around (12)
Fasten off and leave a long tail to sew onto the body. Attach them in the middle, about 5 rows from the very center. Make sure you watch the video for all my best tips and tricks on how to attach limbs.

Arms
*I only stuff the very bottom and very lightly. Then not at all through the top half.*
Using accent color:
Round 1: SC 6 in a magic ring.
Round 2: SC INC in each around. (12)
Round 3: SC in first, SC INC in the next. Repeat around. (18)
Rounds 4-6: SC in each around. (18)
Round 7: SC in first, INV DEC in the next. Repeat around. (12)
Change color. Alternate colors every two rows.
Rounds 8-23: SC in each around.(12)
Fasten off and leave a long tail to sew on the body. I sew them on rows 22- 26 angled slightly so that the arms are angled down toward the feet.
Ears (make two)
Using Accent Color:
Round 1: In a magic circle, 6 SC.
Round 2: SC in each around. (6)
Round 3: SC INC in each around. (12)
Round 4: SC in first, SC INC in next. Repeat around. (18)
Round 5: SC in the first 2, SC INC in next. Repeat around. (24)
Rounds 6-7: SC in each around. (24)
Round 8: SC in first 2, INV DEC in next. Repeat around. (18)
Round 9: SC in first, INV DEC in next. Repeat around. (12)
Round 10: SC in each around.
Fasten off, leaving a tail to sew on the head. Pinch the bottom of the ear to make a little crease and sew a few stitches to hold the shape. I sewed them about 6 rows from the last row of the head. I attached them so that they stand mostly straight, lined up with the eyes.
Tail
Chain to 15. HDC in the second chain from hook and in each chain across. Fasten off leaving a tail to sew on. Attach 6 strands of yarn and trim to desired size. Sew on the bottom.
Mane
Using the 5.0 hook:
With white, chain 20. In the third chain from the hook, DC INC. Change yarn color to black in your second DC. Then DC INC in the next chain using the black. Take care to lay the white tail over the chain so that you crochet over it. Continue this pattern to the end. Fasten off leaving a long tail.
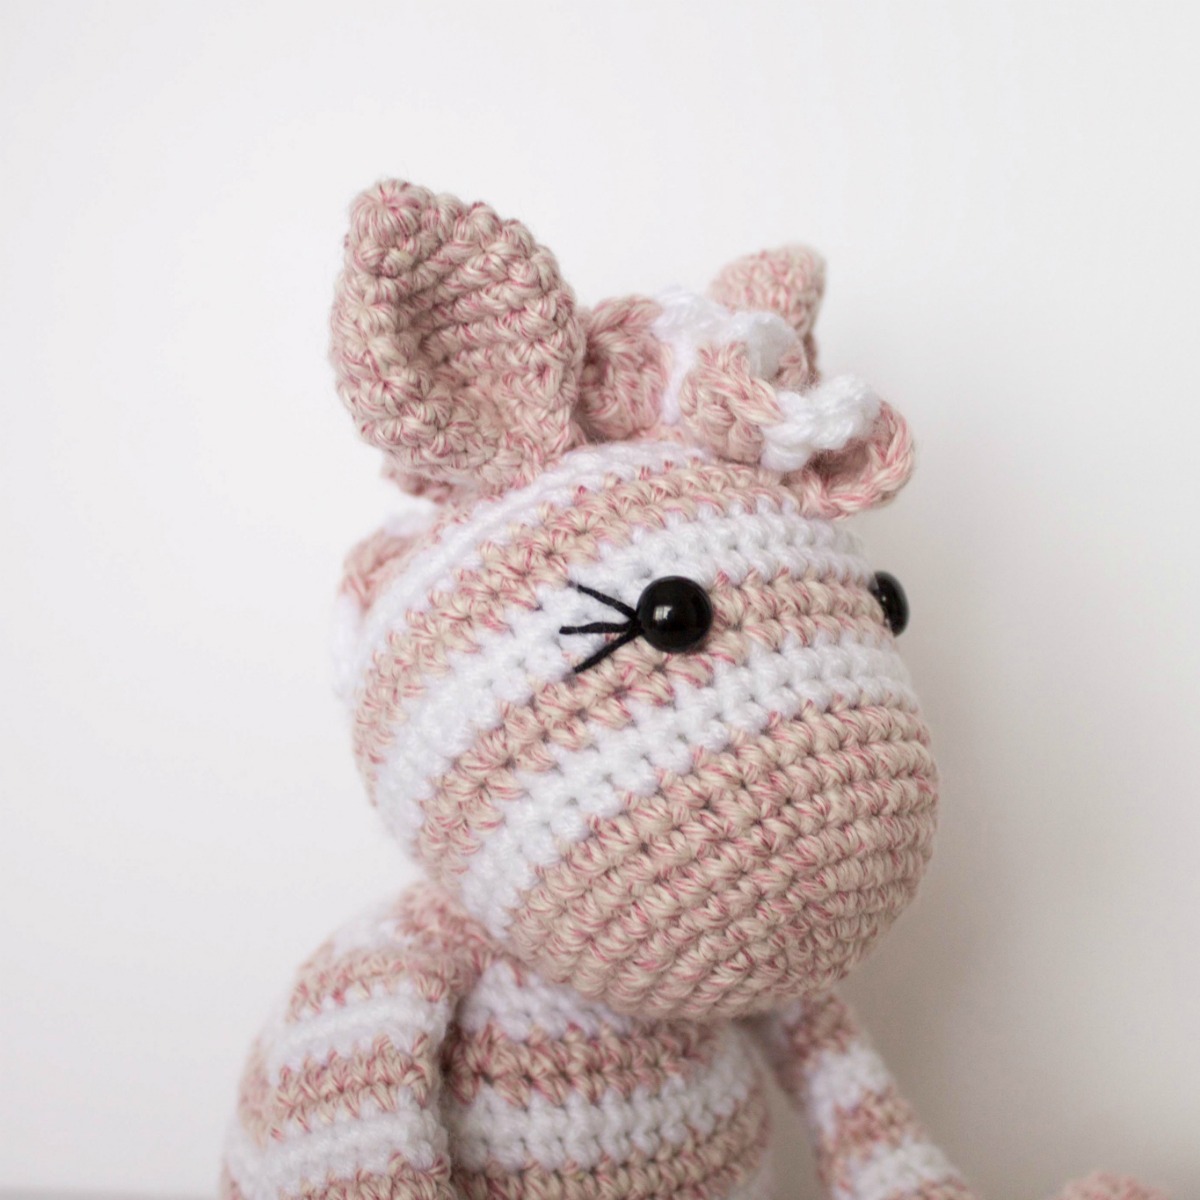
For the larger, more wavy mane on the pink zebra, I used a TRC instead of a DC and TRC 3 times, instead of twice in each chain.
Weave in the extra ends, but keep the long tail to sew on. I pin the front piece centered between the eyes a couple of rows up. Pin the chained part to the head and sew on.