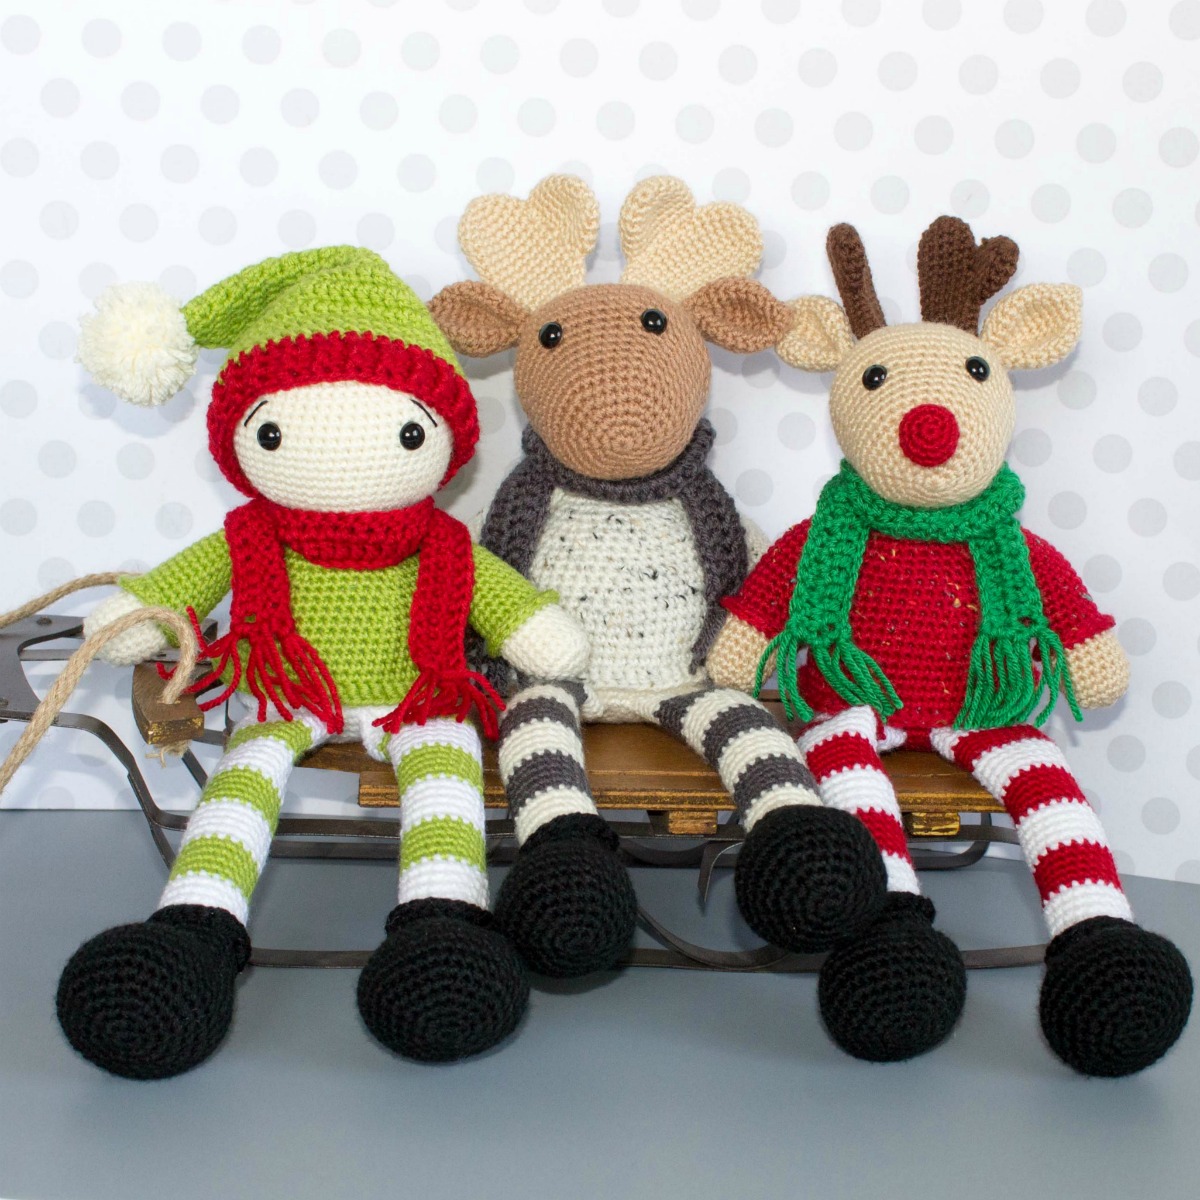
Free Crochet Moose and Crochet Reindeer Pattern
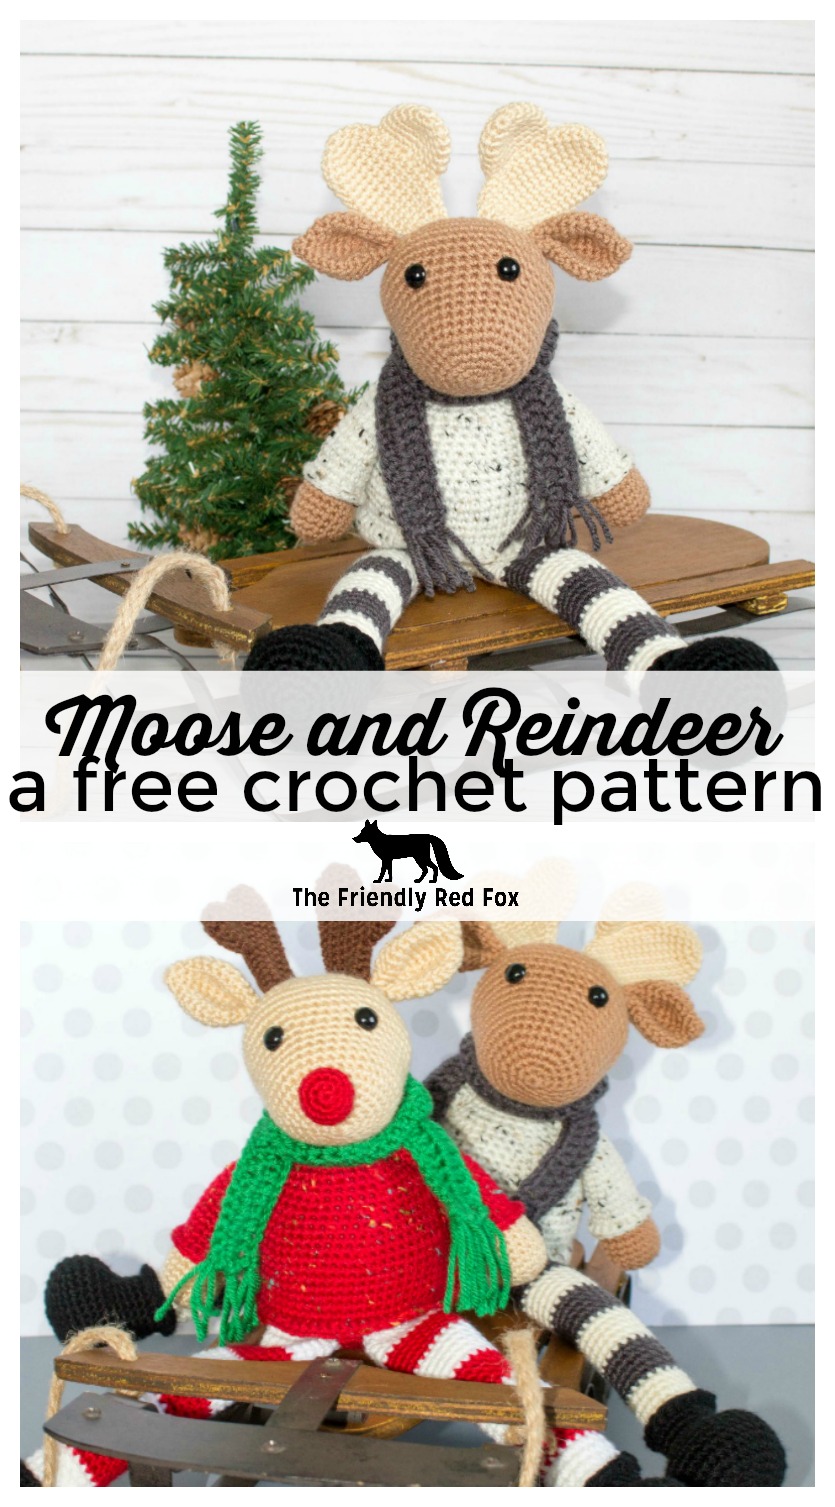
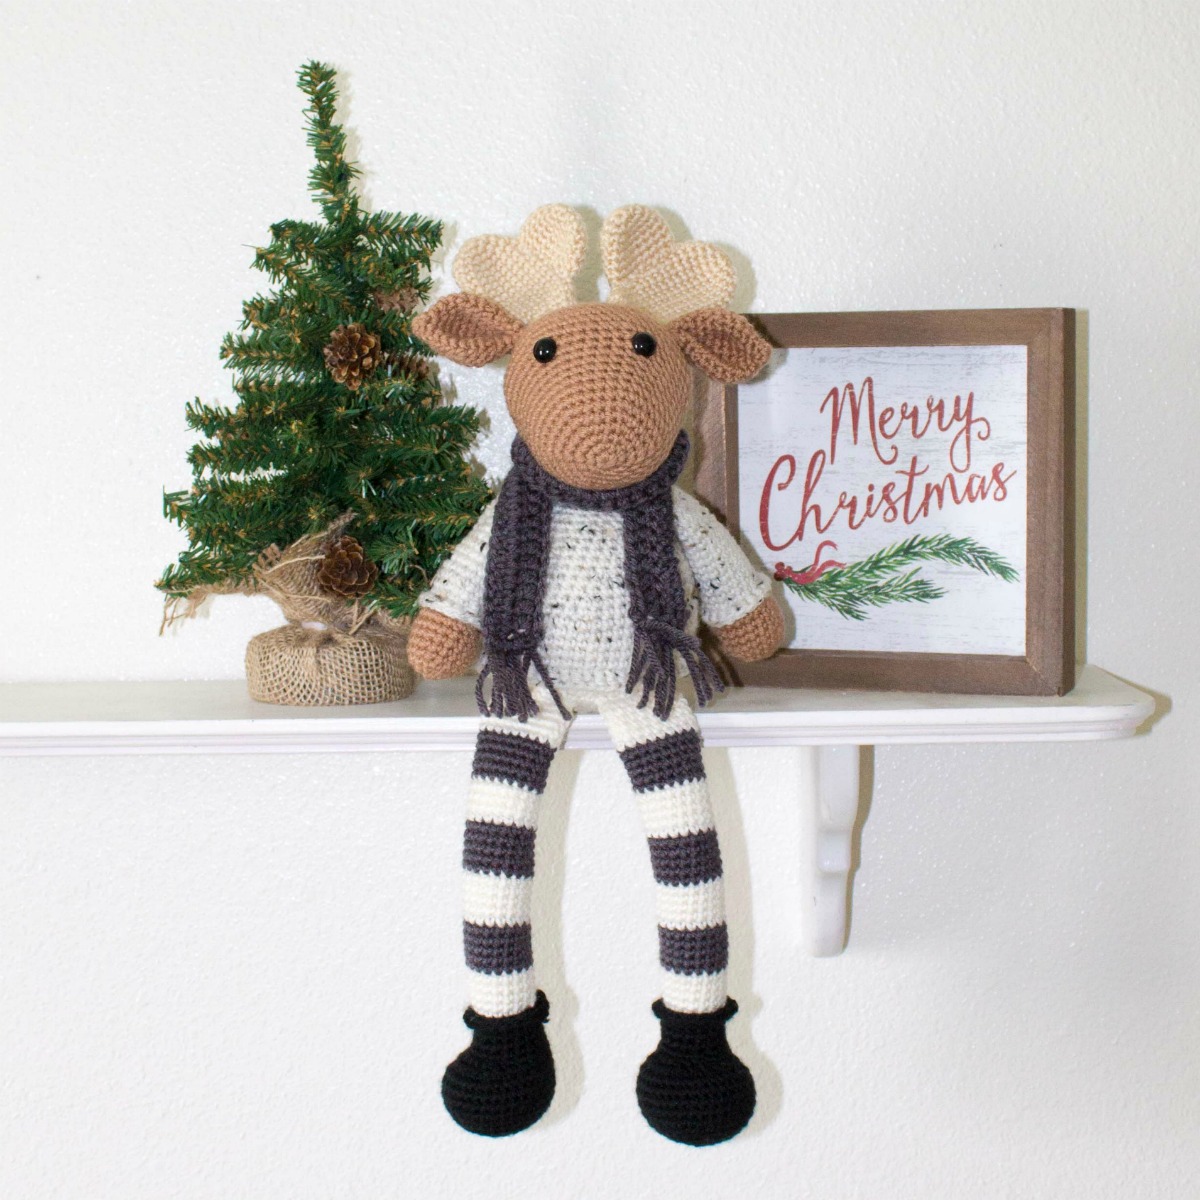
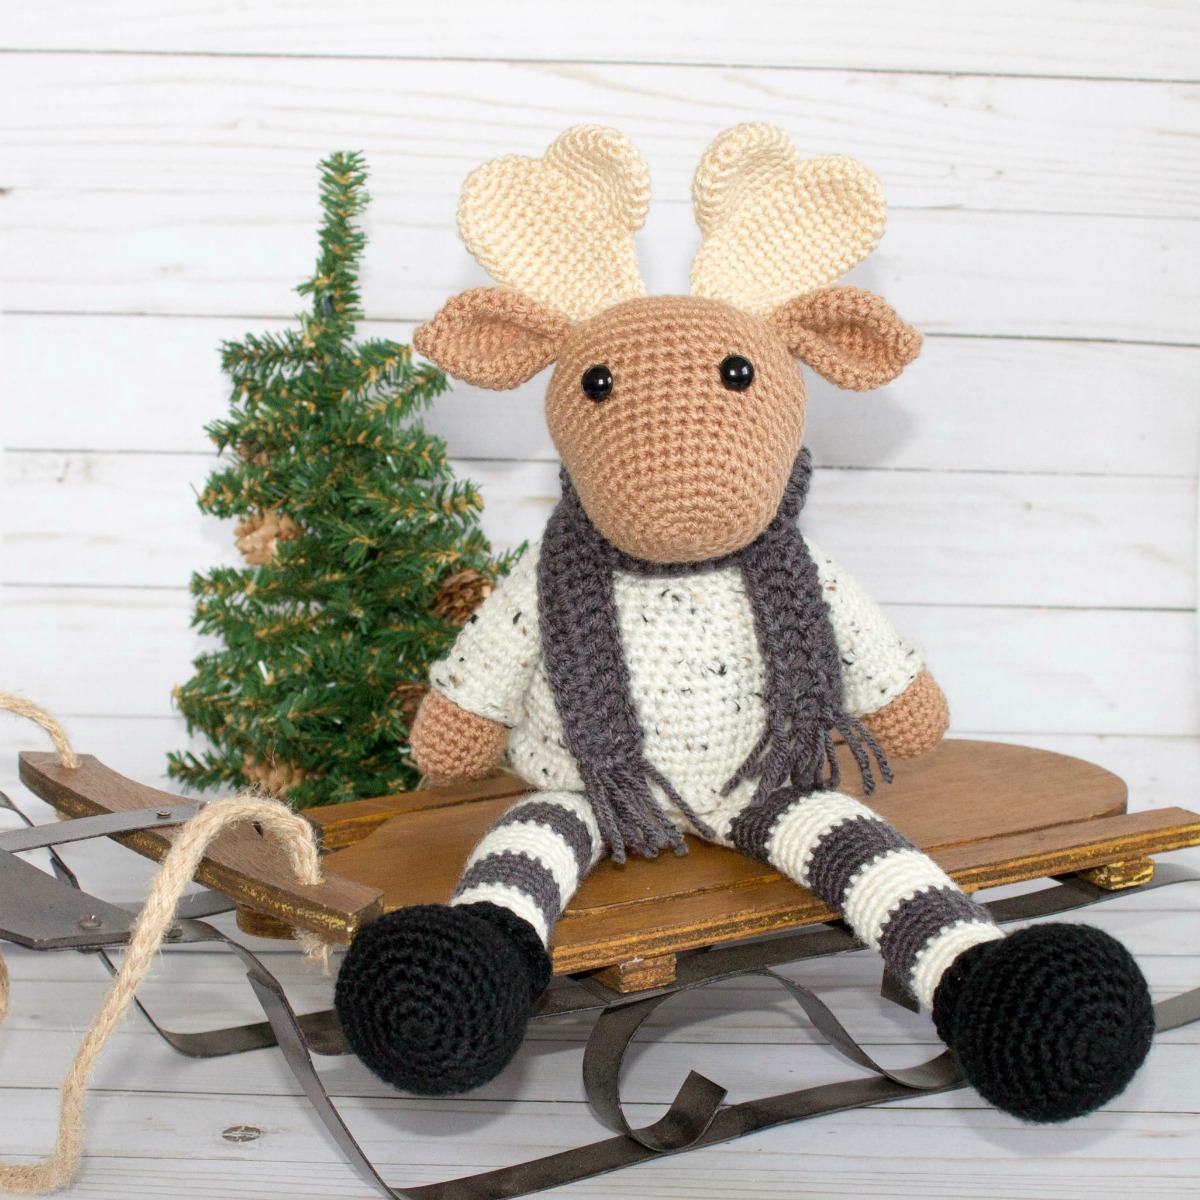
This crochet moose and crochet reindeer was a lot of fun to make! I had this image in my head that I worked really hard to replicate- the perfect crochet moose to sit on a little shelf at Christmas-time. This little moose needed a little friend, so with a few alterations, the crochet reindeer was made! Both are made to sit on a shelf with the legs dangling over. I love the neutrals of the moose and the vibrant Christmasyness of the reindeer! They are 7 inches from bottom to head, but close to 15 counting the legs.


Sign up for The Friendly Newsletter if you haven’t already! This is one sure way to make sure you get all the updates!! Sign up here!

Then join the Friendly Crochet Club on facebook! You can go here to ask questions, get inspiration and share your project!
You will need:
About 50g each of Size 4 Worsted weight yarn in fur color, sweater color, stripe colors
(I used Hobby Lobby’s I love this yarn for the project in colors, toasted almond, taupe, ivory tweed, red tweed, white, gray, ivory and red.)
Small amount of either tan or brown for antlers, black for boots, red for reindeer nose and the scarf
12mm safety eyes
Stuffing
E hook (3.25)
H hook (5.0) [I HIGHLY recommend this set. Especially for this time of year. I have had the same set for 4 years and they still look brand new]
Needle for sewing
Stitch marker
¾ cup Poly pellets (these are used to weigh down the body so it can sit on the shelf)
This post contains affiliate links. For more information see my policies page.
Read my post on the best tips and tricks for amigurumi. This is a lot of the things that I wish I knew before I started!
You will need to know these abbreviations and stitches:
SC- single crochet
SC INC- single crochet increase (2 SC in each stitch)
INV
DEC- Invisible decrease (put hook through the FRONT LOOP ONLY of two
consecutive stitches [two loops on hook] Yarn over pull through both
loops. [two loops on hook] Yarn over pull through two loops)
Magic
Circle- Make a loop, leaving a long tail to work with. Insert hook in
center of loop, yarn over and draw up a loop. Yarn over, pull through to
make the first chain (this does not count as a stitch!). Continue to
crochet over the loop and tail with the number of stitches called for.
(If you need 6 SC, then crochet 6 SC inside the ring.) Pull the tail to
close the circle.
The body will and head need to be very firmly stuffed. You will almost always need more than you think you need. I like to stuff them as full as I can. But don’t stuff TOO much or your stitches will stretch. The main problem I see with amigurumi projects is that they are under-stuffed. I also do not stuff all the way to the top of the leg or arms, that way they do not bulge too much when they are sewed on. Especially as this project is designed to hang over the edge of a shelf, do not over stuff the legs. The boots should be stuffed firmly though.
The first color you use in the stripes will be the color of the bottom when you make the body. So the white was the same color as the bottom for the reindeer.
Using Black:
Round 1: 6 SC in a magic circle.
Round 2: INC in each around. (12)
Round 3: SC in the first, SC INC in the next. (18)
Round 4: SC in the first 2, SC INC in the next. Repeat around. (24)
Round 5: SC in first 3, SC INC in next. Repeat around. (30)
Round 6: SC in first 4, SC INC in the next. Repeat around. (36)
Rounds 7-11: SC in each around. (36)
Round 12: INV DEC 12 times. SC in the remaining 12 stitches. (24)
Round 13: INV DEC 6 times. SC in the remaining 12. (18)
Rounds 14-17: SC in each around. (18)
Change color to the color you want the bottom to be on your amigurumi. For the rest of the leg, change colors every 5 rows.
Rounds 18-52: SC in each around. (18)
Fasten off leaving a long tail to sew onto the body. You will attach the legs to row 10 of the body.
Make the boots edge by attaching the black yarn to the first row where you change color, with the legs facing up and the boots down so that your stitches will be facing up.Go around the stitch, like you were making a post stitch. Chain 2. HDC in each around, slip stitching to the first when you meet it. Fasten off and weave in the ends.Arms
*I only stuff the very bottom and very lightly. Then not at all through the top half.*
Using tan color:
Round 1: SC 6 in a magic ring.
Round 2: SC INC in each around. (12)
Round 3: SC in first, SC INC in the next. Repeat around. (18)
Rounds 4-8: SC in each around. (18)
Change to sweater color.
Rounds 9-25: SC in each around.(18)
Round 26: SC in the first, INV DEC in the next. Repeat in next.
Fasten off and leave a tail long enough to sew on. Attach the arms between rows 28 and 29 on the body.
Make the sweater edge by attaching the same color of yarn to the first row where you change color, with the hands facing up so that your stitches will be facing down (like the cuffs of your sweater would.) Go around the stitch, like you were making a post stitch. Chain 2. HDC in each around, slip stitching to the first when you meet it. Fasten off and weave in the ends.
Body
Round 1: In a magic circle, 6 SC.
Round 2: SC INC in each around. (12)
Round 3: SC in first, SC INC in next. Repeat around. (18)
Round 4: SC in first 2, SC INC in next. Repeat around. (24)
Round 5: SC in first 3, SC INC in next. Repeat around. (30)
Round 6: SC in first 4, SC INC in next. Repeat around. (36)
Round 7: SC in first 5, SC INC in next. Repeat around. (42)
Round 8: SC in first 6, SC INC in next. Repeat around. (48)
Round 9: SC in first 7, SC INC in next. Repeat around. (54)
Round 10: SC in first 8, SC INC in next. Repeat around. (60)
Rounds 11-12: SC in each around. (60)
Change to sweater color.
Rounds 13-19: SC in each around. (60)
Round 20: SC in the first 8, INV DEC in the next. Repeat around. (54)
Rounds 21: SC in each around. (54)
Round 22: SC in the first 7, INV DEC in the next. Repeat around. (48)
Round 23: SC in each around. (48)
Round 24: SC in the first 6, INV DEC in the next. Repeat around. (42)
Round 25: SC in each around. (42)
Round 26: SC in the first 5, INV DEC in the next. Repeat around. (36)
Round 27: SC in each around. (36)
Round 28: SC in the first 4, INV DEC in the next. Repeat around. (30)
Round 29: SC in the first 3, INV DEC in the next. Repeat around. (24)
Round 30: SC in the first 2, INV DEC in the next. Repeat around. (18)
Rounds 31-32: SC in each around (18)
Change to tan color.
Round 33: SC in each around. (18)
Fasten off, leaving a long tail. This is what you will use to sew on the head. Attach the head by pinning it in place. The nose will hang off toward the front, while the back will be mostly attached. Sew around multiple times. Make sure the neck is firmly stuffed before you attach.Make the sweater edge by attaching the same color of yarn to the first row where you change color, with the bottom facing up so that your stitches will be facing down (like the edge of your sweater would.) Go around the stitch, like you were making a post stitch. Chain 2. DC in each around, slip stitching to the first when you meet it. Fasten off and weave in the ends.
PART TWO

Reindeer Nose
Round 1: In a magic ring, crochet 6 SC.
Round 2: SC INC in each around. (12)
Round 3: SC in the first, SC INC in the next. (18)
Rounds 4: SC in each around. (18)
Stuff lightly here.
Round 5: SC in the first, INV DEC in the next. (12)
Round 6: INV DEC in each. (6)
Fasten off with a long tail to sew on to the head.
Head
Using the tan/toasted almond worsted weight yarn:
Round 1: In a magic circle, 6 SC.
Round 2: SC INC in each around. (12)
Round 3: SC in first, SC INC in next. Repeat around. (18)
Round 4: SC in first 2, SC INC in next. Repeat around. (24)
Round 5: SC in first 3, SC INC in next. Repeat around. (30)
Round 6: SC in first 4, SC INC in next. Repeat around. (36)
Rounds 7-12: SC in each around. (36)
Round 13: SC in first 5, SC INC in next. Repeat around. (42)
Round 14: SC in first 6, SC INC in next. Repeat around. (48)
Round 15: SC in first 7, SC INC in next. Repeat around. (54)
Rounds 16-18: SC in each around. (54)
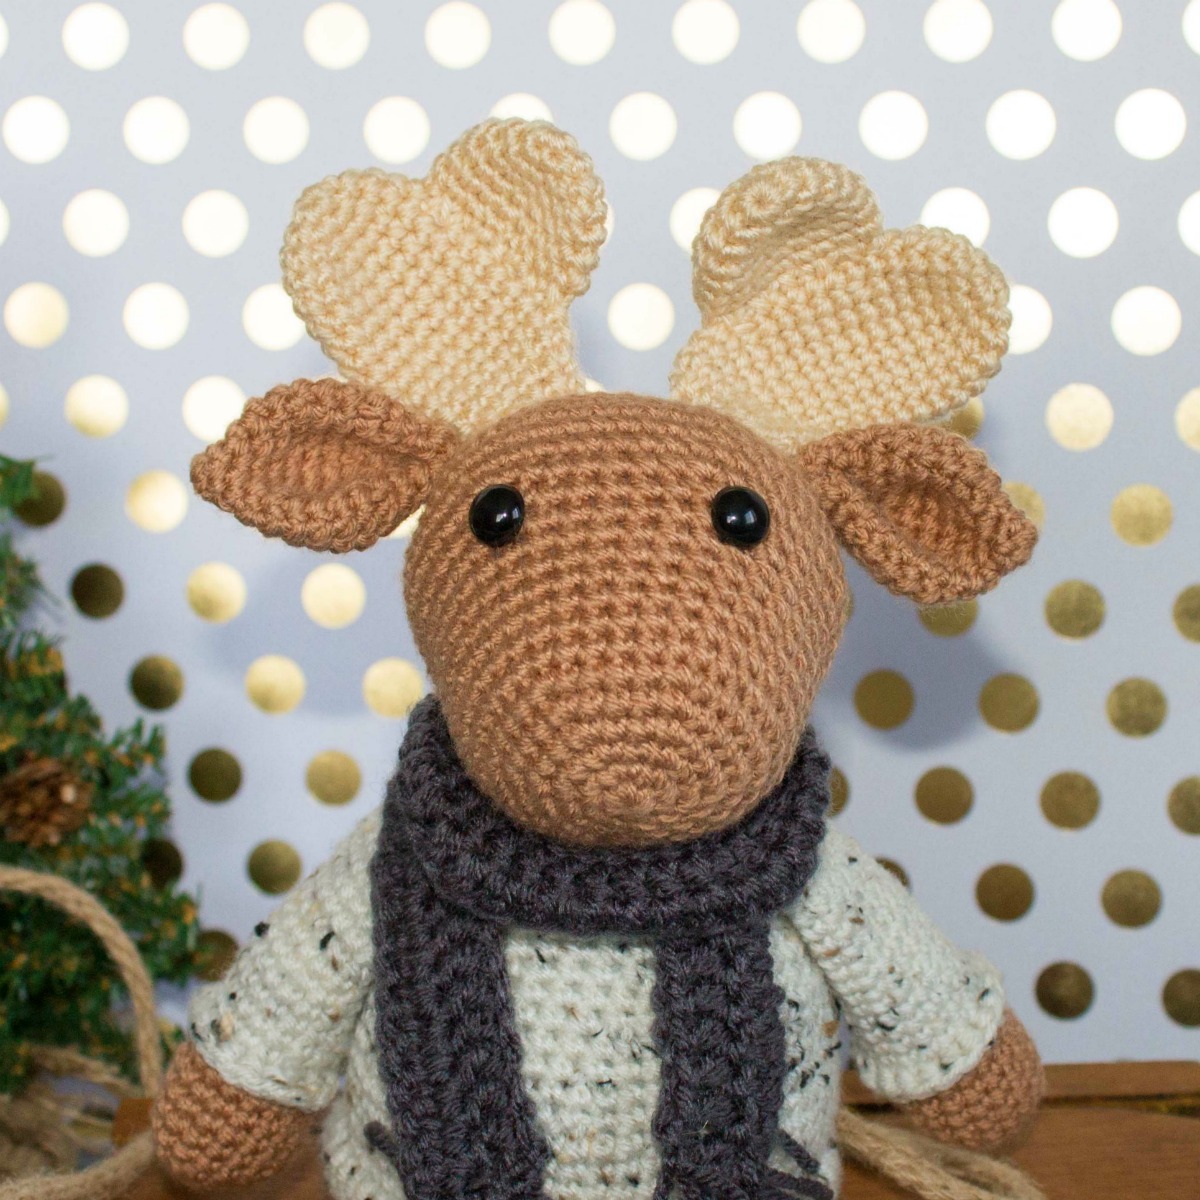
Attach the eyes between 13 and 14, six stitches apart. Begin to stuff here. Sew on the Reindeer nose if applicable. I sewed it on row 6. Center between eyes.
Round 19: SC in the first 7, INV DEC in the next. Repeat around. (48)
Round 20: SC in the first 6, INV DEC in the next. Repeat around. (42)
Round 21: SC in the first 5, INV DEC in the next. Repeat around. (36)
Round 22: SC in the first 4, INV DEC in the next. Repeat around. (30)
Round 23: SC in the first 3, INV DEC in the next. Repeat around. (24)
Round 24: SC in the first 2, INV DEC in the next. Repeat around. (18)
Round 25: SC in the first, INV DEC in the next. Repeat around. (12)
Round 26: INV DEC around. (6)
Fasten off and carefully sew the remaining hole closed. Use the long tail from the body to attach the head. Attach the head by pinning it in place. The nose will hang off toward the front, while the back will be mostly attached. Sew around multiple times. Make sure the neck is firmly stuffed before you attach.
Ears (make two)
Round 1: In a magic circle, 6 SC.
Round 2: SC in each around. (6)
Round 3: SC INC in each around. (12)
Round 4: SC in first, SC INC in next. Repeat around. (18)
Round 5: SC in the first 2, SC INC in next. Repeat around. (24)
Rounds 6-8: SC in each around. (24)
Round 9: SC in first 2, INV DEC in next. Repeat around. (18)
Round 10: SC in first, INV DEC in next. Repeat around. (12)
Round 11-12: SC in each around.
Fasten off, leaving a tail to sew on the head. Pinch the bottom of the ear to make a little crease and sew a few stitches to hold the shape. I sewed them about 6 rows from the last row of the head. The reindeer will be angled up and the moose will stick out more. Use pins to tack them in place before you sew.
Moose Antlers
First Piece
Round 1: In a magic ring, crochet 6 SC.
Round 2: SC INC in each around. (12)
Round 3: SC in the first, SC INC in the next. (18)
Rounds 4-15: SC in each around. (18)
Round 16: SC in the first, INV DEC in the next. (12)
Round 17: INV DEC in each. (6)
Fasten off with a long tail to sew onto head.
Second Piece
Round 1: In a magic ring, crochet 6 SC.
Round 2: SC INC in each around. (12)
Round 3: SC in the first, SC INC in the next. (18)
Rounds 4-7: SC in each around. (18)
Fasten off with a tail to sew onto the first piece.
Flatten both pieces. Attach the smaller piece to the side of the antler, about 5 rows from the top. Sew into place. Attach to the head, right behind the ears.
Reindeer Antlers
First Piece
Round 1: In a magic ring, crochet 6 SC.
Round 2: SC INC in each around. (12)
Rounds 3-16: SC in each around. (12)
Fasten off with a long tail to sew onto the head.
Second Piece
Round 1: In a magic ring, crochet 6 SC.
Round 2: SC INC in each around. (12)
Rounds 3-5: SC in each around. (12)
Flatten both pieces. Attach the smaller piece to the side of the antler, about 5 rows from the top. Sew into place. Attach to the head, right behind the ears.
Fasten off with a tail to sew onto the first piece.
Scarf
Using H hook:
Chain 70. Two stitches from the end DC. DC in each stitch to the end (68)
Chain 2 and DC in the same stitch. DC in each stitch to the end. (68)
Fasten off. Attach fringe.