
Free Crochet Mermaid Tail Blanket Pattern

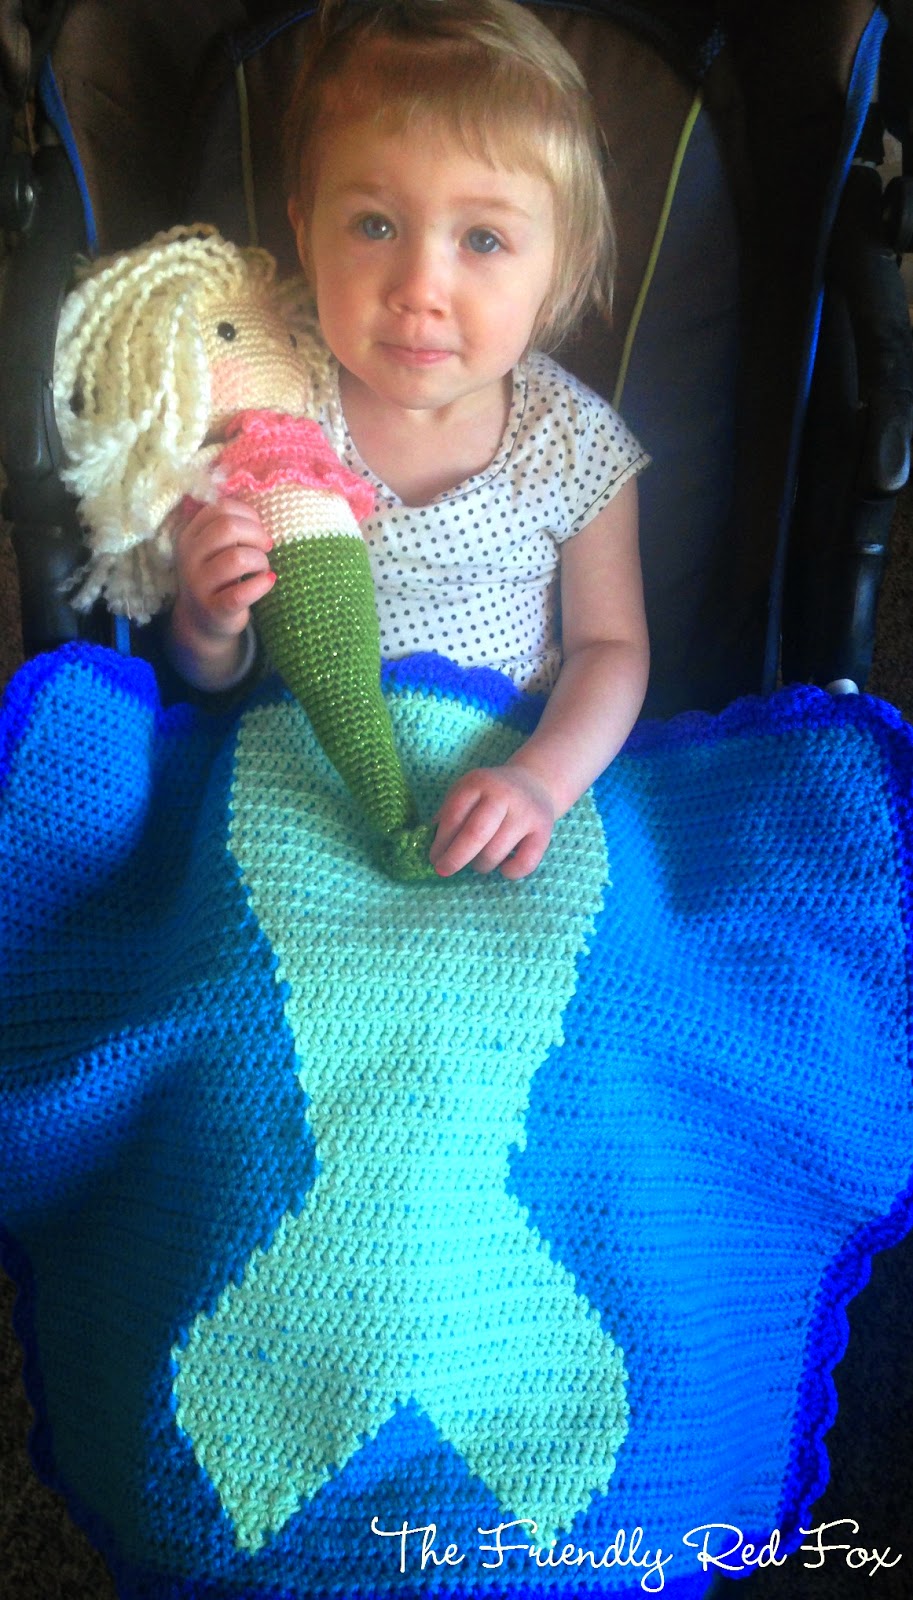
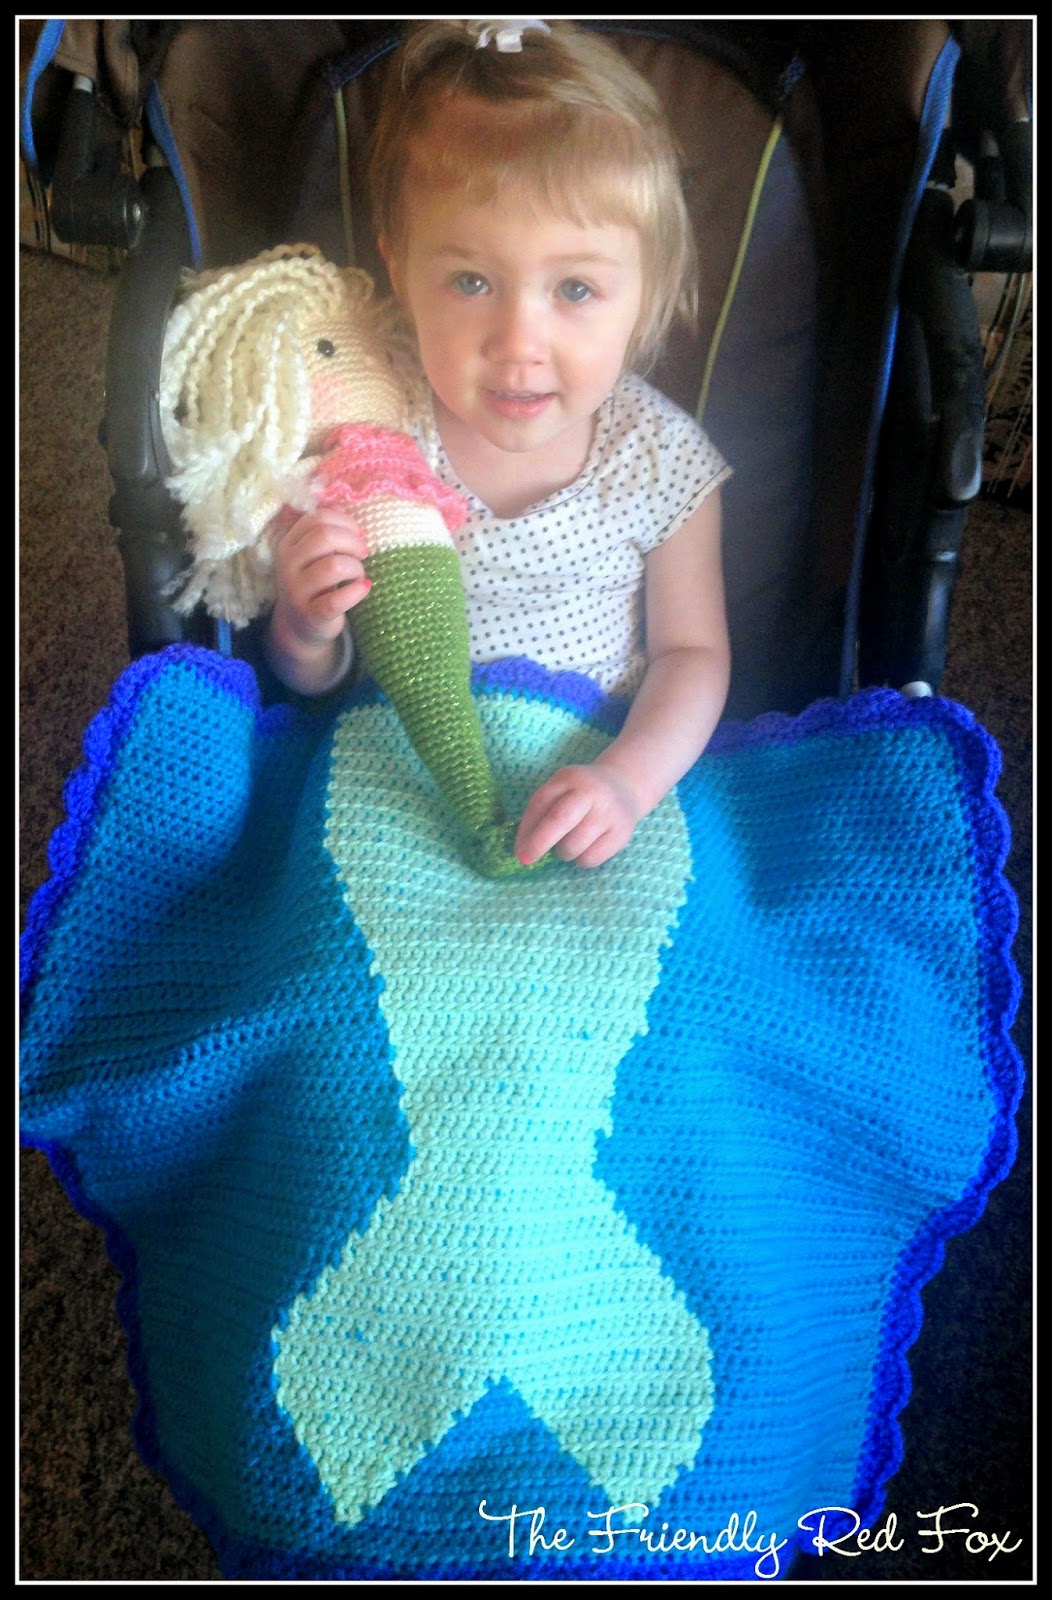
I have recently been a wee bit obsessed with mermaids. It may be that summer is coming up and I want to go swimming. Or that they have super cool hair. Either way I had this idea for a mermaid blanket. I was partly inspired by this blanket but thought that, although I LOVE it and the idea, I want a blanket that works like a blanket and I don’t sit with my feel straight out. I’m not classy that way, apparently. This is the prototype blanket so it’s baby/toddler size. And it really does work up to about 3, even for the wee little babies! But how cute is it as a stroller blanket, or to keep your little one warm in the car seat?? ADORABLE. This is my good friend’s little girl and she is a little over 2 and a half. Is she not the cutest thing?
This could be considered a graph pattern, but my head doesn’t work like that. In fact, I hate counting. And I do not like doing small stitches (which is why this is a HDC blanket, although a SC would probably be a little tighter and neater) because I am impatient. So pretty much I love this hobby that includes counting and small stitches, but do’te like counting or small stitches. About as understandable as my recent fascination with mermaids, even though I am an adult.
Anyway… It’s not as scary as it looks with all those rows. You will repeat a lot of rows at first, and then decrease the amount of green by one and repeat that for three rows, decrease by one and repeat that for three rows, etc. So it is very easy to see as you are going and you do not need to actually count every stitch. YAY. The increases work the same way for the fins, just an increase for the green by one for every row. It really is pretty easy to see but I did write it all out for you so you can keep track.
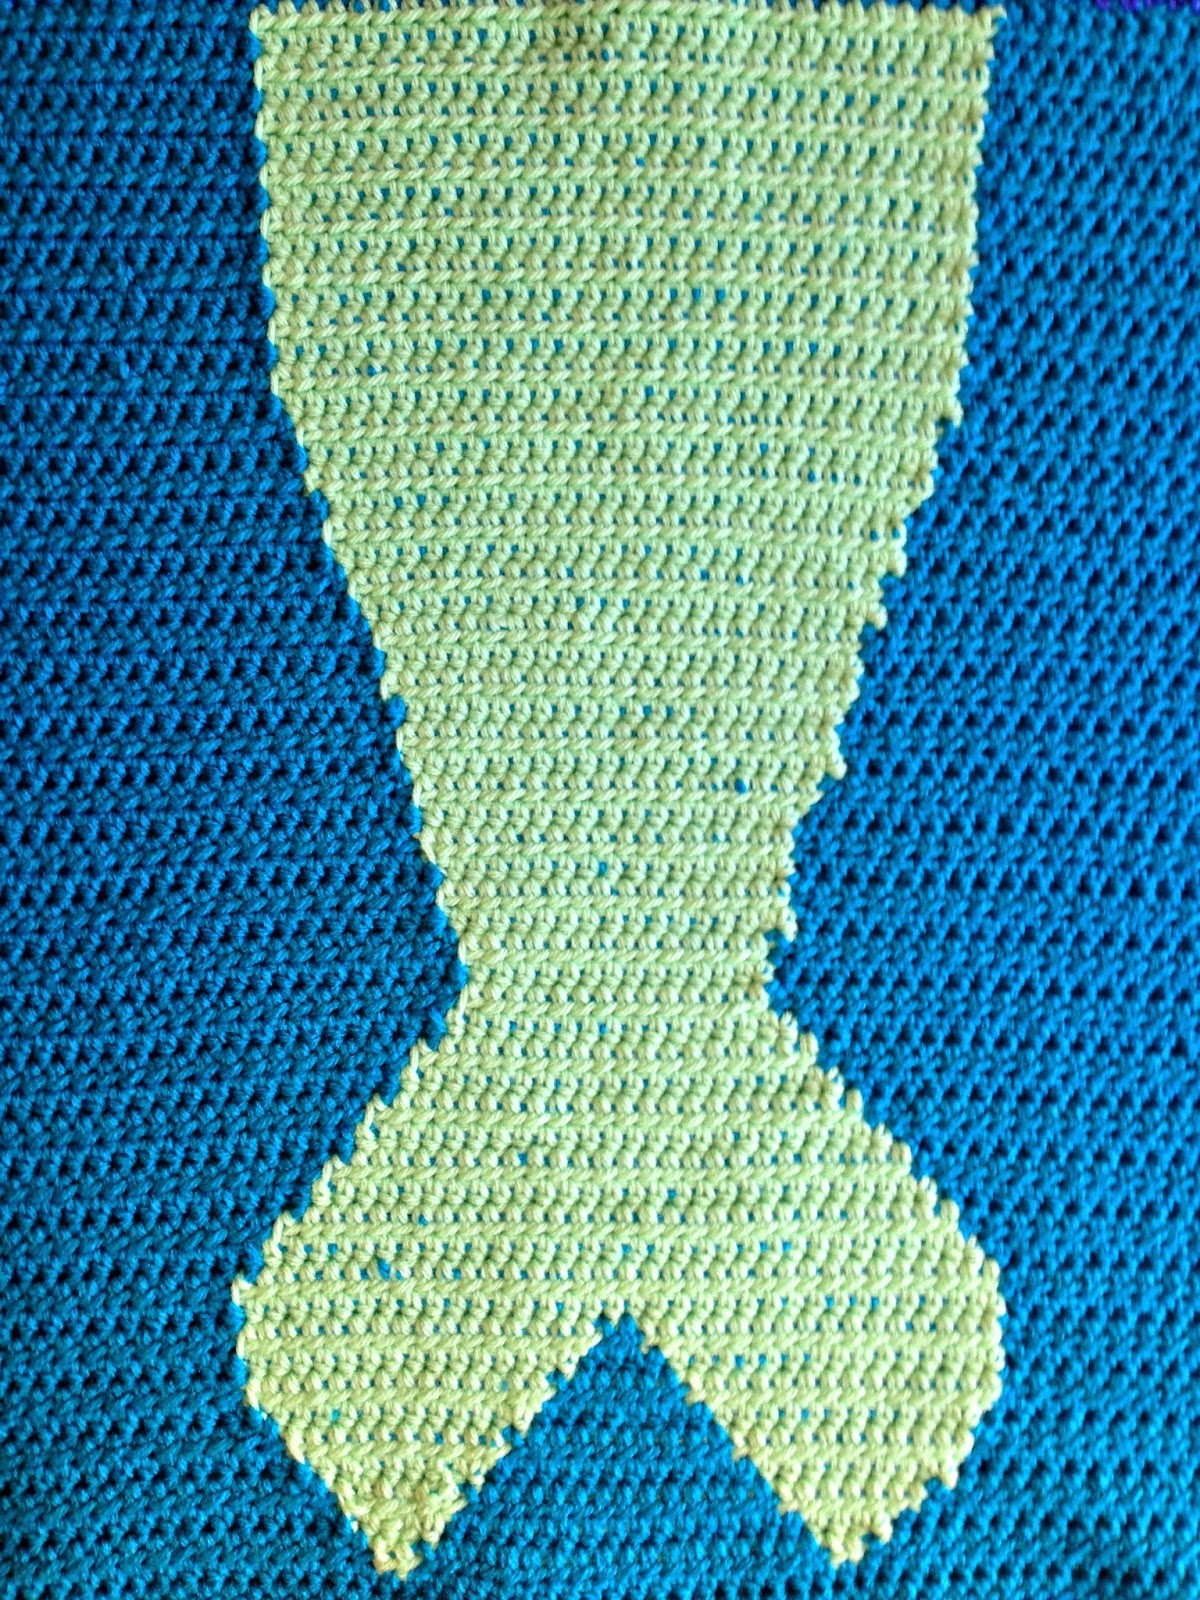
You will need to carry the blue yarn and crochet over it with the green to make this work. I found that using the same size of hook would not work because the extra yarn under the stitches made it bulge. So use a size 4.0 hook for the green, and a 5.0 for the blue. It is a little obnoxious, but worth it. And when you start the gap for fins you will need to carry the green under the blue. You will be a pro by that time so no worries.
And you will want to know how to seamlessly change colors. THIS is a great post from Rescue Paw Designs to teach you all about it.
Okay? Okay.
You will need:
- 5.0 hook and a 4.0 hook (I recently got these Clover Armour hooks
 and I LOVE them)
 - Size 4 worsted weight yarn in Blue, green, and purple. Or any color you prefer. I used Red Heart with Love yarn.
Before you start, PLEASE READ all the tips above. It will make a big difference in how it turns out!
Row 1: Chain 82 with the blue yarn.
Row 2: In the second chain from hook place a HDC. HDC in each stitch across.
Row 3: HDC in next 25, switch to green. In Green HDC in next 30, switch back to blue. HDC in the last 25. Chain 2 and turn.
Row 4-18: Repeat row 3.
Row 19: HDC in next 26 switch to green. HDC in the next 28, switch to blue. HDC in the next 26.
Rows 20-21: Repeat row 19.
(Get the idea? From here on, I am taking some of the terms out, but just keep going like you have. All you need is the stitch number.)
Rows 22-24: BLUE 27, GREEN 26, BLUE 27
Rows 25-27: BLUE 28, GREEN 24, BLUE 28
Rows 28-30: BLUE 29, GREEN 22, BLUE 29
Rows 31-33: BLUE 30, GREEN 20, BLUE 30
Rows 34-36: BLUE 31, GREEN 18, BLUE 31
Rows 37-39: BLUE 32, GREEN 16, BLUE 32
Rows 40-42: BLUE 33, GREEN 14, BLUE 33
(Now you will be increasing for the fins.)
Row 43: BLUE 32, GREEN 16, BLUE 32
Row 44: BLUE 31, GREEN 18, BLUE 31
Row 45: BLUE 30, GREEN 20, BLUE 30
Row 46: BLUE 29, GREEN 22, BLUE 29
Row 47: BLUE 28, GREEN 24, BLUE 28
Row 48: BLUE 27, GREEN 26, BLUE 27
Row 49: BLUE 26, GREEN 28, BLUE 26
Row 50: BLUE 25, GREEN 30, BLUE 25
Row 51: BLUE 24, GREEN 32, BLUE 24
Row 52: BLUE 23, GREEN 34, BLUE 23
(Now you will begin making the gap in the fin.)
Row 53: BLUE 23, GREEN 16, BLUE 2, GREEN 16, BLUE 23
Row 54: BLUE 24, GREEN 14, BLUE 4, GREEN 14, BLUE 24
Row 55: BLUE 25, GREEN 12, BLUE 6, GREEN 12, BLUE 25
Row 56: BLUE 26, GREEN 10, BLUE 8, GREEN 10, BLUE 26
Row 57: BLUE 27, GREEN 8, BLUE 10, GREEN 8, BLUE 27
Row 58: BLUE 28, GREEN 6, BLUE 12, GREEN 6, BLUE 28
Row 59: BLUE 29, GREEN 4, BLUE 14, GREEN 4, BLUE 29
Row 60: BLUE 30, GREEN 2, BLUE 16, GREEN 2, BLUE 30
Rows 61-62: In all blue, HDC in each stitch across.
Before the border, I SC up both sides so that I would have a nice clean line for the border.
For the border I used the border pattern detailed HERE (the second pattern on the monkey blanket.)

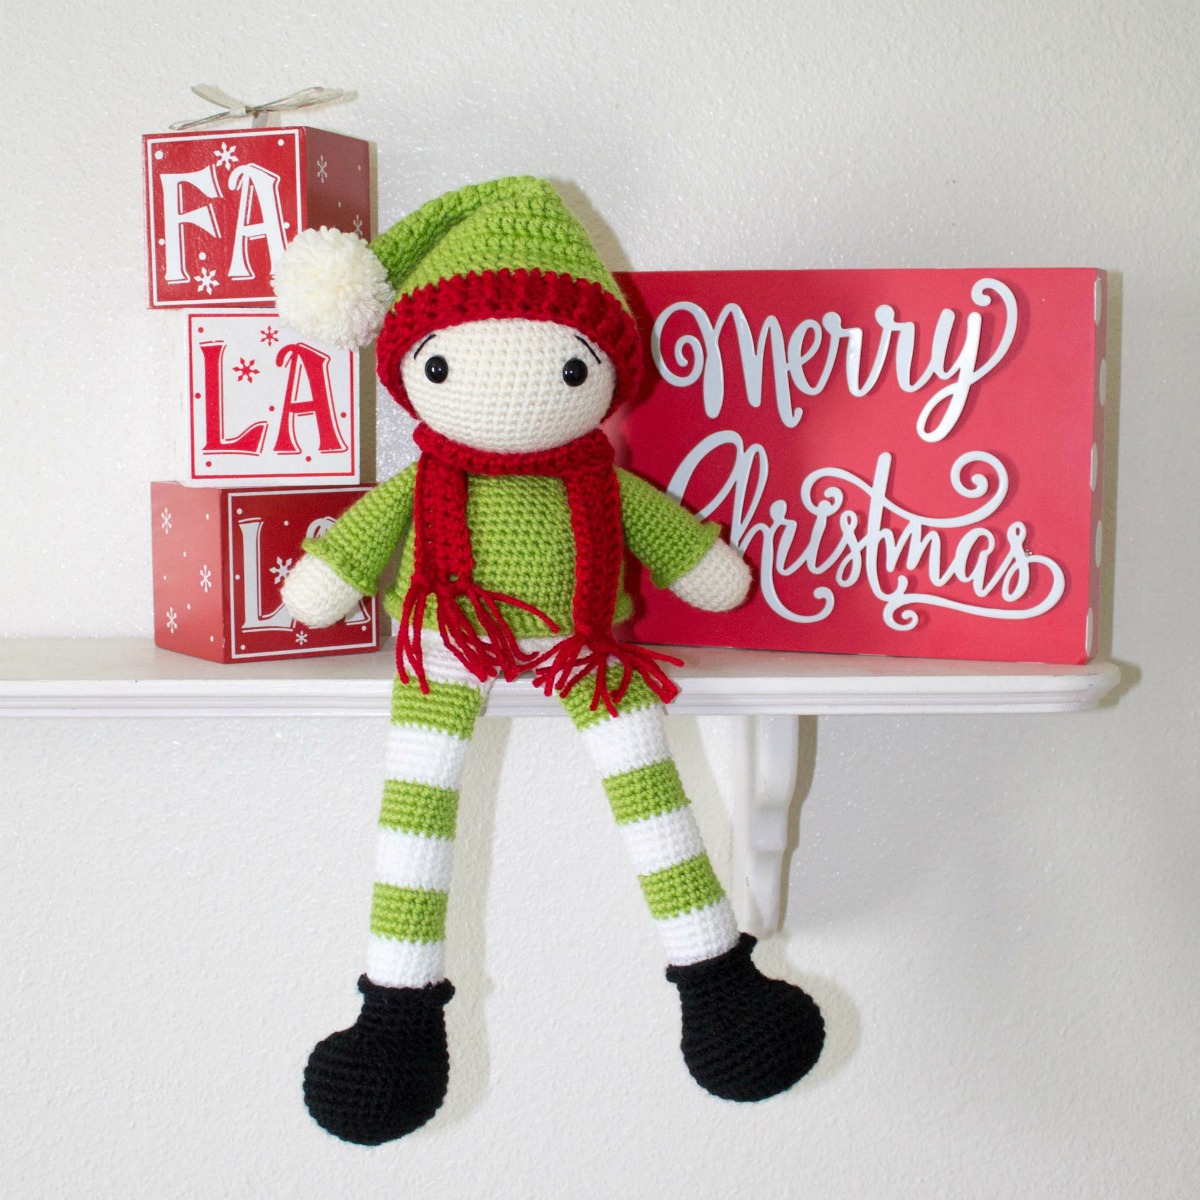
The mermaid dolls I made with THIS PATTERN from Kornflake Stew on Etsy! It was very easy to follow and understand, and I highly recommend it. There are a lot of other adorable amigurumi patterns there too, so be sure to check it out! If you want to purchase any of these finished items check out my etsy shop!
(This post contains affiliate links but are only products that I have used and love!)
Absolutely adorable!!! I love the gorgeous blanket and doll! Congrats!
Have a wonderful day!
Hugs and love from Portugal,
Ana Love Craft
http://www.lovecraft2012.blogspot.com
I love it! Thanks for sharing the pattern! I'll have to add this to my to do list for my little girl!
T'onna @ usscrafty.com
Love it! I want to make a grownup-size one for myself.
hilarious, and super cute!
b
Cutest. Blanket. Ever. I'm going to have to make one!
Very cute!
As an aside, writing out patterns in regular ol' crochet terminology is totally ok. Many people prefer it to graphs, and besides, others are doing it as well, so you're not alone in your method 🙂
The link to Rescued Paw Designs doesn't work 🙁
Would be nice to have the PDF so I could put it on my tablet
Love the pattern an thank you